Very, very nice.
I can't wait to see more.
Cheers,
Craig
An Alpine URQ in Utah - Knee deep in Swarf
-
a_CQ
Re: An Alpinweiss URQ in Utah - Springing Into Action
I would suggest you build your own harness. You've gone this far, spend a litte extra on few more connectors and spend time planning it out and you'll be happy in the end. I hated doing the harness work before and when I installed IIc the very first time I was afraid I'd screw something up, but it was rather simple and I had no issues. For the V8, I used the stock harness on the motor as I wanted to get it done faster and it worked out great in this example. Used most of the connectors and spliced it all into firewall bulkhead connector for the ECU. If I were doing it again, and wasn't in a rush, I'd build it from scratch.

Re: An Alpinweiss URQ in Utah - Springing Into Action
Yeah, I'm kinda leaning that way...with the ability use some good 'connector group sections' cut from the originals where they make sense to do so...
-
Nollywood
Re: An Alpinweiss URQ in Utah - Springing Into Action
I'm loving this build...the Ur quattro is a timeless design, good to see another being rescued.
Re: An Alpinweiss URQ in Utah - Springing Into Action
Micro-update
This is good for another 30 years, right?...this thing is ALL original...or WAS before I got to it...
I guess it's not quite like replacing one in a B3/4 after the fact, but while I'm in there...
Time to get to the wiring...harnesses laid out for re-identification. Bottom left is the updated dash harness; bottom right is the headlight harness; AAN harness is directly above that...except for the bottom two, the rest will be mostly unused except for splicing sections and connectors...
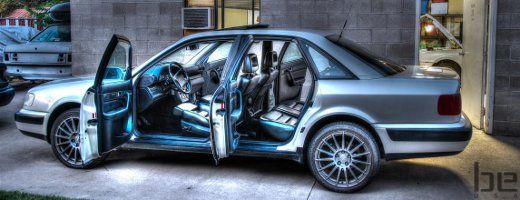
It almost looks like a car inside again...test fitting some bits...the stalk will need to be updated as the old style hits the cluster bezel...
This is good for another 30 years, right?...this thing is ALL original...or WAS before I got to it...
I guess it's not quite like replacing one in a B3/4 after the fact, but while I'm in there...
Time to get to the wiring...harnesses laid out for re-identification. Bottom left is the updated dash harness; bottom right is the headlight harness; AAN harness is directly above that...except for the bottom two, the rest will be mostly unused except for splicing sections and connectors...
It almost looks like a car inside again...test fitting some bits...the stalk will need to be updated as the old style hits the cluster bezel...

Re: An Alpinweiss URQ in Utah - Springing Into Action
Is this thing done yet? 
(We haven't been using this phrase much lately and never on your project threads!)

(We haven't been using this phrase much lately and never on your project threads!)
Darin
1989 80 20vt
1989 80 20vt
Re: An Alpinweiss URQ in Utah - Springing Into Action
Well of course it is done. I've been driving it for months. I just don't have the thread caught up yet.
...see...here I am picking up a fish taco at LoneStar during a maiden voyage. You will see I was still working on the engine, which is why I was driving with the hood off...
...see...here I am picking up a fish taco at LoneStar during a maiden voyage. You will see I was still working on the engine, which is why I was driving with the hood off...
Re: An Alpinweiss URQ in Utah - Springing Into Action
Looks like you welded the doors shut too. Time to paint that thing orange I guess 
P.s. That place has some good food.
P.s. That place has some good food.
-
dbldmnd
Re: An Alpinweiss URQ in Utah - Springing Into Action
LoneStar oh my, awesome grub!
Re: An Alpinweiss URQ in Utah - Springing Into Action
Chris, I had to log in just to Laugh on the record.  Is it fast?
Re: An Alpinweiss URQ in Utah - Springing Into Action
Lol! Best reply to "is it done yet" ever!!!!
Darin
1989 80 20vt
1989 80 20vt
Re: An Alpinweiss URQ in Utah - Springing Into Action
John, you can only imagine...quattro87 wrote:Is it fast?
Re: An Alpinweiss URQ in Utah - Springing Into Action
cbrydon wrote:John, you can only imagine...quattro87 wrote:Is it fast?
OK, so here I go with the imagining.....It is so fast that your order is there at the table faster than McDonalds drive through. Wow!! Do we have Lone Stars down here in Vegas?
Re: An Alpinweiss URQ in Utah - Springing Into Action
Sorry, but the one and only is just a couple blocks away from me.
Often imitated, but never duplicated...
http://www.lonestartaqueria.com
...maybe, NEXT time you are in town, you should stop by for a visit...We could take a lunch break from cutting the floor pan from the 4kq.
Often imitated, but never duplicated...
http://www.lonestartaqueria.com
...maybe, NEXT time you are in town, you should stop by for a visit...We could take a lunch break from cutting the floor pan from the 4kq.
Re: An Alpinweiss URQ in Utah - Springing Into Action
You know I was up there this weekend, but my time was pretty well used up driving my 80yr old parents around the valley. Had to gas up the accord at Costco and of course dad wanted a costco hotdog everytime we stopped. You are on with the next visit for floor pan cutting. Do you work in the middle of the week?
-
volvadi
Re: An Alpinweiss URQ in Utah - Springing Into Action
Hey! I'll buy the taco's if you let me hang out to help and to learn where to make the cuts.
Re: An Alpinweiss URQ in Utah - Springing Into Action
Gregg, it's starting to sound like a party, but I think it would be a case of figuring out where to cut with an extra head might be beneficial.
Re: An Alpinweiss URQ in Utah - Springing Into Action
I have a sawzall if anybody needs to use it. 
-
JamesBufkin
Re: An Alpinweiss URQ in Utah - Springing Into Action
Oh boy,
that looks interesting.... Texmex Tacos in Utah.
An Alpinweiss URQ in Utah - Springing Into Action
But it's not a couple blocks from me :( went there once and haven't been able to go back. So good though!cbrydon wrote:Sorry, but the one and only is just a couple blocks away from me.
Re: An Alpinweiss URQ in Utah - Springing Into Action
A bit more progress on things...
I just got notification today from Superflex that my control arm and rear differential bushings will be shipping finally. I think I placed the order mid-February. I ordered them for the stamped arms, but also have some forged arms that I was thinking about using. I may need to order another set or exchange a set depending on what I decide on doing. I should probably decide before I place the orders.
Still waiting on the offset subframe mounts from 034. They’ve been queued up for maching for that last 2 months. I still am not being held up on things, but starting to get close.
I’ve still be plugging away at little things here and there that need to be completed. I decided to not use the AAN harness on this build for a couple reasons…1-I changed quite a few engine components that no longer allow stock connectors to be plug and play or even in the right location in some cases…2-I will not be using the 55 pin connector either as I have the standard VEMS with flying lead harness…3-the fuse box generation is not the same so none of those connectors will work either. So there is really no gain and I will end up with more splicing, more extraneous circuits, and 15-20 year old sections of wire. Instead, a smaller customized harness to tie into the new sensors and ECU. I will still use some of the AAN connectors and sections, but will largely be new from scratch. I will tie it in to the dash/gauges and fuse box just as I would need to do with the AAN harness anyway.
In preparation for a trip from the local ‘stud welder’, I needed to get a few things sorted out. I picked up some pipe to make my weld-on rings for the coilovers. I just needed to bore out the ID to the proper size, which was roughly 2.170”. This is about what the A1 sleeves were as well.
Then I parted and faced them off at about .250”…
and gave the edges a nice little chamfer to finish them up…
The strut tubes needed to be skimmed on the OD with a flap wheel to bring the size down a little for everything to slide together nicely. Here is the set mocked up and ready for welding…
With getting the engine bay prepped up for a respray prior to reassembly, I figured I would put the strut brace mounts in. I have a couple sets of these originally destined for the eS2, front and rear. The urq will eventually get some adjustable castor/camber plates, but for now I wanted to at least get things stiffened up. I can try and get some castor with the offset subframe mounts, control arms, and/or ball joint selections.
Anyway, I shaved the cover mount posts and removed the paint in preparation for the stitch welds…
As was mentioned earlier in the thread, there was a fluid leak (from the clutch master presumably) that caused some surface corrosion and deterioration of the seam sealer. I used a wire wheel to remove the corrosion…
And followed it up with some primer and a new application of seam sealer…
I also at this point replaced the removed tar layer with a layer of Dynamat Extreme I had laying around. Until all the tar goes, I figured I’ll keep the noise level down a bit…
I epoxied the fuse panel mounting flange in and went over the transition with some Bondo…
After lots of sanding and reapplication, I’ve nearly got it to where I want it…
How’s this for an ’83???
There were a couple things in the engine bay that I thought were now obsolete or outdated…
The CIS mount…
…some old metal straps that could be updated with something more appropriate…
…and fuel lines that will be taking a bit of a turn…
…and it took a while to start cutting into and grinding on this thing, but now I can’t seem to stop myself…uh oh!
…is the front crossmember really safe anymore?
And the dreadful task that is currently taking my time and sucking away my motivation. There is a ton of old dried cosmoline all over the place and it is really a bear to get off. I’ve found that steaming it works the best as it is able to soften it and kind of spray it away with some mild cleaning solutions. A heat gun and some solvent may work too. But I’m nearly through what I need to remove before painting.
It was all over underneath here, which needed to be removed…
And all over the frame horns, which was especially nasty…
…at least it’s not rust, I guess…and I threw a new coat of paint on the front subframe…
On deck…wiring diagrams, suspension build-up, prep and paint engine bay...
Re: An Alpinweiss URQ in Utah - Springing Into Action
Looks great Chris!! so we going for a fully shaved engine bay?
Re: An Alpinweiss URQ in Utah - Springing Into Action
Nope, just a little trim...Hybrid_Hatch wrote:Looks great Chris!! so we going for a fully shaved engine bay?
Re: An Alpinweiss URQ in Utah - Springing Into Action
looks like you are upping the ante here on this build. I like it!! Is it going to be done for pikes peak?