Don't waste you money. Here is the write up do order the parts.
http://www.motorgeek.com/viewtopic.php? ... ne#p504634
The parts can be ordered here for 1/3 the cost.
http://www.techna-fit.com
Dave A. Rally CQ: Now in Seattle, sort of
Re: Dave A. Rally CQ Project: The Teardown
"If you can't find one, make one"
Dallastown, PA
1991 Audi 80 quattro (20vt project)
1991 Audi Coupe Quattro (project: my first 20v)
2007 Mitsubishi Raider(Dakota in disguise)
2019 Chevy Cruze RS hatch (wife's little red sporty car)
Dallastown, PA
1991 Audi 80 quattro (20vt project)
1991 Audi Coupe Quattro (project: my first 20v)
2007 Mitsubishi Raider(Dakota in disguise)
2019 Chevy Cruze RS hatch (wife's little red sporty car)

Re: Dave A. Rally CQ Project: The Teardown
Excellent! Thank you!
'95 Audi 90Q
'91 Audi CQ Project: Davescq.wordpress.com
'00 Buell X1 Racing Stripe
'91 Audi CQ Project: Davescq.wordpress.com
'00 Buell X1 Racing Stripe
Re: Dave A. Rally CQ Project: The Teardown
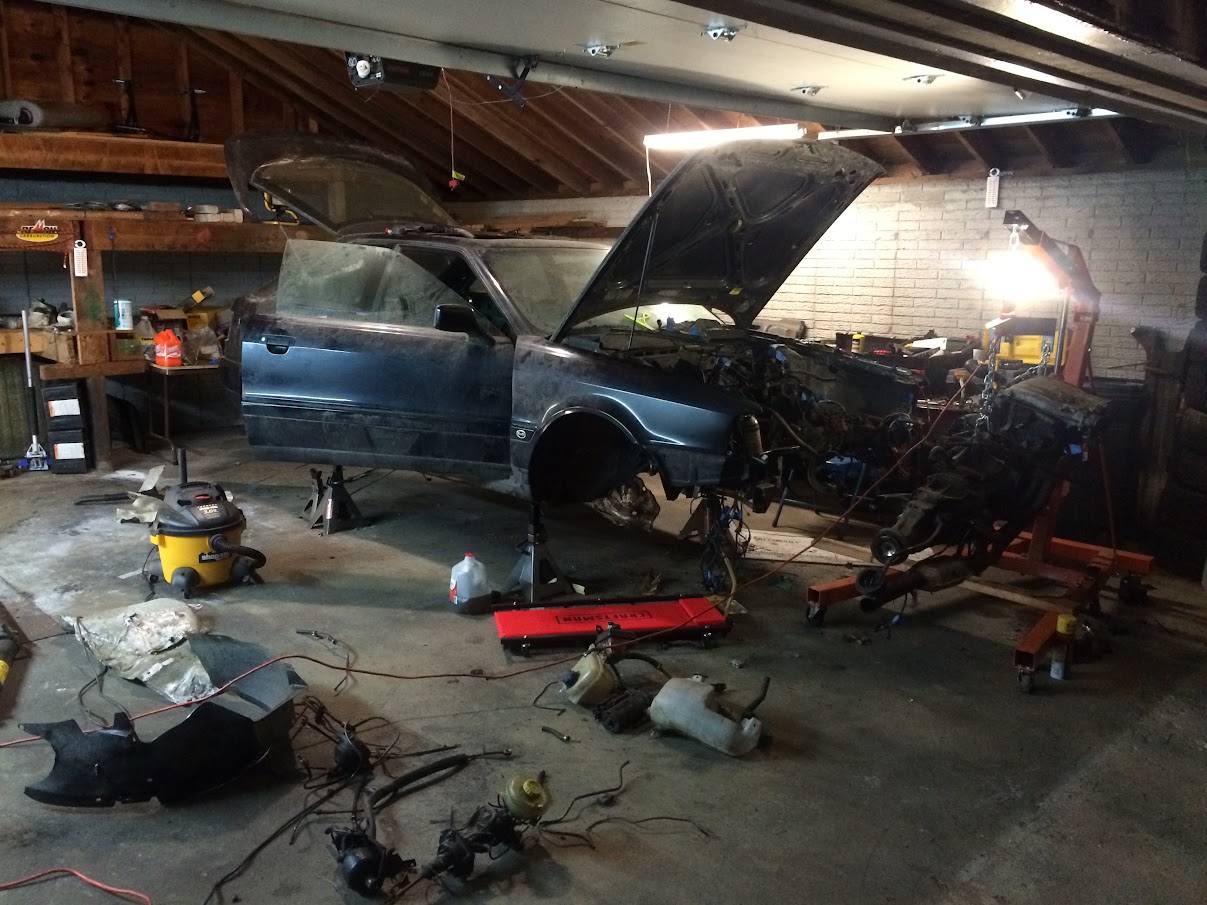
Got in there Wednesday night.
Pulled out Aux Washer fluid tank (DAMN that thing is huge...), pulled ABS, Brake Booster and MC, hydraulic fluid accumulator, and hoses for hydro boost brakes (or whatever its called). Pulled off some more exhaust shields... etc. etc. etc. I got covered in hydraulic fluid by the end of it...
Still sooo far to go and soooo much more money to spend...
ordered up some new O-rings and rad mounts... then the coolant tank on my DD 90 decided to start leaking so gotta fix that too...
I seriously wonder how anyone maintains more than 2 of these and has their sanity still...
'95 Audi 90Q
'91 Audi CQ Project: Davescq.wordpress.com
'00 Buell X1 Racing Stripe
'91 Audi CQ Project: Davescq.wordpress.com
'00 Buell X1 Racing Stripe
Re: Dave A. Rally CQ Project: The Teardown
post just got deleted... damnit
Got some time in last night but didn't push too hard - feelin a little sick.
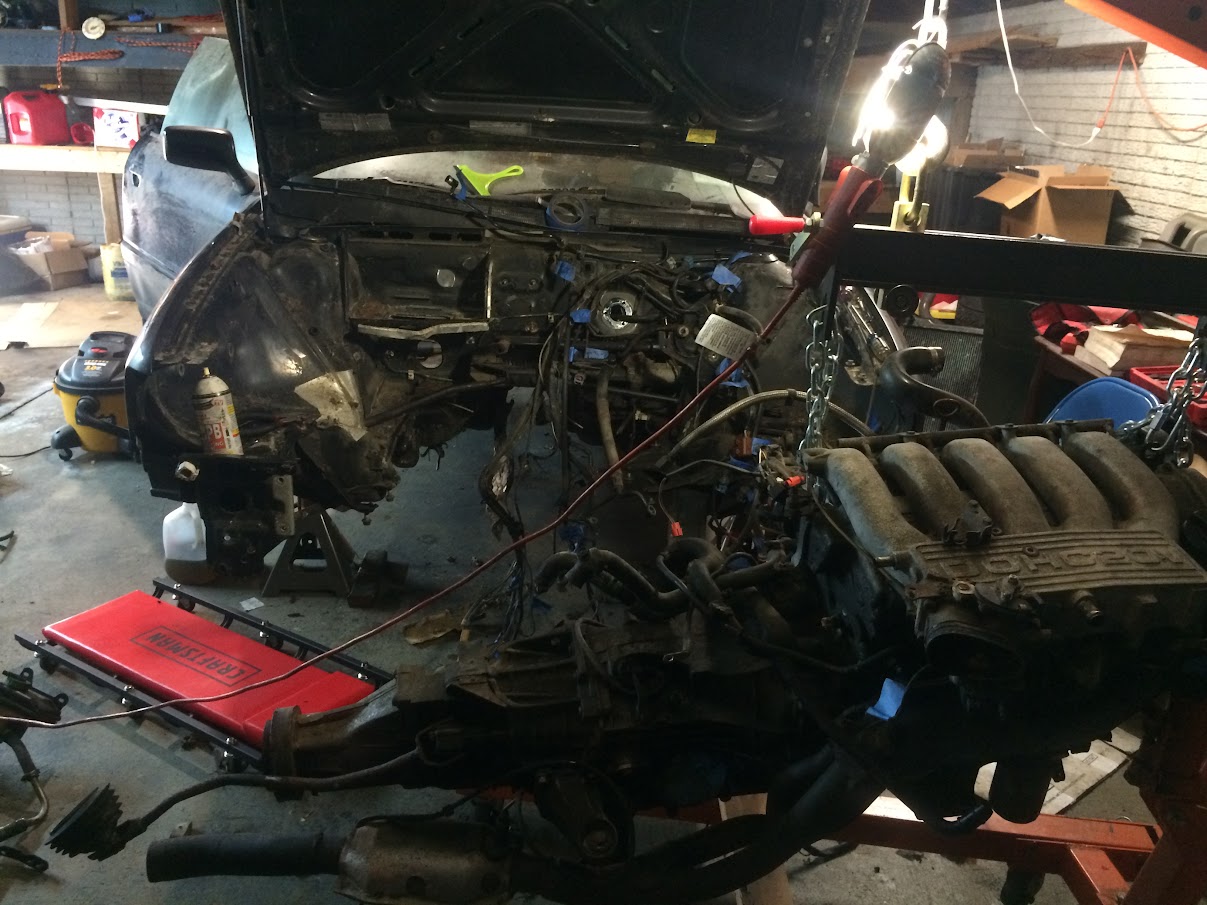
But continuing to clean up the engine bay, pulled out the fuel lines, the rear brake line (to be run inside the car), wiring management stuff, motor mount, etc etc.
Pulled out the coolant, PS and Washer resevoirs to be cleaned up and get access behind them for some painting.
Got the control cable for the diff lock, just need to figure out the interface there with the diff lever.
Started on getting the exhaust mani off, got 8/10 off until one nut rounded - woooo... will need to spend a little time on that one. Audi certainly didn't make it easy to get on a couple of those...
Garage needs a cleaning...
Got some time in last night but didn't push too hard - feelin a little sick.
But continuing to clean up the engine bay, pulled out the fuel lines, the rear brake line (to be run inside the car), wiring management stuff, motor mount, etc etc.
Pulled out the coolant, PS and Washer resevoirs to be cleaned up and get access behind them for some painting.
Got the control cable for the diff lock, just need to figure out the interface there with the diff lever.
Started on getting the exhaust mani off, got 8/10 off until one nut rounded - woooo... will need to spend a little time on that one. Audi certainly didn't make it easy to get on a couple of those...
Garage needs a cleaning...
'95 Audi 90Q
'91 Audi CQ Project: Davescq.wordpress.com
'00 Buell X1 Racing Stripe
'91 Audi CQ Project: Davescq.wordpress.com
'00 Buell X1 Racing Stripe
Re: Dave A. Rally CQ Project: The Teardown
I got most of saturday clear but of course had some other pressing issues to attend to. Both my 90Q and my gf's Volvo blew their coolant tanks so that had to be done. A couple other small things on the volvo and an oil change and some vacuum leak fixes on the 90... and much of my open window had already passed 
but alas, I did get some work on the rally CQ done. I stripped the Brake booster of all decent fittings and the brake manifold. Then I started stripping down the front brakes which are in desperate need of a rebuild. I put a wrench over the hose fitting and before I could even apply force, this happened:

I've never had a fitting come apart like that before... so I'll need to spend some time fishing that out. (If anyone has a full set of CQ brakes (with carriers!!!) that don't require a rebuild, I could be entertained with a decent price).
I tore down the airbox, removed the EGR stuff, installed the MAF and new 034 hose.
Question: What are people doing for the late style ISV? mine certainly won't fit in that inlet as provided, are people just boring that ID out to fit the later ISVs??? don't want to ruin my part so quickly...
This should make a difference!

But other than that, I cleaned up the garage and tried my luck on the last two manifold bolts for a bit with no luck with the bolt-offs, may be time to get creative!
but alas, I did get some work on the rally CQ done. I stripped the Brake booster of all decent fittings and the brake manifold. Then I started stripping down the front brakes which are in desperate need of a rebuild. I put a wrench over the hose fitting and before I could even apply force, this happened:
I've never had a fitting come apart like that before... so I'll need to spend some time fishing that out. (If anyone has a full set of CQ brakes (with carriers!!!) that don't require a rebuild, I could be entertained with a decent price).
I tore down the airbox, removed the EGR stuff, installed the MAF and new 034 hose.
Question: What are people doing for the late style ISV? mine certainly won't fit in that inlet as provided, are people just boring that ID out to fit the later ISVs??? don't want to ruin my part so quickly...
This should make a difference!
But other than that, I cleaned up the garage and tried my luck on the last two manifold bolts for a bit with no luck with the bolt-offs, may be time to get creative!
'95 Audi 90Q
'91 Audi CQ Project: Davescq.wordpress.com
'00 Buell X1 Racing Stripe
'91 Audi CQ Project: Davescq.wordpress.com
'00 Buell X1 Racing Stripe
Re: Dave A. Rally CQ Project: Nearing the bottom!
Spent a long night in the garage last night, pic of my moss covered - rented - garage.

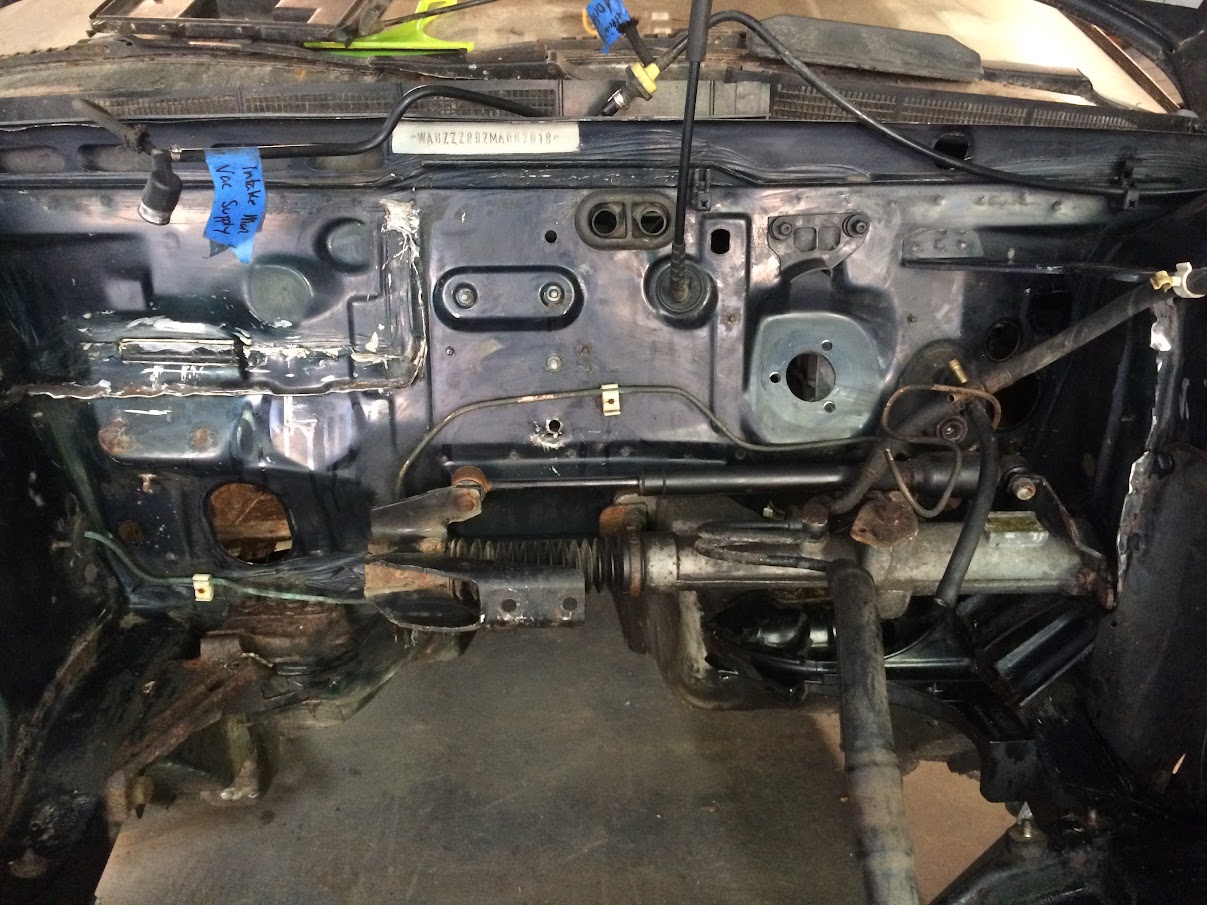
Spent some time early in the engine bay continuing to try and get the harness out, I think it's good from this side now but I found this connector I don't recognize or have labeled, anyone help?

Man, the germans really loved their vacuum systems in this car... and I really enjoy ripping them out. This is the feed line for the diff lock which is going mechanical...

I spent some more time with the wiring inside the car, everything rear of the dash is free so I just have to deal with the squirrel's nest that remains where the driver's left knee would be. Anyone have any tips on removing the rest of the harness? it just looks like a bundled nightmare that doesn't want to move..
The old and the new, I need to clean up the new one a bit before installing. Is the threaded port on the collector for o2 or EGR?

Tranny fluid drained...

and a parting shot...
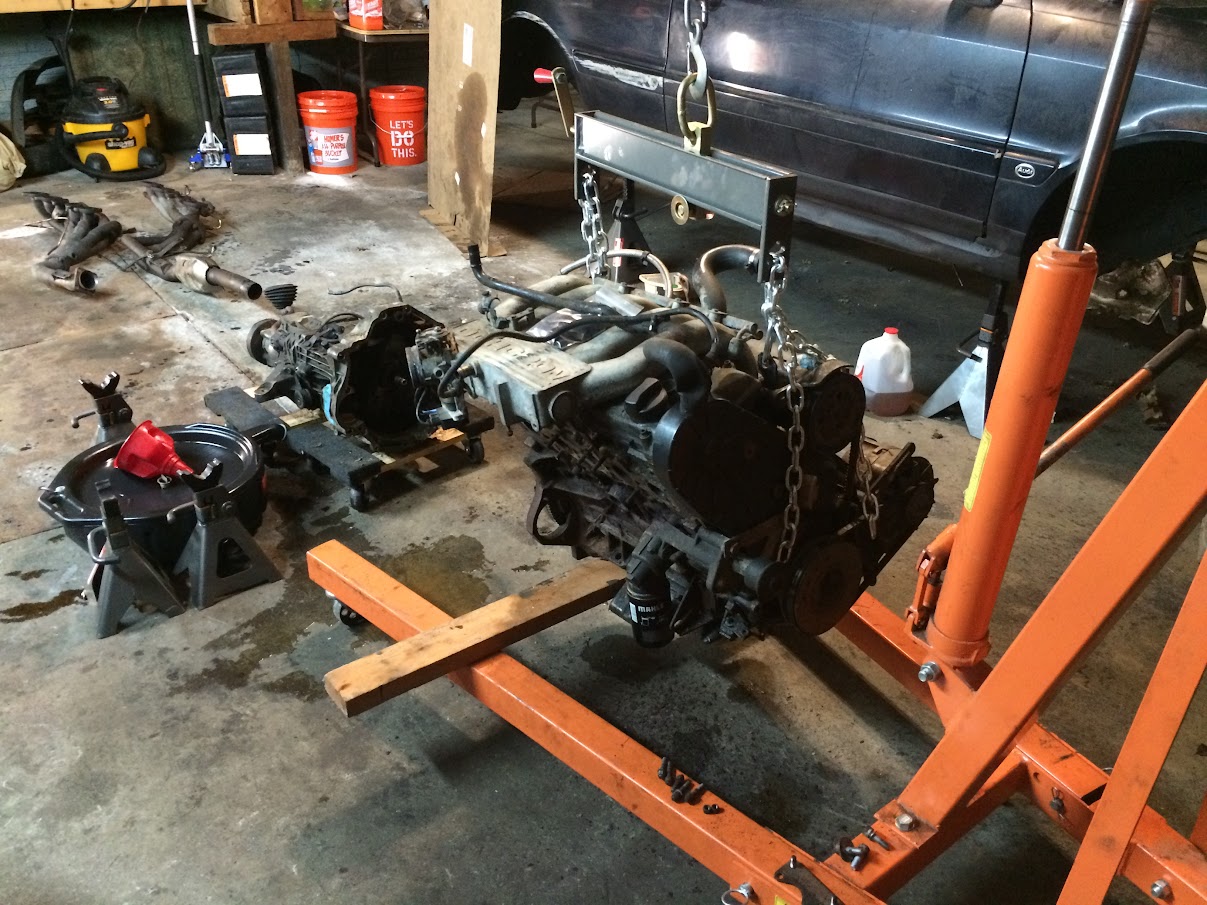
There is little left to do before I think the project officially "bottom's out" where I stop ripping things apart, and I start building!
Left to tear apart:
Wiring harness (Big one)
remaining fuel and brake lines
battery tray
In-tank fuel pump assembly
Parking Brake
Spent some time early in the engine bay continuing to try and get the harness out, I think it's good from this side now but I found this connector I don't recognize or have labeled, anyone help?
Man, the germans really loved their vacuum systems in this car... and I really enjoy ripping them out. This is the feed line for the diff lock which is going mechanical...
I spent some more time with the wiring inside the car, everything rear of the dash is free so I just have to deal with the squirrel's nest that remains where the driver's left knee would be. Anyone have any tips on removing the rest of the harness? it just looks like a bundled nightmare that doesn't want to move..
The old and the new, I need to clean up the new one a bit before installing. Is the threaded port on the collector for o2 or EGR?
Tranny fluid drained...
and a parting shot...
There is little left to do before I think the project officially "bottom's out" where I stop ripping things apart, and I start building!
Left to tear apart:
Wiring harness (Big one)
remaining fuel and brake lines
battery tray
In-tank fuel pump assembly
Parking Brake
'95 Audi 90Q
'91 Audi CQ Project: Davescq.wordpress.com
'00 Buell X1 Racing Stripe
'91 Audi CQ Project: Davescq.wordpress.com
'00 Buell X1 Racing Stripe
Re: Dave A. Rally CQ Project: Nearing the bottom!
Getting work done! Tear down is always time consuming as hell.... I'm still contemplating how I want to sort out the "rats nest" of a harness under my dash too. I'm really drifting towards just completely rewiring the whole car, now that I'm going standalone. A universal chassis harness from painless or ezwiring would be really slick. Mount the fuse box in the dash and completely get rid of all the factory 20 year old wiring are my thoughts for my own rally car. That'll be next year though for me. Glad to see more progress! Keep it up!
Re: Dave A. Rally CQ Project: Nearing the bottom!
Thank you varia for clearing that up, need to label that - maintain sanity...
The wiring this is a tough call, I would definitely consider a new custom harness if I were running aftermarket engine management. But that's not on the plate for now, so I'll pull it all out and cut it all down. We'll see what happens...
The wiring this is a tough call, I would definitely consider a new custom harness if I were running aftermarket engine management. But that's not on the plate for now, so I'll pull it all out and cut it all down. We'll see what happens...
'95 Audi 90Q
'91 Audi CQ Project: Davescq.wordpress.com
'00 Buell X1 Racing Stripe
'91 Audi CQ Project: Davescq.wordpress.com
'00 Buell X1 Racing Stripe
Re: Dave A. Rally CQ Project: Nearing the bottom!
I"d like to do something with the carbon build-up on the exhaust ports. Is that just a waste of time since I can't help the valves right now too?
I was thinking a dremel with a fine grit sand paper would take it off pretty quick (followed by vacuum) and wouldn't hurt the aluminum much...
Thoughts? Waste of time or good thing to do while I'm staring at it?
I was thinking a dremel with a fine grit sand paper would take it off pretty quick (followed by vacuum) and wouldn't hurt the aluminum much...
Thoughts? Waste of time or good thing to do while I'm staring at it?
'95 Audi 90Q
'91 Audi CQ Project: Davescq.wordpress.com
'00 Buell X1 Racing Stripe
'91 Audi CQ Project: Davescq.wordpress.com
'00 Buell X1 Racing Stripe
Re: Dave A. Rally CQ: Hit Bottom - Need Help
I got two good work days in this weekend and it really felt like the project was moving along nicely.
First off, scored an oil cooler from a friend, this should do nicely!

Got all (but 1 broken) exhaust stud out, then took the brushes and grinders to the side of the motor to clean it up a bit - being careful of the aluminum head around the exhasut ports

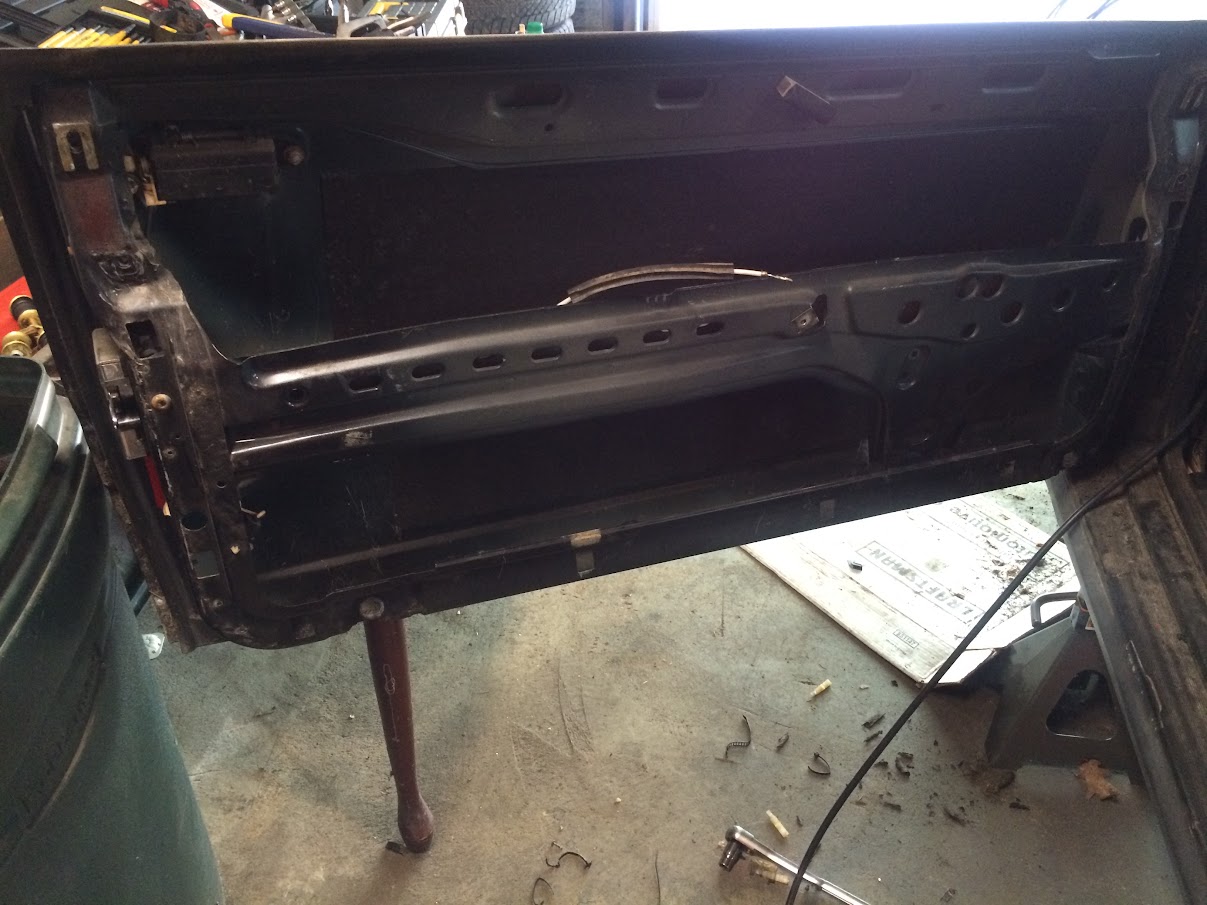
Then I turned focus on the wiring harness, started with the driver's door, then the passenger door, then everything rear of the dash

Door without the window or the wooden window regulator, incredible weight difference...
How I left the car after Day 1 this weekend

Is this port OK for o2 placement? on the OEM exhasut the o2 sensor was much further down - just before the cat. I want to make sure it won't burn up here / what else would this port be for?

Anyone know what the connectors are? Found them hanging loose when messing around with the harness

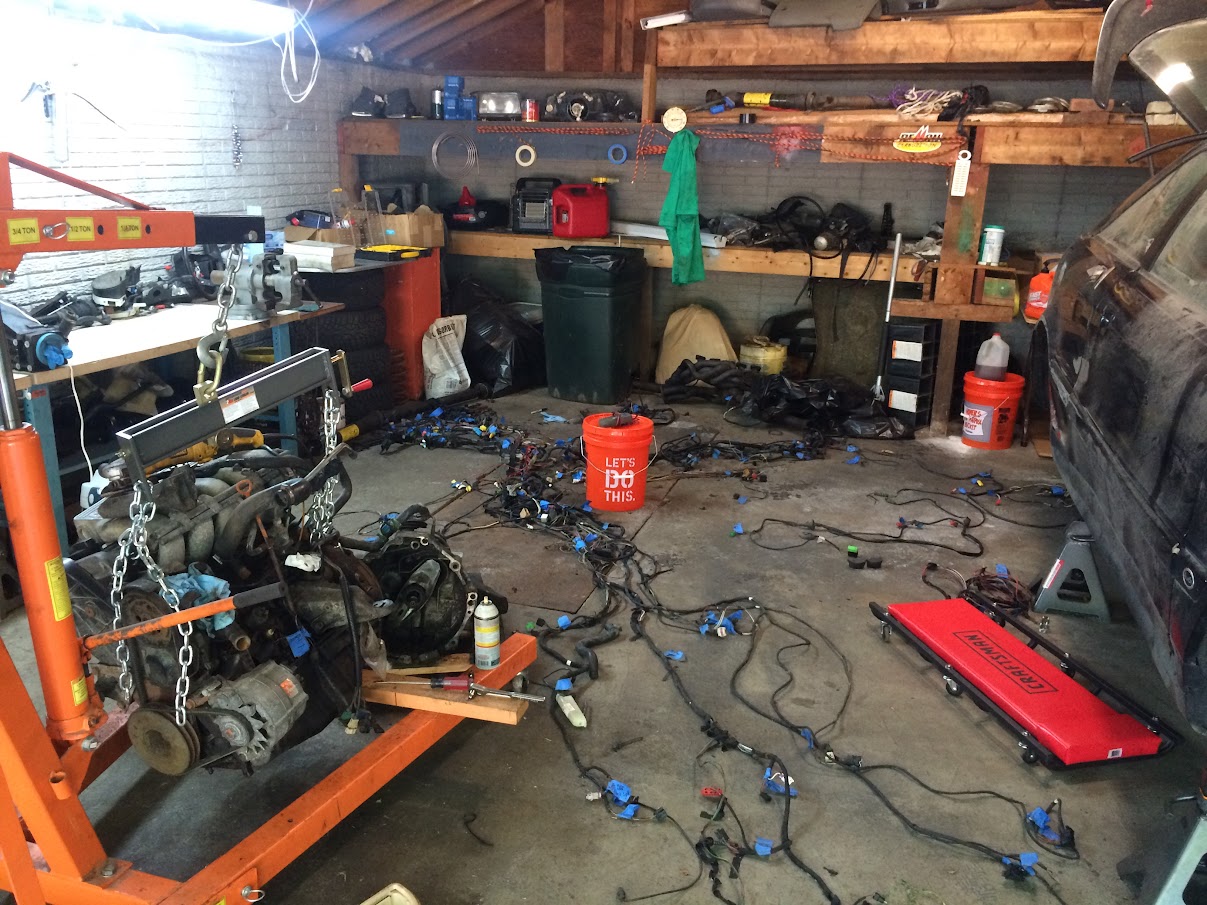
Entire Chassis and Motor harness out as one, fuse panel and relay panel still attached and draped over the fender... wow, this was an effort for 2 people...

Harness on the floor, prepping for surgery

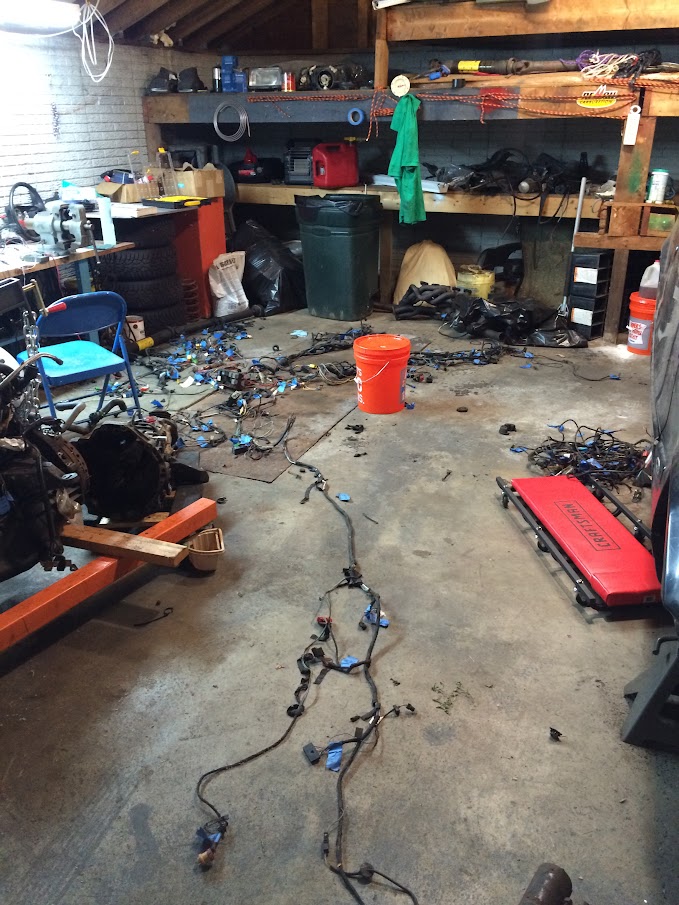
Engine Bay looking a bit empty!

How I left the garage on Day 2, feeling good about the project but soooo many questions to come...

First off, scored an oil cooler from a friend, this should do nicely!
Got all (but 1 broken) exhaust stud out, then took the brushes and grinders to the side of the motor to clean it up a bit - being careful of the aluminum head around the exhasut ports
Then I turned focus on the wiring harness, started with the driver's door, then the passenger door, then everything rear of the dash
Door without the window or the wooden window regulator, incredible weight difference...
How I left the car after Day 1 this weekend
Is this port OK for o2 placement? on the OEM exhasut the o2 sensor was much further down - just before the cat. I want to make sure it won't burn up here / what else would this port be for?
Anyone know what the connectors are? Found them hanging loose when messing around with the harness
Entire Chassis and Motor harness out as one, fuse panel and relay panel still attached and draped over the fender... wow, this was an effort for 2 people...
Harness on the floor, prepping for surgery
Engine Bay looking a bit empty!
How I left the garage on Day 2, feeling good about the project but soooo many questions to come...
'95 Audi 90Q
'91 Audi CQ Project: Davescq.wordpress.com
'00 Buell X1 Racing Stripe
'91 Audi CQ Project: Davescq.wordpress.com
'00 Buell X1 Racing Stripe
Re: Dave A. Rally CQ: Hit Bottom - Need Help
OK Help needed:
Wiring: I've never taken on a wiring project of this magnitude. I have the bentley and electrical manual but I know there's got to be other reference documents out there to help with this. Any information or helpful tips would be greatly appreciated!
Knock Sensors: Just replace them since they're right there? Why is the style that I see for sale different from what's on my engine? Are the different colors just different lengths of wire?
ISV: How do I get the late-style ISV to work with the 034 intake boot? I'm tempted to drill out the boss, but definitely not looking to ruin the part...
I'm sure more to come...
'95 Audi 90Q
'91 Audi CQ Project: Davescq.wordpress.com
'00 Buell X1 Racing Stripe
'91 Audi CQ Project: Davescq.wordpress.com
'00 Buell X1 Racing Stripe

Re: Dave A. Rally CQ: Hit Bottom - Need Help
As I mentioned on Instagram, if you are able to weigh the harness, I'd really appreciate it  Take a look at s2central.net, if I recall correctly there's a badass wiring schematic there that may prove useful.
Regarding the knock sensors, I believe the sensors themselves are the same but as you said the they're colour coded for length. Go with the newer (bolt-thru) style for better cost, reliability and availability.
Regarding the knock sensors, I believe the sensors themselves are the same but as you said the they're colour coded for length. Go with the newer (bolt-thru) style for better cost, reliability and availability.
Find me on Instagram @pry4sno
|| 2010 Golf Sportwagen TDI /// #farmenwagen
|| 2002 Dodge Ram 2500 24vt 4x4 #bertancummins
|| 1992 80 quattro 20v /// Eventual AAN'd Winter Sled
|| 1990 Coupe quattro /// Because Racecar
|| 2010 Golf Sportwagen TDI /// #farmenwagen
|| 2002 Dodge Ram 2500 24vt 4x4 #bertancummins
|| 1992 80 quattro 20v /// Eventual AAN'd Winter Sled
|| 1990 Coupe quattro /// Because Racecar
Re: Dave A. Rally CQ: Hit Bottom - Need Help
Great, thanks for the tip. I did find a schematic on there for the 7a. Not sure if it contains anything more than the electrical manual but we'll see.
I'll try to find a way to measure the harness before touching it.
I'll try to find a way to measure the harness before touching it.
'95 Audi 90Q
'91 Audi CQ Project: Davescq.wordpress.com
'00 Buell X1 Racing Stripe
'91 Audi CQ Project: Davescq.wordpress.com
'00 Buell X1 Racing Stripe
Re: Dave A. Rally CQ: Hit Bottom - Need Help
It looks more scary than it really is, just really time consuming. You've got your Bentley and really that's all you need. What I do is start with one harness and spread it out on the floor. Seperate all the branches and then label them. Then you figure out what you don't want or need, that's all up to you. Sometimes I'll leave certain connectors there for possible future ignition pickups for accessories or the like(like leaving the AC relay and curcuit for your light bar.) Once you do that its just a matter of shucking off the looming and cutting out the circuits that you don't need. Then I put the harness back in and route the wires where you want them. Tape your branches up and then loom them. Seriously spend a good deal of time reading over the schematics and planning it all out. Wiring is one of those things I tend to try and do in one shot and right the first time(I hate splices!  ) so I tend to overthink it some too in the planning stages lol.
Body harness is the same but almost easier because it's really segregated. Same principal goes with leaving certain circuit in place, like if you're going to use lexan windows, keep part of your window curcuit for say, powering your intercom, or mounting a power inverter or something. Sometimes having a switched curcuit already there that just needs pinning vs having to splice into another curcuit is really handy.
Once you tear into and start working, it gets easier as you go. It can be pretty intimidating at first however! Good luck!
Re: Dave A. Rally CQ: Hit Bottom - Need Help
Knock sensor - the through hole styles work and are cheaper and easier to install than the 7 a ones, the color is just the length of the wiring.dalspaugh wrote:OK Help needed:
Wiring: I've never taken on a wiring project of this magnitude. I have the bentley and electrical manual but I know there's got to be other reference documents out there to help with this. Any information or helpful tips would be greatly appreciated!
Knock Sensors: Just replace them since they're right there? Why is the style that I see for sale different from what's on my engine? Are the different colors just different lengths of wire?
ISV: How do I get the late-style ISV to work with the 034 intake boot? I'm tempted to drill out the boss, but definitely not looking to ruin the part...
I'm sure more to come...
ISV - did you get the correct intake boot? http://store.034motorsport.com/silicone ... rsion.html you should just have to push the ISV in and clamp it
Re: Dave A. Rally CQ: Hit Bottom - Need Help
OK, great. Thanks for the tips. I think what I'm most worried about is just cutting some useless feature out (like ABS) and getting a "no start" condition as a result because the computer is expecting a signal back or something foolish. There will be lots pictures and notes taken.deaner wrote:It looks more scary than it really is, just really time consuming. You've got your Bentley and really that's all you need. What I do is start with one harness and spread it out on the floor. Seperate all the branches and then label them. Then you figure out what you don't want or need, that's all up to you. Sometimes I'll leave certain connectors there for possible future ignition pickups for accessories or the like(like leaving the AC relay and curcuit for your light bar.) Once you do that its just a matter of shucking off the looming and cutting out the circuits that you don't need. Then I put the harness back in and route the wires where you want them. Tape your branches up and then loom them. Seriously spend a good deal of time reading over the schematics and planning it all out. Wiring is one of those things I tend to try and do in one shot and right the first time(I hate splices!
Body harness is the same but almost easier because it's really segregated. Same principal goes with leaving certain circuit in place, like if you're going to use lexan windows, keep part of your window curcuit for say, powering your intercom, or mounting a power inverter or something. Sometimes having a switched curcuit already there that just needs pinning vs having to splice into another curcuit is really handy.
Once you tear into and start working, it gets easier as you go. It can be pretty intimidating at first however! Good luck!
'95 Audi 90Q
'91 Audi CQ Project: Davescq.wordpress.com
'00 Buell X1 Racing Stripe
'91 Audi CQ Project: Davescq.wordpress.com
'00 Buell X1 Racing Stripe
Re: Dave A. Rally CQ: Hit Bottom - Need Help
Thanks Peter for confirming that on the sensors.Peters wrote:Knock sensor - the through hole styles work and are cheaper and easier to install than the 7 a ones, the color is just the length of the wiring.dalspaugh wrote:OK Help needed:
Wiring: I've never taken on a wiring project of this magnitude. I have the bentley and electrical manual but I know there's got to be other reference documents out there to help with this. Any information or helpful tips would be greatly appreciated!
Knock Sensors: Just replace them since they're right there? Why is the style that I see for sale different from what's on my engine? Are the different colors just different lengths of wire?
ISV: How do I get the late-style ISV to work with the 034 intake boot? I'm tempted to drill out the boss, but definitely not looking to ruin the part...
I'm sure more to come...
ISV - did you get the correct intake boot? http://store.034motorsport.com/silicone ... rsion.html you should just have to push the ISV in and clamp it
As for the boot, I bought it used in part of a package but even that link you sent me shows that it's for a early style not the late style which I have which plugs directly into the boot. I suppose I can just move it and plumb it into the boot (although I'm concerned it will cause an unexpected feedback delay in the ISV...
'95 Audi 90Q
'91 Audi CQ Project: Davescq.wordpress.com
'00 Buell X1 Racing Stripe
'91 Audi CQ Project: Davescq.wordpress.com
'00 Buell X1 Racing Stripe
Re: Dave A. Rally CQ: Hit Bottom - Need Help
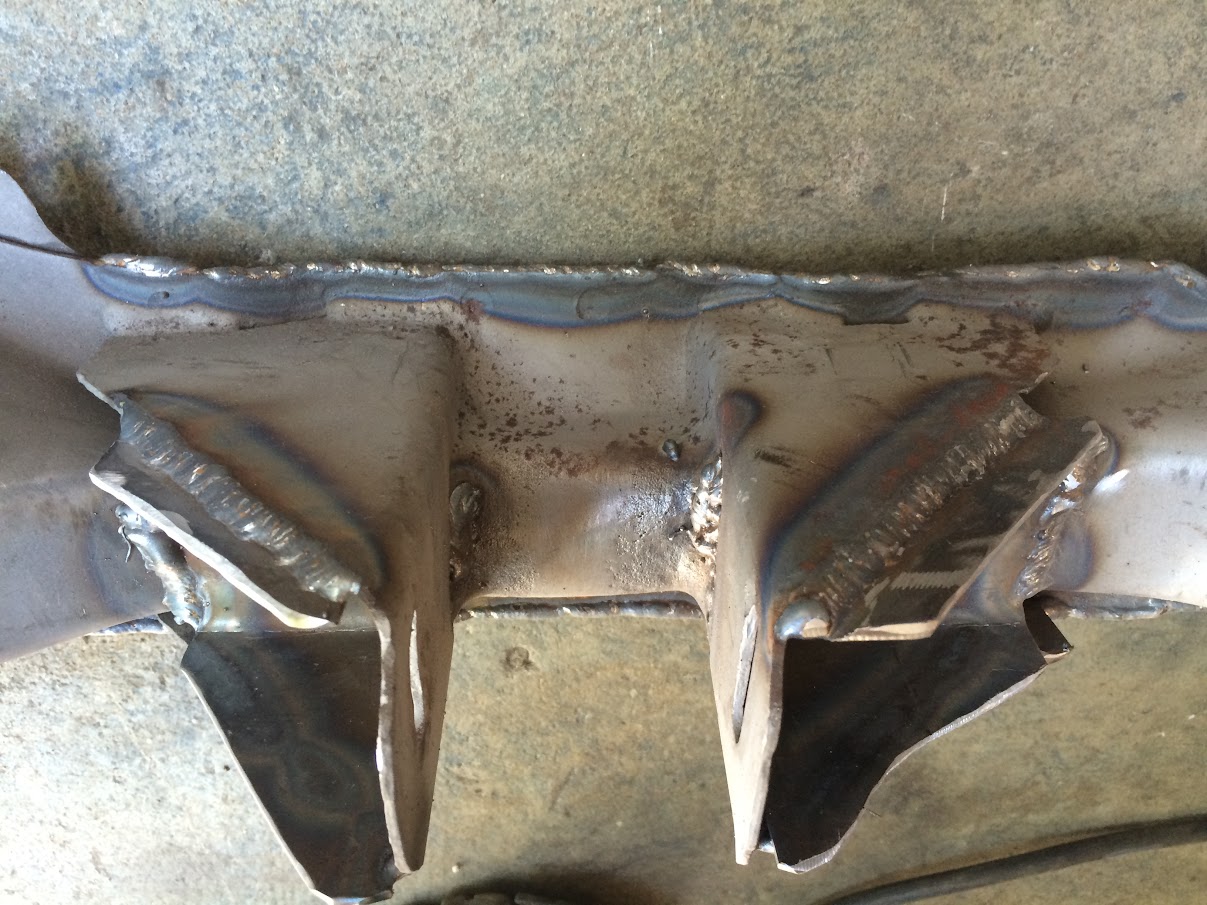
So, because the northeast has not been kind to this car, and the rear diff mount is supposedly a weak point for these cars anyway, I started mocking up a rear diff mount reinforcement. Seam welding is now done, now I just need to hack this up, weld it in, and paint up the last few items!
Picture of ugliness:
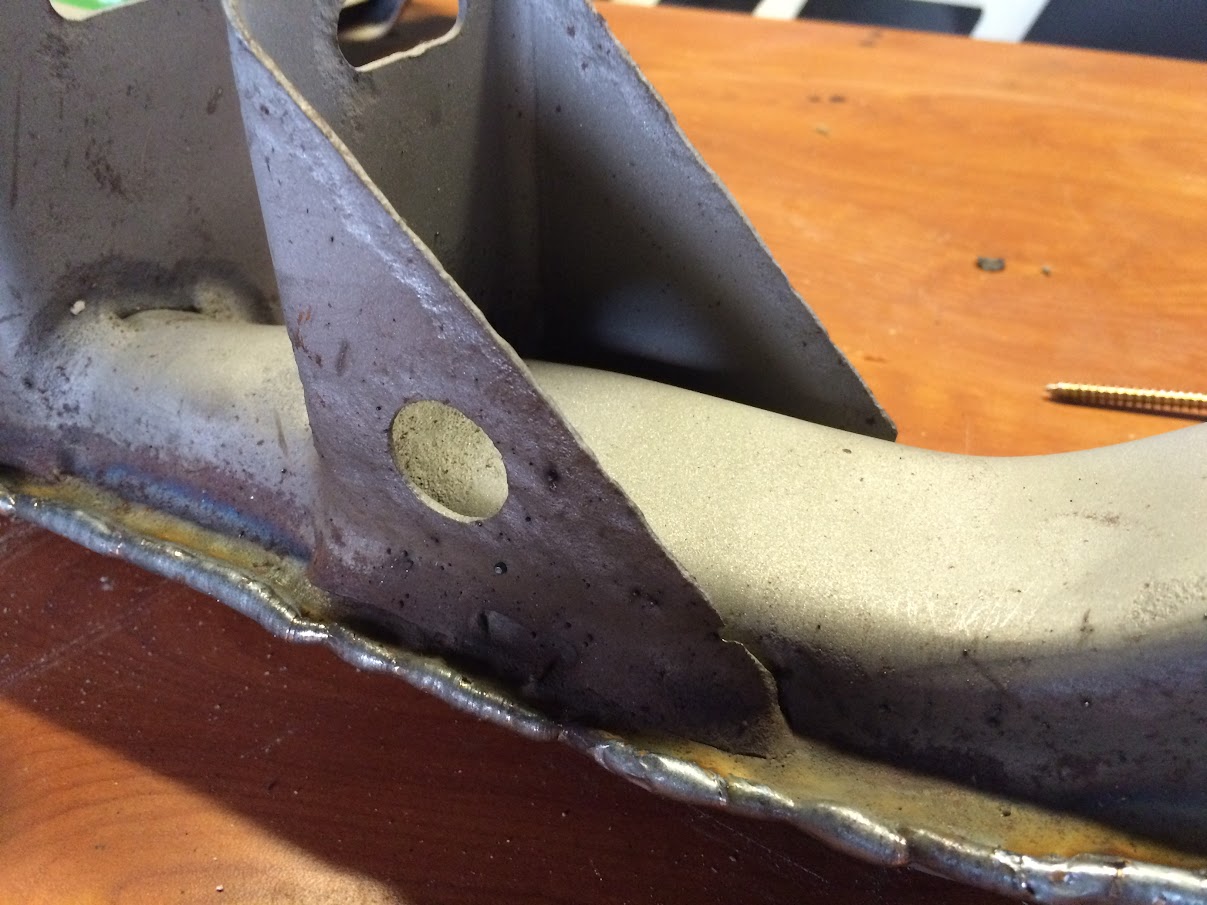
So with only 2 clamps and a pipe for a hammer, I made this!

a little more finagling...
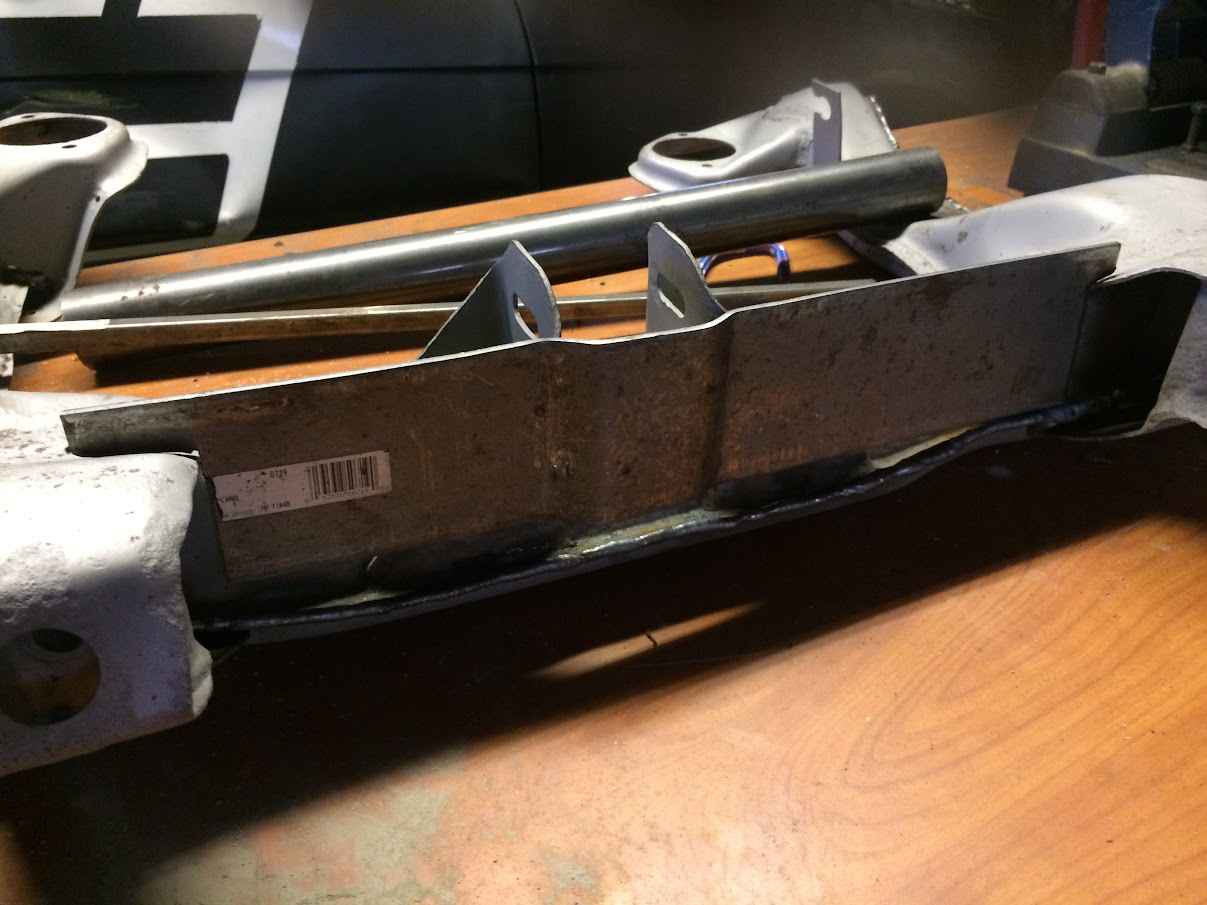
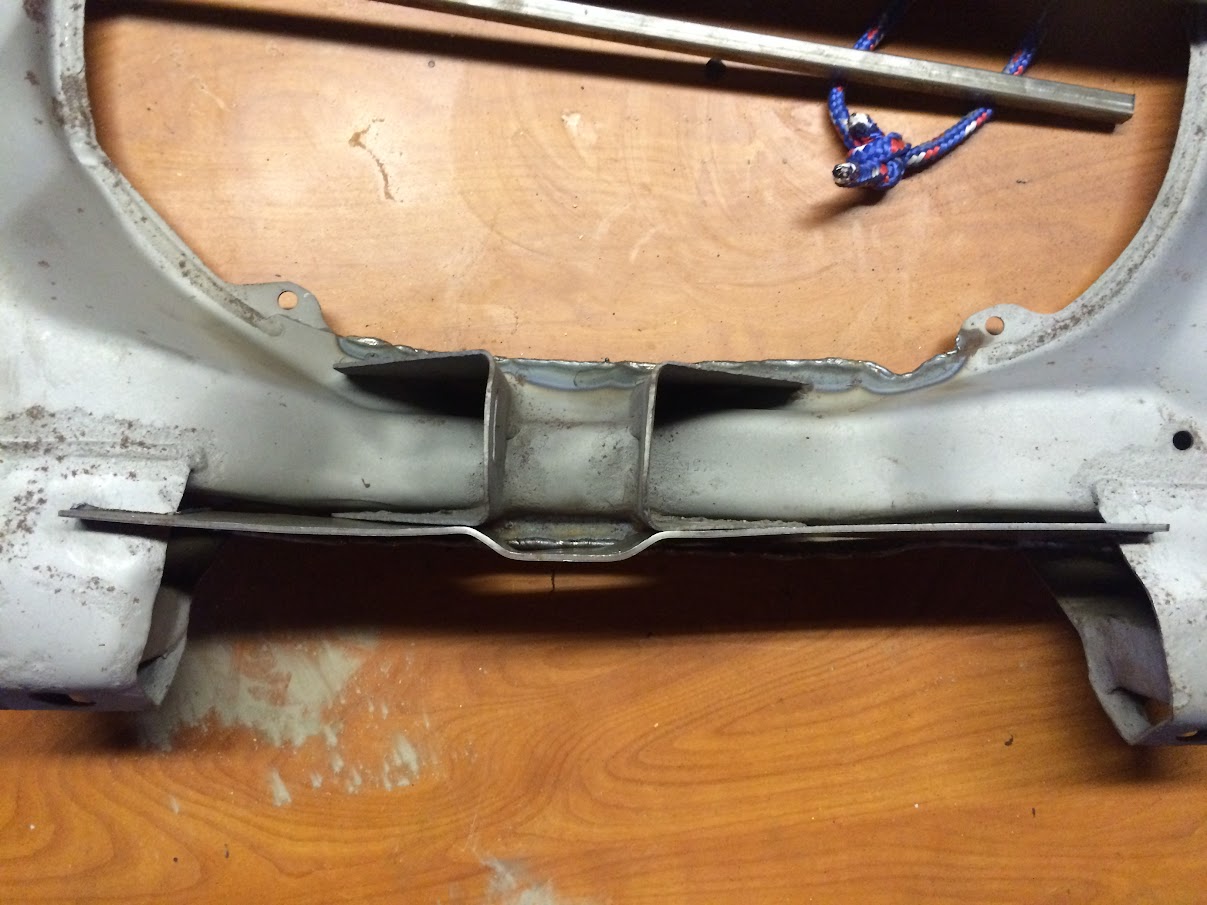
So what do you think? Is that enough space to clear the rear diff mount? the bends allow about .5" off the back surface of the OEM mount...
Thoughts?

Picture of ugliness:
So with only 2 clamps and a pipe for a hammer, I made this!
a little more finagling...
So what do you think? Is that enough space to clear the rear diff mount? the bends allow about .5" off the back surface of the OEM mount...
Thoughts?
'95 Audi 90Q
'91 Audi CQ Project: Davescq.wordpress.com
'00 Buell X1 Racing Stripe
'91 Audi CQ Project: Davescq.wordpress.com
'00 Buell X1 Racing Stripe
Re: Dave A. Rally CQ: Labor Day Update
Alright, I had a bit of a marathon weekend in the garage. 3 days, alone but productive.
I'll start with the rear diff mount since that's where I left off. I abondoned my one-piece rear solution shown above. and decide to form two U-shaped pieces that fit inside the OEM mount, and then reinforce one spot outside that was particularly worn away from rust.
Welded up and mid grind...
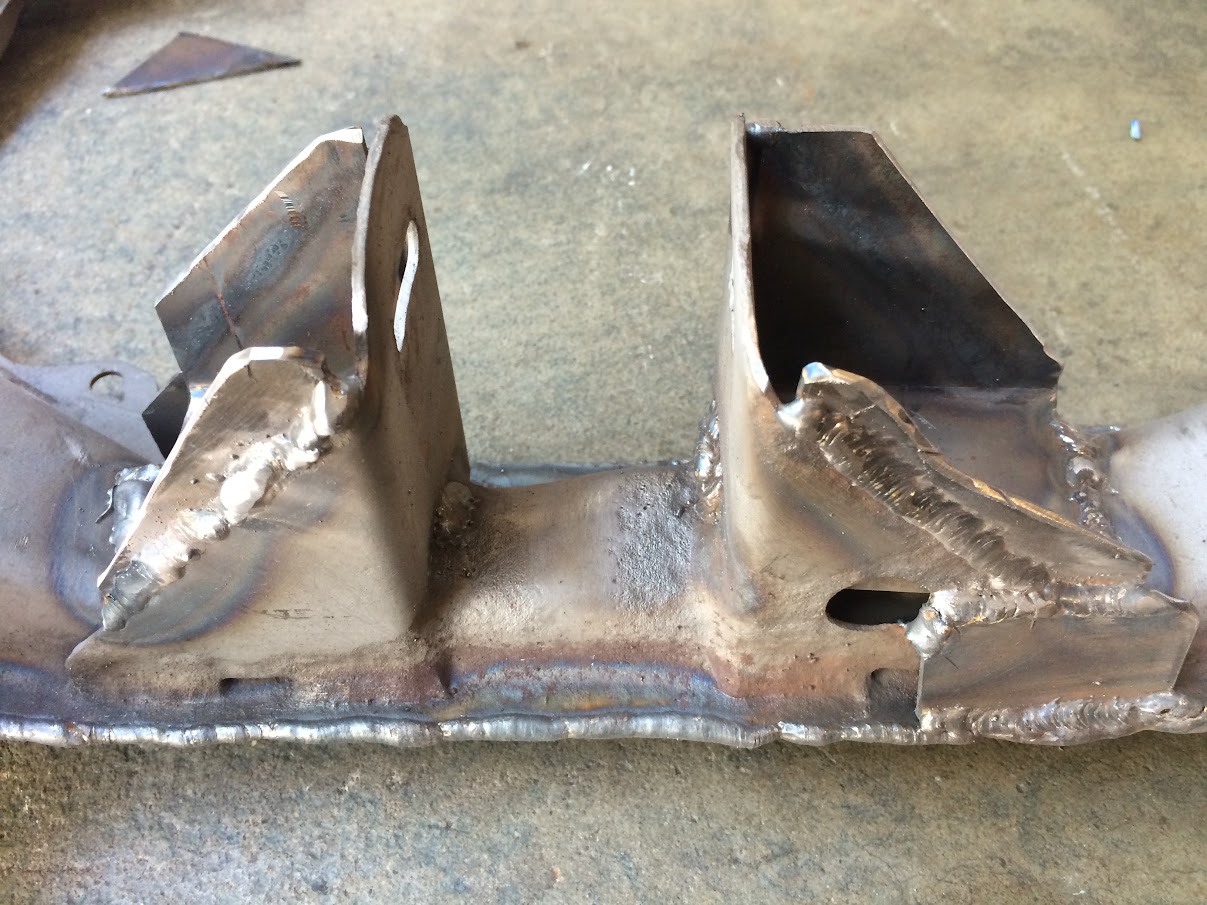
inside look... I got little bit carried away with the welding - I was really enjoying it!
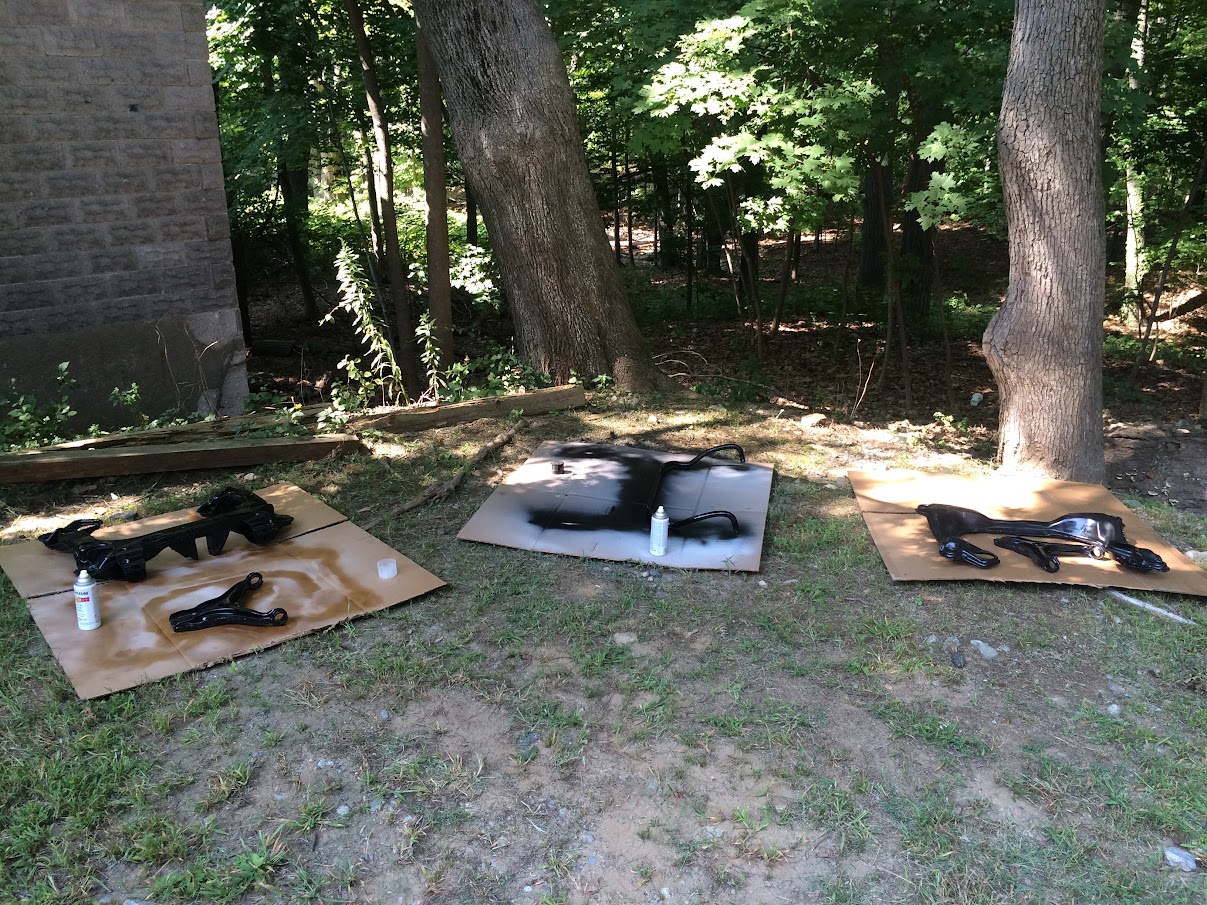
Once that was welded up, it was time to finish painting the suspension pieces... damn this was time consuming...

Process: Clean with scour pad and POR15 Degreaser, rinse and let dry. Spray with POR15 metal prep for 20 minutes, rinse (A LOT) and let dry, hang up and paint with POR15... wait... apply second coat... let dry.
Then... top coat with 2 layers of rustoleum clearcoat...
I also realized that I've been ignoring the front swaybar this whole time... so I got out the angle grinder...

I didn't want to open a whole new can of POR15 just for this bar so I decided to do it all with rustoleum spray (and I'm already regretting it) 2 coats of primer... 3 coats of black... 2 coats of clearcoat and it's no where near as strong as the POR15... oh well...
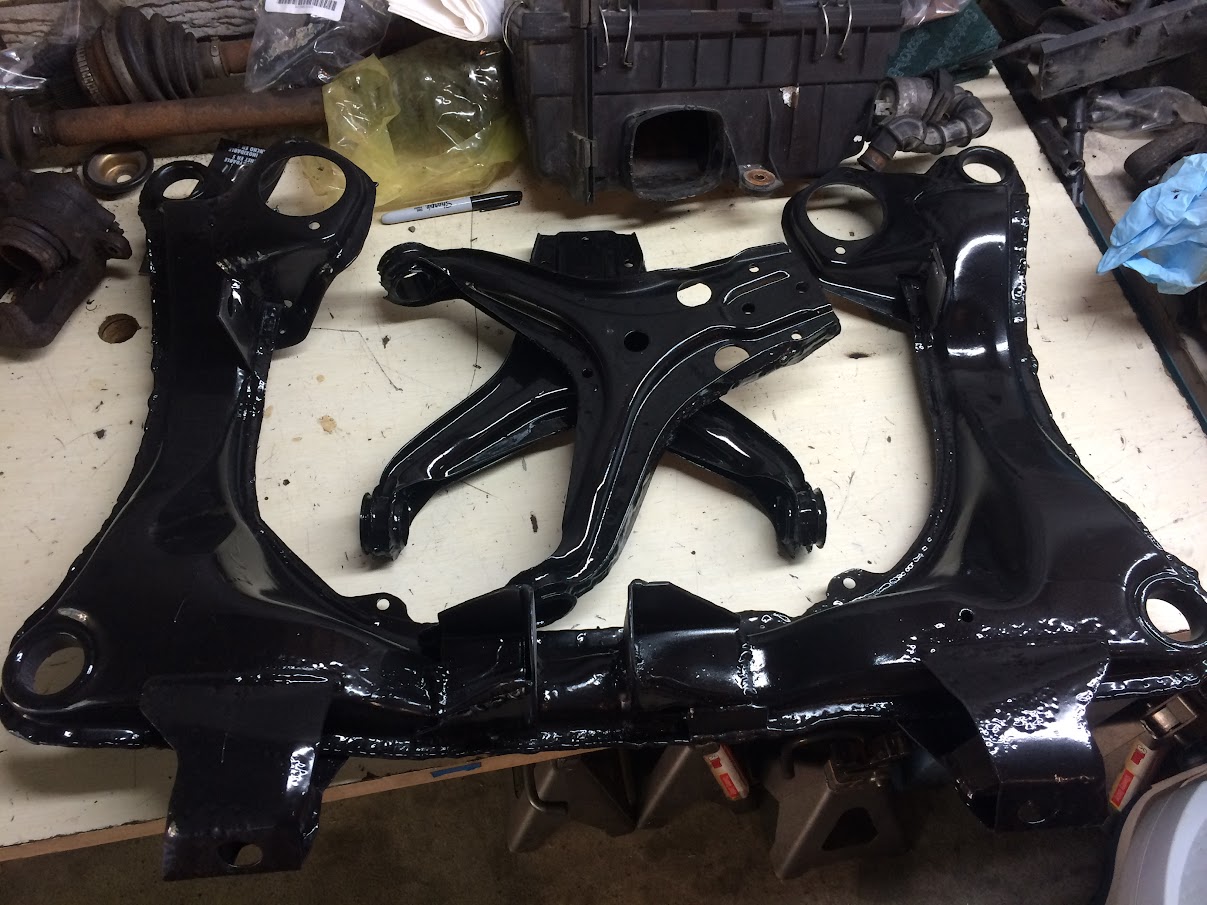
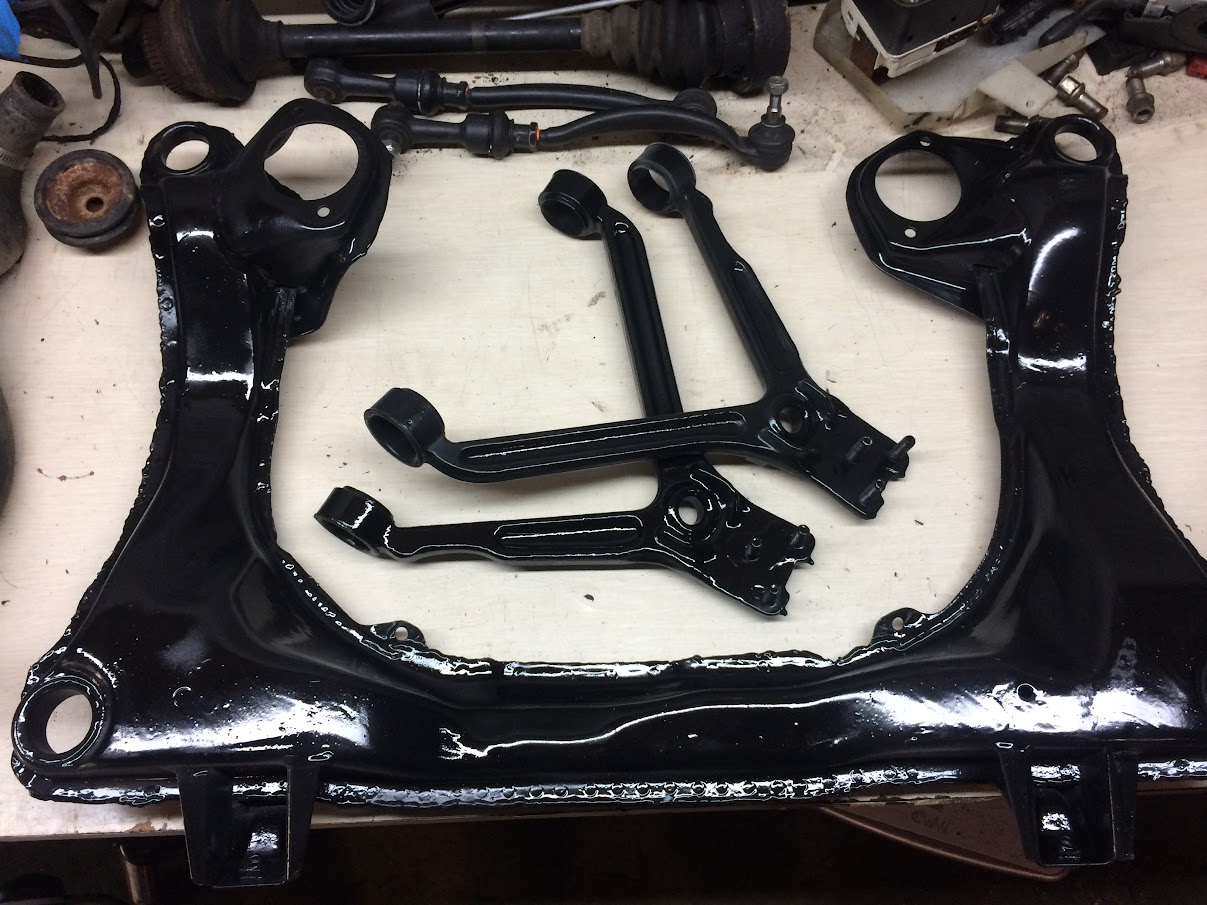
Shiny pieces awaiting install...

I'm so sick of painting...
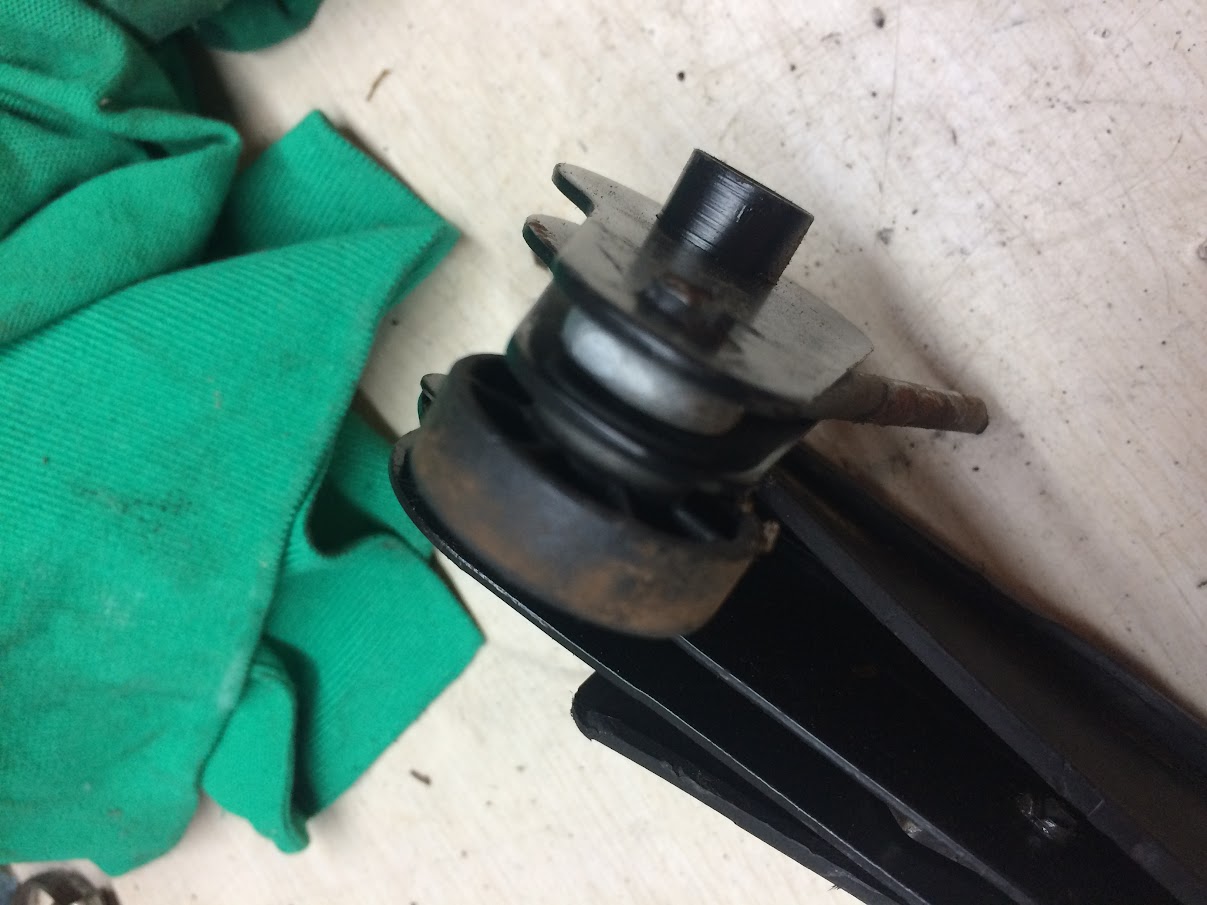
Then, attention turned to the E Brake. The grey threaded piece that offers adjustment was completely rusted and seized so that had to go. but Audi doesn't make this part serviceable... for most.
Old Assembly
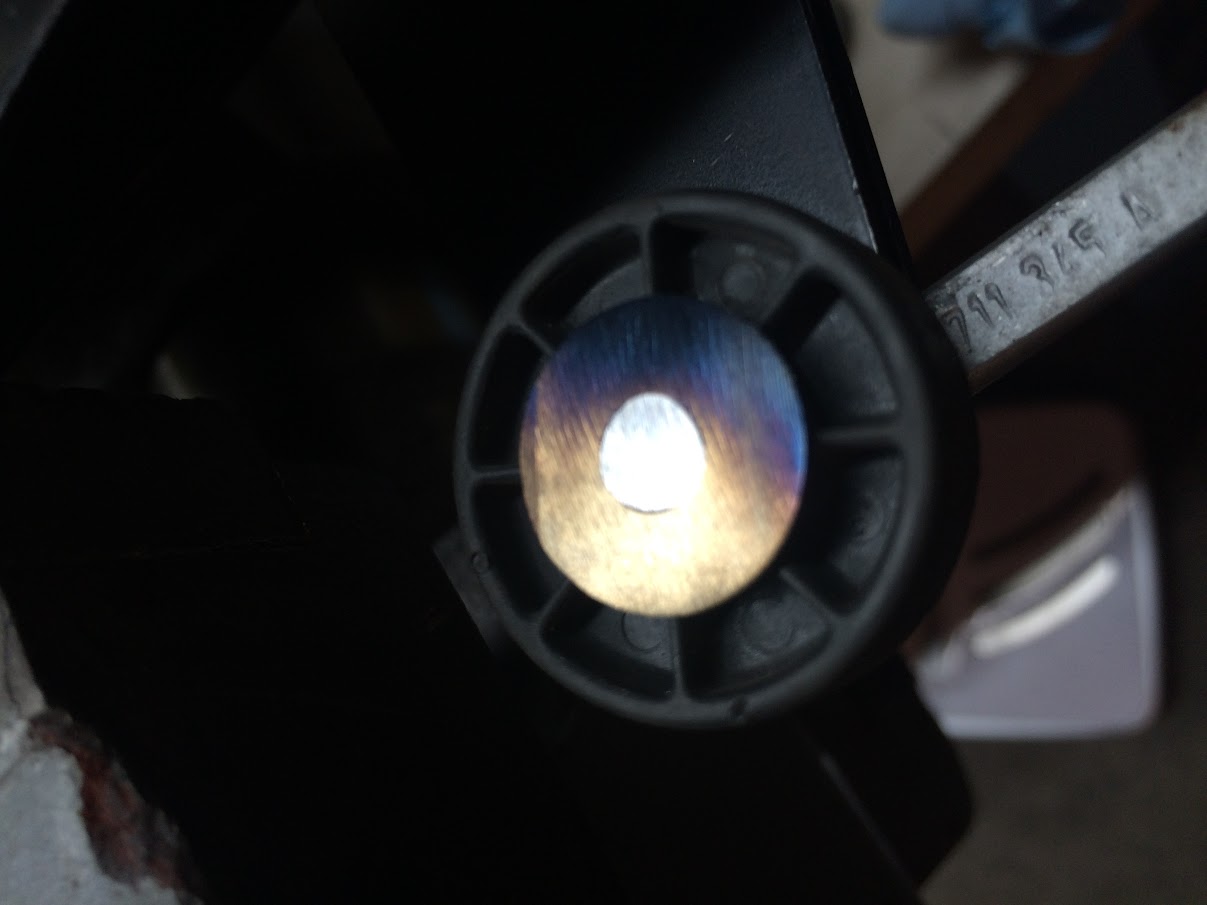
Grind off the ends of the pin, make pretty colors on the washer, punch out the old pin
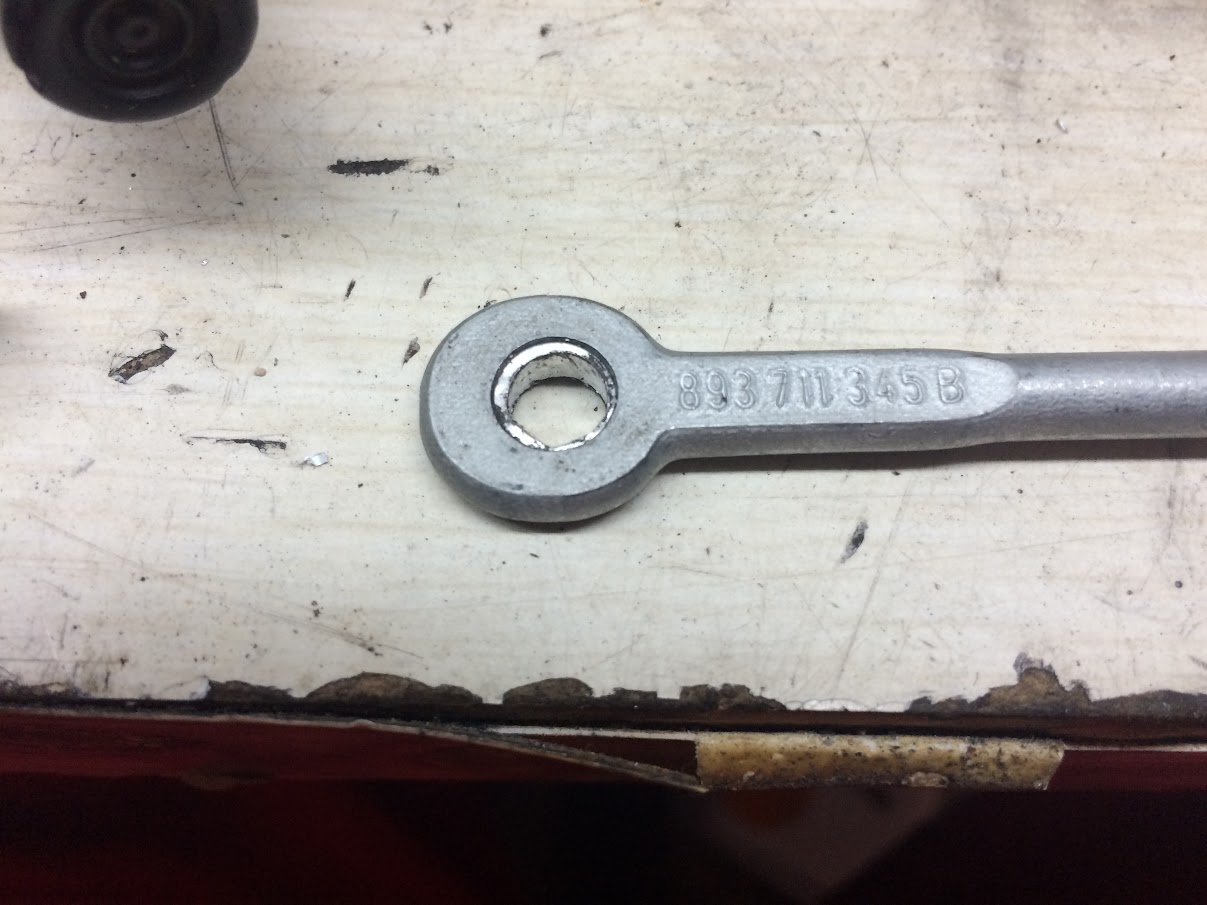
You'll find then that all of the pieces have different ID's... wtf Audi?... so I made up some inserts of Alum and Plastic... and pressed them, nothing fancy, the assembly is totally captive once installed so it doesn't have to be fancy....
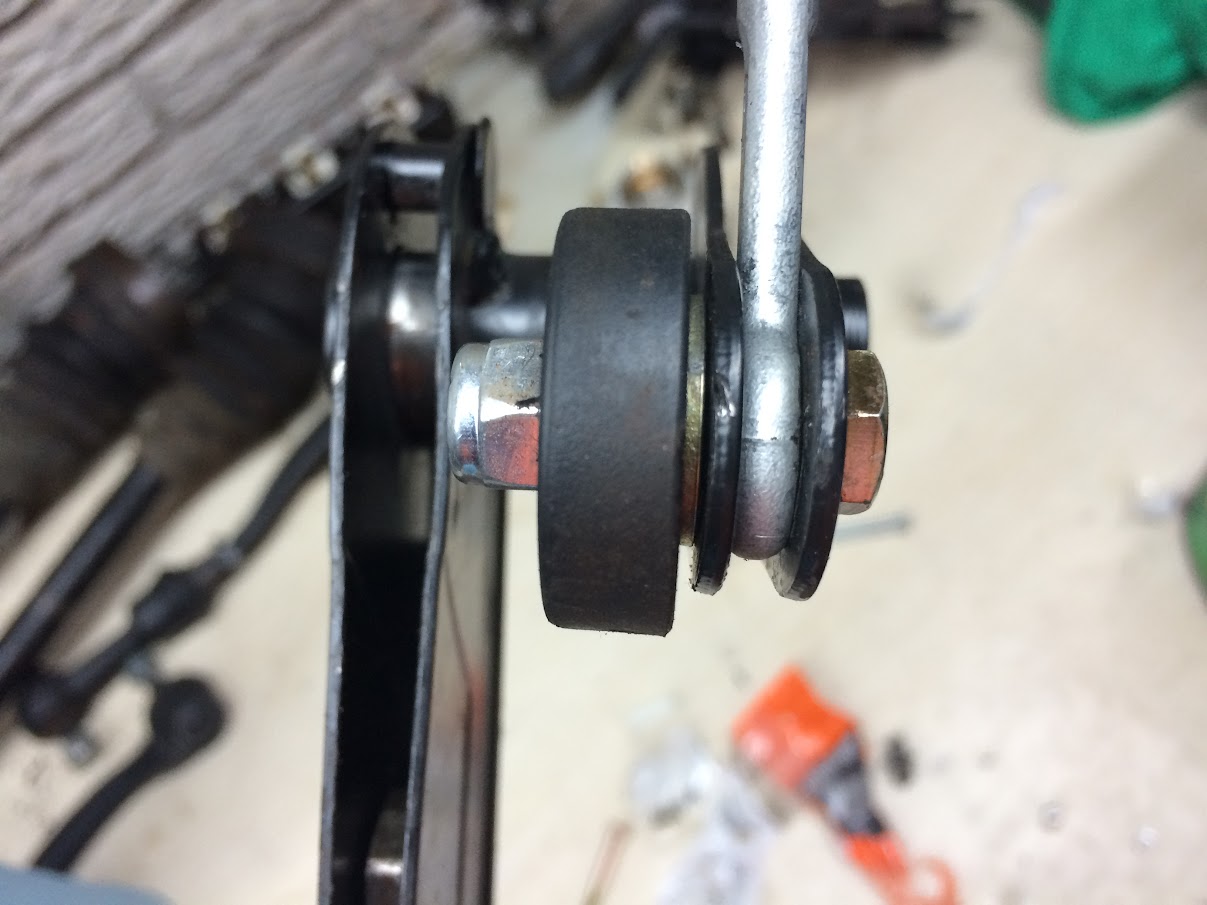
Assembled back together. I want to get a low-profile nut for the 1/4-20 bolt... help slim things down... but overall I'm happy with it.
Spent considerable amount of time in the engine bay cleaning. I found that simple green worked better than Acetone and the POR15 "industrial" degreaser... Simple green FTW...

Oh yeah, I cut out the battery tray, ABS brackets, random broken and corroded studds and crap...
I need to start thinking about which holes to weld up and which ones to leave... I'll likely post up something in the fb group for that.
This is how I left the garage on Monday night:
You can see at this point I had started looking into the wiring harness. spreading it as best I can in the limited space, trying not to step on and break any connectors...
On Tuesday night I got free and went right back at it for the 4th day in the row... and got a few hours to get familiar with the wiring harness. Started pulling out certain strands and labeling what's left behind and etc. etc... I've deleted power seats, ABS, and the locking system and alarm... much more to come on that... but the harness is already looking thinner... deleted wire bundles on the right there...
I'll start with the rear diff mount since that's where I left off. I abondoned my one-piece rear solution shown above. and decide to form two U-shaped pieces that fit inside the OEM mount, and then reinforce one spot outside that was particularly worn away from rust.
Welded up and mid grind...
inside look... I got little bit carried away with the welding - I was really enjoying it!
Once that was welded up, it was time to finish painting the suspension pieces... damn this was time consuming...
Process: Clean with scour pad and POR15 Degreaser, rinse and let dry. Spray with POR15 metal prep for 20 minutes, rinse (A LOT) and let dry, hang up and paint with POR15... wait... apply second coat... let dry.
Then... top coat with 2 layers of rustoleum clearcoat...
I also realized that I've been ignoring the front swaybar this whole time... so I got out the angle grinder...
I didn't want to open a whole new can of POR15 just for this bar so I decided to do it all with rustoleum spray (and I'm already regretting it) 2 coats of primer... 3 coats of black... 2 coats of clearcoat and it's no where near as strong as the POR15... oh well...
Shiny pieces awaiting install...
I'm so sick of painting...
Then, attention turned to the E Brake. The grey threaded piece that offers adjustment was completely rusted and seized so that had to go. but Audi doesn't make this part serviceable... for most.
Old Assembly
Grind off the ends of the pin, make pretty colors on the washer, punch out the old pin
You'll find then that all of the pieces have different ID's... wtf Audi?... so I made up some inserts of Alum and Plastic... and pressed them, nothing fancy, the assembly is totally captive once installed so it doesn't have to be fancy....
Assembled back together. I want to get a low-profile nut for the 1/4-20 bolt... help slim things down... but overall I'm happy with it.
Spent considerable amount of time in the engine bay cleaning. I found that simple green worked better than Acetone and the POR15 "industrial" degreaser... Simple green FTW...
Oh yeah, I cut out the battery tray, ABS brackets, random broken and corroded studds and crap...
I need to start thinking about which holes to weld up and which ones to leave... I'll likely post up something in the fb group for that.
This is how I left the garage on Monday night:
You can see at this point I had started looking into the wiring harness. spreading it as best I can in the limited space, trying not to step on and break any connectors...
On Tuesday night I got free and went right back at it for the 4th day in the row... and got a few hours to get familiar with the wiring harness. Started pulling out certain strands and labeling what's left behind and etc. etc... I've deleted power seats, ABS, and the locking system and alarm... much more to come on that... but the harness is already looking thinner... deleted wire bundles on the right there...
'95 Audi 90Q
'91 Audi CQ Project: Davescq.wordpress.com
'00 Buell X1 Racing Stripe
'91 Audi CQ Project: Davescq.wordpress.com
'00 Buell X1 Racing Stripe
Re: Dave A. Rally CQ: Labor Day Update
Been working on the harness a bit, probably 7 hours since the last post. It is amazing how time flies digging through the manual, cutting off old grimy wire tape... sheesh...
I'm down to the main engine harness, main interior harness, and headlight/engine sensor harness as shown below. The headlight harness is a complete disaster... electrical tape splices, wires ending nowhere, bleh
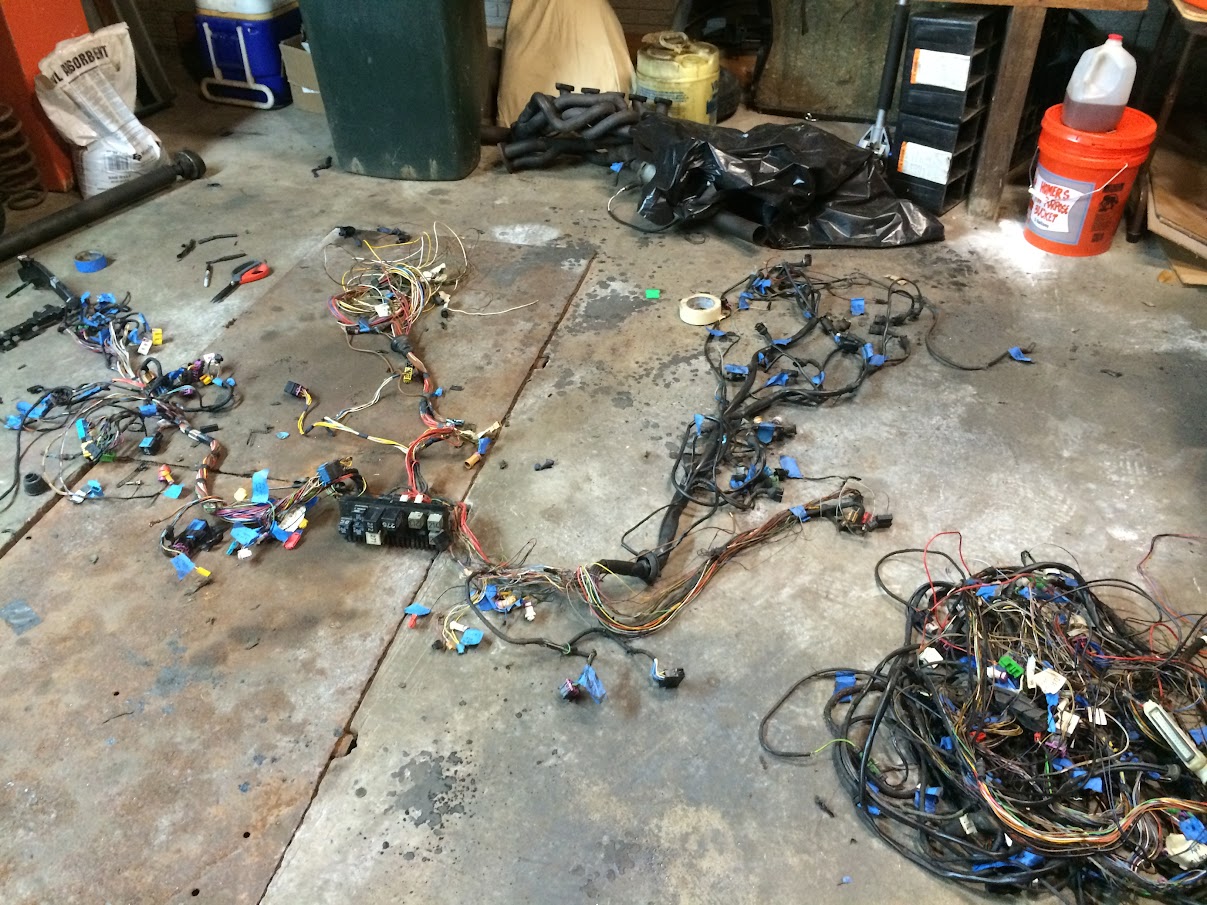
that said, I'm actually kind of enjoying the puzzle that is 90's Audi Wiring... deleted strands on the right there... there is another pile of wires to go in elsewhere
I definitely don't understand all of it... nor understand all of the bypass connections I need to make... but more to come on that later...
I'm thinking this will be like a Gen 1 wire harness. Mostly OEM Wires and connectors, some creature comforts will remain (power windows, mirrors...)
I'm down to the main engine harness, main interior harness, and headlight/engine sensor harness as shown below. The headlight harness is a complete disaster... electrical tape splices, wires ending nowhere, bleh
that said, I'm actually kind of enjoying the puzzle that is 90's Audi Wiring... deleted strands on the right there... there is another pile of wires to go in elsewhere
I definitely don't understand all of it... nor understand all of the bypass connections I need to make... but more to come on that later...
I'm thinking this will be like a Gen 1 wire harness. Mostly OEM Wires and connectors, some creature comforts will remain (power windows, mirrors...)
'95 Audi 90Q
'91 Audi CQ Project: Davescq.wordpress.com
'00 Buell X1 Racing Stripe
'91 Audi CQ Project: Davescq.wordpress.com
'00 Buell X1 Racing Stripe
-
mr_aj_johnson
- Posts: 220
- Joined: Mon Apr 22, 2013 11:01 am
Re: Dave A. Rally CQ: Wiring...
I skipped power mirrors myself, but power windows are awesome!
Re: Dave A. Rally CQ: Wiring...
That's funny... I'd really like to have some manual windows. Less complexity and less weight.
Unfortunately, they're even harder to find than power rear windows.
Unfortunately, they're even harder to find than power rear windows.
Find me on Instagram @pry4sno
|| 2010 Golf Sportwagen TDI /// #farmenwagen
|| 2002 Dodge Ram 2500 24vt 4x4 #bertancummins
|| 1992 80 quattro 20v /// Eventual AAN'd Winter Sled
|| 1990 Coupe quattro /// Because Racecar
|| 2010 Golf Sportwagen TDI /// #farmenwagen
|| 2002 Dodge Ram 2500 24vt 4x4 #bertancummins
|| 1992 80 quattro 20v /// Eventual AAN'd Winter Sled
|| 1990 Coupe quattro /// Because Racecar
Re: Dave A. Rally CQ: Wiring...
Power rear windows? that couldn't possible have been a thing... good idea though!
Yeah, I figured power mirrors could be really nice when you're all buttoned up in the harness or something and notice they aren't where you want them (lemons experience)
progress might slow up a bit since the 24 hours of lemons race is coming up at the end of october but I'm still pushing hard!
Yeah, I figured power mirrors could be really nice when you're all buttoned up in the harness or something and notice they aren't where you want them (lemons experience)
progress might slow up a bit since the 24 hours of lemons race is coming up at the end of october but I'm still pushing hard!
'95 Audi 90Q
'91 Audi CQ Project: Davescq.wordpress.com
'00 Buell X1 Racing Stripe
'91 Audi CQ Project: Davescq.wordpress.com
'00 Buell X1 Racing Stripe
Re: Dave A. Rally CQ: Wiring...
I'm still here...! I'm just getting lost in the world of wiring... whoever said this was time consuming was so right. I've spent many many more hours than I could have expected on this.
I think to save some time on this aspect and have any hope of putting this car together in the next 6 months, I"m going to leave the engine harness mostly untouched. I need to fix some stuff on the interior side of the harness but the wires in the engine bay seem to be well protected still.
I found this capacitor in the plug for my brake switch, bentley doesn't show it, and it needs to be reconnected, what's this for?
'95 Audi 90Q
'91 Audi CQ Project: Davescq.wordpress.com
'00 Buell X1 Racing Stripe
'91 Audi CQ Project: Davescq.wordpress.com
'00 Buell X1 Racing Stripe