Page 7 of 11
Re: An Alpinweiss URQ in Utah - Springing Into Action
Posted: Sun Aug 05, 2012 1:48 pm
by glibobbo21
hmmm...interesting
Re: An Alpinweiss URQ in Utah - Springing Into Action
Posted: Tue Aug 07, 2012 12:30 am
by Twintowers
I like the deck cooling idea, but not sure there is enough material at the top of that block to do that, try a bunch of brass fittings with small tubes I think you will have better luck.. :-)
Attachment ( 32069 ) : youngtimer2012045.jpg
Re: An Alpinweiss URQ in Utah - Springing Into Action
Posted: Tue Aug 07, 2012 2:57 am
by glibobbo21
almost saved that last pic to my porn directory on accident...
Re: An Alpinweiss URQ in Utah - Springing Into Action
Posted: Tue Aug 07, 2012 5:08 am
by Highlander
glibobbo21 wrote:almost saved that last pic to my porn directory on accident...
:stupid:

Re: An Alpinweiss URQ in Utah - Springing Into Action
Posted: Tue Aug 07, 2012 6:20 am
by Wheeljack
Twintowers wrote:I like the deck cooling idea, but not sure there is enough material at the top of that block to do that, try a bunch of brass fittings with small tubes I think you will have better luck.. :-)
Don't be so quick to doubt. The additional ports on the outside, like shown above, would do little more than the stock turbo water neck for the 20V.
You want to get the water as close as possible to the source of heat and the only way to do it is with deck cooling...you increase the dT/dx and subsequently the heat transfer rate as well. This does 2 things. 1-It can remove more heat for high power applications, but it also will improve the temperature uniformity in the head (reduce hot spots), which is also a good thing.
Also, I am building a 20V motor here and there is plenty of material left to do it. Many others BTDT. Both my measurements and the solid model support this. It has also been done many times on the 20V head and block with good success. If you look at even newer VAG motors, many include a cooling jacket around the combustion chamber.
The model I posted above really doesn't have the full deck geometry captured, so it is not really indicative of the clearances on the deck. It was mainly to set up the CNC code for machining the groove. I will be detailing it further, but it isn't required for this exercise.
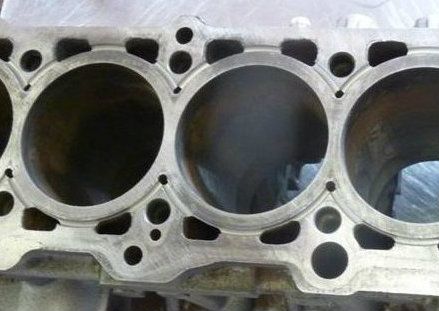
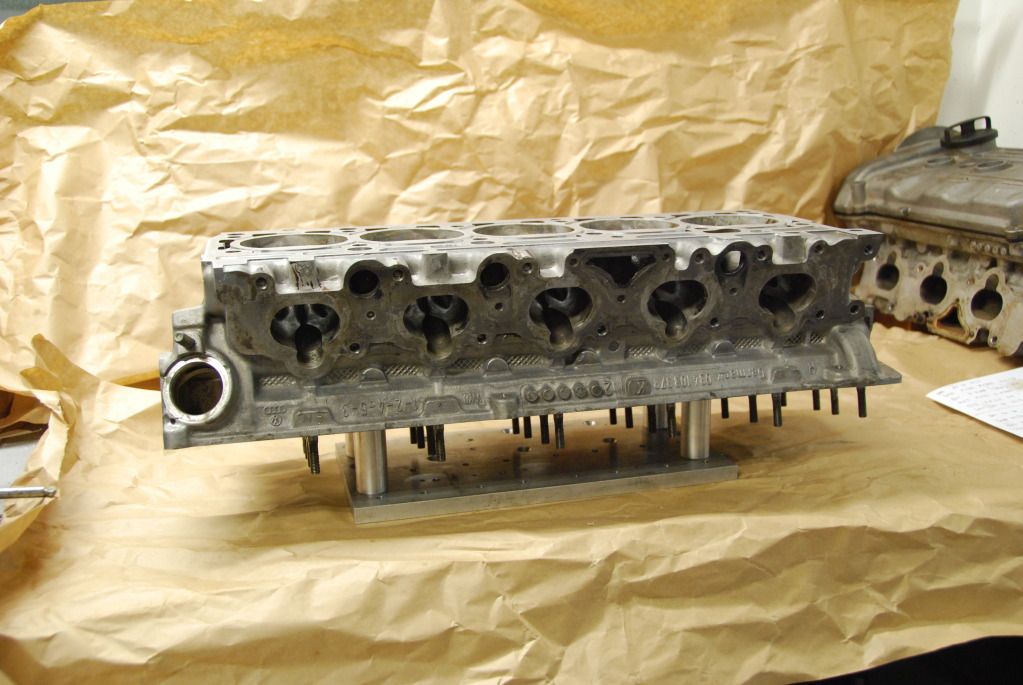
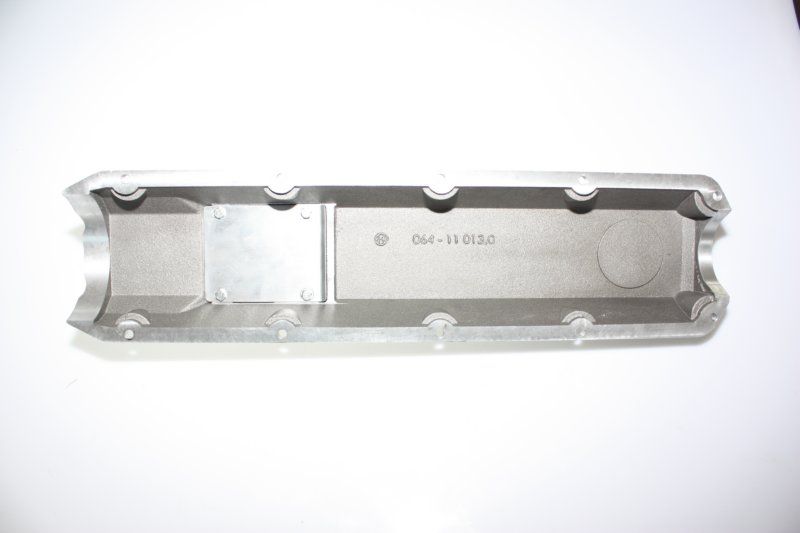
For reference, here is a machined block showing plenty of meat available...
and here is a new VAG I5 showing the factory cooling on the head...
The head groove can be the same dimensions as on the block. This head will still have the turbo water porting, so don't think I'll be adding anything like that picture. The machining to do the deck cooling modification is super simple...and what the works motors did on the cross flow 20V.
The real question is whether there is any benefit in my application.
Re: An Alpinweiss URQ in Utah - Springing Into Action
Posted: Tue Aug 07, 2012 7:39 am
by Hank
There is another good reason to do it to, and that has to do with surface area. If you have 200ksi headbolts, they are putting 200,000 pounds on each square inch. If you are removing surface area on the head for cooling, you are increasing the available clamp on the headgasket.
I wish I would have done this with my deck! I am sure I'll have another shot at it sometime in the future.
Re: An Alpinweiss URQ in Utah - Springing Into Action
Posted: Tue Aug 07, 2012 7:44 am
by Wheeljack
ShavedQuattro wrote:There is another good reason to do it to, and that has to do with surface area. If you have 200ksi headbolts, they are putting 200,000 pounds on each square inch. If you are removing surface area on the head for cooling, you are increasing the available clamp on the headgasket.
I wish I would have done this with my deck! I am sure I'll have another shot at it sometime in the future.
A couple posts up...
cbrydon wrote:The other possible benefit I am hoping for is an increase in the strength of the head gasket interface. Most seals are a strong function of the pressure exerted on the seal in the static case, and this reduction in deck contact area should increase the static load on the gasket (comparing equal clamping forces). Of course, o-ringing is another option that works off the same principle...?
:wink:
Re: An Alpinweiss URQ in Utah - Springing Into Action
Posted: Tue Aug 07, 2012 7:48 am
by Hank
doh... I just read this pages worth!!! I knew I wasn't teaching you anything new

Re: An Alpinweiss URQ in Utah - Springing Into Action
Posted: Tue Aug 07, 2012 7:27 pm
by 80qtdi
Awesome work, I had not been following your thread too much, that will be changing.
Re: An Alpinweiss URQ in Utah - Springing Into Action
Posted: Tue Aug 07, 2012 8:59 pm
by 85oceanic
I really like the idea of the block cooling you have planned out. I am 100 percent positive the block itself will withstand the work just fine. Not that I have anything Audi related to back it up, but after working enough Honda engines now and seeing how thin their cylinder walls are, I am dang sure it will be just fine.
Re: An Alpinweiss URQ in Utah - Springing Into Action
Posted: Wed Aug 08, 2012 12:23 am
by Twintowers
If you do it, your probably looking at a huge improvement in the base ignition timing map, and you will reduce the propensity for the engine to knock under load at all speeds. I would consider the mod if you can prove it will work on that older block which it appears there is enough material, what about the head gasket now, copper? Guy in the video states you need at least the top 1 inch of the cylinder bore to take advantage of these cooling aspects, though that small amount of grooving with some holes drilled in the grooves might work also or even better. I'm reading that old school V8 engine builders would drill a few more cooling passages near the cylinder edge to help with cooling in those areas... 1000hp 6pack Subaru block with custom liners...
http://www.youtube.com/watch?v=KhGu0dciwBo 
Re: An Alpinweiss URQ in Utah - Springing Into Action
Posted: Wed Aug 08, 2012 6:48 am
by audifreakjim
Ha ha, that is my local machinist. Good guy. Chris, you are going to have to do a pump gas tune on this to see how far you can take it!
Re: An Alpinweiss URQ in Utah - Springing Into Action
Posted: Wed Aug 08, 2012 8:09 am
by Quattro v1.0
audifreakjim wrote:Ha ha, that is my local machinist. Good guy. Chris, you are going to have to do a pump gas tune on this to see how far you can take it!
AND He's a FIAT Guy!
Re: An Alpinweiss URQ in Utah - Springing Into Action
Posted: Sun Aug 12, 2012 8:51 pm
by Twintowers
Machine the hell out of the top of that tall block at least, and get that thing on the dyno no O rings needed....! :cheers: :pics:
Re: An Alpinweiss URQ in Utah - Springing Into Action
Posted: Sun Aug 12, 2012 9:14 pm
by Wheeljack
Yup, no o-rings with this configuration. Stock mls gasket should work fine. NC code is ready and should be machining the head and block later this week or early next week. It will be a little bit before dyno....but im a pic whore, so you've got that coming...
Re: An Alpinweiss URQ in Utah - Springing Into Action
Posted: Mon Aug 13, 2012 6:57 am
by Highlander
cbrydon wrote:Yup, no o-rings with this configuration. Stock mls gasket should work fine. NC code is ready and should be machining the head and block later this week or early next week. It will be a little bit before dyno....but im a pic whore, so you've got that coming...
Looking forward to pics
:cheers: :cheers:
Re: An Alpinweiss URQ in Utah - Springing Into Action
Posted: Tue Aug 21, 2012 4:43 pm
by Wheeljack
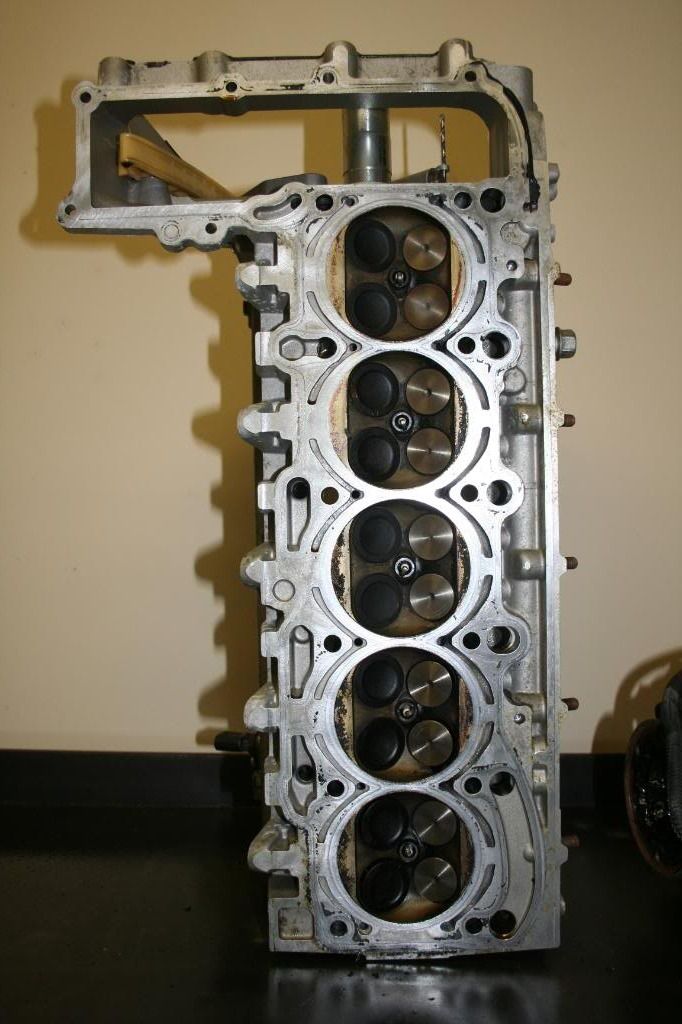
I decided to do a test run on a damaged head to keep from damaging/destroying any of my good 20V heads.
I've scratched my head a few times trying to hypothesize the particular failure with this one. This is the head that came on the urs6 parts car that I picked up a few months back for a song. The story that I was told was that it recently had a head job, and then proceeded to crunch an intake valve on cylinder 1 within a few thousand miles. I would assume that the timing belt jumped or something, because it doesn't really make sense to just drop an intake valve...at least not like a sodium exhaust valve can.
When I pulled it apart and pulled the valves, I noticed something that I couldn't believe. This freakin' head had been skimmed (it was definitely freshly decked, as I could see fresh tool lines) with the intake valves IN THE HEAD! If you've looked at many 20V heads, the intake valves are .030" proud or so when seated. I can't say where they sit on a new, unskimmed head as I'm not sure I've ever seen one, but all of the heads I've come across have been this way. I am in the process of trying to uncover the factory specs/dimensions on these heads so I can tell how much some of them have been skimmed, and be able to work with them a bit better.
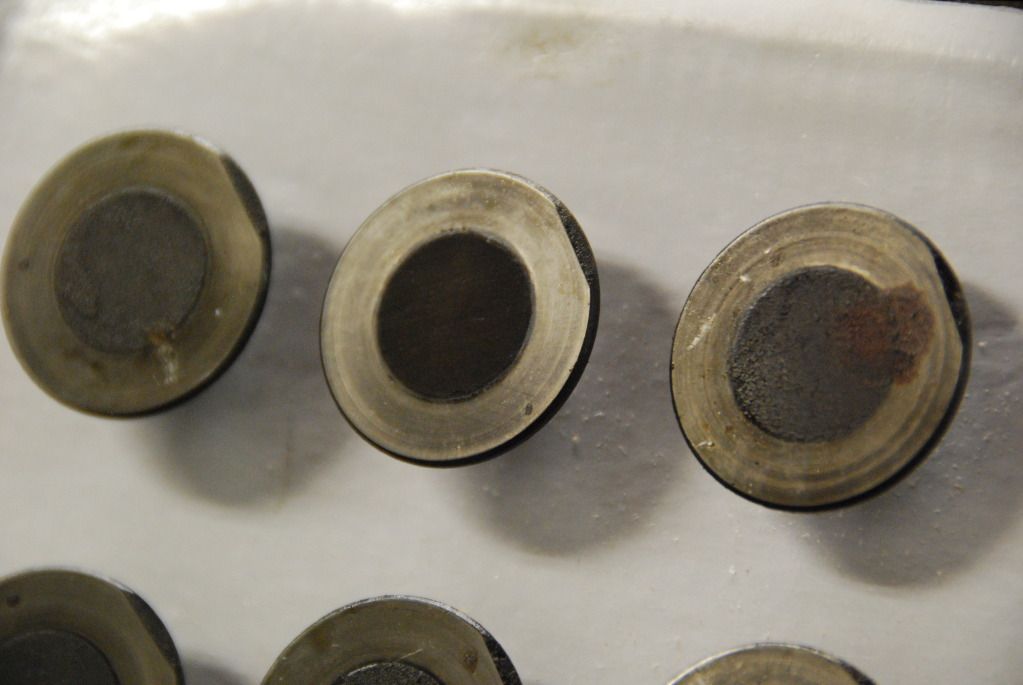
So here are the intake valves that I pulled, minus a broken one and a bent one from Cyl.1...
What kind of machine shop does crap like this? I'm pretty sure I know the repair shop that handled the repair, but they likely outsourced the head work to another shop. Unbelievable.
But, on with the task at hand. After measuring the critical dimensions on the MLS gasket, the block, and the head and also looking at what some of the other guys that have done this had done, I came to the dimensions that I wanted. I got the code set up and did a test run on an old 2X6. Everything looked good, so I figured I was ready to fling some chips.
But, of course, the head doesn't want to sit in the proper orientation and stay put by itself, so I spent a silly amount of time figuring out the setup and making a fixture. It seemed the best way was to try and rest it on the head bolt ledges, as they should be parallel to the lower deck.
So I made some little pillars to rest it on...
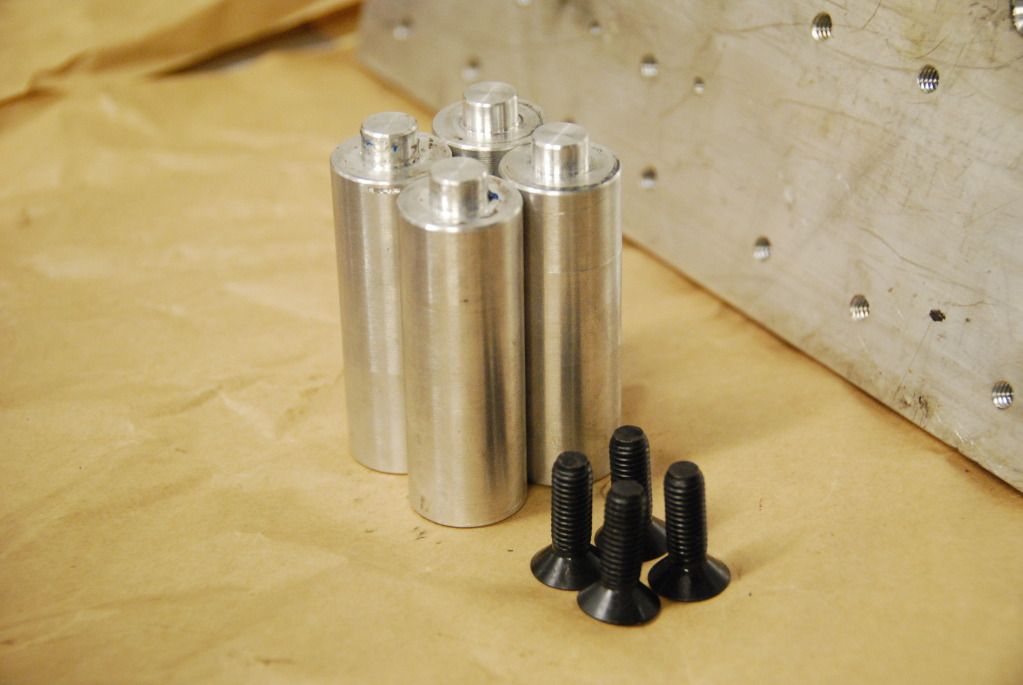
The 'nipples' are sized for a snug fit into the head bolt bores and the outer diameter was maximized to take advantage of as much seating area as possible. The can be mounted on a plate and moved around to work with the most appropriate location for the particular task at hand.
The fixture plate that I had around was pretty short, so it started with the locations shown here...
As configured, it is still a pain because I have to clamp the head down the the table, but it works for now. I'll fix it when I get around to doing it for real next time. So with the head mounted to the table, I could go to town. And I quickly remembered how much fun it is to machine sticky cast aluminum. Constant air pressure and a lubed brush kept the end mill from loading up too bad, but still was a challenge. I've found that uncoated, high speed steel tooling works best (for my mill--no flood coolant, a bit flexy) in the aluminum as it is highly polished and very smooth, unlike many of the tool coatings available.
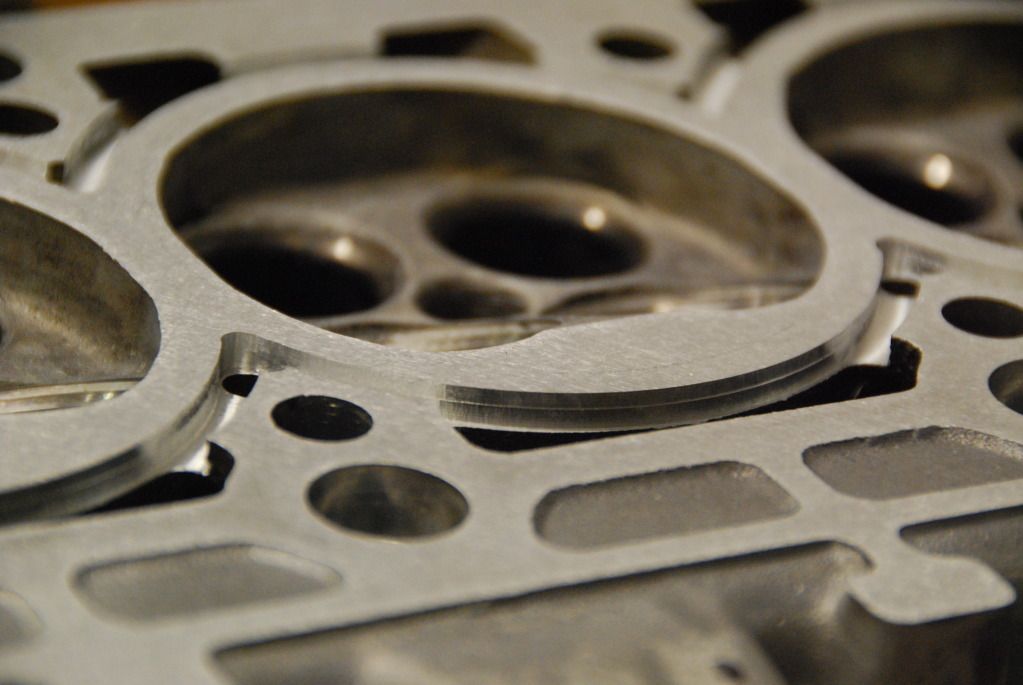
There are a few things that I will need to modify with the program, but for the most part came out as designed...
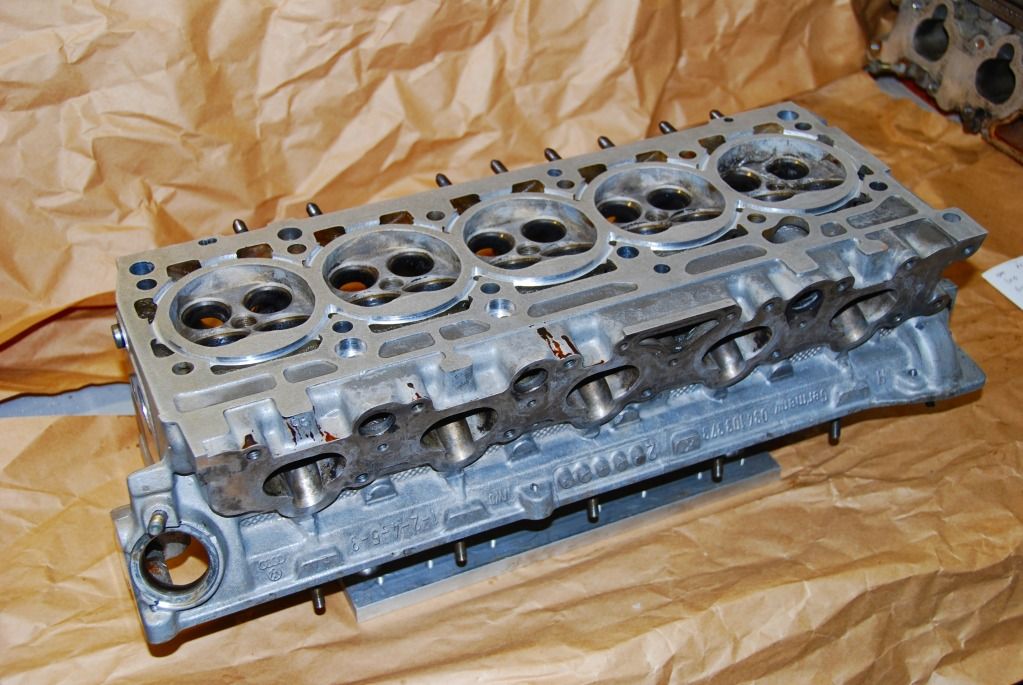
The tool loading was also causing my machine to flex a bit, as you can see with the stepover, but I don't think the coolant will mind...
Machining the block should be much better. The cast iron machines like butter, even on my little mill.
I probably won't get back to this for a few weeks, as I've now got the remaining parts to put the eS2 back together.
Re: An Alpinweiss URQ in Utah - Springing Into Action
Posted: Tue Aug 21, 2012 5:10 pm
by impretzle
Twintowers wrote:I like the deck cooling idea, but not sure there is enough material at the top of that block to do that, try a bunch of brass fittings with small tubes I think you will have better luck.. :-)
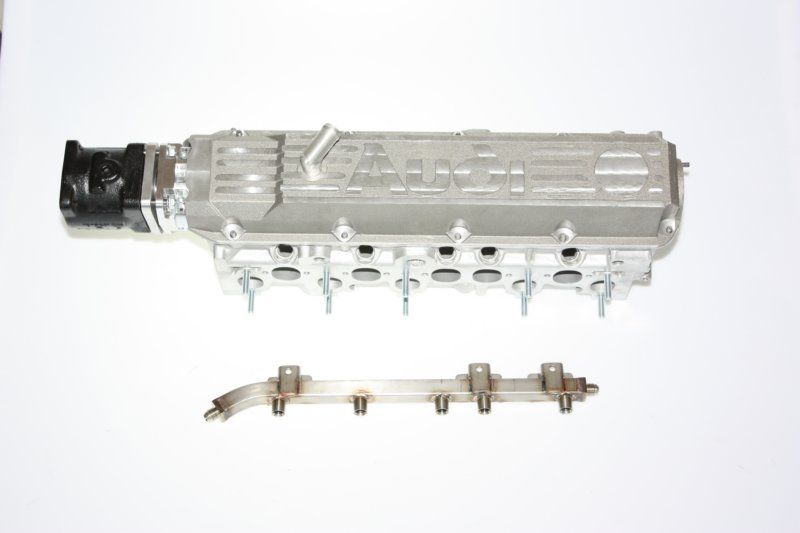
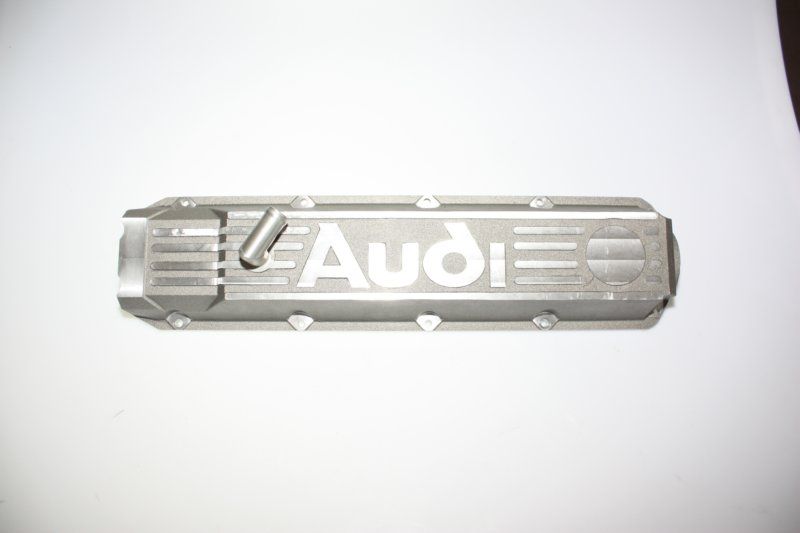
I would pay lots of money for that valve cover... any idea where I can get one??
Re: An Alpinweiss URQ in Utah - Springing Into Action
Posted: Tue Aug 21, 2012 7:05 pm
by nsimps
Is that blood or dye there in the second to last pic?
Glad to see this moving forward, looking good!
Re: An Alpinweiss URQ in Utah - Springing Into Action
Posted: Tue Aug 21, 2012 7:26 pm
by Hank
Wow Chris. Killer. I wish I would have done this to my head. I am going to build up a nasty solid lifter with cams this winter and I think I may need you to do that to a couple of my heads! how deep of passes and what is the final depth?
Looks great.
Re: An Alpinweiss URQ in Utah - Springing Into Action
Posted: Tue Aug 21, 2012 7:47 pm
by Hank
You should have your program de shroud the exhaust valves while you are in there. Open them up a little

Re: An Alpinweiss URQ in Utah - Springing Into Action
Posted: Tue Aug 21, 2012 8:59 pm
by audifreakjim
I am with Hank, just awesome.
Re: An Alpinweiss URQ in Utah - Springing Into Action
Posted: Tue Aug 21, 2012 9:24 pm
by Wheeljack
impretzle wrote:Twintowers wrote:I like the deck cooling idea, but not sure there is enough material at the top of that block to do that, try a bunch of brass fittings with small tubes I think you will have better luck.. :-)
I would pay lots of money for that valve cover... any idea where I can get one??
You will need to ask Martin who makes these, as I can't find the records, only the pictures. But these are produced in Europe, along with other very cool and expensive parts.
Re: An Alpinweiss URQ in Utah - Springing Into Action
Posted: Tue Aug 21, 2012 9:29 pm
by Wheeljack
Hank and Jim...I've been having dreams about some killer porting and work to get the efficiency up to where some serious power can be made at much lower boost levels.
Then we point cloud it, and CNC port it for replication. Sounds like a fun project.
The features above are .188" wide and .188" deep, done with two .094" passes. Since I'm not doing production, I can go 'Slow and low, that is the tempo...' I designed it for a ball or corner rounded end mill (you know, to minimize the stress concentrations), but broke my last one yesterday, so had to just use a normal end mill for the test run. I doubt it makes much of a difference at this stage.
And, no Nick, that isn't dried blood, but it sure looks like it...I'm not sure what it is...it was on the head and didn't come off with the stage 1 clean-up. I have, however, suffered many a cut through my gloves that are really putting a damper on my hand modeling career.
An Alpinweiss URQ in Utah - Springing Into Action
Posted: Wed Aug 22, 2012 5:13 am
by nsimps
Glad it wasn't blood. But yes, you need some better hand protection, something like this maybe?
