Page 9 of 45
Re: A tale of Rubí... Bottom End Assembly Commences w/PICS
Posted: Mon Jun 03, 2013 12:15 pm
by EDIGREG
The B chassis guys have been using these for a while, haven't seen them used on a C4 yet but I have a set on the bench. Lined them up with the stock mounts and they look like they'll fit nicely...might require some slight modification.
http://www.summitracing.com/parts/ens-4-1104g/overview/ (price is each)
Note that you'll want to shield the passenger side to prevent it from melting.
Re: A tale of Rubí... Bottom End Assembly Commences w/PICS
Posted: Mon Jun 03, 2013 12:53 pm
by vt10vt
Ed, you seem so skeptical of these

Considering the OEM and 034 mounts are all marketed as being universal for 5cyl apps I can't imagine they wouldn't fit. There's pics somewhere in my project thread of them mounted up, I just used a dremel to make the holes a little bit ovaled away from the center of the mounts and 5min later they fit perfect!
Re: A tale of Rubí... Bottom End Assembly Commences w/PICS
Posted: Mon Jun 03, 2013 1:27 pm
by EDIGREG
Yeah all the mounts are the same, surprisingly I had just never seen anyone use them on the C4...maybe I'll be the first

Re: A tale of Rubí... Bottom End Assembly Commences w/PICS
Posted: Mon Jun 03, 2013 2:59 pm
by themagellan
You guys are like hocus pocus with your mounts and untried products haha!
Obi won't even try my home made mounts for free! Oh well - I have some sweet hock puck mounts with Grad10 Hardware and rubber bushies to decrease vibration...
Maybe I'll have to show everyone rubber is rubber... poly is poly....
Re: A tale of Rubí... Bottom End Assembly Commences w/PICS
Posted: Mon Jun 03, 2013 3:10 pm
by EDIGREG
What do you mean by that? There are many durometers of each, not the same at all.
Re: A tale of Rubí... Bottom End Assembly Commences w/PICS
Posted: Mon Jun 03, 2013 3:12 pm
by mushasho
Never said I wouldn't... just that C4 folks haven't really dabbled with different options... Matter of fact, Lets meet today so I can take a look at these homemade contraptions of yours...

Re: A tale of Rubí... Bottom End Assembly Commences w/PICS
Posted: Mon Jun 03, 2013 5:44 pm
by urs6ville
Hank wrote:Here is a picture of scats in aftermarket pistons (JEs in this case). Aftermarkets float as well. It is the job of the thrust surface on the crank to keep the rod aligned.
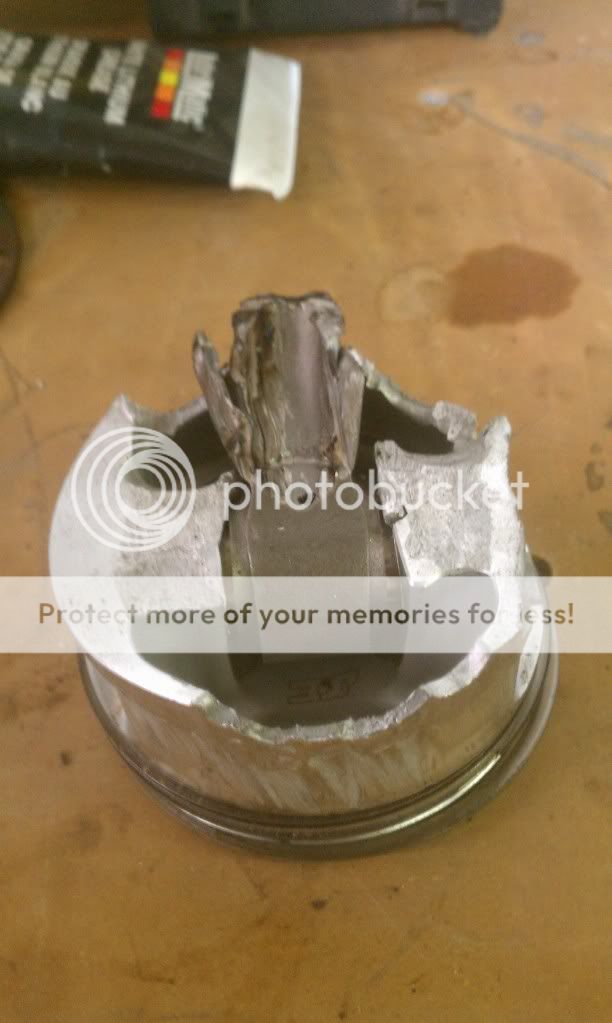
Yikes... someone not test the tolerances on the thrust bearings on the crank?
Re: A tale of Rubí... Bottom End Assembly Commences w/PICS
Posted: Mon Jun 03, 2013 7:21 pm
by Hank
Nah, I just tried to run more than the recommended 165 ft/lbs of torque at the flywheel per rod that is recommended by Scat for this particular rod.
Re: A tale of Rubí... Bottom End Assembly Commences w/PICS
Posted: Mon Jun 03, 2013 8:25 pm
by mushasho
Hank wrote:Nah, I just tried to run more than the recommended 165 ft/lbs of torque at the flywheel per rod that is recommended by Scat for this particular rod.
Those where an H profile, right? What are my I profile rods rated at?
Sent from my KFTT using Tapatalk HD
Re: A tale of Rubí... Bottom End Assembly Commences w/PICS
Posted: Fri Jun 07, 2013 11:12 am
by mushasho
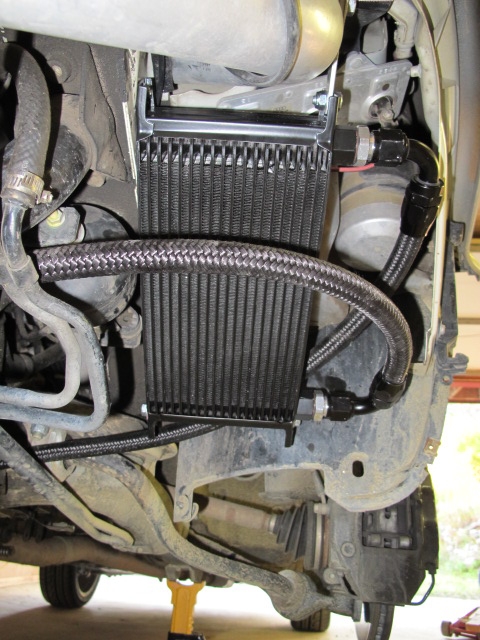
Looking to piece together a little Side Mount fluid cooling section for my car, similar to the one AutoSpeed version


Possibly with some sort of ducting to the oil side...

The Question is, do we NEED to oversize it over 3x over the stock 7row in order to keep things in check on hot days with spirited driving?
25-Row

19-Row
Re: A tale of Rubí... Bottom End Assembly Commences w/PICS
Posted: Fri Jun 07, 2013 12:04 pm
by EDIGREG
You need to consider the entire size of the core not just the height
For example a short core can have the same cooling capacity as a taller one. OE oil cooler is much thicker
WxHxD
10x10x1=100in3
10x5x2=100in3
5x5x4=100in3
I would fit as large of a core as you can for the oil cooler.
Re: A tale of Rubí... Bottom End Assembly Commences w/PICS
Posted: Fri Jun 07, 2013 2:26 pm
by Mcstiff
Splitting hairs but I'd think that more rows/in³ would be the more efficient.
Re: A tale of Rubí... Bottom End Assembly Commences w/PICS
Posted: Fri Jun 07, 2013 4:43 pm
by mushasho
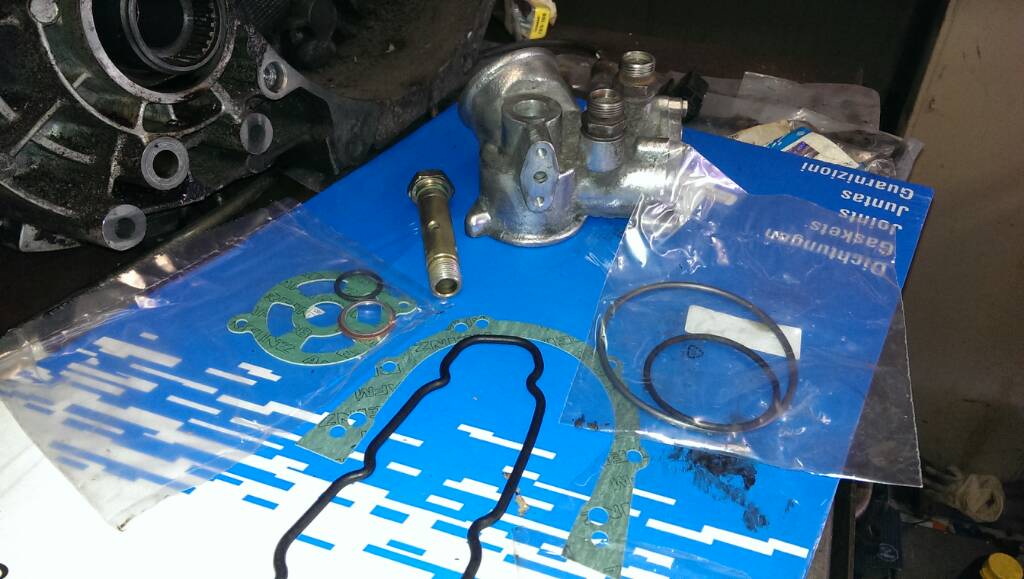
Anyone have clue what these extra gaskets go to?
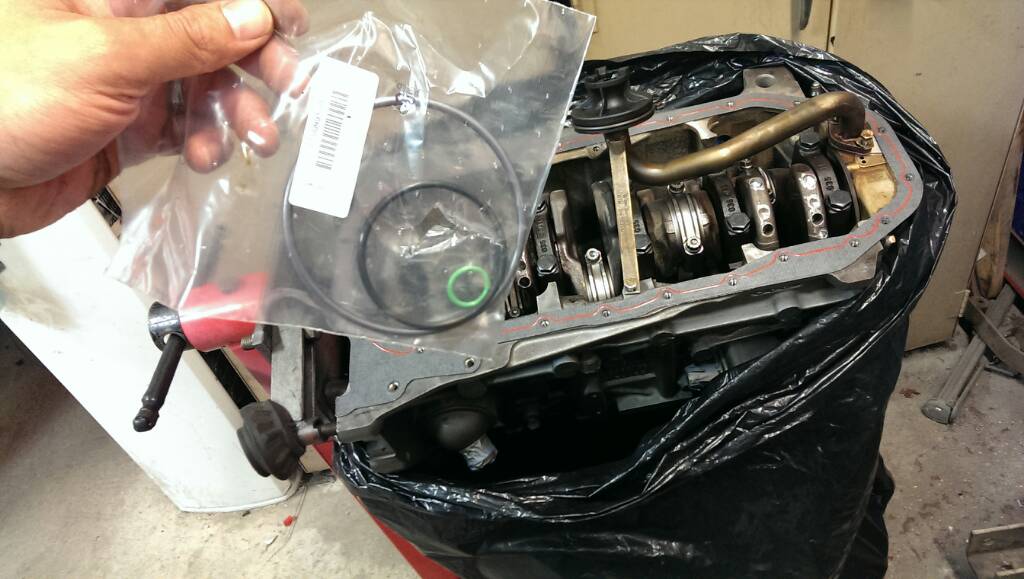
- uploadfromtaptalk1370641391843.jpg (81.42 KiB) Viewed 36322 times
Sent from my HTC One using Tapatalk 2
Re: A tale of Rubí... Bottom End Assembly Commences w/PICS
Posted: Fri Jun 07, 2013 5:14 pm
by Toph
Splitting hairs but I'd think that more rows/in³ would be the more efficient.
More surface area exposed to cooler air, also agree with the hair splitting

Medium one looks like a tstat oring...
Small one looks to be the size of the water manifold orings (three of em though...and I've only seen those in yellow, so I'm not sure)?
Large one may be for the water pump?
Re: A tale of Rubí... Bottom End Assembly Commences w/PICS
Posted: Fri Jun 07, 2013 6:15 pm
by mushasho
They were in with the oil pick up gasket and O-Ring... I'll confirm in the morning once I get back at it...
Sent from my HTC One using Tapatalk 2
Re: A tale of Rubí... Bottom End Assembly Commences w/PICS
Posted: Fri Jun 07, 2013 8:58 pm
by themagellan
Good insurance on that cooler - the extra surface area should help. Where did you purchase it from?
Re: A tale of Rubí... Bottom End Assembly Commences w/PICS
Posted: Sat Jun 08, 2013 6:14 am
by mushasho
Haven't purchased any yet, but I found a Setrab unit local to you actually (Lynn) that I'm checking out this morning....
Sent from my HTC One using Tapatalk 2
Re: A tale of Rubí... Bottom End Assembly Commences w/PICS
Posted: Sat Jun 08, 2013 9:13 am
by mushasho
Re: A tale of Rubí... Bottom End Assembly Commences w/PICS
Posted: Sat Jun 08, 2013 9:15 am
by mushasho
Re: A tale of Rubí... Bottom End Assembly Commences w/PICS
Posted: Sat Jun 08, 2013 1:33 pm
by mushasho
Confirmed that the green one is for the oil filter housing bolt... The other 2 in the above pic are indeed for t-stat housing and water pump...

- uploadfromtaptalk1370716158288.jpg (81.29 KiB) Viewed 36272 times
Still got a few more to go... I've got the green gaskets already in the right places... But the other ones are still in question... As I go along it may become clear where they go, but I don't wanna go so far to have to undo it all again for 1 overlooked seal...
- uploadfromtaptalk1370716319267.jpg (82.37 KiB) Viewed 36272 times
Sent from my HTC One using Tapatalk 2
Re: A tale of Rubí... Bottom End Assembly Commences w/PICS
Posted: Sat Jun 08, 2013 3:35 pm
by mushasho
Rear Main: ON
Oil Pump: ON
First Gasket: ON
Windage Tray: ON
Pickup Tube: ON
Second Gasket: ON
Oil Pan: ON
Oil Filter Housing: ON


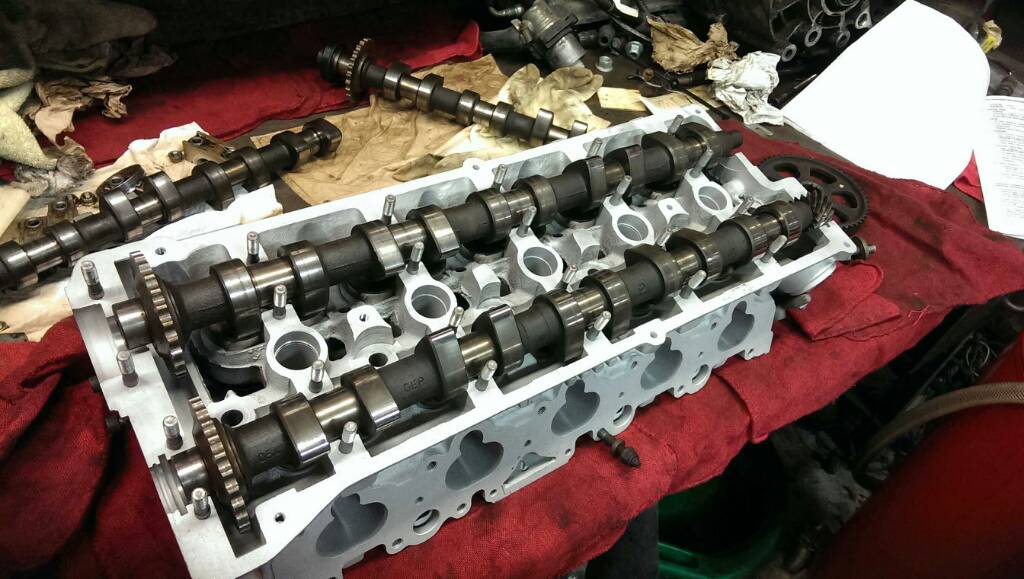
Re: A tale of Rubí... Bottom End Assembly Commences w/PICS
Posted: Mon Jun 10, 2013 12:49 pm
by mushasho
How about AAN exhaust cam on the intake side paired with 7a exhaust side?
- uploadfromtaptalk1370886518936.jpg (97.38 KiB) Viewed 36269 times
Sent from my HTC One using Tapatalk 2
Re: A tale of Rubí... Bottom End Assembly Commences w/PICS
Posted: Mon Jun 10, 2013 12:53 pm
by EDIGREG
That will work just fine, but the most gains are with both 7A intake/exhaust
Re: A tale of Rubí... Bottom End Assembly Commences w/PICS
Posted: Mon Jun 10, 2013 1:11 pm
by Hank
Use 7a exhaust on both
Some machining/degreeing required.
Hank
Re: A tale of Rubí... Bottom End Assembly Commences w/PICS
Posted: Mon Jun 10, 2013 1:50 pm
by mushasho
7a & 7a it is... Assembling now..
how many open links should there be an on chain now?
Sent from my HTC One using Tapatalk 2