Page 9 of 23
Re: Pat's 1983 URQ Alpine white #603 , 20V in progress
Posted: Fri Mar 17, 2017 6:45 am
by Mentosman42
I went a little unconventional with the powersteering pump, if you are not reinstalling A/C you can mount it off of the bosses for the compressor. I used a piece of angle iron and made a little bracket that bolts up to the 2 lower bosses. I was questioning whether it was ok to mount the tensioner to the front of the oil pan(7a with the threaded boss in the front) but I have been running it for ~10,000 miles and I dont see any cracking or indications of a problem, thing is fairly beefy and once you have the pump locked down it shouldnt see much load.
Unfortunately I only have a grainy picture but its better than nothing haha.
Re: Pat's 1983 URQ Alpine white #603 , 20V in progress
Posted: Fri Jun 02, 2017 9:51 am
by Afterthought
Re: Pat's 1983 URQ Alpine white #603 , 20V in progress
Posted: Fri Jun 02, 2017 6:11 pm
by PRY4SNO
Regarding the wastegate bellows, I would absolutely include one. They're used to prevent cracking due to thermal expansion. Doesn't necessarily need to be the OE piece, but some kind of flex hose would be beneficial.
As for the fab on the wastegate into downpipe, the best way is to mark the ordinates and basically cut a saddle into the small pipe, then scribe it onto the downpipe and cut out the opening before welding. The book we used in school is "Ordinates for 1000 Pipe Intersections," which is very cheap... roughly $10.
I dug around quickly, and this guy does a good job explaining the process (even though it was for culvert).
http://www.instructables.com/id/How-to- ... addle-Cut/
Also, here's a decent pocket reference kind of .pdf that digs into marking ordinates and other common topics.
https://pipefitter.com/PipefitterSqManual.pdf
Re: Pat's 1983 URQ Alpine white #603 , 20V in progress
Posted: Fri Jun 02, 2017 7:33 pm
by Afterthought
PRY4SNO wrote:Regarding the wastegate bellows, I would absolutely include one. They're used to prevent cracking due to thermal expansion. Doesn't necessarily need to be the OE piece, but some kind of flex hose would be beneficial.
As for the fab on the wastegate into downpipe, the best way is to mark the ordinates and basically cut a saddle into the small pipe, then scribe it onto the downpipe and cut out the opening before welding. The book we used in school is "Ordinates for 1000 Pipe Intersections," which is very cheap... roughly $10.
I dug around quickly, and this guy does a good job explaining the process (even though it was for culvert).
http://www.instructables.com/id/How-to- ... addle-Cut/
Also, here's a decent pocket reference kind of .pdf that digs into marking ordinates and other common topics.
https://pipefitter.com/PipefitterSqManual.pdf
I ordered it man... it was $6 ha. I will look into that link - I've been using the trial and error method which is a little wasteful but I'm trying scraps first .
Sent from my iPhone using Tapatalk
Re: Pat's 1983 URQ Alpine white #603 , 20V in progress
Posted: Sat Jun 03, 2017 11:30 am
by PRY4SNO
Cool! Ordinates seem a little intimidating until you do it a couple times. You're just taking measurements from a square baseline (marked out using a wrap-a-round or tape) and marking with a punch. Once you get to the centre, they go back to the start in reverse order. Just make sure you bevel the edges (37.5 degrees is standard) of the pipes to ensure penetration.
Re: Pat's 1983 URQ Alpine white #603 , 20V in progress
Posted: Sat Jun 03, 2017 11:45 am
by Afterthought
PRY4SNO wrote:Cool! Ordinates seem a little intimidating until you do it a couple times. You're just taking measurements from a square baseline (marked out using a wrap-a-round or tape) and marking with a punch. Once you get to the centre, they go back to the start in reverse order. Just make sure you bevel the edges (37.5 degrees is standard) of the pipes to ensure penetration.
Yeah I am pretty bad about just hauling off and doing it without researching. Also I need to invest in some tools that will allow me to do this fit up type stuff easier. I just got a belt sander finally , ha.
I spend a lot of time when I get bored looking at all the welds at work and admiring the pipe fitters work. We have a lot of cool metals around there Hastelloy C276, duplex stainless and all that which doesn't get painted after welding .
Heres another thing I'm gonna make an attempt at but I have only had two tries so far at using a brake. I want to make some rockers, I can see that this looks like a pretty difficult bend on the lower one because its not just an angle its a curve.

Re: Pat's 1983 URQ Alpine white #603 , 20V in progress
Posted: Sat Jun 03, 2017 11:58 am
by PRY4SNO
Haven't worked with Hastelloy yet, but the welders say it's a real bitch to get the puddle to move... very difficult technique for most. Duplex stainless is for sulphur resistance, and is soft as hell when you touch it with a grinder. Which, by the way, is the tool of choice for fit ups. I've had some welders complain about using flapper discs (sandpaper) because they do two things: 1) round the beveled edges, and 2) impart silicates into the metal. Granted, that's coming from French TIG welders, so you know they're going to be picky as hell haha. That said, it's tough to go wrong with a zip disc, cone stone and 1/4" disc for a 5" grinder and a carbide burr for a pencil grinder to cover most bases with piping fabrication.
Pat's 1983 URQ Alpine white #603 , 20V in progress
Posted: Mon Jun 05, 2017 7:44 pm
by Afterthought
Couple small pieces of the puzzle .
1.5" bellows

Fuel rail. But need to get fittings for in and out to adapt to 6AN . I don't recall on these what the Inlet size is ... anyone know?
Also the threads on one end appear to knocked down - is this an issue or would the piece threading in form the aluminum a little ? I'm worried if alum-alum it would Gall. Any thoughts?


Some cool DeCals

TiAL wastegate


Re: Pat's 1983 URQ Alpine white #603 , 20V in progress
Posted: Tue Jun 06, 2017 10:00 pm
by PRY4SNO
Alu-alu should gall too badly unless it gets cross threaded. I'd be more worried if you used dissimilar metals. One of the engineer types can probably refute or verify. Build is looking good!
Re: Pat's 1983 URQ Alpine white #603 , 20V in progress
Posted: Thu Jun 08, 2017 10:49 pm
by Afterthought
PRY4SNO wrote:Alu-alu should gall too badly unless it gets cross threaded. I'd be more worried if you used dissimilar metals. One of the engineer types can probably refute or verify. Build is looking good!
On the fuel rail, I think it is supposed to be tapped for AN 8 do I just need to figure the thread size on that and chase it maybe ? Definitely not something I want a loose connection on.
Sent from my iPhone using Tapatalk
Re: Pat's 1983 URQ Alpine white #603 , 20V in progress
Posted: Thu Jun 08, 2017 10:50 pm
by Afterthought
Got a couple more things .

Setrab oil cooler ... $45! And already has the proper AN fittings for my use

Decided to get some wheels mounted up so I can refinish the avant-gardes I'm embarrassed for anyone to see the red wheels on the car


HF abrasive blaster with the conversion kit for Soda

Started marking and trimming the DP


Sent from my iPhone using Tapatalk
Sent from my iPhone using Tapatalk
Re: Pat's 1983 URQ Alpine white #603 , 20V in progress
Posted: Thu Jun 08, 2017 11:45 pm
by audifreakjim
Looking good!
Re: Pat's 1983 URQ Alpine white #603 , 20V in progress
Posted: Fri Jun 09, 2017 5:56 pm
by PRY4SNO
Afterthought wrote:PRY4SNO wrote:Alu-alu should gall too badly unless it gets cross threaded. I'd be more worried if you used dissimilar metals. One of the engineer types can probably refute or verify. Build is looking good!
On the fuel rail, I think it is supposed to be tapped for AN 8 do I just need to figure the thread size on that and chase it maybe ? Definitely not something I want a loose connection on.
Sent from my iPhone using Tapatalk
Sorry, I meant to say aluminum to aluminum shouldn't gall unless cross threaded. But yeah I'd chase the threads and maybe put on a few wraps of Teflon tape and give it a try. You could always pressure test with fuel to try it before you run it in the car.
Re: Pat's 1983 URQ Alpine white #603 , 20V in progress
Posted: Fri Jun 09, 2017 6:12 pm
by Afterthought
Getting a little closer on the exhaust the welds are not great but it will hold together


Time to get the bottom portion of the downpipe figured out , I want it tucked up tight . Seems to always scrape there
Sent from my iPhone using Tapatalk
Re: Pat's 1983 URQ Alpine white #603 , 20V in progress
Posted: Fri Jun 09, 2017 10:30 pm
by Afterthought
Re: Pat's 1983 URQ Alpine white #603 , 20V in progress
Posted: Sat Jun 10, 2017 6:39 am
by chaloux
Nice! Exhaust looks done to me!

What are those intercoolers? You really can't go wrong with treadstone...
Re: Pat's 1983 URQ Alpine white #603 , 20V in progress
Posted: Sat Jun 10, 2017 7:09 am
by DE80q
I don't know what the little one is, but I you can read JDMsport on the right side of the large one. That's the same intercooler a friend of mine was running on his 1.8t B4, and to be honest, it's not very good. It did the job, but should have done it much better.
Re: Pat's 1983 URQ Alpine white #603 , 20V in progress
Posted: Sat Jun 10, 2017 10:39 pm
by Afterthought
Exhaust is almost finished . Just a small piece in the middle where it connects to the rear section.
At this point I only have one muffler in the system. It's going to be tough fitting another one in- may just run with one .


Thinking of moving the V-band into this section here , so the center section will be removable and the exhaust will be 3 pieces . I think after looking at it this location is least likely to rub.

Avantgardes off and ready to be refinished . Will try and clean them up tomorrow with the soda blaster maybe .

This is a good look for the car

Sent from my iPhone using Tapatalk
Pat's 1983 URQ Alpine white #603 , 20V in progress
Posted: Sat Jun 10, 2017 10:40 pm
by Afterthought
DE80q wrote:I don't know what the little one is, but I you can read JDMsport on the right side of the large one. That's the same intercooler a friend of mine was running on his 1.8t B4, and to be honest, it's not very good. It did the job, but should have done it much better.
I got that one for very cheap and wanted to use it for fit up. I'm quite embarrassed that it says JDM in it
The larger depth core is the one that came in my 01E 4000. I was thinking of using that in this car.
Sent from my iPhone using Tapatalk
Re: Pat's 1983 URQ Alpine white #603 , 20V in progress
Posted: Sun Jun 11, 2017 1:08 am
by audifreakjim
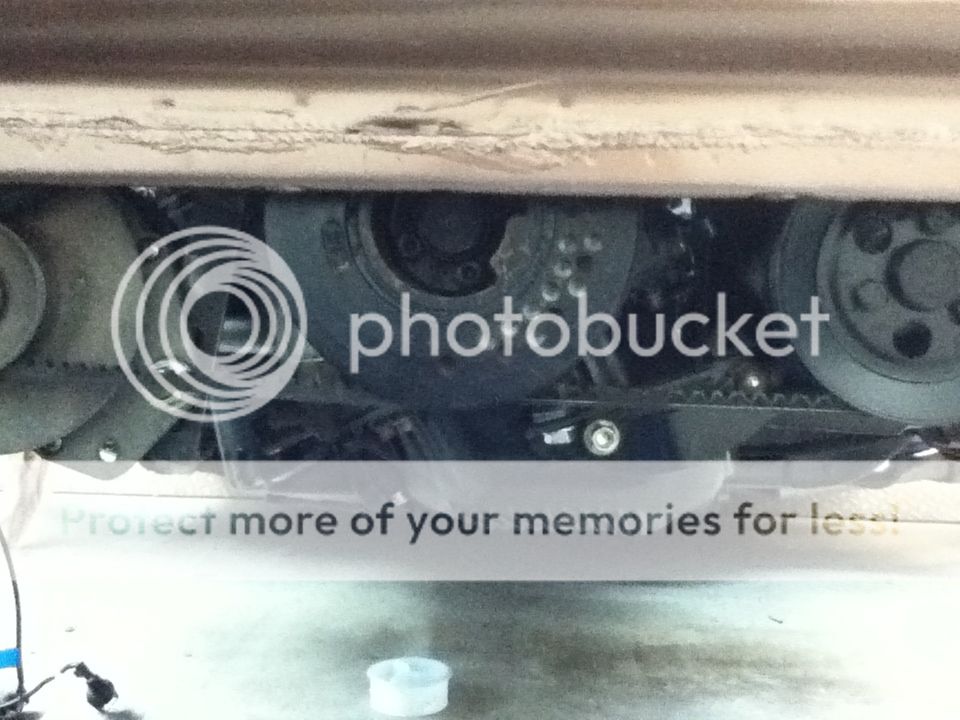
That shinny area between the axle and the diff mount is where i have mine, and where 034 put theirs. It works well for a three piece.
Re: Pat's 1983 URQ Alpine white #603 , 20V in progress
Posted: Sun Jun 11, 2017 9:32 pm
by Afterthought
Started out this morning and tried out the soda blaster. Been wanting to try one for two reasons, one to clean up a large area (Car body, bottom of a car ) , and also Ive been looking for an alternative to the sandblaster to clean up engine parts without the risk of getting contaminants in the engine.
Grabbed my 7A oil pan I had slated for this car.
 Untitled
 by
patrick C, on Flickr
Cleaned up decent.
 Untitled
 by
patrick C, on Flickr
Unfortunately found an issue while preparing to clean it, it looks like it has been bottomed out and has an actual hole in the oil pan extension.
 Untitled
 by
patrick C, on Flickr
 Untitled
 by
patrick C, on Flickr
Had to extract all the bolts very carefully
 Untitled
 by
patrick C, on Flickr
 Untitled
 by
patrick C, on Flickr
Im hoping I can fix this but the issue with welding it is that I am missing a piece of the "valley " that holds the gasket
 Untitled
 by
patrick C, on Flickr
Re: Pat's 1983 URQ Alpine white #603 , 20V in progress
Posted: Sun Jun 11, 2017 10:01 pm
by Afterthought
Jim I put the Vband exactly in the spot you mentioned. It seemed like the best location space-wise and still allows me to get the exhaust in and out without dropping the subframe down.
 Untitled
 by
patrick C, on Flickr
Still thinking I might try and fit something here. Might not be able to fit a muffler but maybe a small sleek resonator or something. Vibrant maybe?
Just want to keep the drone down.
 Untitled
 by
patrick C, on Flickr
 Untitled
 by
patrick C, on Flickr
Re: Pat's 1983 URQ Alpine white #603 , 20V in progress
Posted: Sun Jun 11, 2017 11:47 pm
by the german
looking good! you could probably fit a small coast muffler in there.
Re: Pat's 1983 URQ Alpine white #603 , 20V in progress
Posted: Fri Jun 16, 2017 2:37 pm
by Afterthought
the german wrote:looking good! you could probably fit a small coast muffler in there.
So I googled the coast muffler . It's over $400 just for a scratch/dent sale ???
So for now , one muffler only . Well see
How I like it , easy to fix.
Continued the exhaust today.

Quite a few little odd cuts that were really a pain. Wondering if I shouldn't have started with a better way to cut stainless (using a chop saw) or do people just buy pre cut angles like 15, 30?


Re: Pat's 1983 URQ Alpine white #603 , 20V in progress
Posted: Fri Jun 16, 2017 2:40 pm
by the german
Looking good!
Yeah... Coast is reallly proud of their mufflers. I've only used them on other people's cars where I wasn't paying for them LOL


