Page 2 of 4
Re: 88' 90Q 1.8T Swap, MS3 and a lot of wire wheeling.
Posted: Wed Apr 09, 2014 1:39 pm
by lorge1989
Second one down on this page:
http://www.wilwood.com/Pedals/PedalList.aspxI got this kit,
http://www.fabquest.com/wilwood/wilwood ... -arms.htmlComes with the forged pedal assembly, 3 masters and a remote reservoir mounting kit (since I will still be running a dash).
I've done a bit of digging. I want to raise up the brake and clutch further from the floor so they are even or a bit above the gas. As for distance from the driver my main design constraint will be that under hard braking, the brake and gas pedal will be even. If anything I will mount the new pedals too far away from the driver and can always make some spacers to go between the arms and the pad for fine adjustment.
Re: 88' 90Q 1.8T Swap, MS3 and a lot of wire wheeling.
Posted: Thu Apr 10, 2014 1:41 pm
by my2000apb
build yourself a small "box frame" for the pedals to sit on, then add a series of rivnuts and the box can be adjustable fore and aft
check out my VRTCQ thread, theres one under my pedal box
Re: 88' 90Q 1.8T Swap, MS3 and a lot of wire wheeling.
Posted: Fri Apr 11, 2014 6:27 am
by lorge1989
That a good idea thank. Seems like I completely overlooked the fact that my car has a steering wheel....
The linkage will go right through where this needs to mount. I think I'm going to try to pick up one of the floor mounted pedal sets like you have my2000apb. Man this is frustrating.
Anyone want to pick up these pedals? It will cost me 20% as a restocking fee if I'm able to return them anyway.
Re: 88' 90Q 1.8T Swap, MS3 and a lot of wire wheeling.
Posted: Mon Apr 14, 2014 9:37 am
by lorge1989
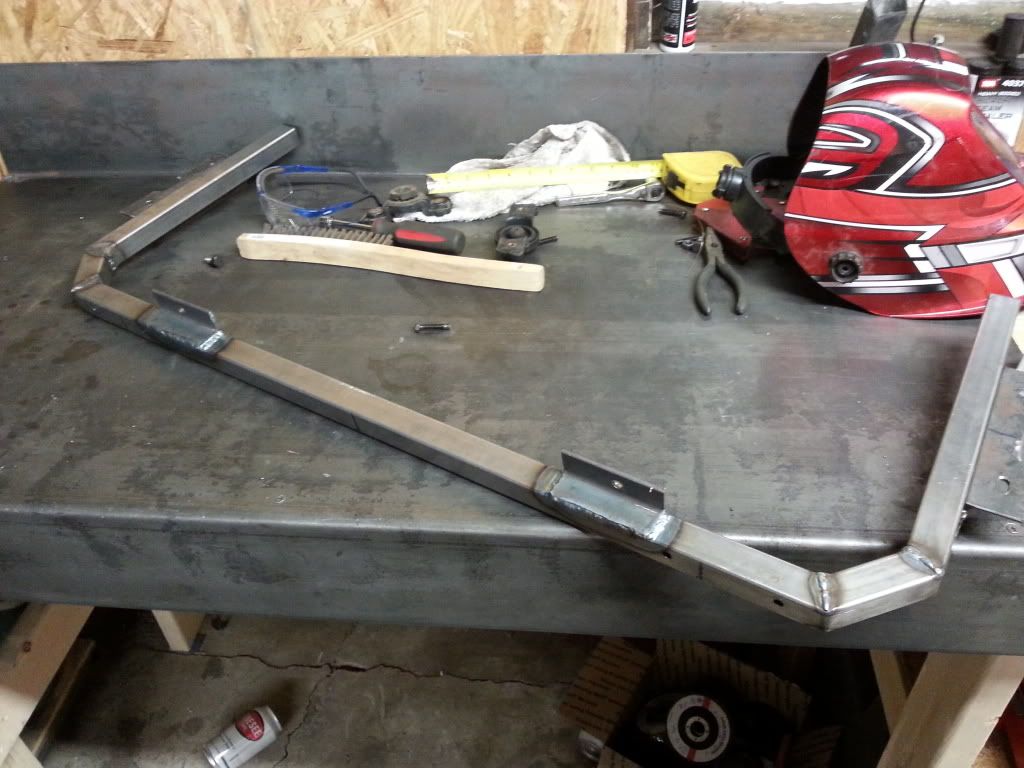
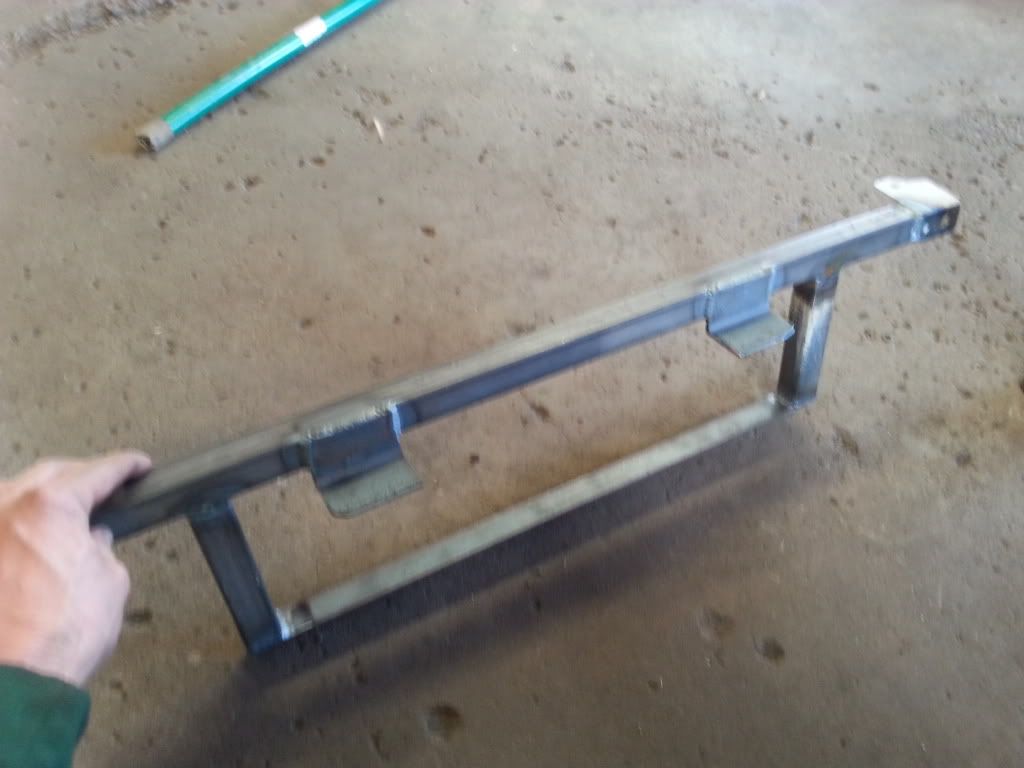
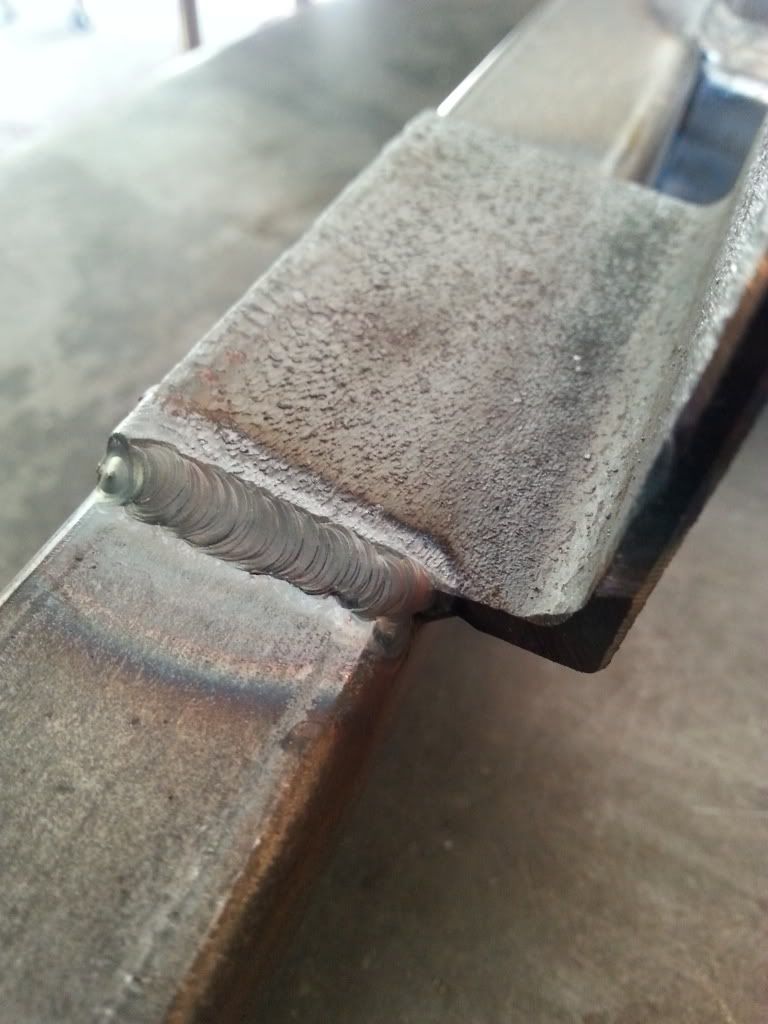
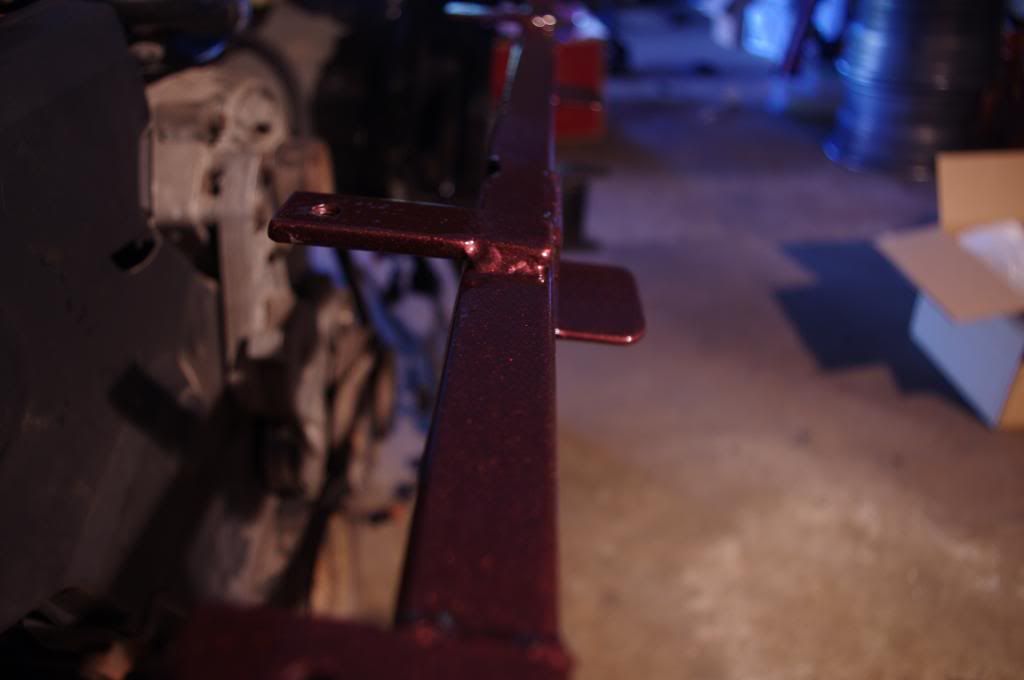
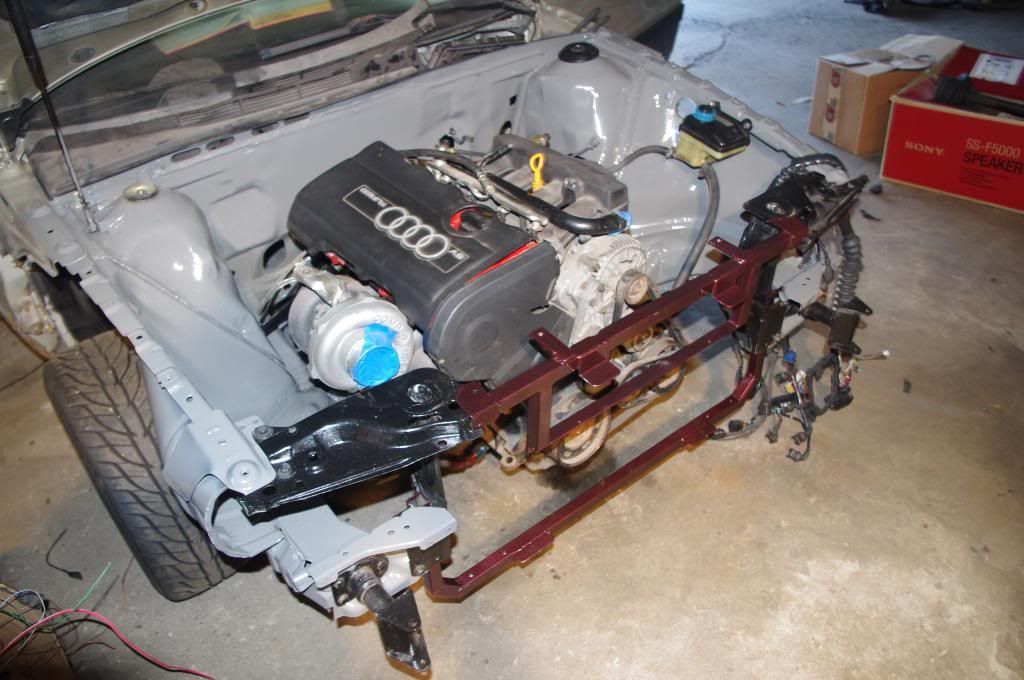
With some help, was able to make some progress on Saturday, mainly on the front end. This will hold the intercooler, oil cooler and rad. Its not completely done yet. I'm getting better with my tig.
Re: 88' 90Q 1.8T Swap, MS3 and a lot of wire wheeling.
Posted: Wed Apr 16, 2014 12:12 pm
by lorge1989
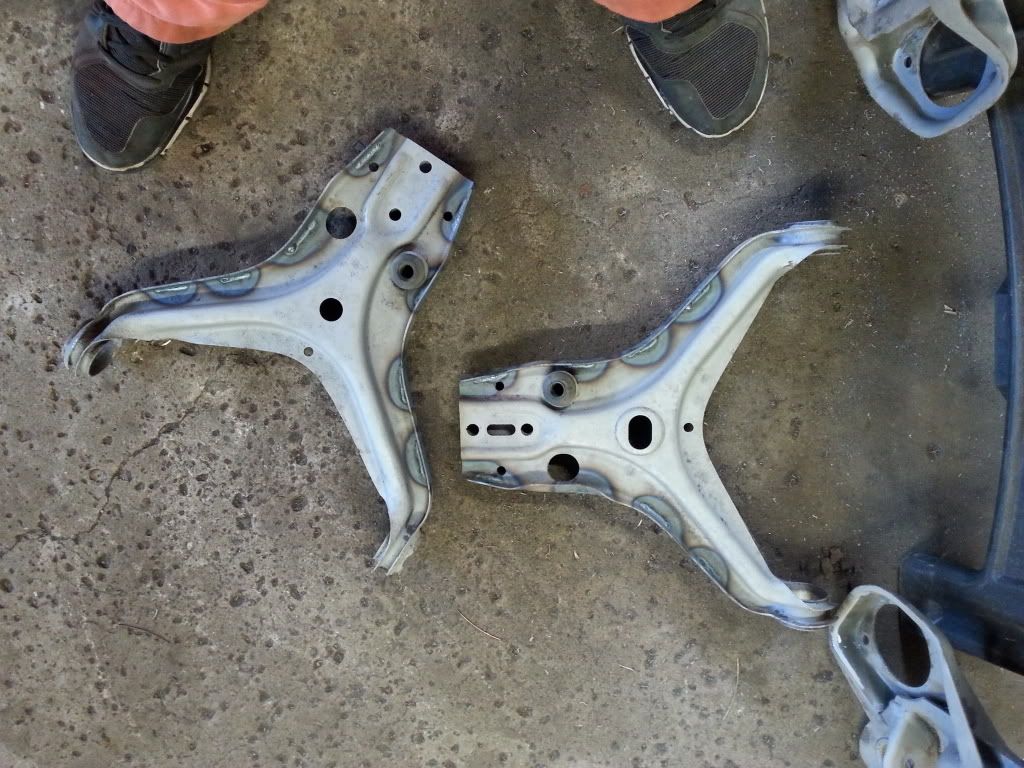
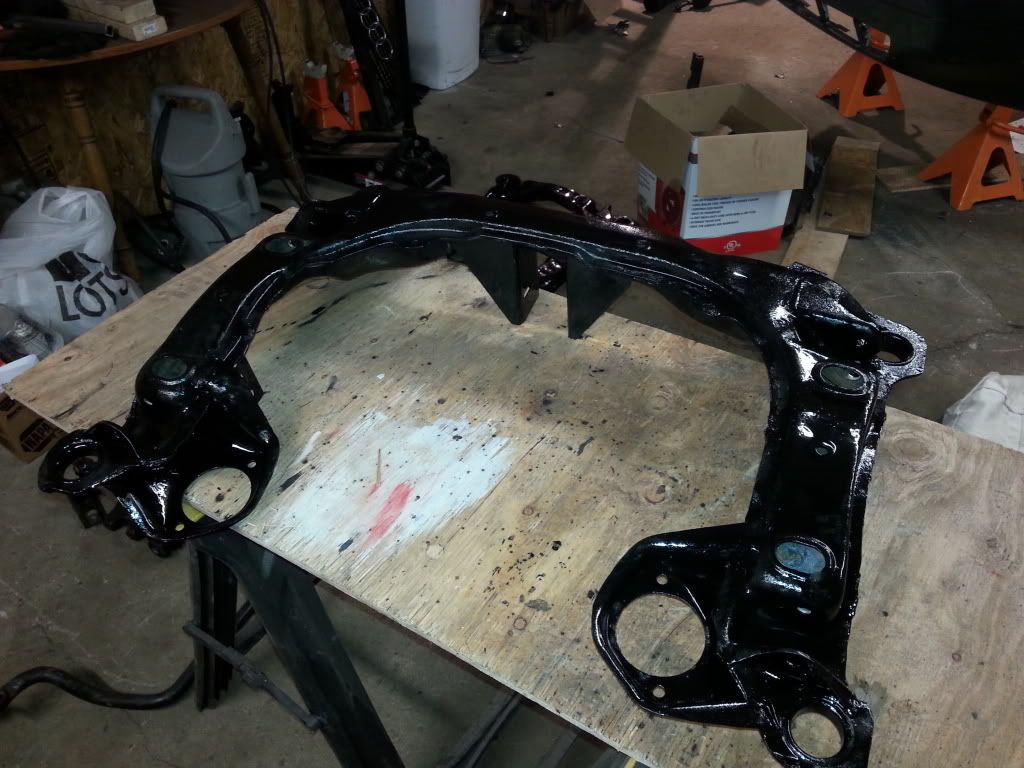
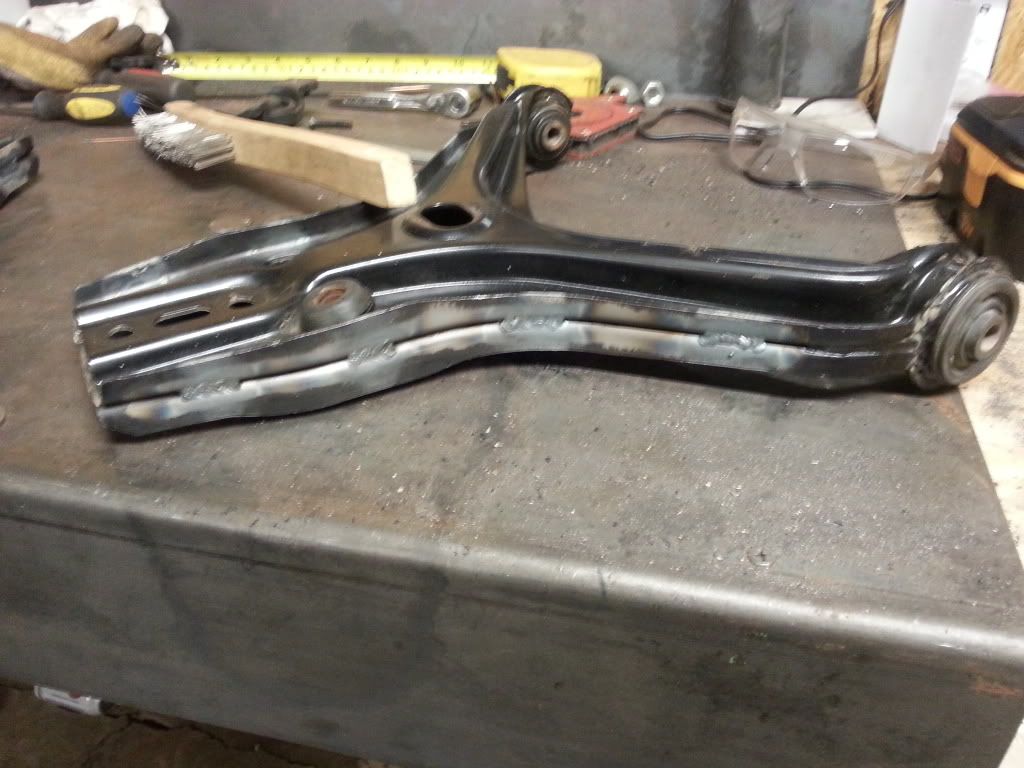
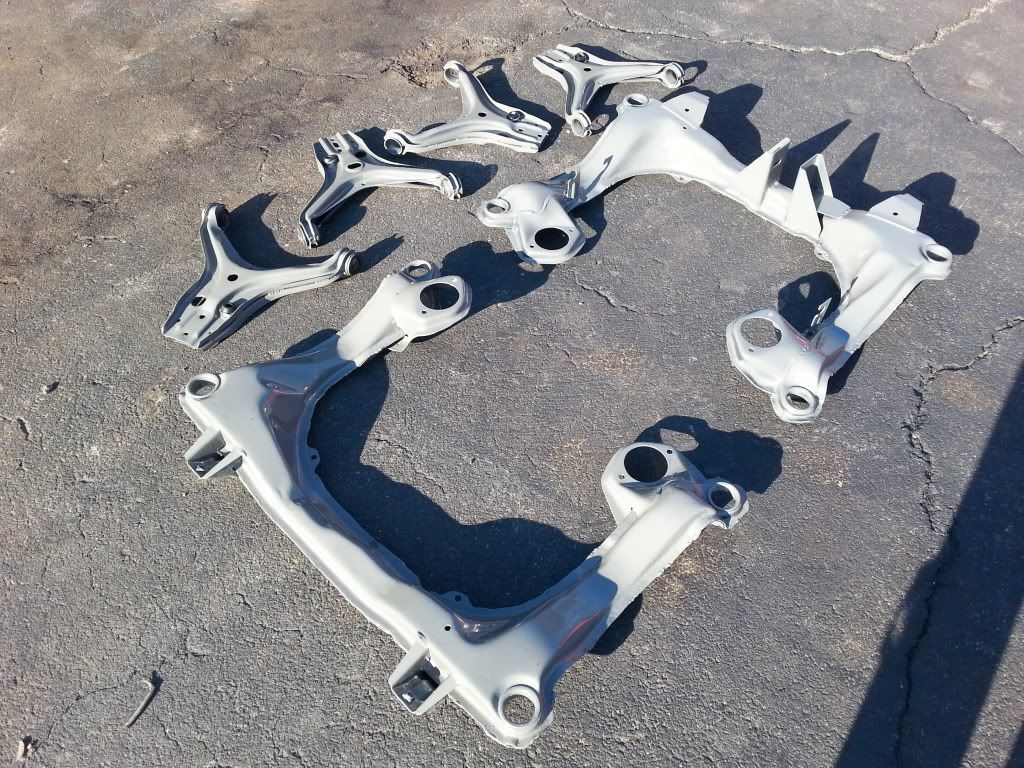
Have been cleaning up the subframes and rear control arms in preparation for new bushings. The front control arms are new so all I will do to those is seam weld em and re paint.
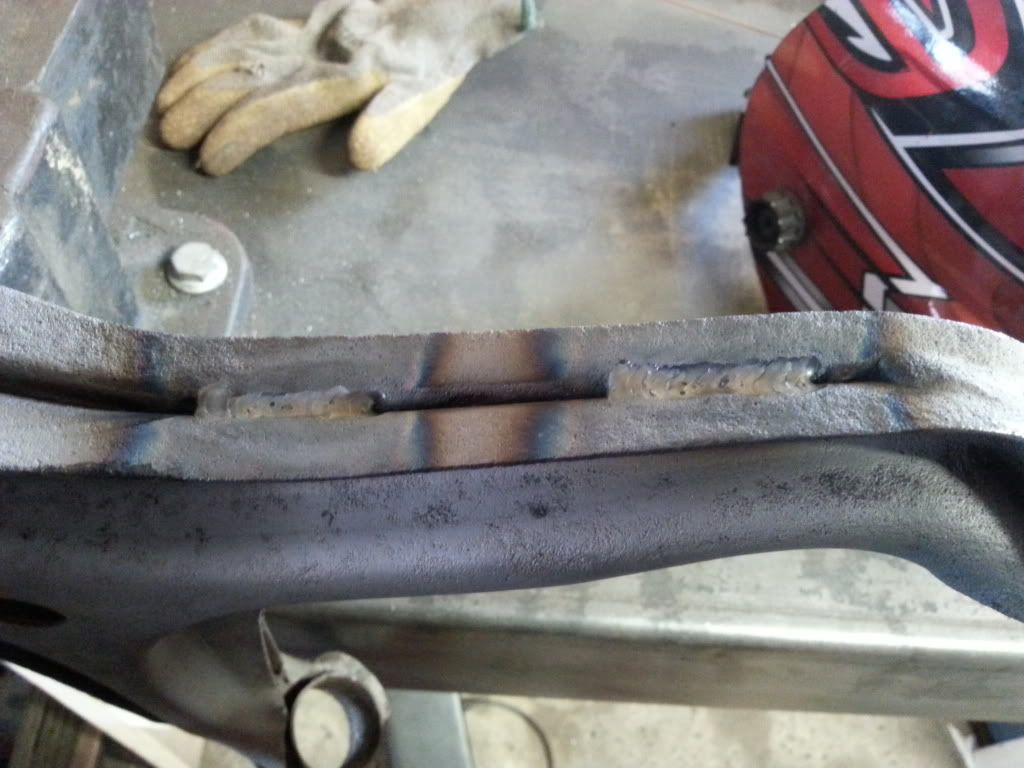
After a quick wire wheel and some welding, by Phat Bunny.

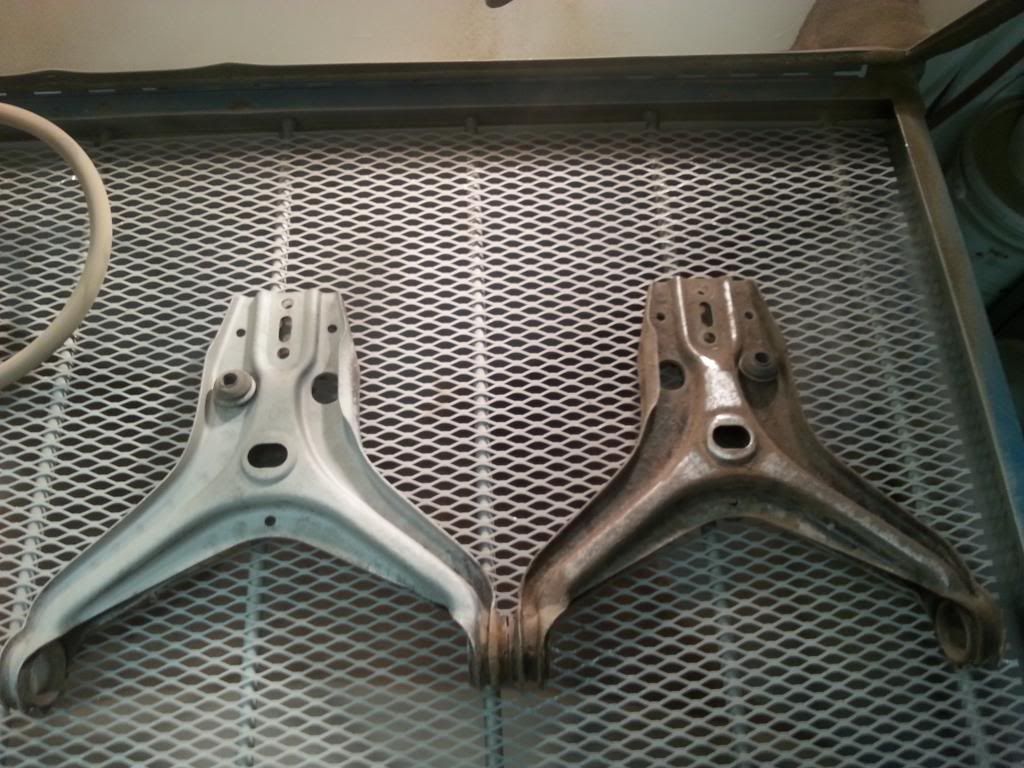
Blasted
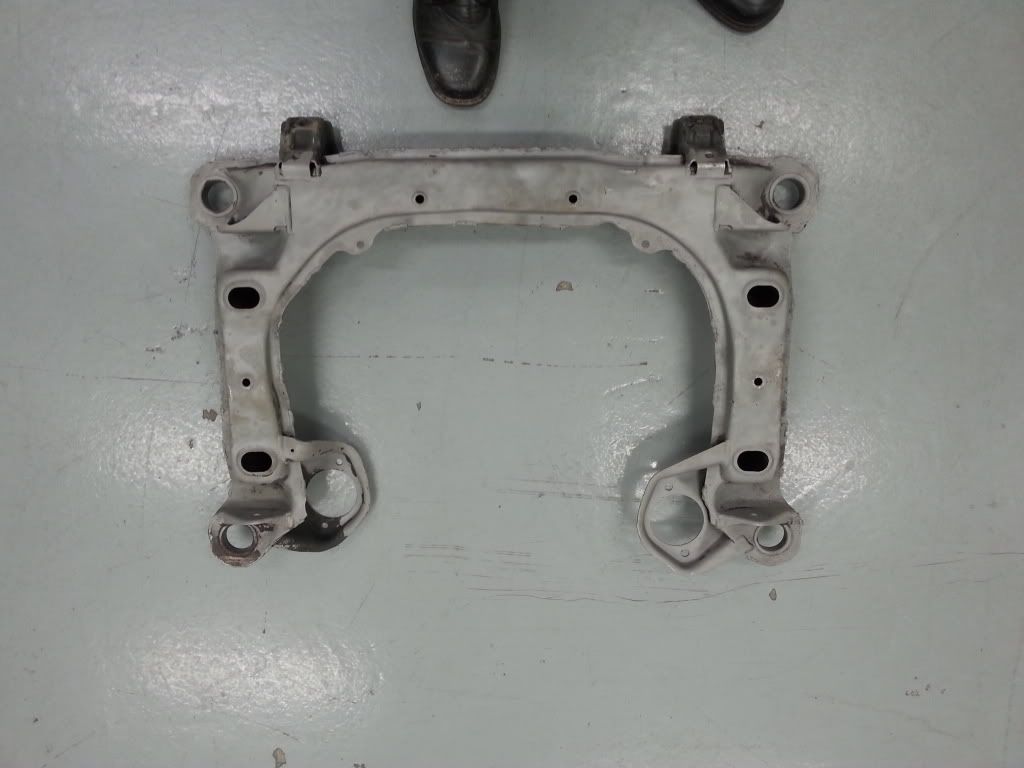
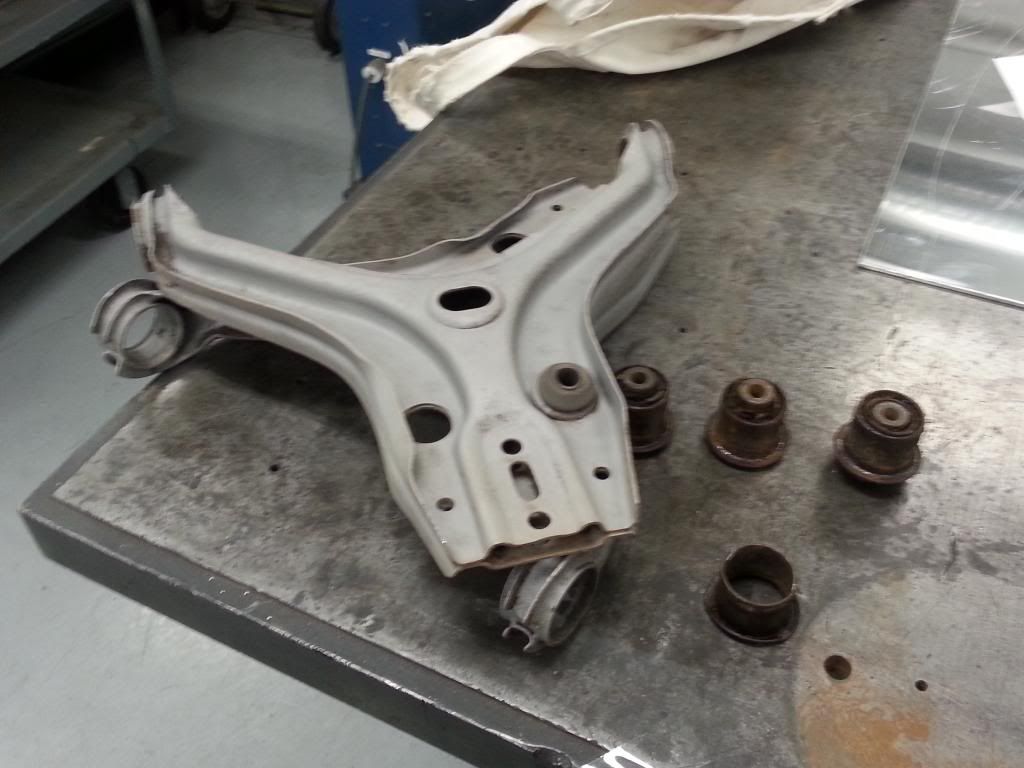
The bushings were surprisingly terrible to remove even though they are mostly rubber.
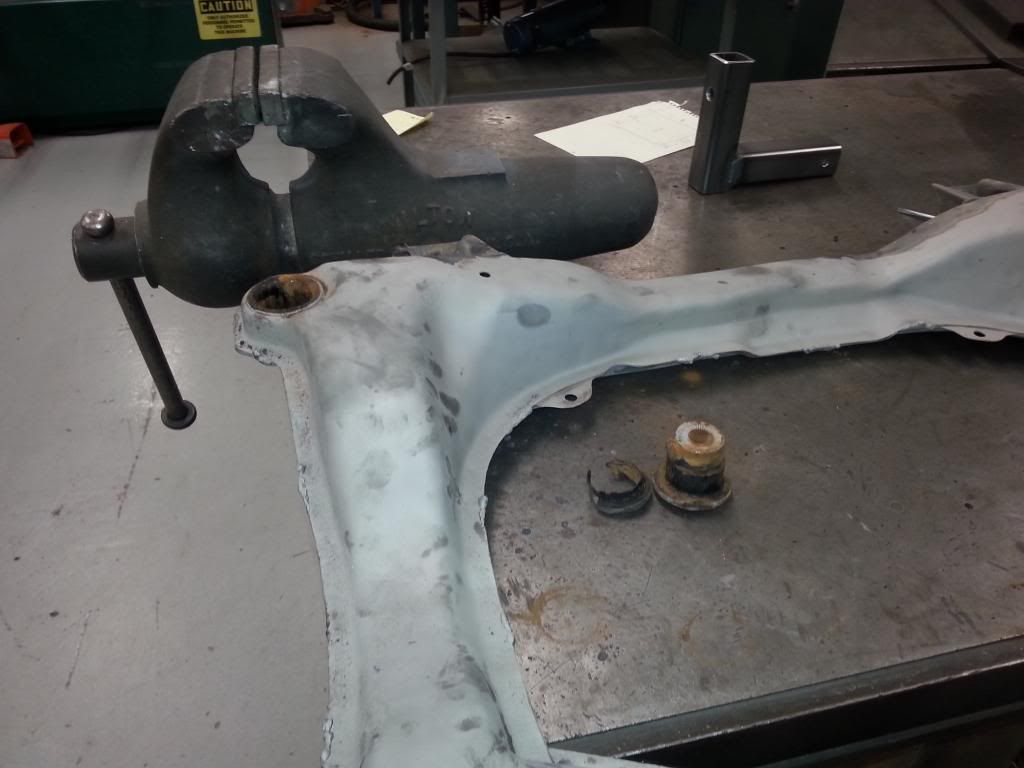
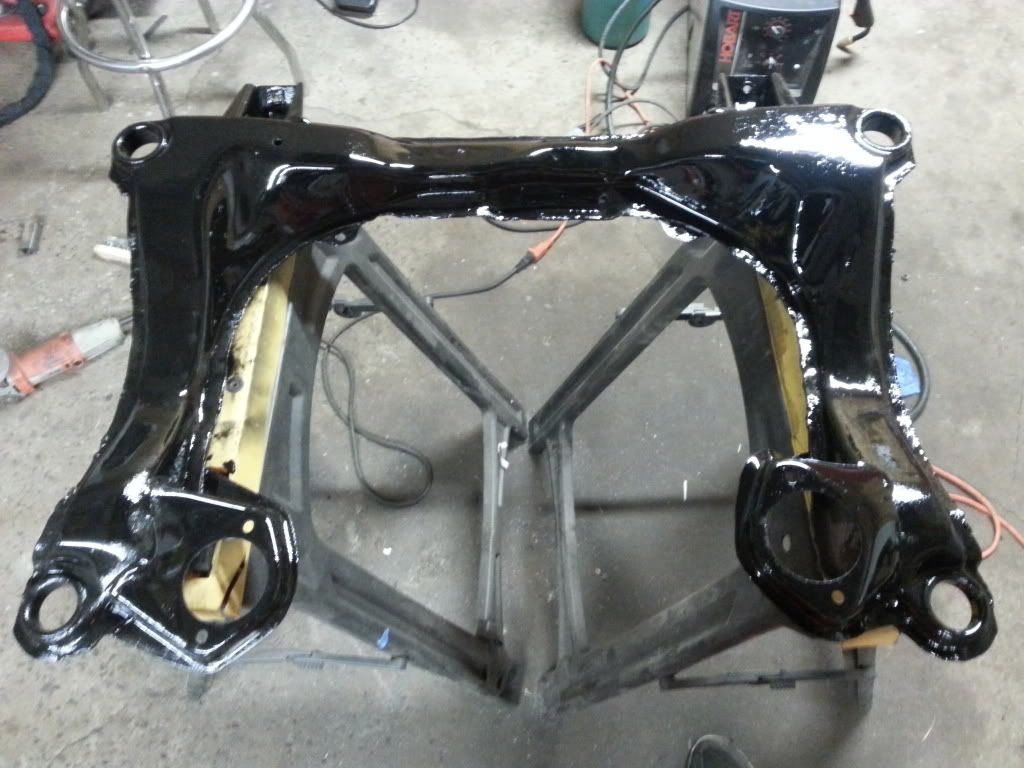
After some more welding and some paint.
And the control arms. Spent a few hours getting the bushings out of these. Rust welded in mod.
Shitty pic of the rear subframe.
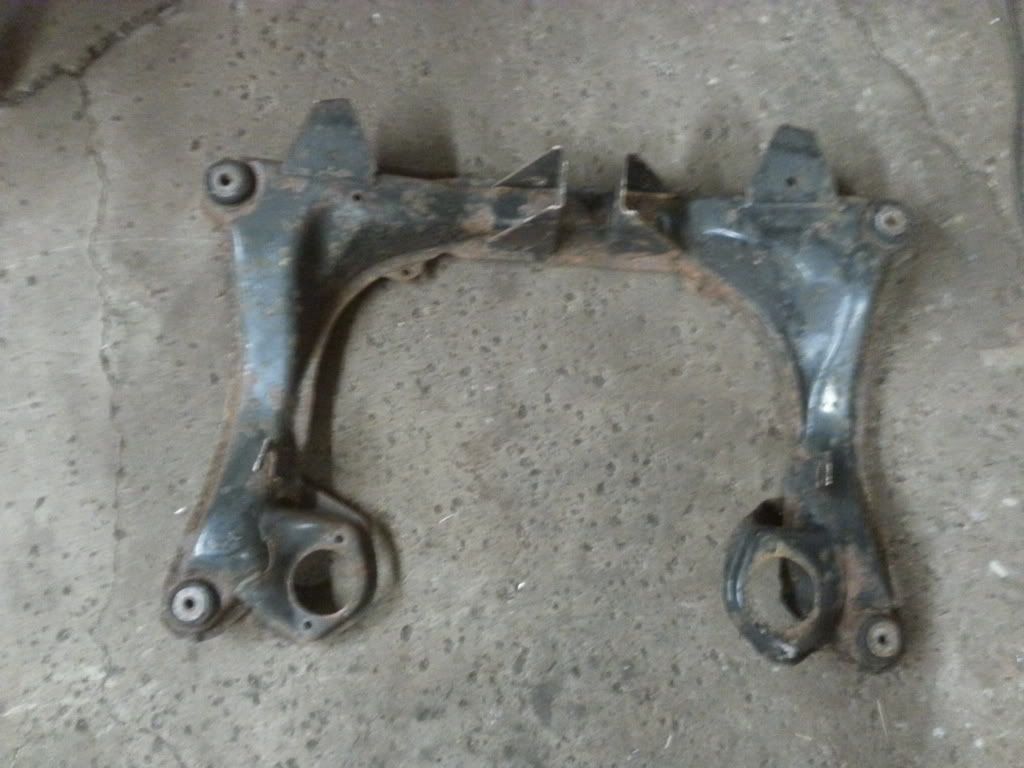
Got the bushings out, and now just struggling with blasting this beast.
Should be welding and POR15'ing most everything tonight, my C25 bottle is low (again) so I might tig the control arms, just depends on how clean I got them.
Here's my to do list:
-Control Arms and Subframes welded + painted.
-2nd Coat of undercoat on and front wheel wells finished.
-Subframe bushings made
-New bushings for control arms installed
-Re-assemble rear subframe stuff and re-install
-Re-assemble front subframe stuff, fug around with the springs and re-install.
-Finish rad support
-Finish metal work in engine bay
-Powdercoat rad support (Nick)
-Body wiring/engine harness/relay box/fuse panel/switch panel (huge task)
-Mount pedals (figure out clutch switch/brake switch/throttle)
-Paint bay
-Brake lines
-Fuel lines
Re: 88' 90Q 1.8T Swap, MS3 and a lot of wire wheeling.
Posted: Thu Apr 17, 2014 6:57 am
by lorge1989
Still chipping away.
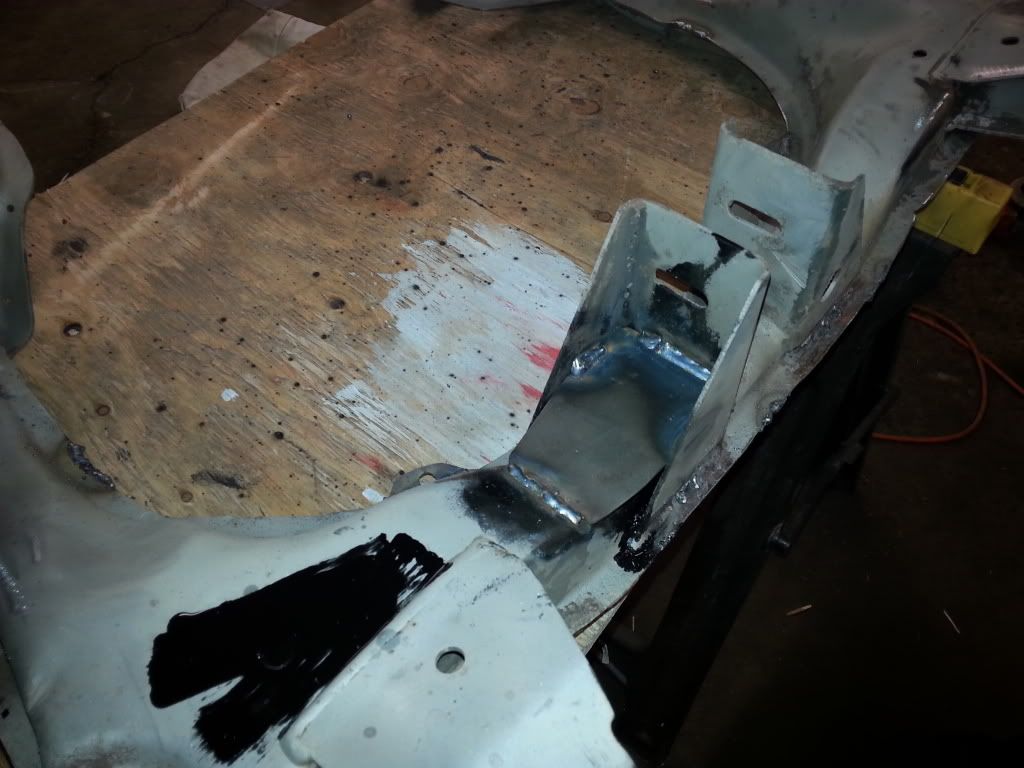
Found some troubled metal so I made a small brace.
I am going to quickly blast the sides of my new front control arms so I can seam weld those as well. Everything but those have already been PORd and I hope to scuff everything up and paint them with some regular paint this Saturday.
Re: 88' 90Q 1.8T Swap, MS3 and a lot of wire wheeling.
Posted: Wed Apr 30, 2014 10:17 am
by lorge1989
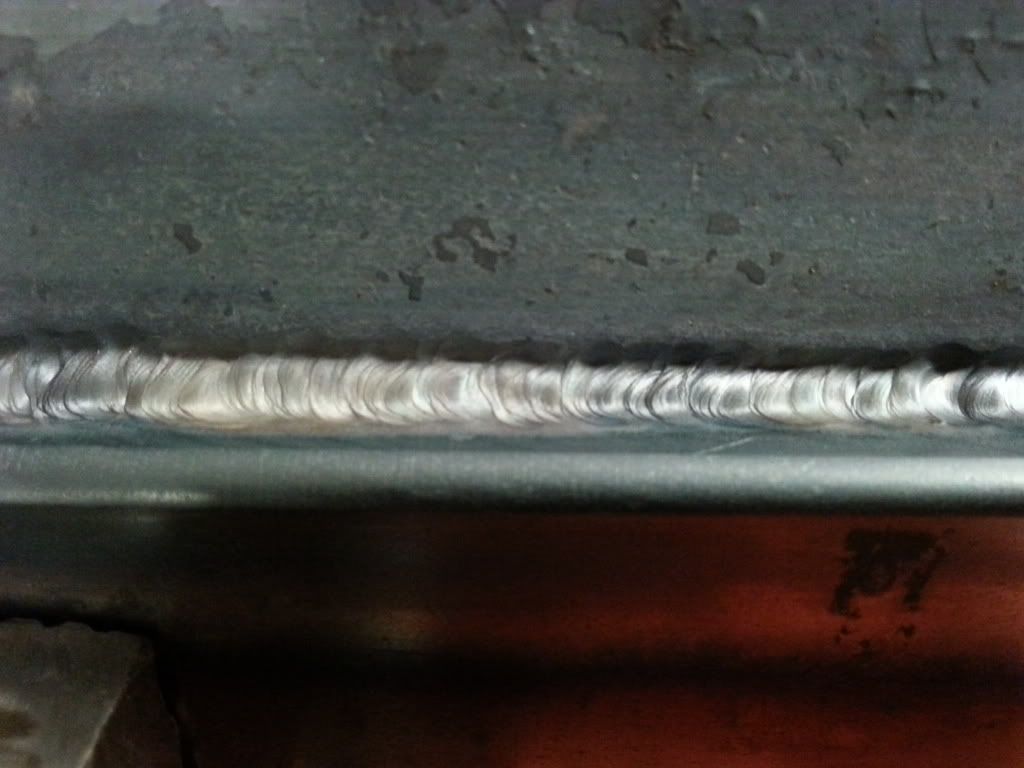
Welded the fronts.
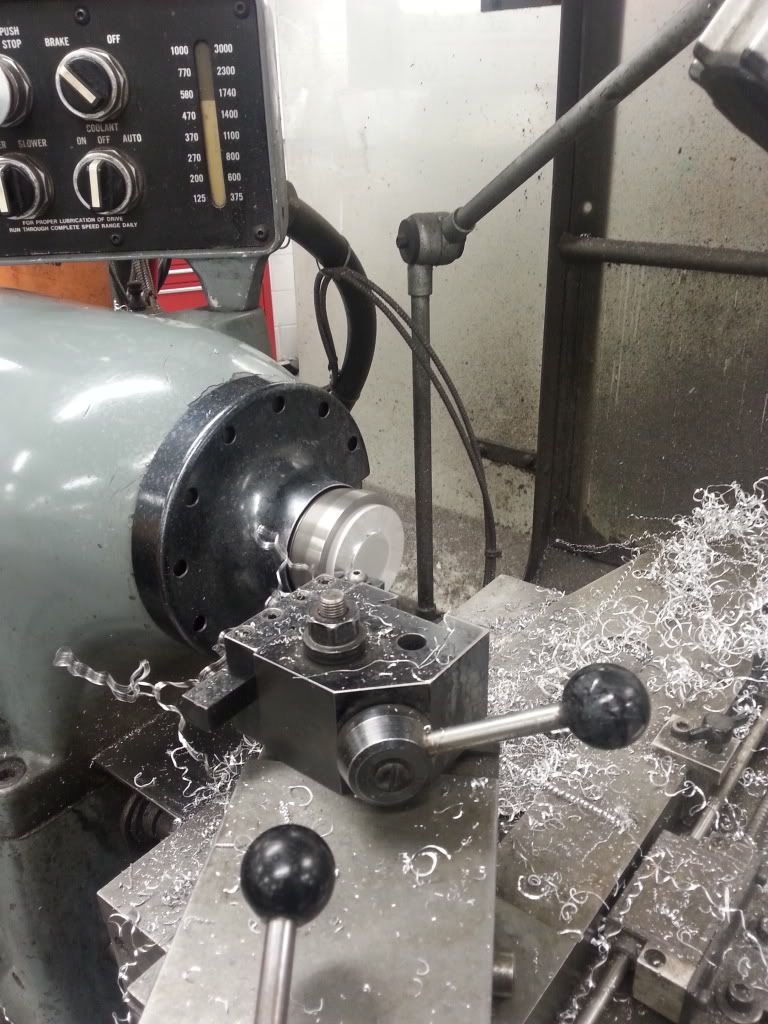
Made 16 of these guys.

2nd part of my core support. Welding is getting better.
I also gave my subframes and control arms a topcoat.
I started tracing all the switches to rewire the body. Got the windows switches all figured out. I won't be keeping the auto up/down feature considering thats the only part that uses a relay directly.
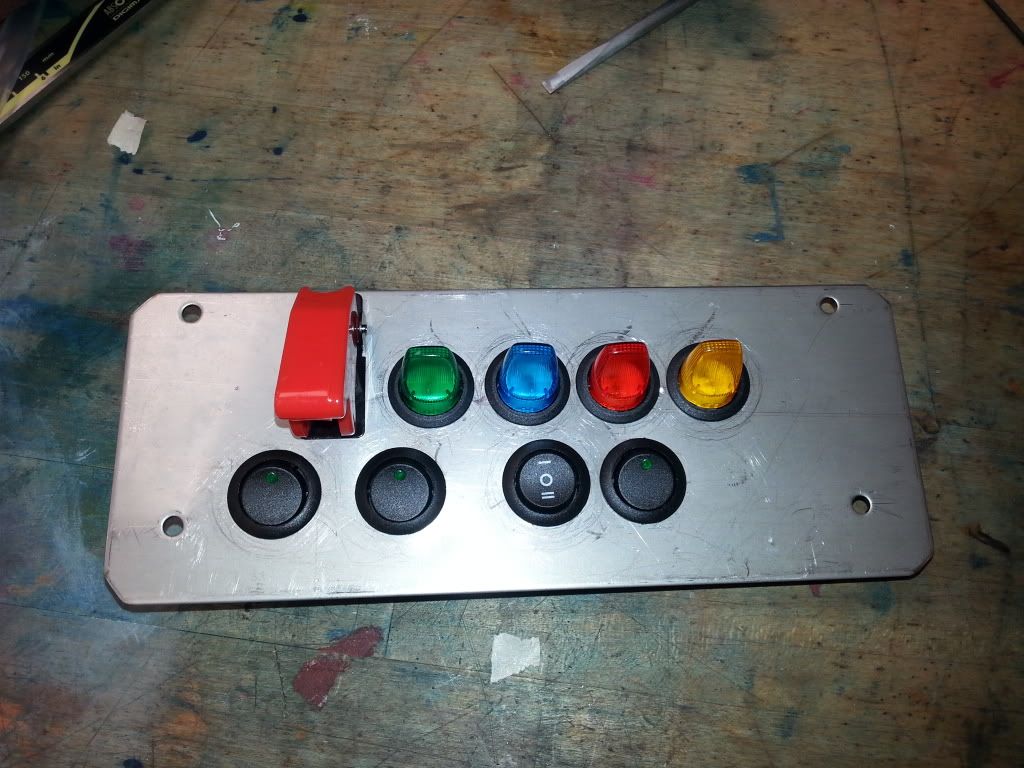
The wiper motor was pretty easy except the factory stalk probaby won't be used because so far its not intuitive to figure out. Same goes for the headlight stalk, turn signals and hazards. Right now I'm leaning on the idea of just using standalone switches for that stuff. Signals will be a pain, but right now I think my time is better used elsewhere.
Other things I need to supply power to include defroster, aux power, amp, headlight, tailight, turns maybe a few others. I have have a diagram I am working on I can post up soon.
Re: 88' 90Q 1.8T Swap, MS3 and a lot of wire wheeling.
Posted: Thu May 01, 2014 9:02 am
by DE80q
DANG and I thought the machines I run were old! As long as it works though. Glad to see some more machining fools around. We are a dieing breed,
Nice progress though. Looks like you are be quite thorough.
Re: 88' 90Q 1.8T Swap, MS3 and a lot of wire wheeling.
Posted: Thu May 01, 2014 9:43 am
by lorge1989
DE80q wrote:DANG and I thought the machines I run were old! As long as it works though. Glad to see some more machining fools around. We are a dieing breed,
Nice progress though. Looks like you are be quite thorough.
Thanks, but to me honest I'm no pro, not even close, but I'm young and trying to learn as much as I can. That machine is one of the lathes at my work, we don't do production just R&D stuff so it gets the job done.

Re: 88' 90Q 1.8T Swap, MS3 and a lot of wire wheeling.
Posted: Thu May 01, 2014 9:51 am
by DE80q
Makes sense. I am a machinest, welder, fabricator. We do repair work, so all of our machines are manual. Some big, some small, but all are pretty old. It is fun, and when you get the hang of it, pretty easy in most cases. Keep at it, you will get it. Looks like the bushings came out pretty good, I have made more then I care to remember of those things...
Re: 88' 90Q 1.8T MS3 - Pedal assembly mounting!
Posted: Tue May 27, 2014 9:57 am
by lorge1989
Re: 88' 90Q 1.8T MS3 - Pedal assembly mounting!
Posted: Thu May 29, 2014 1:33 pm
by lorge1989
Made up a little to do list, just for myself.
Stuff that can be done immediately:
-Clean off motor and trans and mate them.
-Weld/finish up cross members for rad, intercooler, oil cooler mounting
-Weld stud on e-brake handle, install e-brake cables
-Swap out one control arm bolt that was getting tight when putting it in.
-Run and label wires from tail lights, windows, wipers etc. to rough mounting location
-Figure out mounting of clutch switch and brake switch
-Repack front axle (driver) and give driveshaft a once over
Once the motor is in, which will be tomorrow this stuff can be done:
-Route throttle cable and figure out throttle body mounting
-Install engine wiring harness and sort through wires that need to go to the fuse box + label
-Run brake lines
-Mount relays, fuse box and other stuff in preparation for final wiring.
-Re-make charge pipes, or at least temporarily make them work.
-Re-install interior
Once the fuel rail comes in:
-Run fuel lines
Re: 88' 90Q 1.8T MS3 - Pedal assembly mounting!
Posted: Mon Jun 02, 2014 6:20 am
by lorge1989
Dusty motor is dusty.
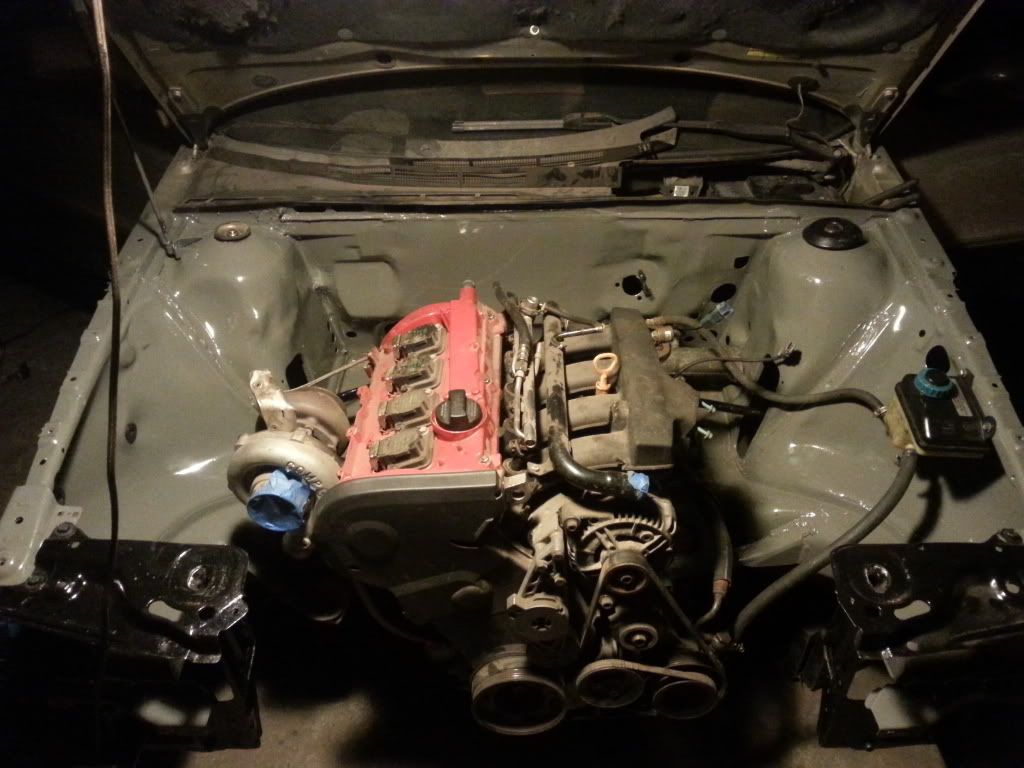
Took care of the harness yesterday:
Also got most of the body harness sorted/ran! Making progress. Going to make a mounting plate for the fuse panel and relays today and hopefully she will be wired up by the weekend!
Re: 88' 90Q 1.8T MS3 - Pedal assembly mounting!
Posted: Mon Jun 02, 2014 9:56 am
by DE80q
NICE! Keep it up and she will be running in no time. Will be nice to see another megasquirt running!
Re: 88' 90Q 1.8T MS3 - Wiring
Posted: Mon Jun 02, 2014 12:03 pm
by lorge1989
I'm super pumped to be able to drive it again! Hopefully bringing it to Waterfest for the drags. At least thats my goal.
Re: 88' 90Q 1.8T MS3 - Wiring
Posted: Mon Jun 02, 2014 12:06 pm
by DE80q
When/where is waterfest? I have heard a few people talking about it, and still I dont know anything about it.
Re: 88' 90Q 1.8T MS3 - Wiring
Posted: Mon Jun 02, 2014 12:11 pm
by lorge1989
Englishtown, NJ . July 19th and 20th.
http://www.waterfest.net/Its a decent show. Lots of cars, autocross, drags etc. Lots of stancenation stuff, but a fair amount of motorsport mixed in. Most of the fast VW/Audi's on the east coast usually show. I always say this, but it would be cool too see some older Audi/motorsports themed Audi's at these events. Just hard to get them out because they are intolerant of the typical VW shenanigans.
I don't blame them, but in order to push things in the right direction we need participation from new groups of people!

Anyways it should be fun!
Re: 88' 90Q 1.8T MS3 - Wiring
Posted: Wed Jun 04, 2014 9:24 am
by lorge1989
Super pumped how this came out!
Re: George's 88' 90Q 1.8T MS3X
Posted: Wed Jun 04, 2014 10:28 am
by gregdell1121
Excellent work! Great to see you taking your time to cover all your basis and make it one hell of a solid car! I'am tuned in!
Re: George's 88' 90Q 1.8T MS3X
Posted: Wed Jun 04, 2014 10:54 am
by lorge1989

heres one more showing the powdercoat:
Re: George's 88' 90Q 1.8T MS3X - Welding on the rad, HELP!
Posted: Tue Jun 10, 2014 6:58 am
by lorge1989
So, my aluminum tigging used to be decent. But lately, meaning the past 4 days, that I have attempted to weld a different angle nipple on the radiator, it hasn't been going well at all. Basically my new rad support makes the T-stat hose run super close to the serpentine belt, I bent it down and attempted to weld in a small filler piece on the top side of the nipple.
This was a disaster, I tried is two more times, with a different new nipple and double checking all my settings but it still welds very poorly.
I have a plan on how to do it this last time, but I would like some confirmation because I have failed these first three times.
-New nipped with similar thickness and same 6061 material as the radiator
-cut off all old welds and grind smooth, clean clean clean!
-bake the shit out the radiator to try and evaporate any more contaminates
-preheat area
My last step, which I'm not sure will help, is going around the base flange, without the nipple on it, with the torch and no filler. Just making sure that I can form a good puddle and that the material is free of contaminents. The last three times the filler would not wet into the puddle. Or if it did, it would only do so at certain sections. Most of the time it would just ball up, form what appeared to be this greyish coating and sit on the material. I could not get it to melt down cleanly again either. It also would not join with any other part of the weld.
I'm probably doing a poor job explaining this, but if anyone can give me some tips, or has had a similar problem please help.
Re: George's 88' 90Q 1.8T MS3X- Welding Radiator, help!
Posted: Tue Jun 10, 2014 12:16 pm
by DE80q
The Alum radiators are normaly clear anodized or powder coated on the end tanks to keep them from corroding. Your best bet is to make sure that the surface is super clean inside and out. Then yes, I would try to get the filler to flow into the material before attempting to atach the new flange. Where did this radiator come from? I am only asking because this sounds too much like when we have tried to weld "white" metal. never seems to flow right, the filler wouldnt flow in completely and they the original material would just drop out.
On a side note, are you sure you are using the correct filler? I have had problems when trying to mix different aluminums together. Be it the to pieces, or the filler.
Re: George's 88' 90Q 1.8T MS3X- Welding Radiator, help!
Posted: Fri Jun 13, 2014 7:27 am
by lorge1989
DE80q wrote:The Alum radiators are normaly clear anodized or powder coated on the end tanks to keep them from corroding. Your best bet is to make sure that the surface is super clean inside and out. Then yes, I would try to get the filler to flow into the material before attempting to atach the new flange. Where did this radiator come from? I am only asking because this sounds too much like when we have tried to weld "white" metal. never seems to flow right, the filler wouldnt flow in completely and they the original material would just drop out.
On a side note, are you sure you are using the correct filler? I have had problems when trying to mix different aluminums together. Be it the to pieces, or the filler.
I ground it down first eaqch time so even if it was anodized I got all that stuff off. This came from the PO of this vehicle, I got a hold of him yesterday and its from ebay, ebay sell says its 6061. Its been welded before as well. I honestly think I just suck at alum lol.
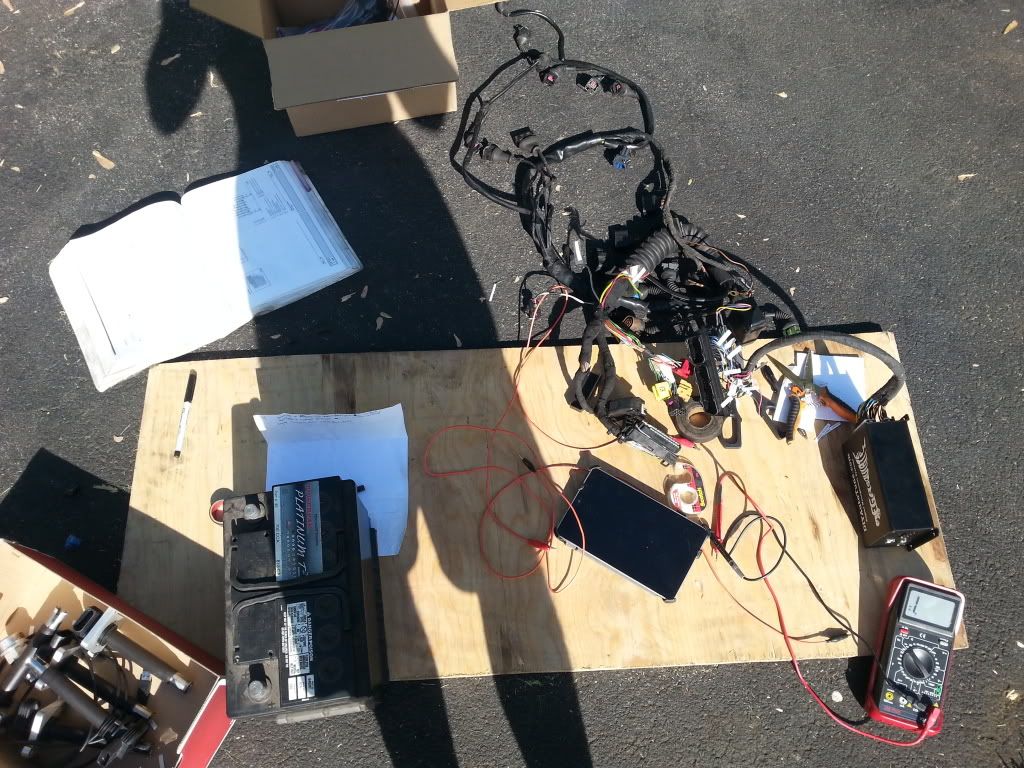
So did some wiring last night. Sorted out the relay/fuse panel and a friend, lil Nicky, helped with routing of a bunch of stuff.
Getting ready:

The plan:
Final placement, ish.

Still have to mount it up and run a bunch of wires but its getting there!
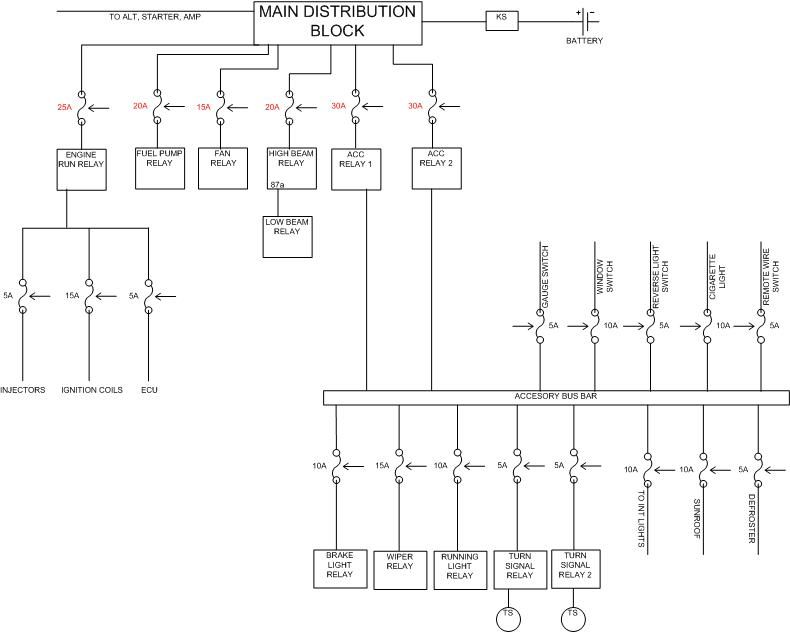
The fuses with Red writing will just be regualar inline ones, all the others will be in the main fuse block which you see on the right. The diagram isn't done, but its more complete than its ever been.
Re: George's 88' 90Q 1.8T MS3X- Relay/Fuse Block Panel Updat
Posted: Fri Jun 13, 2014 11:29 am
by 78srx440
This looks great!
Excited it's coming together.
I like the hardware.

Re: George's 88' 90Q 1.8T MS3X- Relay/Fuse Block Panel Updat
Posted: Mon Jun 23, 2014 7:52 am
by lorge1989
thanks mang.
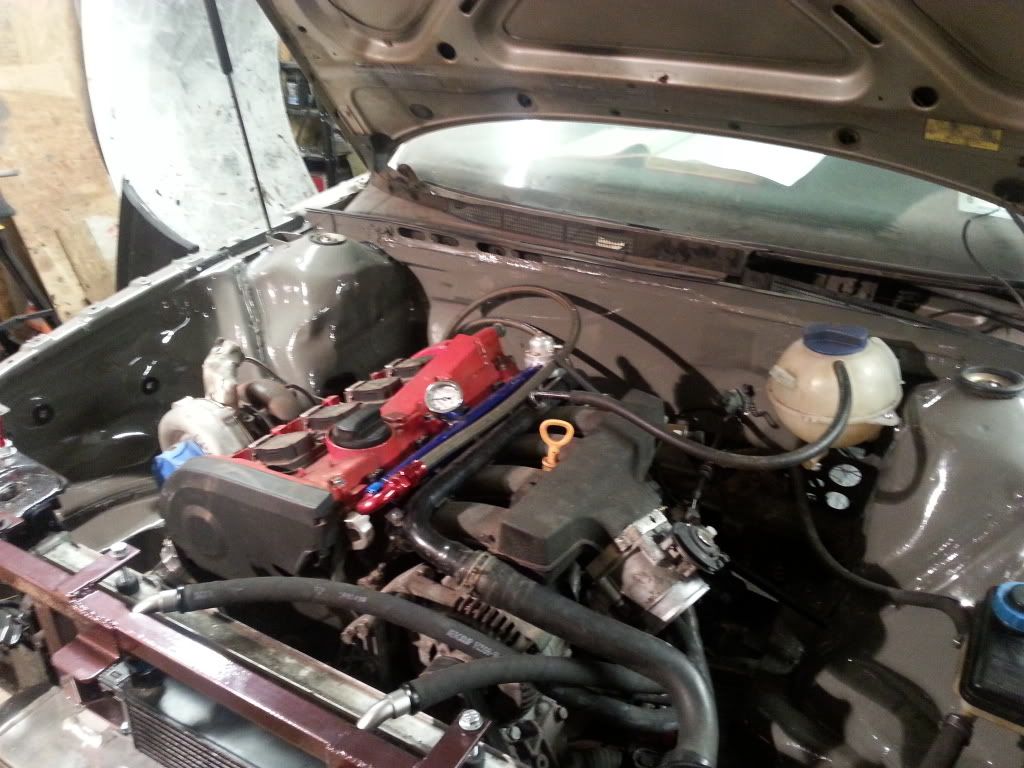
Got the fuel lines and fuel system all squared away over the weekend as well as the oil system and most of the cooling system. I'm in love with these braided stainless, PTFE lined and rubber coated lines.
My racecar panel:
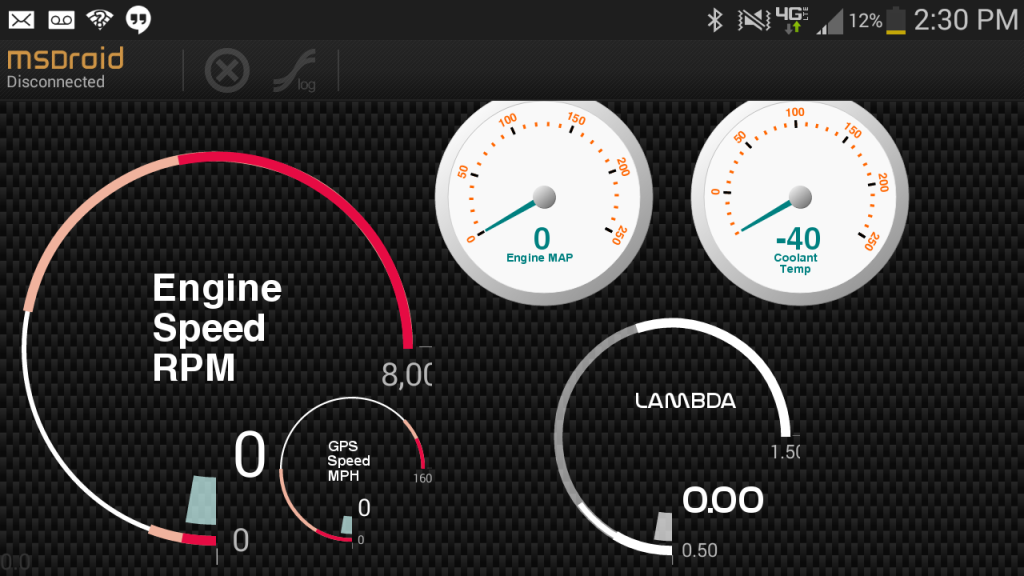
Messing around with the Megasquirt tablet app.