Page 24 of 37
Re: Her Mars Red 83 Urq ...Engine bay painted ready for 20vt
Posted: Tue Aug 02, 2011 5:58 pm
by foxbat
Got the "Super Rat" :woowoo: Did you weigh him before you took him to the taxidermist? That giant will go great in your trophy room

Seriously though, looks like a real killer :wink: . Actually John, he appears to be very well fed, are you sure it wasn't a pet?

BTW, Thanks for lending me the goodies Saturday, alas, I am back to square one. :frustrated: Gonna have to start jumpering power wires now.
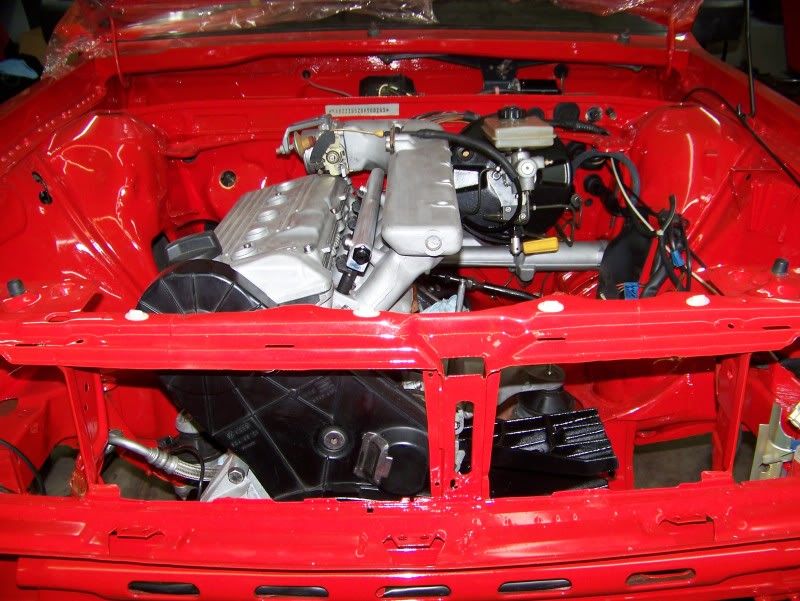
Your engine bay looks oooh so shiny 8) Nothings holding you back now right?
Re: Her Mars Red 83 Urq ...Engine bay painted ready for 20vt
Posted: Tue Aug 02, 2011 6:08 pm
by quattro87
Your engine bay looks oooh so shiny Nothings holding you back now right?
Only work, repairs to a vanity drawer face that got slammed on the killer rat, money, parts, ambition, and of course my wife scheduling time to visit kids and grandkids. For what its worth, while Renee was out in the garage to look at the new freezer she commented on how nice the engine bay looked and that the engine looked pretty clean. I don't know if that is headway or not, but I'll take it.
Re: Her Mars Red 83 Urq ...Engine bay painted ready for 20vt
Posted: Tue Aug 09, 2011 6:22 am
by Quattro v1.0
On a side note. I haven't started my UrQ since I parked it upon return from the Santa Barbara trip. Last night I primed the pump twice and turned the key - started FIRST time. Keep moving on this thing, you'll be greatly rewarded once the 20v is on stand-alone.
Re: Her Mars Red 83 Urq ...Engine bay painted ready for 20vt
Posted: Tue Aug 09, 2011 7:35 am
by nm_audi
The engine bay looks great!
Just curious, when you painted did you spray primer and then the top coat or just spray the top coat? Clear?
Re: Her Mars Red 83 Urq ...Engine bay painted ready for 20vt
Posted: Tue Aug 09, 2011 8:09 am
by quattro87
I wire brushed problem spots down to bare metal, then etched and primed those spots. Everything else was just washed with comet and a scotchbrite pad to remove contaminants once everything was already pretty well cleaned. I also went over most of it with wet 500grit paper. It's pretty tough to beat OEM primer and paint as far as a solid base to stick to, but it has to be roughed up and clean. Another reason for doing this is that other than maybe yellow, red is one of your most expensive paints and doesn't cover real well. If sprayed over your OEM red it can be sprayed on thin in some spots and still cover. If spraying over primer, a rust primer is easier to cover than a grey which takes quite a few passes to cover. I then just used a single stage color code Mars Red paint. The outside will probably be done in a two stage job because I like the flat look (no orange peal) that you can get by cut and polishing a clearcoat.
Re: Her Mars Red 83 Urq ...Engine bay painted ready for 20vt
Posted: Tue Aug 09, 2011 8:54 am
by nm_audi
Thanks for the detailed explanation. Very helpful!
Re: Her Mars Red 83 Urq ...Engine bay painted ready for 20vt
Posted: Sat Aug 13, 2011 12:51 am
by quattro87
Got a bit more done in the last few days. First off the steering rack needed to be cleaned to be allowed to get installed into the newly painted bay. Notice how I have it up against the Mars Red painted cardboard.

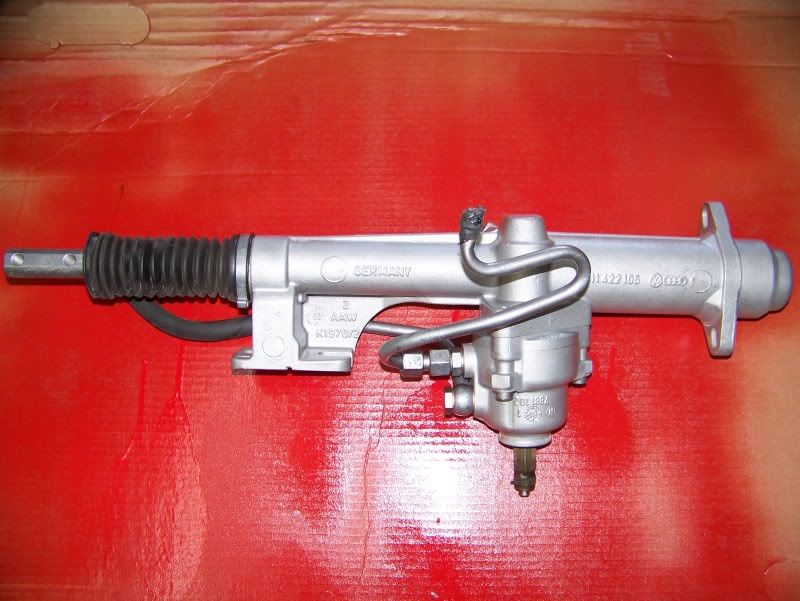
It looks just as good sitting in the car along with the newly painted master clutch cylinder. I love clean!!
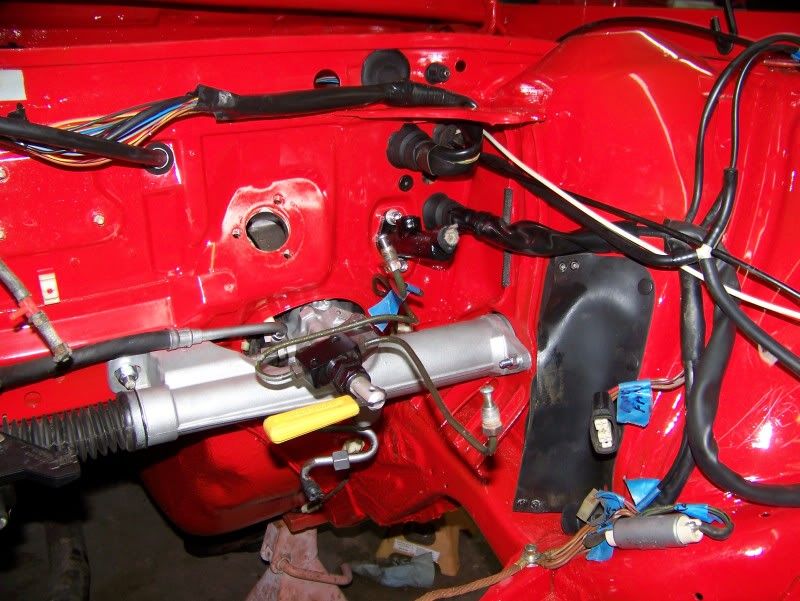
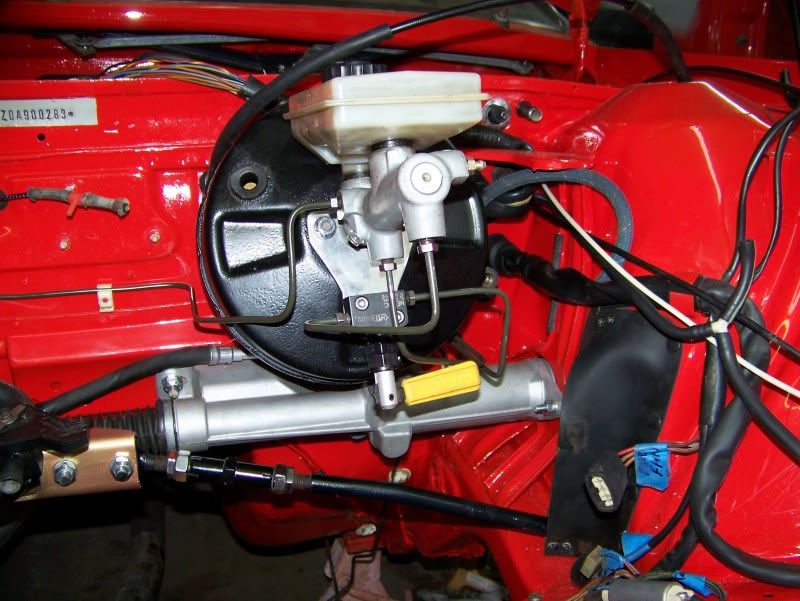
I then robbed the already cleaned and painted vacuum assist brake booster from the other Urq so that I could change from hydraulic brakes to the vacuum assist. I also cleaned up the steering rack bracket and tie rods making sure that the turn buckle for adjustment was free for movement.

I need to figure out what kind of seal goes between the brake master cylinder and booster, but wanted to get the front brake lines ran new. Going from hydraulic to vacuum made the lines not even close. I could have used the shorter 4k M/C, but elected to go with the Urq unit since it has less than 4k miles on it. I also wanted to get the aftermarket proportioning valve tied down instead of just floating like it was. I made a bracket for it to bolt to that sits under the M/C and then ran new lines to everything.
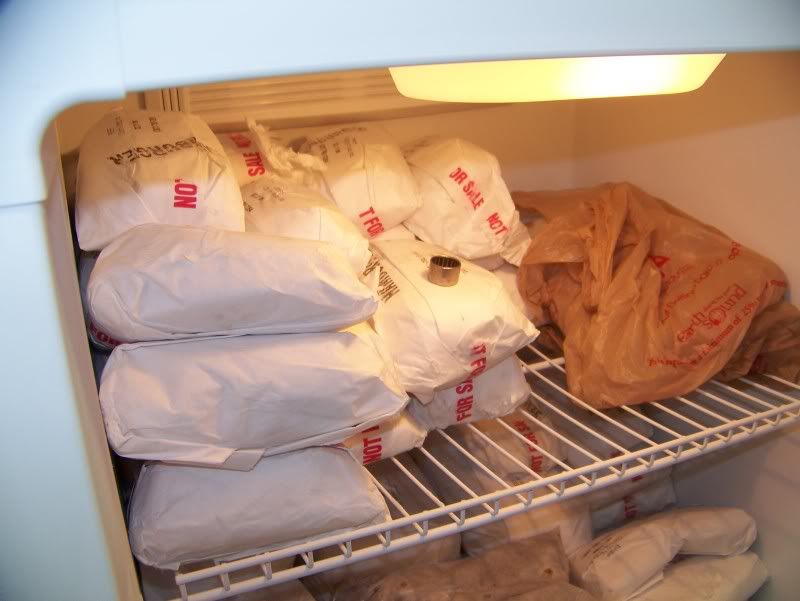
I then moved on to using my new freezer that I had to deal with last week. Here is the new unit.
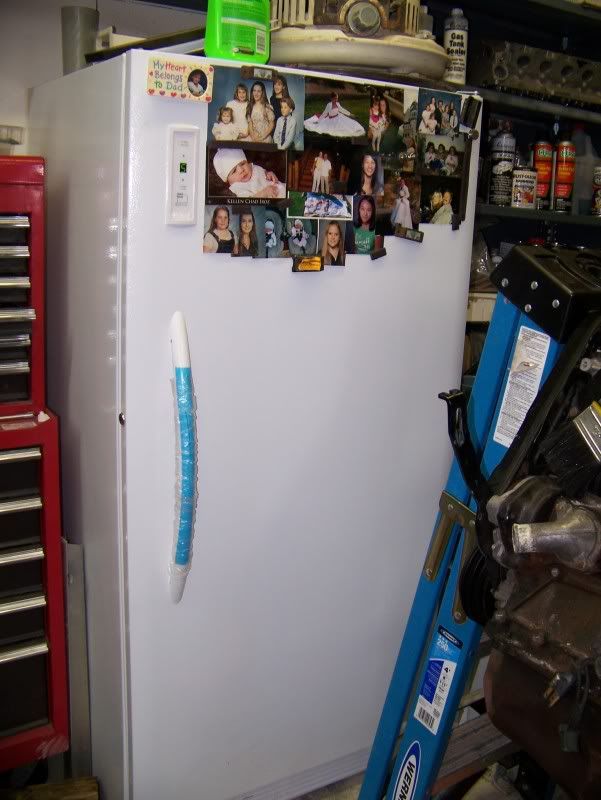
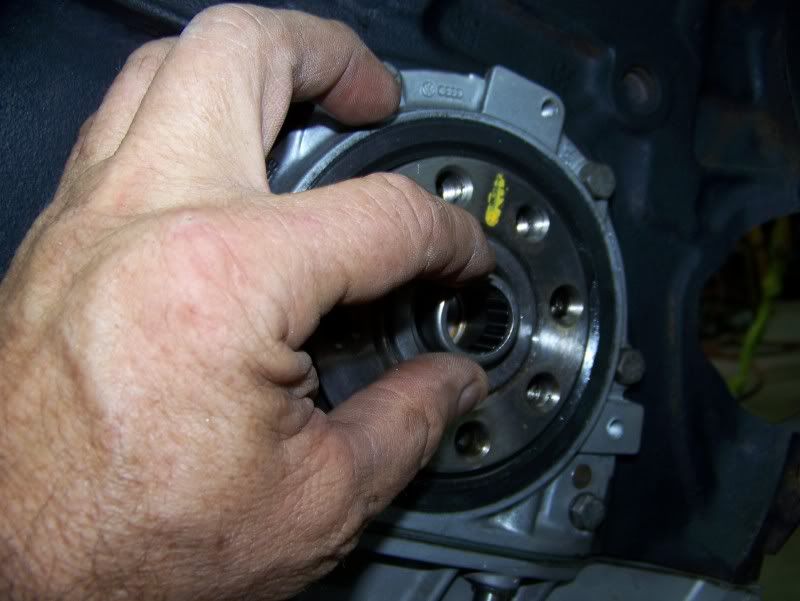
And this is the use I found for it other than keeping hamburger frozen solid. Notice the pilot bearing getting ready to be installed. :-)
Cold pilot bearing being put into a slightly torch warmed crank.
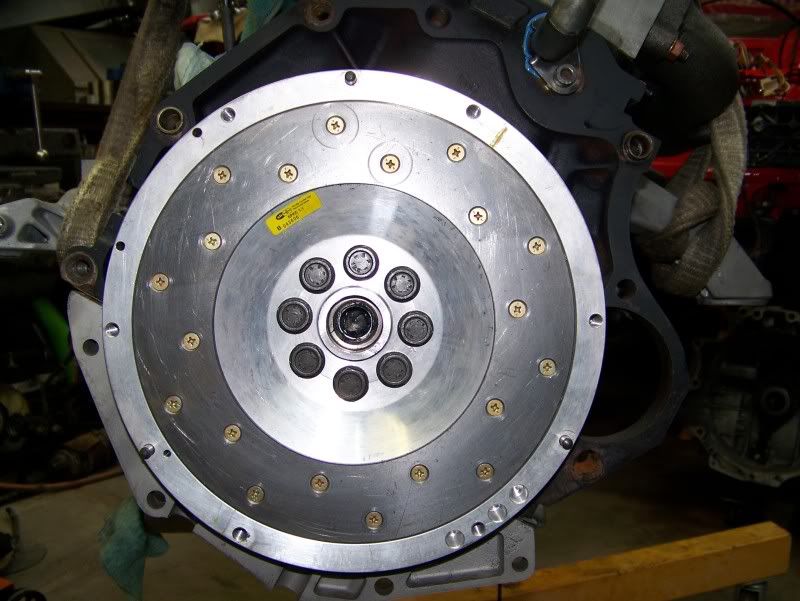
New fidenza flywheel installed
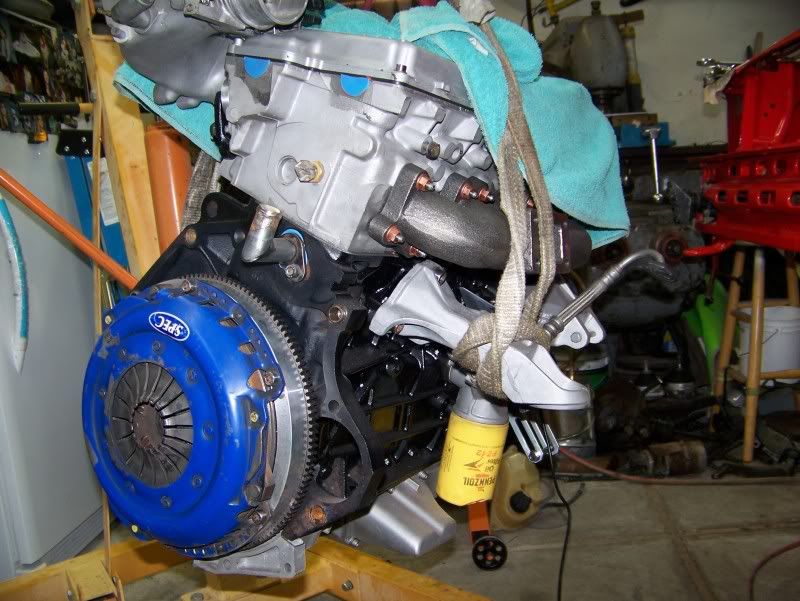
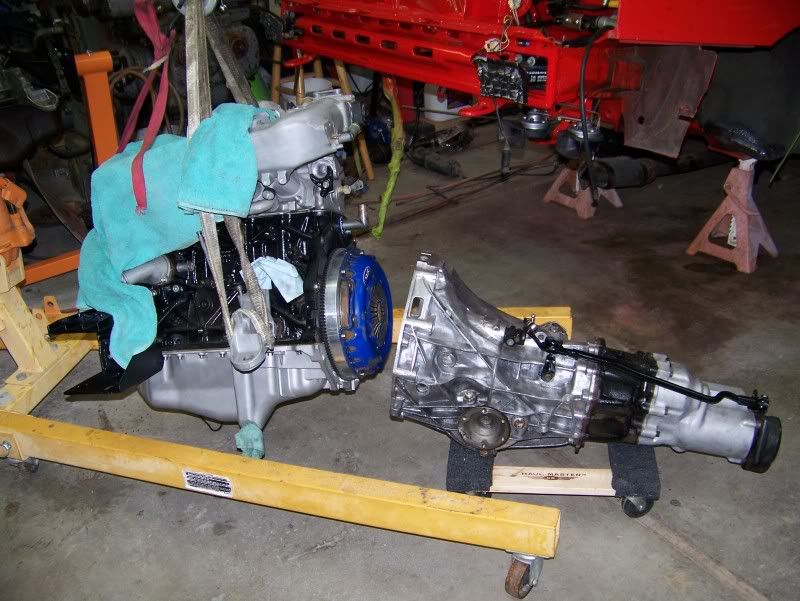
Slightly used Spec 3+ disc and pressure plate installed to get ready to bolt the tranny up to the engine.
With the engine hanging from the hoist and the tranny on a moving dolly I slid the two together. I really went together rather well....much easier than fighting one or the other in the car.
[img][IMG]http://i282.photobucket.com/albums/kk255/quattro87/Urq%20II/100_4260.jpg[/img]
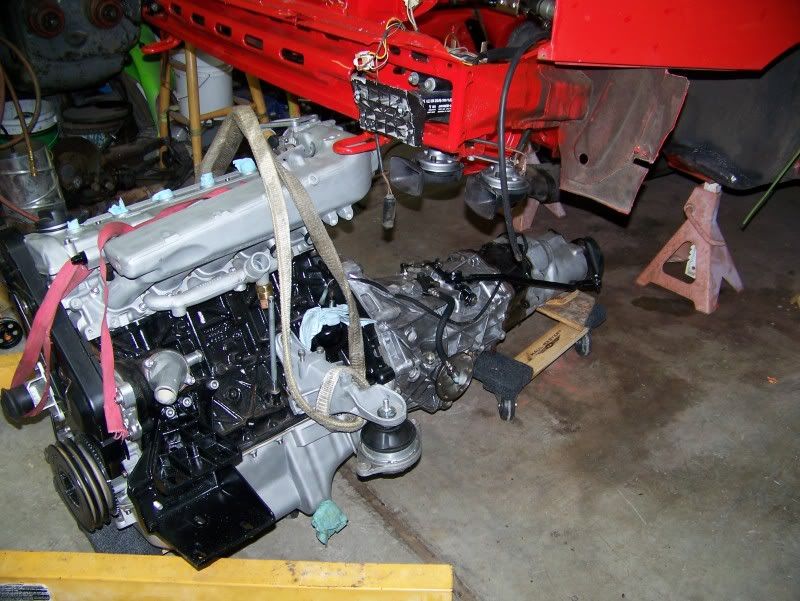
Getting ready to slide the complete unit back under the car.

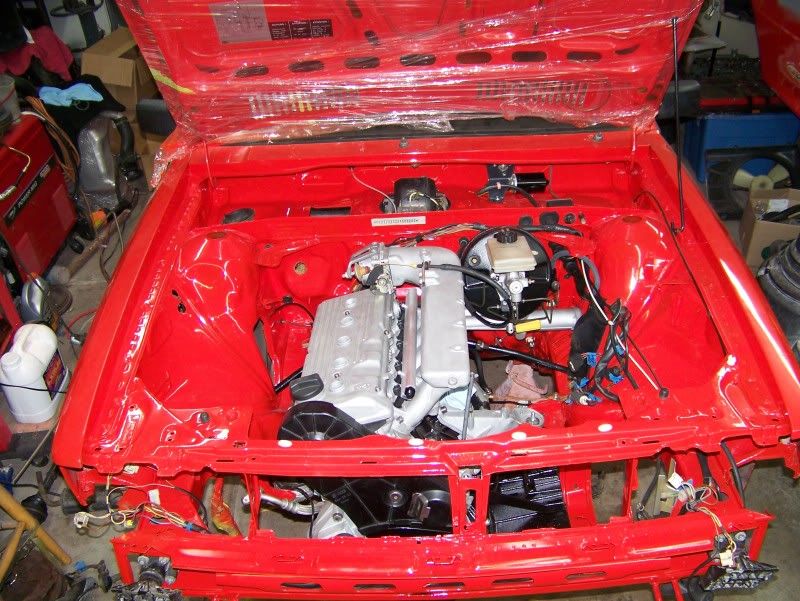
Once under the car I reattached the hoist and put a floor jack under the tranny and lifted it into place.
I had told Hank this morning that this was my goal for the day. I was stretching it and thought I was a done when my wife informed me that she had asked friends if they wanted to go to dinner at 5:30. :( Of course I had to stop early and get cleaned up, but came home and got back to it. This is what I ended up with.
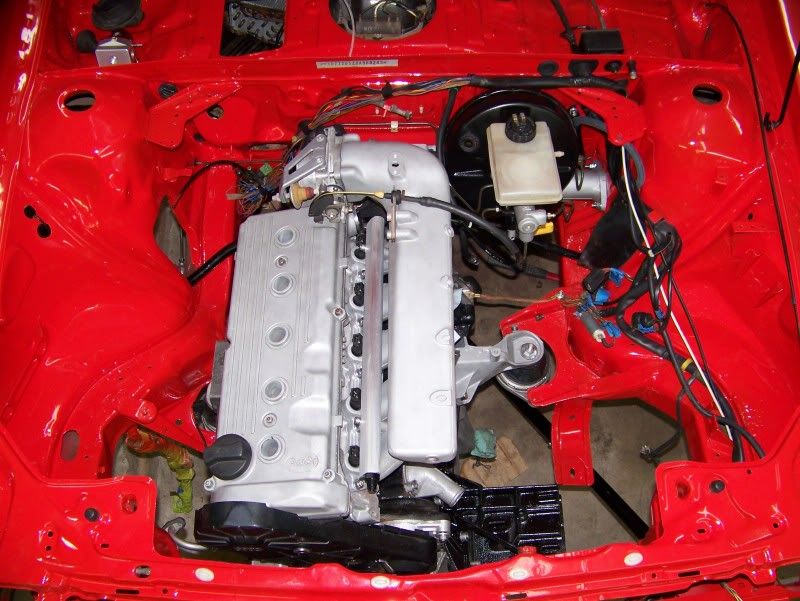
A good day all in all, but my I still have a bunch to do. I've also got some decision making to do in the next little bit. The biggest question is whether I just keep waiting for the Borg Warner Turbo to show up and hope it gets here in time or change gears and have a fighting chance of making the Vegas GTG. I think that I'll wait until tomorrow for that. Night.
Re: Her Mars Red 83 Urq ...Engine in the bay!!
Posted: Sat Aug 13, 2011 3:31 am
by cuatrokoop
Looks good, John. Have they given you any updates on delivery of the BW unit? Or can they?
Re: Her Mars Red 83 Urq ...Engine in the bay!!
Posted: Sat Aug 13, 2011 5:54 am
by Audilard
Wow! You got a lot done. Nice work John!
Re: Her Mars Red 83 Urq ...Engine in the bay!!
Posted: Sat Aug 13, 2011 6:10 am
by loxxrider
Wow that is awesome! You definitely got a lot done. I like doing the engine and tranny as one unit as well. Much easier in my opinion.
Re: Her Mars Red 83 Urq ...Engine in the bay!!
Posted: Sat Aug 13, 2011 6:29 am
by Mentosman42
John you think it would be a good idea to add a nipple for the PCV system on the valve cover?
Re: Her Mars Red 83 Urq ...Engine in the bay!!
Posted: Sat Aug 13, 2011 6:48 am
by nm_audi
WOW - as always, very impressive! I'm headed to the garage to see if I can catch up.... LOL. :woowoo:
Re: Her Mars Red 83 Urq ...Engine in the bay!!
Posted: Sat Aug 13, 2011 7:03 am
by AudiSport4000
Simply gorgeous!
Re: Her Mars Red 83 Urq ...Engine in the bay!!
Posted: Sat Aug 13, 2011 8:55 am
by quattro87
Looks good, John. Have they given you any updates on delivery of the BW unit? Or can they?
That's the problem.....I've been hearing a few weeks for a few months. I've just always figured I still had lots to do so it really didn't matter, but I'm getting to the point that, although I still have a ton to do, downpipe and intake plumbing needs to get addressed. His Urq has an HTA 3076 with the billet wheel sitting on the shelf that I'm contemplating borrowing, but that would mean I would need to come up with a different downpipe still and then have to deal with a waste gate and associated plumbing. I couldn't even use the the cast manifold since it was bought without the wastegate provision. That would mean a new header, wastegate, blowoff, and plumbing that could all be transferred over to my car when the EFR came. I really don't have the funds to be buying all that crap now, but at least it is something that has to get bought or made eventually anyhow and it doesn't hurt that I have an in on some pretty nice headers.
John you think it would be a good idea to add a nipple for the PCV system on the valve cover?
You would have to bring that up. :( I've been playing the old ignore it and maybe it will go away game with that problem. I know that I have to do something, but keep putting it off. The problem with the 7A cover is that there really isn't any good spot to tap into it without being at a spot that either slings oil up to the port or sloshes it there. If you put it in the front, not only is it ugly, but the timing chain is there to sling oil. If you put it in the rear you have the dizzy hole or just the rear of the head that seems like it would fill up with oil on acceleration. If you tap the middle somewhere, looks again are compromised and the cams are there to still sling oil. Suggestions??
Thanks for the comments guys. I think that I need to concentrate on the subframe and related stuff now.
Re: Her Mars Red 83 Urq ...Engine in the bay!!
Posted: Sat Aug 13, 2011 9:40 am
by Hank
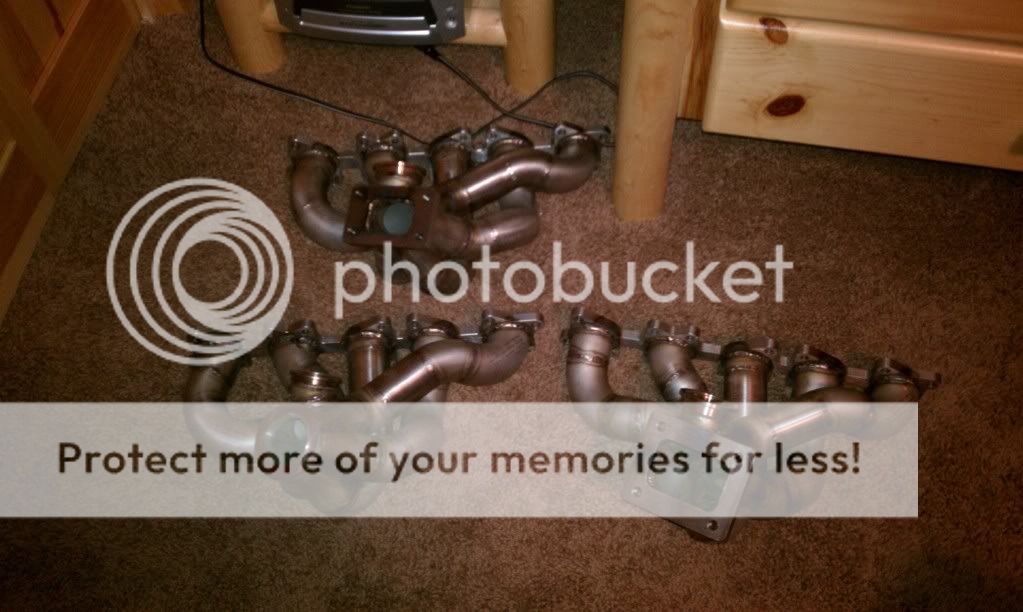
I think the one on the bottom left is destined for Moms car. I think that I have everything to finish off the downpipe and all the intake plumbing when you get here on Monday. Hopefully we can send you home with everything ready for a plug and play senario
Re: Her Mars Red 83 Urq ...Engine in the bay!!
Posted: Sat Aug 13, 2011 9:42 am
by Audilard
Which one is mine then?
Re: Her Mars Red 83 Urq ...Engine in the bay!!
Posted: Sat Aug 13, 2011 9:49 am
by quattro87
OK, so I've thought a little bit more about switching gears than I let on. LOL.
Re: Her Mars Red 83 Urq ...Engine in the bay!!
Posted: Sat Aug 13, 2011 9:52 am
by PRA4WX
Is mine the T4(?) flanged?! ;-p
Re: Her Mars Red 83 Urq ...Engine in the bay!!
Posted: Sat Aug 13, 2011 10:41 am
by Mentosman42
John you think it would be a good idea to add a nipple for the PCV system on the valve cover?
You would have to bring that up. :( I've been playing the old ignore it and maybe it will go away game with that problem. I know that I have to do something, but keep putting it off. The problem with the 7A cover is that there really isn't any good spot to tap into it without being at a spot that either slings oil up to the port or sloshes it there. If you put it in the front, not only is it ugly, but the timing chain is there to sling oil. If you put it in the rear you have the dizzy hole or just the rear of the head that seems like it would fill up with oil on acceleration. If you tap the middle somewhere, looks again are compromised and the cams are there to still sling oil. Suggestions??
Im asking because Im in the same boat

getting close to putting the head on and cams in so im going to take a look at the clearances under the valve cover. I was thinking that if i add a nipple im also going to add a baffle under it in the valve cover as to stop oil from getting up there(hopefully). all depends on what i can get away with in there.
Re: Her Mars Red 83 Urq ...Engine in the bay!!
Posted: Sat Aug 13, 2011 11:06 am
by quattro87
ShavedQuattro wrote:I think the one on the bottom left is destined for Moms car. I think that I have everything to finish off the downpipe and all the intake plumbing when you get here on Monday. Hopefully we can send you home with everything ready for a plug and play senario
Seeing those headers on something other than my phone makes them look a lot nicer and way easier to see the V-band header that is destined for "Mom's car". I love the sound of mom's car.
She just left to go out to lunch with friends and asked as she was leaving if I was just going to be hanging around to work on my car. I told her that yes I would be around, but I would be working on her car. It got her to stop and think about whether or not she could take the A4, then it hit her what I was saying and she just rolled her eyes and kept walking.
Re: Her Mars Red 83 Urq ...Engine in the bay!!
Posted: Sat Aug 13, 2011 12:04 pm
by quattro87
I had a couple of setbacks this morning. Not show stoppers, but annoying still. A while back while looking at Eastwoods brake line flare tool I ran across something that I decided I would try out. The flaring tool is a nice piece and I would recommend it by the way. Works well in the vise where it was designed to be used, but I did use it under the car to run a bubble flare on existing line by using a pipe wrench as leverage against the lever. Cumbersome, but doable.
http://www.eastwood.com/professional-br ... -tool.html


Anyhow, back to the setback, while browsing Eastwood I came across these spray can paints.
http://www.eastwood.com/golden-cad-kit.html
I was all excited to try it out on the all metal hydraulic reservoir. Call me old school, but I still like the metal better than the plastic. It just seems more substantial. Kind of like the days when dashes and door panels were metal. I know that they are heavier and the cadmium plating looks real bad after awhile, but I still like them and this is why I was so excited. I bead blasted the reservoir, which takes some doing without getting sand into the inside, and went to paint and tint. I really like how it turned out and even did the cruise control bracket while I was at it.
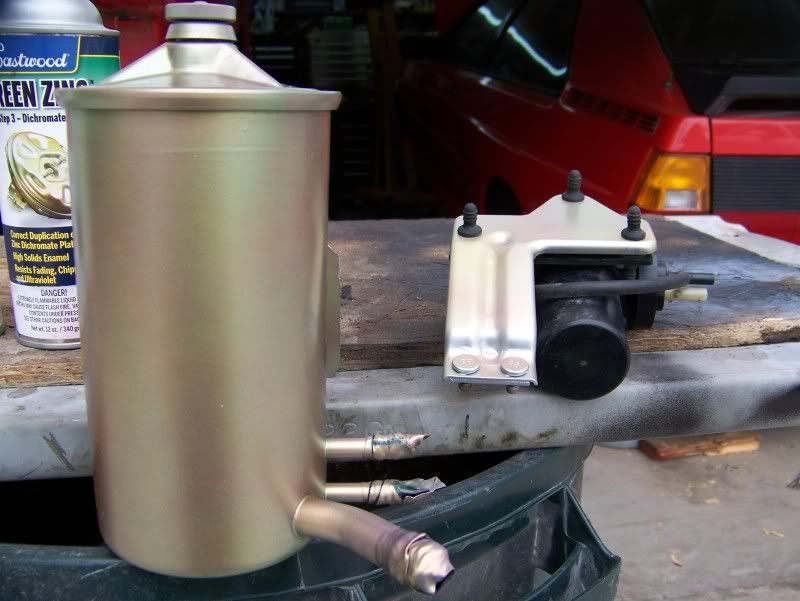 The setback came this morning when I went to install them and found that neither one would work with the 20vt or the vacuum assist brakes.
:( :curses:
Re: Her Mars Red 83 Urq ...Engine in the bay!!
Posted: Sat Aug 13, 2011 12:07 pm
by quattro87
I forgot what I was originally coming in to post. :slap:
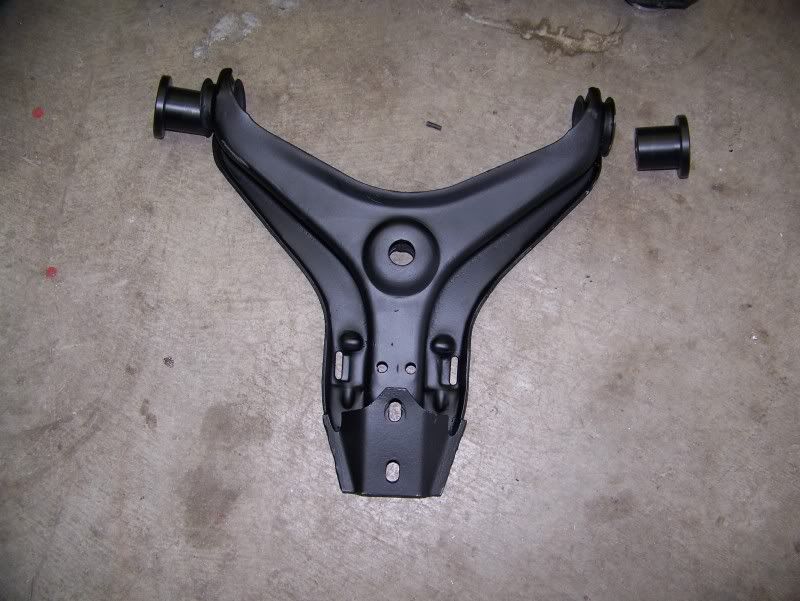
Can anyone tell me how the 034 delrin control arm bushings are supposed to install?
http://www.034motorsport.com/chassis-co ... p-403.html
LIke this
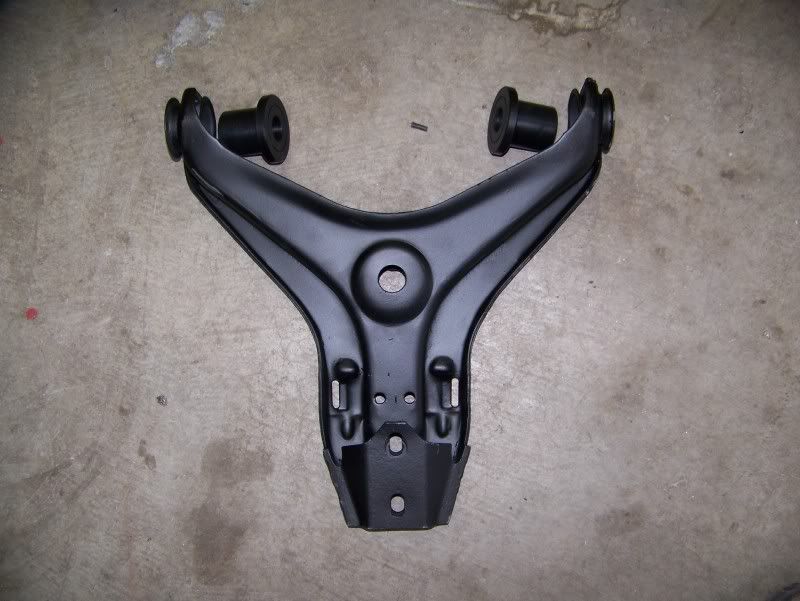
or like this
Re: Her Mars Red 83 Urq ...Engine in the bay!!
Posted: Sat Aug 13, 2011 1:13 pm
by dbldmnd
Nice progress John, it looks great.
You probably already already had it figured out, but I spent 2 hours this morning trying to get the proper routing of the lines along the firewall, ie a/c lines, fuel lines, plastic p/s reservoir bracket and lines to rack, ... And I am still not done. It gets real tight along there. I thought I had it worked out when the engine was out, but I was missing an a/c line. Trying to fit that one in there with the engine in place set off the chain reaction and everything had to get loosened. With a combination of M6 bolts, nuts and standoffs I am getting close. If you haven't preconfigured all this, I would get the fuel lines and a/c lines and hydraulic res in there before it gets too crowded and see where you are at.
And for control arm bushings, I am not 100% on the stamped arms, but I think picture 2 is the correct orientation.
Re: Her Mars Red 83 Urq ...Engine in the bay!!
Posted: Sat Aug 13, 2011 3:06 pm
by quattro87
You probably already already had it figured out
No I don't have it figured out at all. I was going to do it before the engine went in, but I wanted to run AN stainless braid lines for the fuel and really didn't know where things would end up, wasn't sure if the reservoir was going to fit, didn't want to put the evaporator back in until the IIc ECU harness was ran under the carpet on the passenger side, and mostly just needed the motivation boost that seeing an engine in the bay would give me. Right off the bat I'm cussing because I'm so short, with the car is still on jack stands, I can't even think about getting to all that stuff. Oh well!!
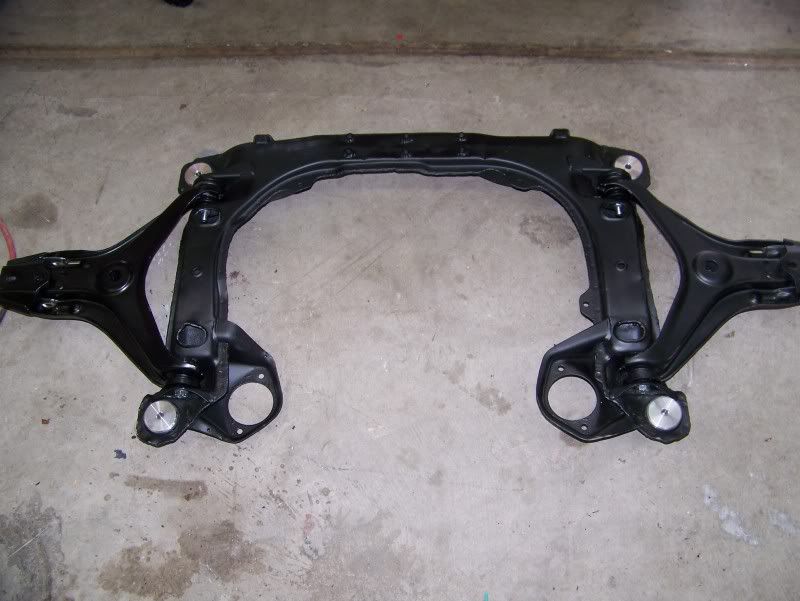
In the interest of time I went downstairs and borrowed the already seam welded, prepped, and painted front subframe from His Urq. I just didn't have it in me to do all the bushing removal, wire brushing/bead blasting, etching, painting and other prep work that was already done. Is all I really had to do was install the solid mounts and delrin control arm bushings. It's raining out and about a 100deg so I needed a break from the hot garage and figured I'd post some more.
Here is the pre prepped subframe.
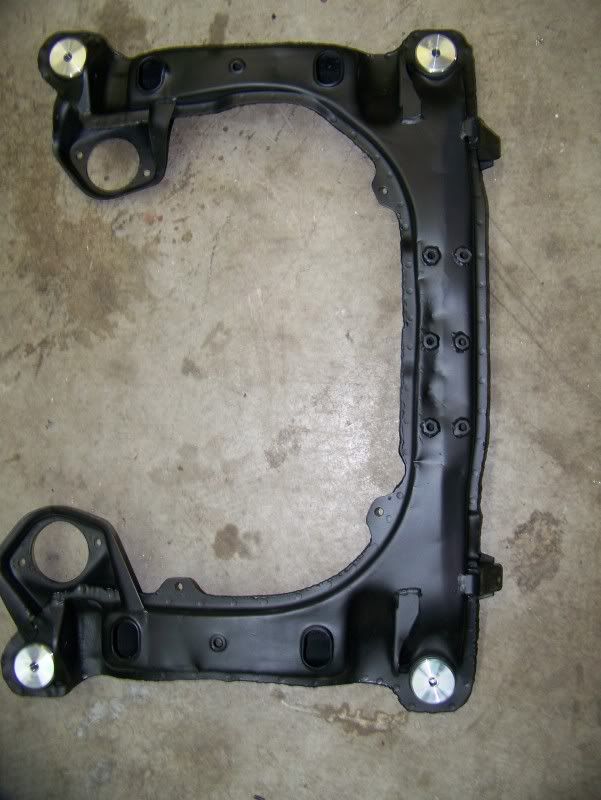
A seamwelded corner.

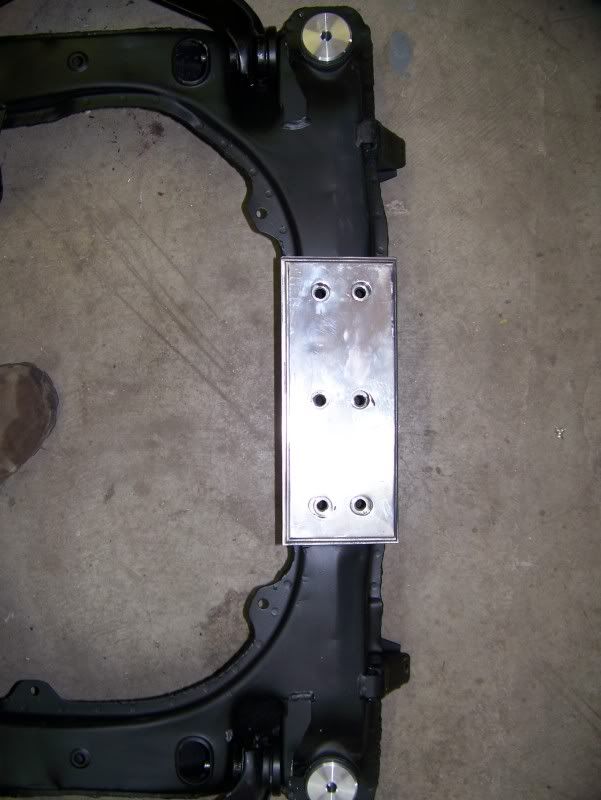
You may have noticed the six holes in the dented up portion of the subframe. I was bored one day a while back and decided to play with the mill and tig machine. I ended up with a bit of bling that I'm not even sure will make it to the final build, but this is what I have.
It covers the dents and makes for a jacking point to try and keep further denting at a minimum. The nuts are welded in flush, and the bolts are inset in the 3/8" aluminum plate.
More freezer use getting ready to press the delrin into the control arms.

I warmed up the control arm with a heat gun, and lubed before pressing them in.
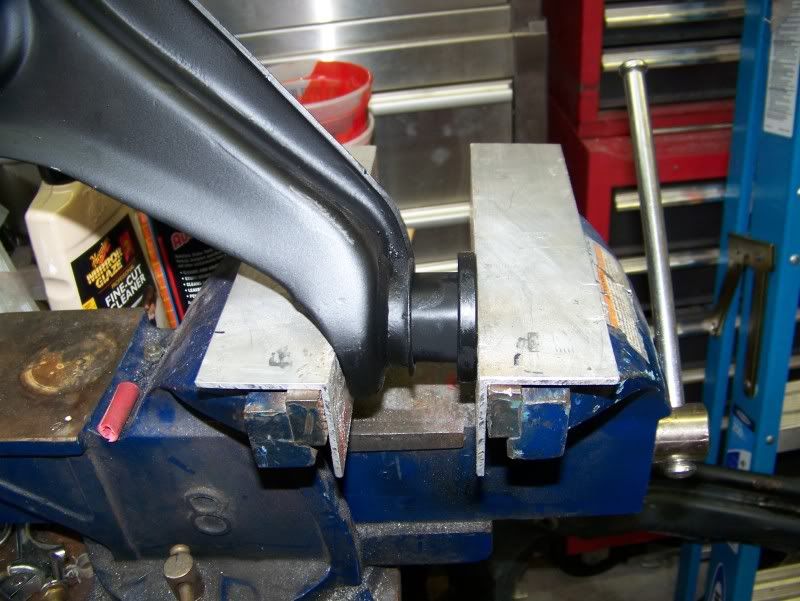
They were still very tight getting them in and the stainless bushing wasn't any easier. They actually reamed a bit of the delrin off while being pressed in. I hope I have enough weight and suspension to be able to move these stiff arms. :wink: I imagine they will break in and loosen up some.
Finished subframe with new delrin bushings and solid mounts ready for install.
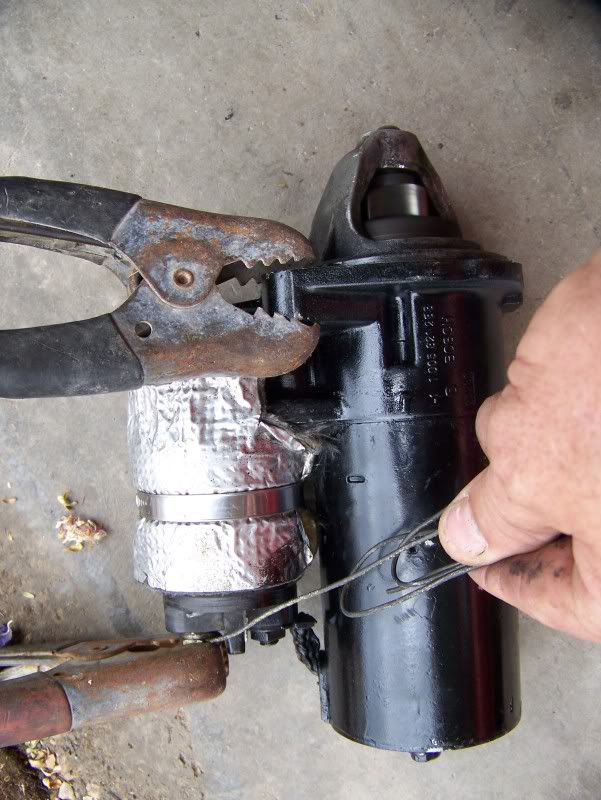
Tested the small style starter motor that I had laying around....Thanks Darin. I cleaned it up, but decided that I ought to at least see if it worked and sounded decent before going to the trouble of installation.
Re: Her Mars Red 83 Urq ...Engine in the bay!!
Posted: Sat Aug 13, 2011 3:59 pm
by Audilard
Man, I gave a lot of stuff away. Glad it's being used but now that I'm back in the game....