Page 1 of 1

Building a 4.2 for my C4 project...

Posted: Sun Jun 19, 2011 11:22 am
by islingtonaudi
Image

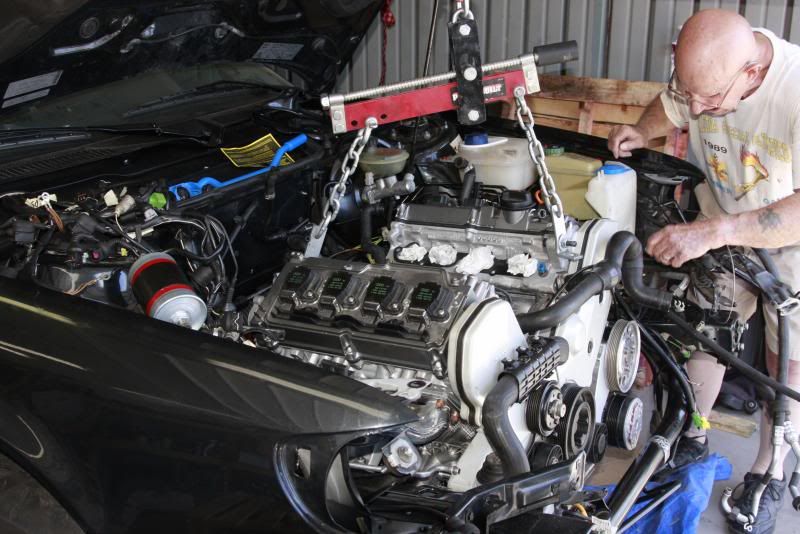
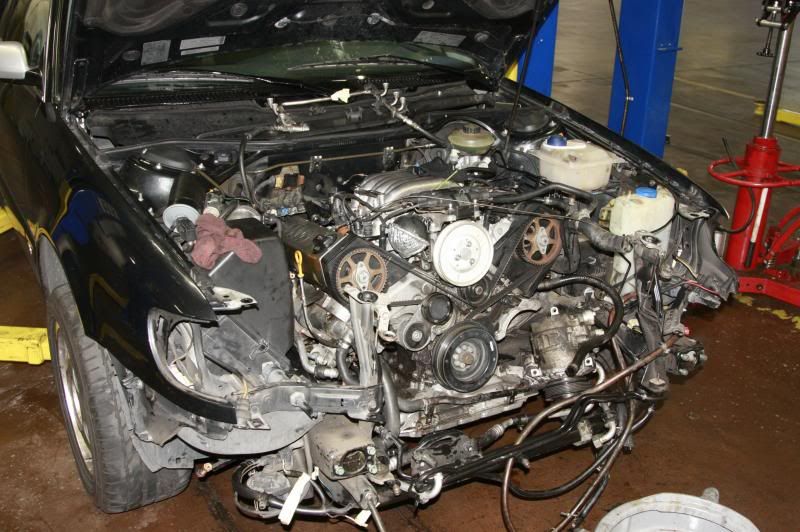
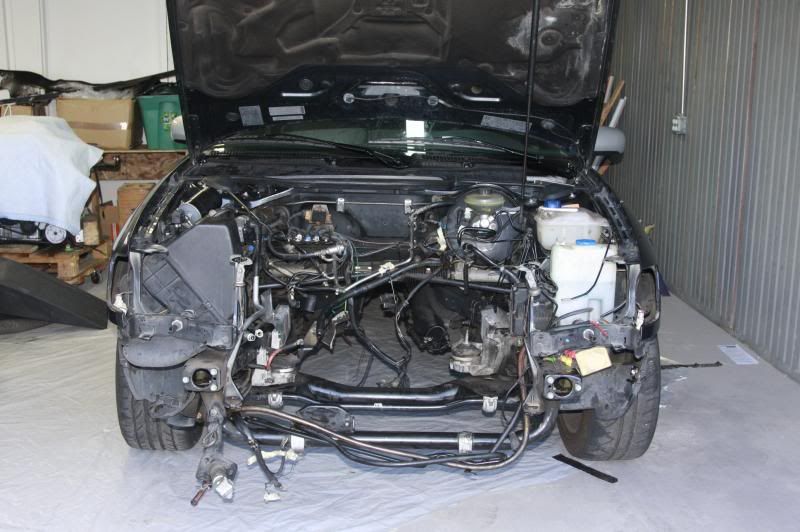
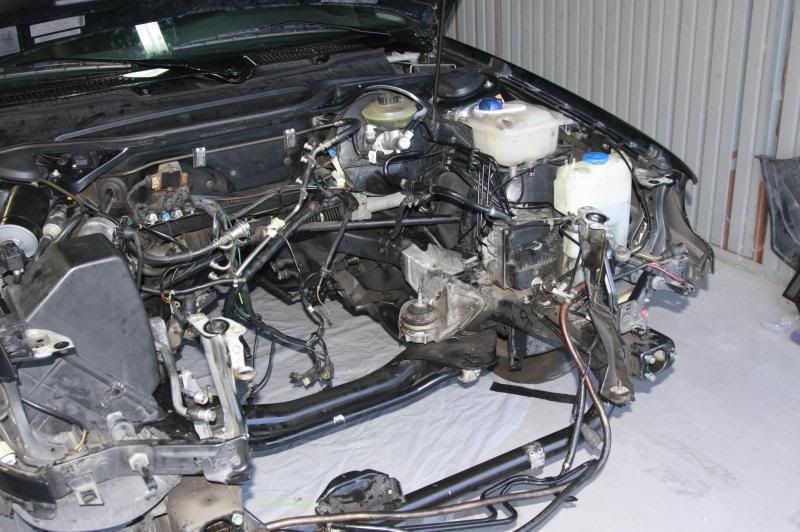
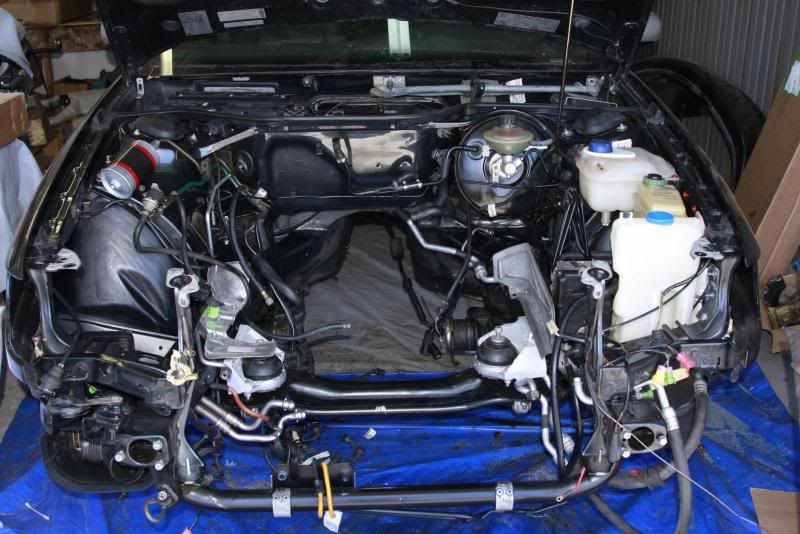
I've been planning on an engine swap in my '97 C4 A6Q Avant for a while now and hopefully this will be a useful build thread for the V8 guys out there. In a perfect world I'd just import an S6 Plus from Europe since it has what I want: my '97 Avant with a V8 and a 6-speed. Since that's very difficult to do (though not impossible, one does exist Stateside) I decided I wanted to build my own version of this amazing engine and car...

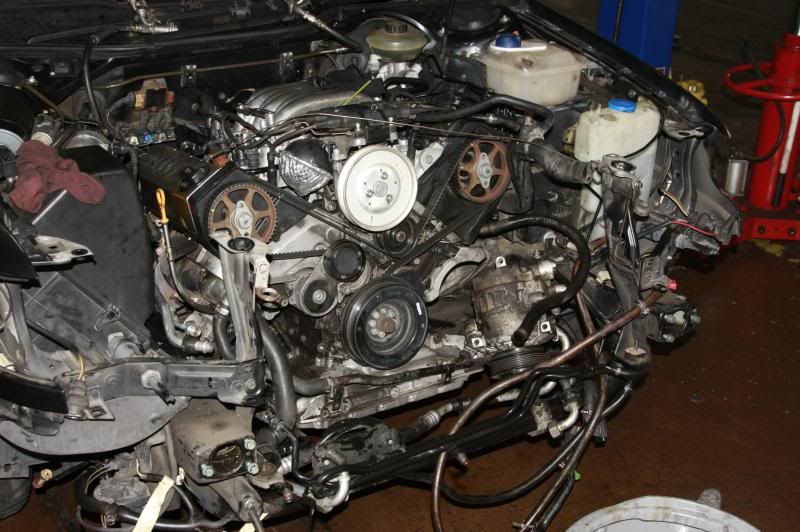
If one wants to drop an Audi V8 into their C4 there are 2 differing options. The first (and easier way IMO) is the early V8s (3.6 PT and 4.2 ABH) from the V8Q models available here from '90-'94. The other option is finding a readily available ABZ A8 engine, lots of them to be had for reasonable $. The problem with the V8Q engine is that it is an earlier design with distributor ignition and looks dated in my opinion with that gargantuan air box. An advantage though is that the ABH block has mounting provisions for the C4 chassis and fits snugly in the C4 engine compartment with chassis-specific hoses and other parts available used in Germany. There's even a C4-specific engine harness and ECU.

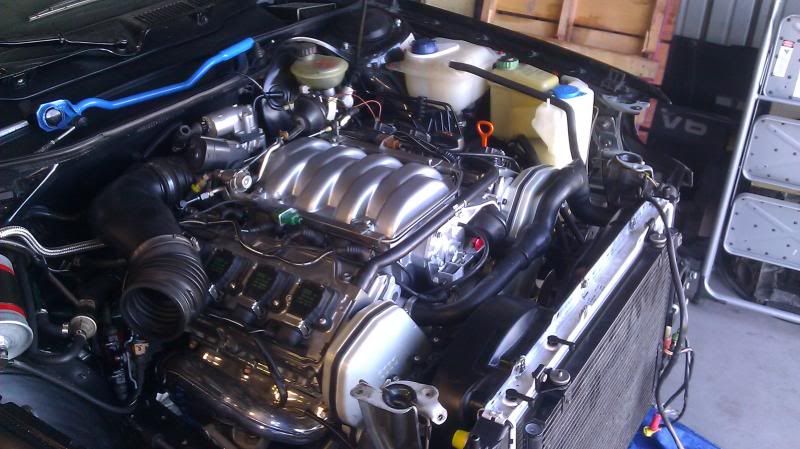
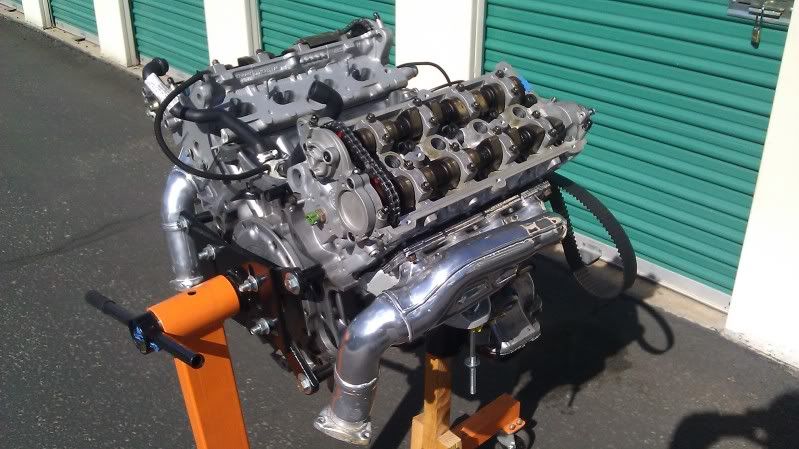
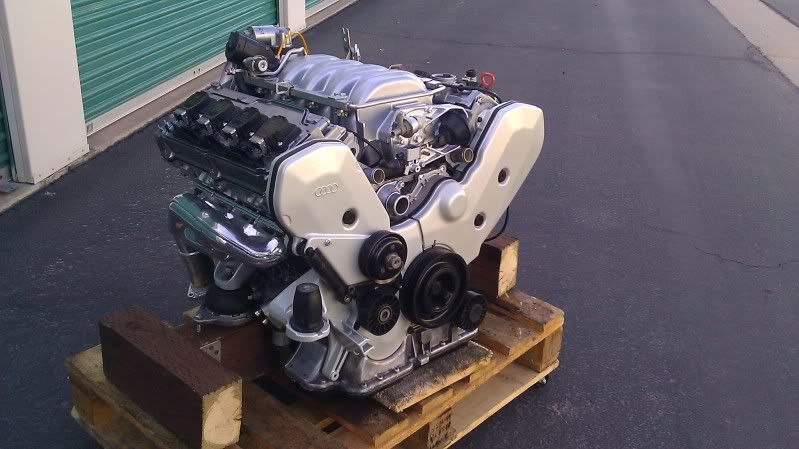
The ABZ is to me a far cleaner design, has coil-pack ignition and some other upgrades but was never designed to fit into the C4 chassis so the oiling system and mounts won't easily adapt to the C4. Some folks have adapted it to B3/B4/B5 chassis cars and it's definitely an affordable option but some engineering is in order to make it work. What is interesting/useful is that the ABZ heads will swap over to the ABH block straight away, exactly what Audi did with the S6 Plus though on the intake side they did tweak the cams and installed solid-lifters. So my engine will be just that: an early 4.2 block with the A8/S8 style coil-pack heads, manifolds, air intake and fuel delivery. Though I won't have the hot cams or higher compression 11.6:1 pistons of the Plus (instead staying with the ABH's 10.6:1 compression ratio) I still feel it will develop close to if not more than the ABZ's 300 h.p. With VEMS I might be able to see closer to 325 h.p. which rivals the S6 Plus.

In the past year I've been compiling parts for this swap, usually A8-specific things such as the air box, MAF, intake manifold, etc. Those parts can be shockingly cheap on Ebay these days: how does $25 for a throttle body or $40 for an intake manifold sound? With these first and second-generation V8s being nearly 20 years old they are quite reasonable to purchase, especially the more readily available ABZ. For my project I knew I needed to find both an ABH and ABZ engine to get the ball rolling....

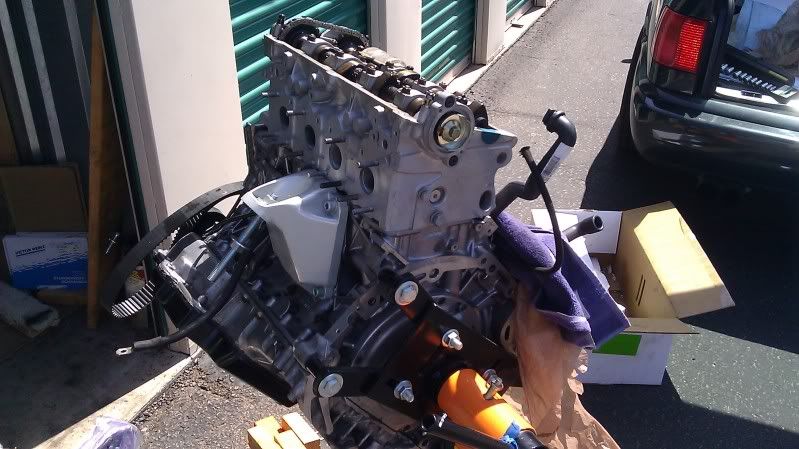
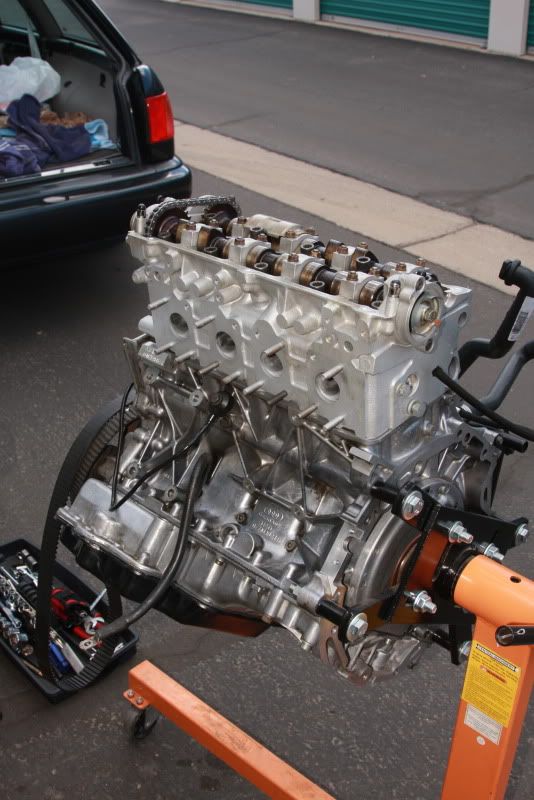
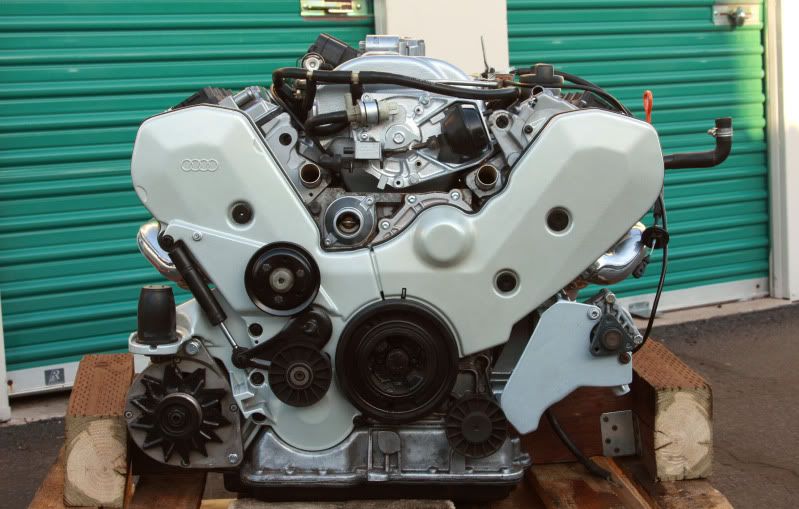
In March the Audi gods came to the rescue when a used ABH long-block popped up on Audifans. It was in need of a valve job since the guides were shot but had a recent timing belt service and a bunch of new parts. Turns out the owner was a really legit guy who provided me dealer receipts for close to $3k in service before he finally just bought a lower mileage engine with hot cams and swapped out this one. I got it for around $500 shipped and it arrived in Phoenix a bit oily but very promising....

Image

Image

Image

Image

Image

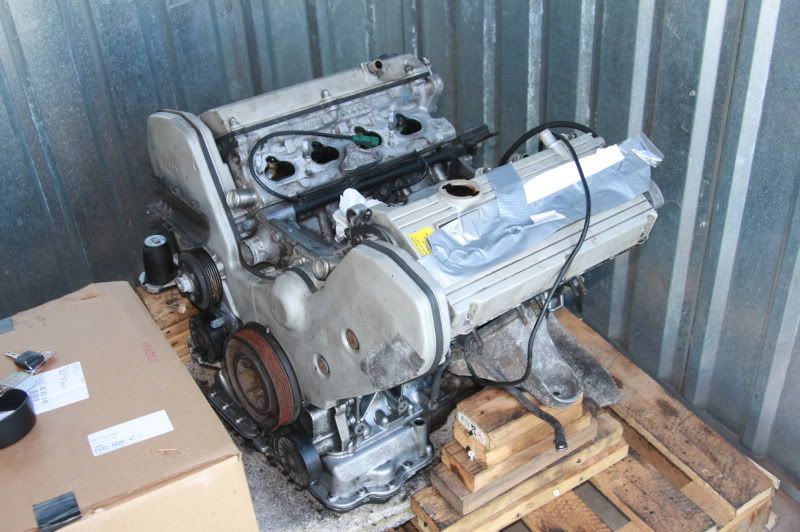
I've rented a cheap storage locker in Phoenix and this has become my de-facto shop while I get this project going. Since I'm in no major rush I decided to approach this project in two parts:

Part 1: Tear-down of the ABH and ABZ engines/ prep ABH bottom end for heads/ clean-up of parts for reassembly.

Part 2: Rebuild ABZ heads/final assembly of the new engine for install.

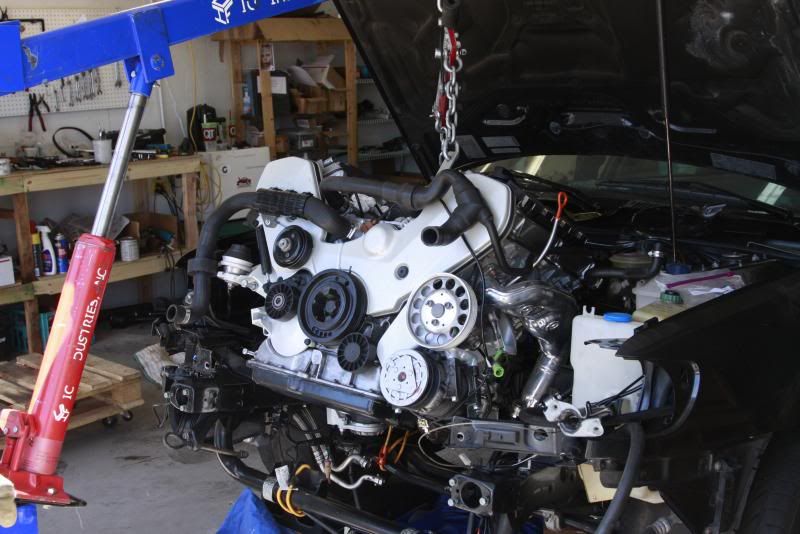
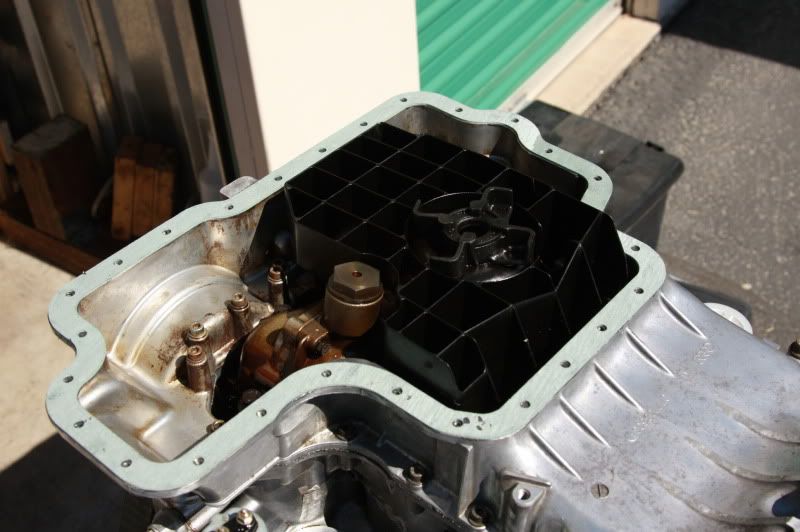
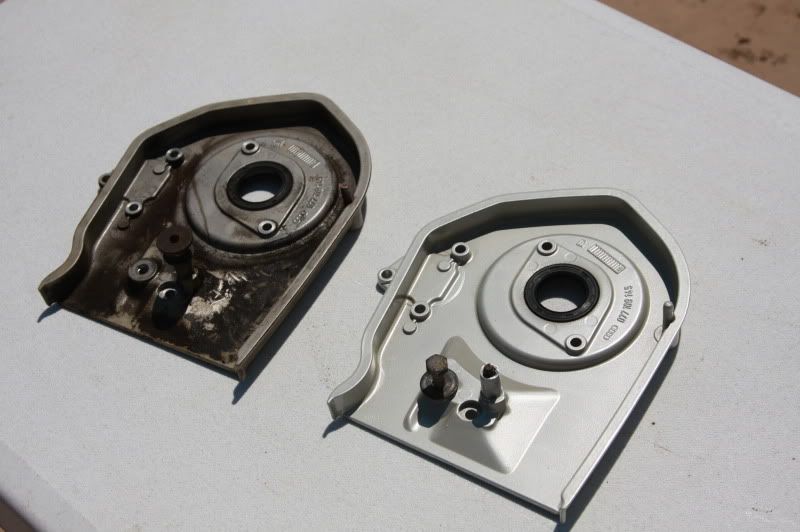
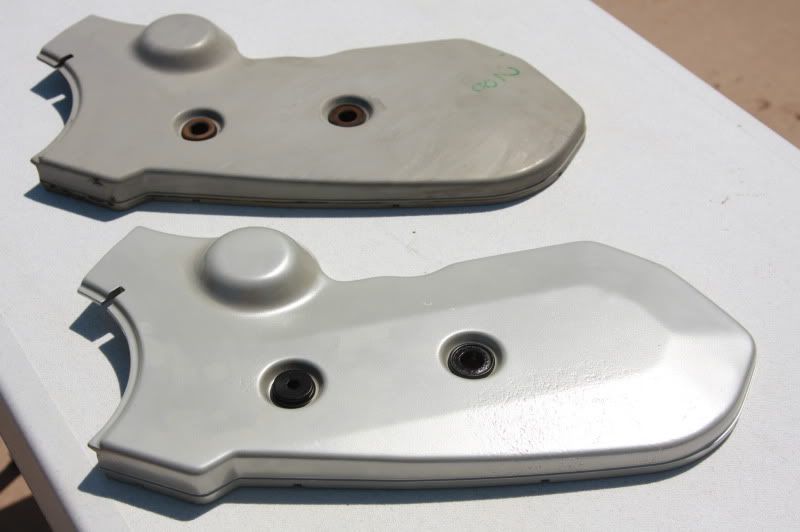
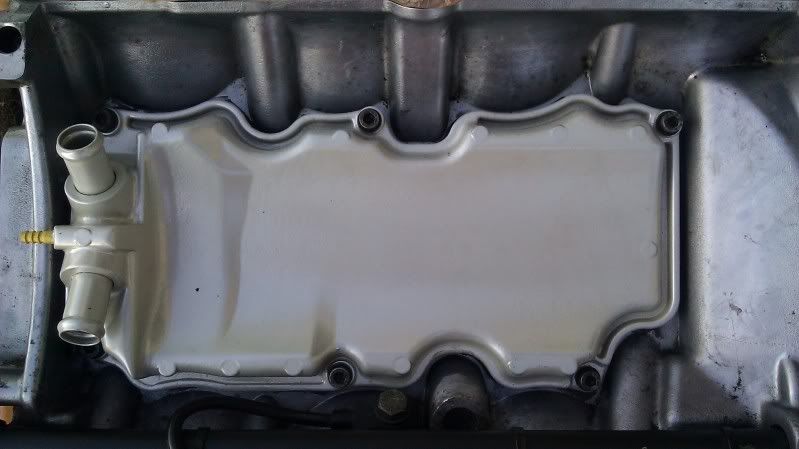
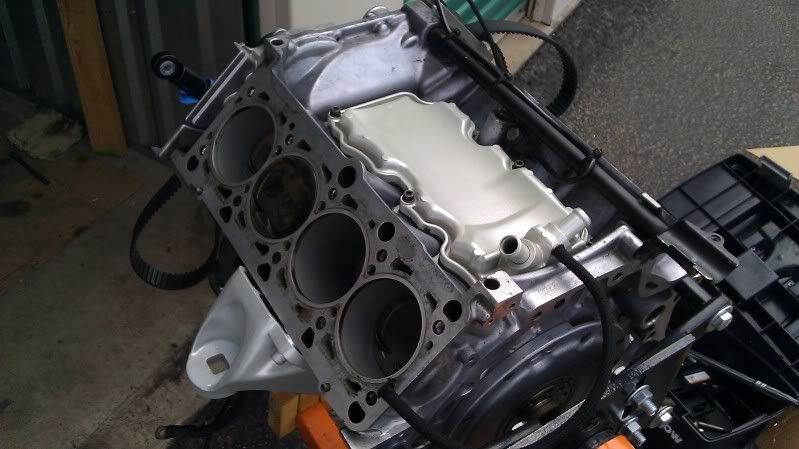
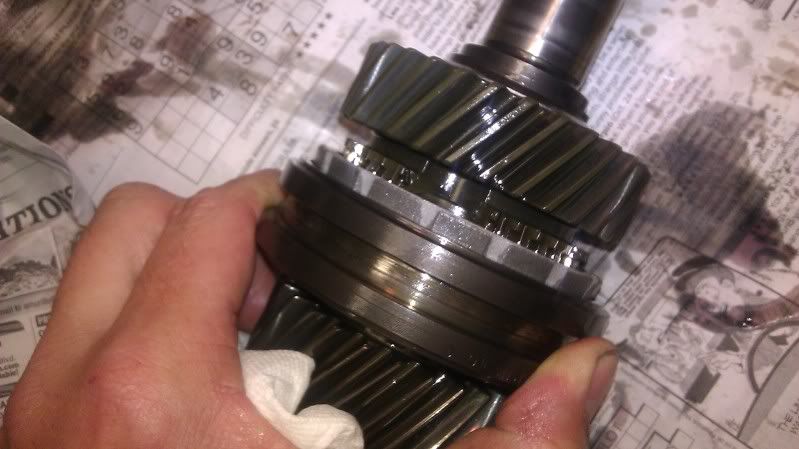
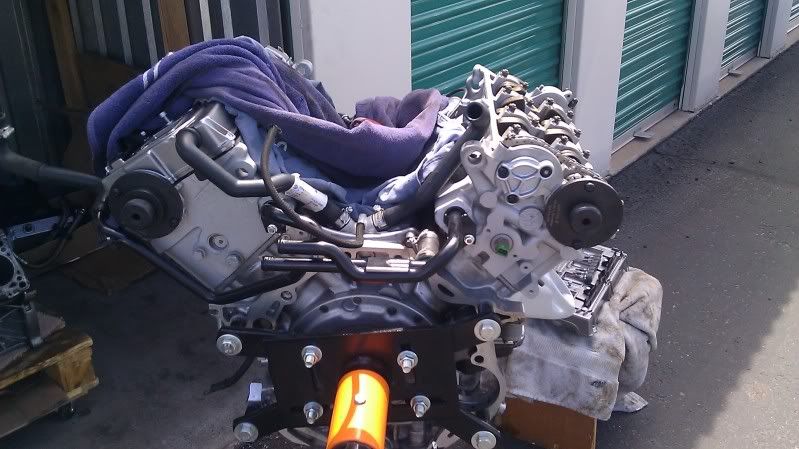
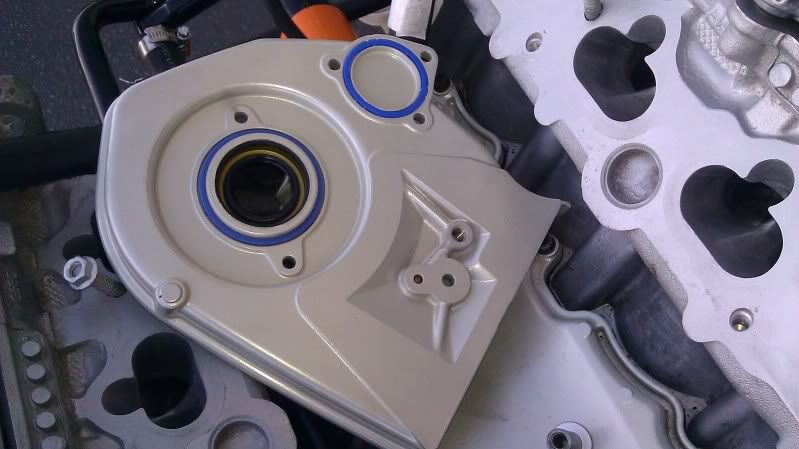
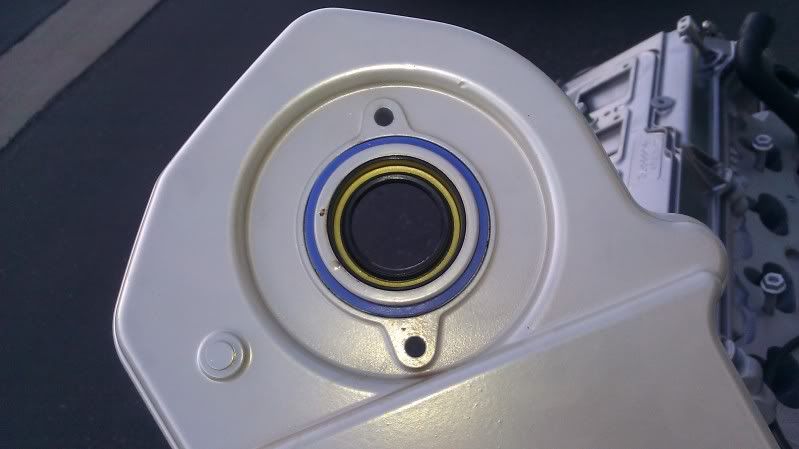
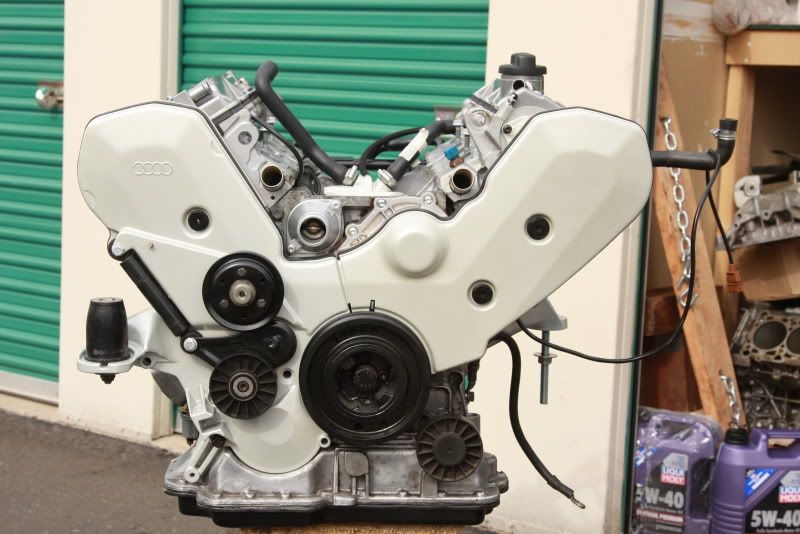
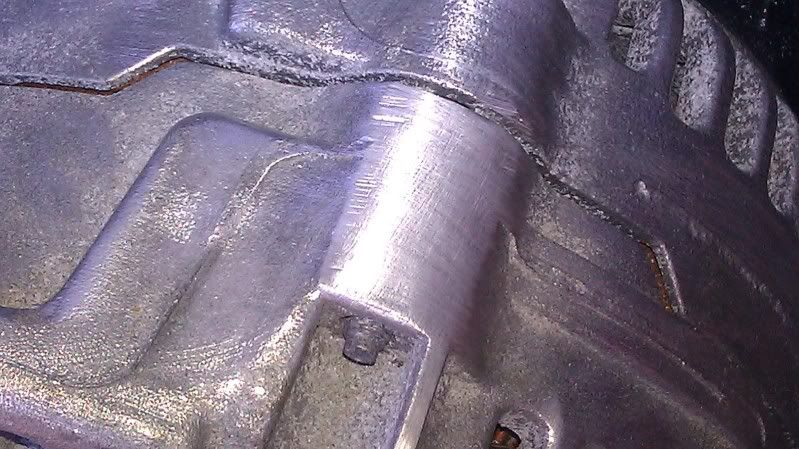
The ABH was in need of a good cleaning and while I had the time I also needed to swap out the upper oil pan to one from a manual transmission car (an S6 V8 in fact) since the bottom of the pan will interfere with the subframe on the C4. Here's a side-by-side comparison of the two pans:

Image

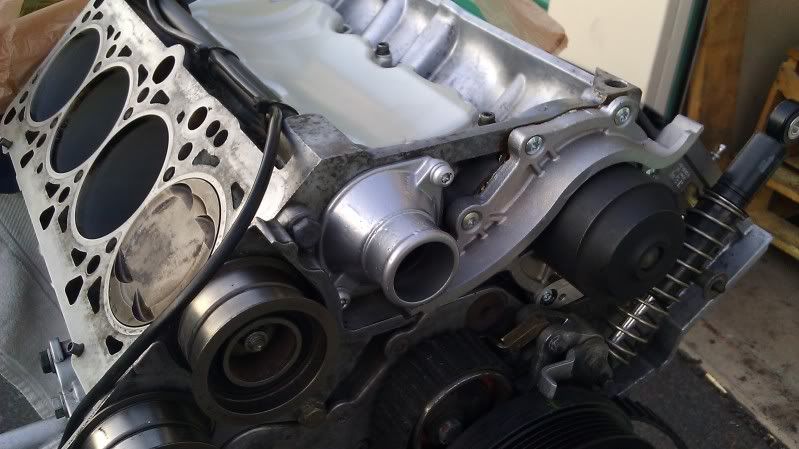
Installing the new pan on the block:

Image

Image

Image

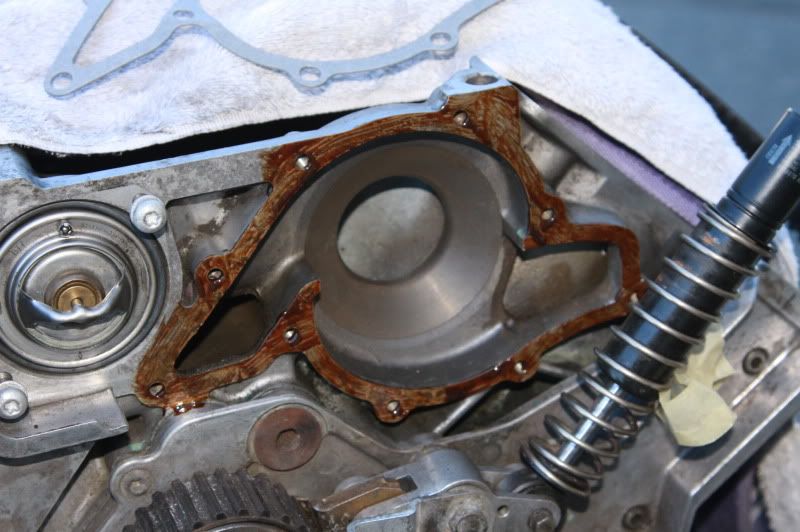
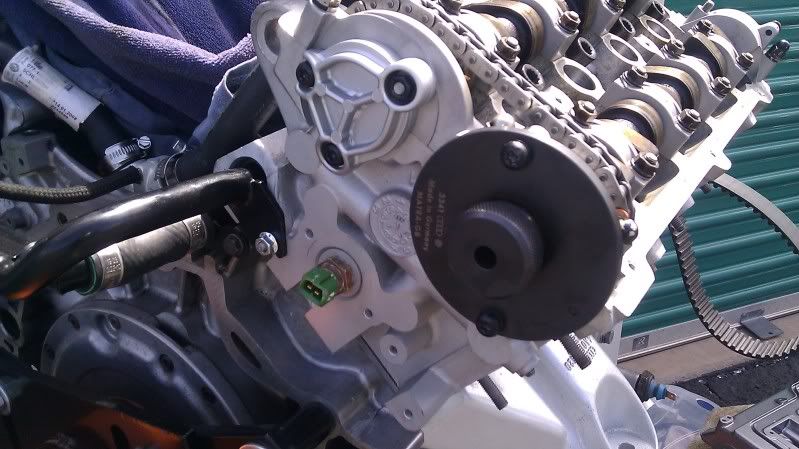
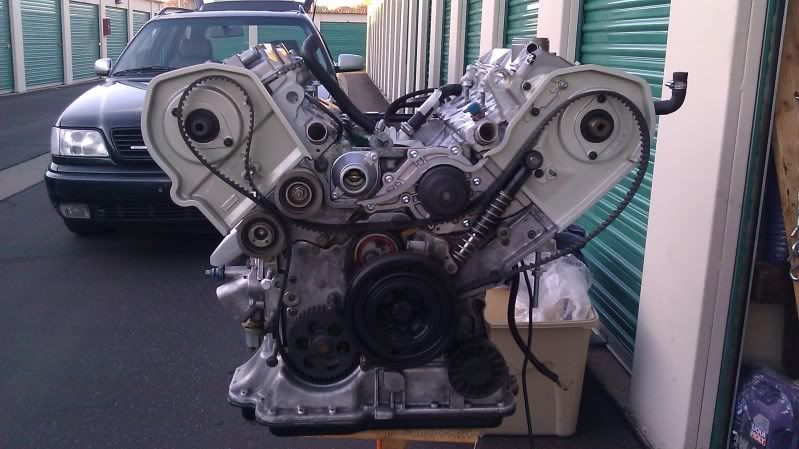
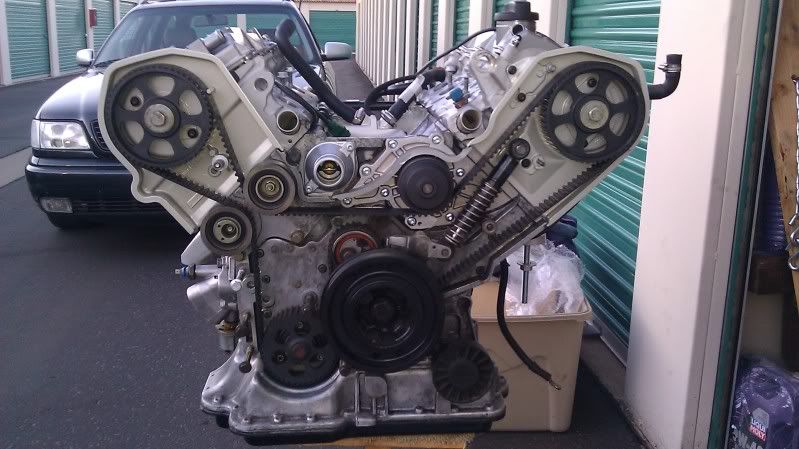
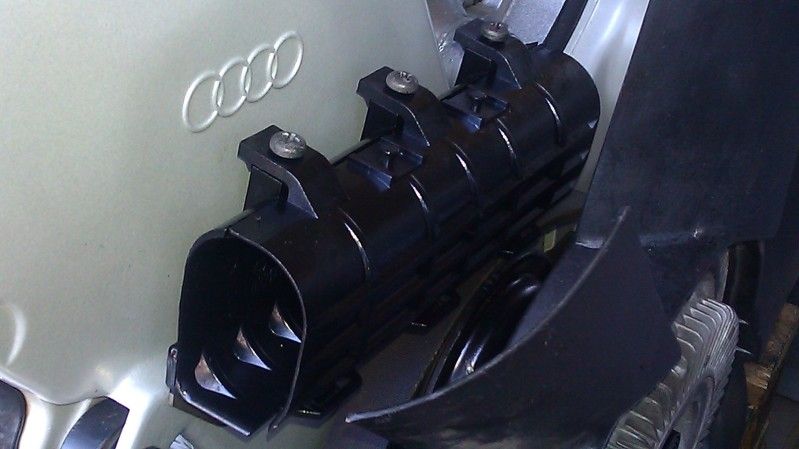
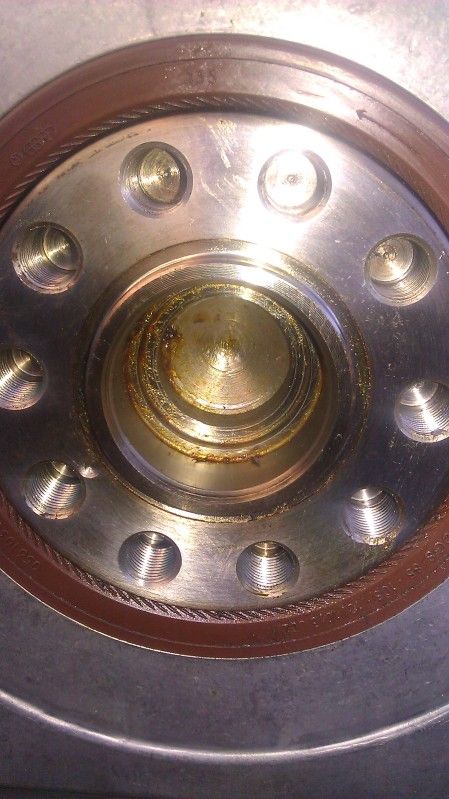
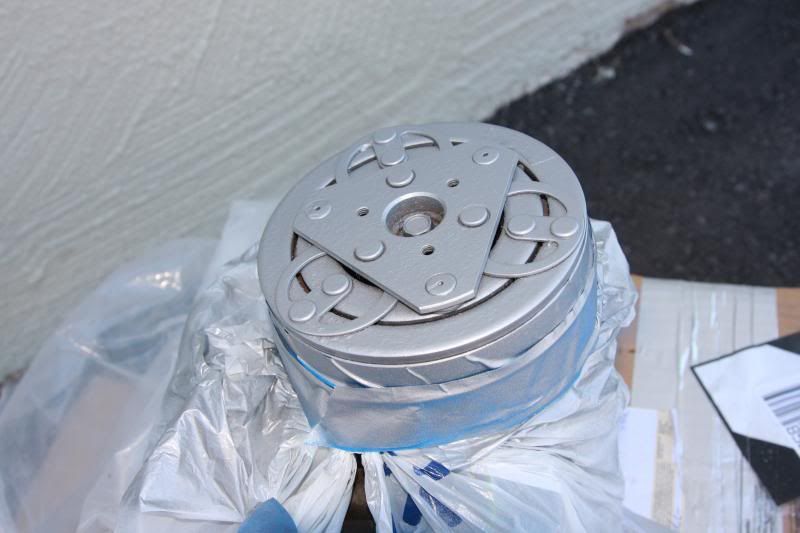
New HEPU water pump and fresh black paint for the harmonic balancer:

Image

Image


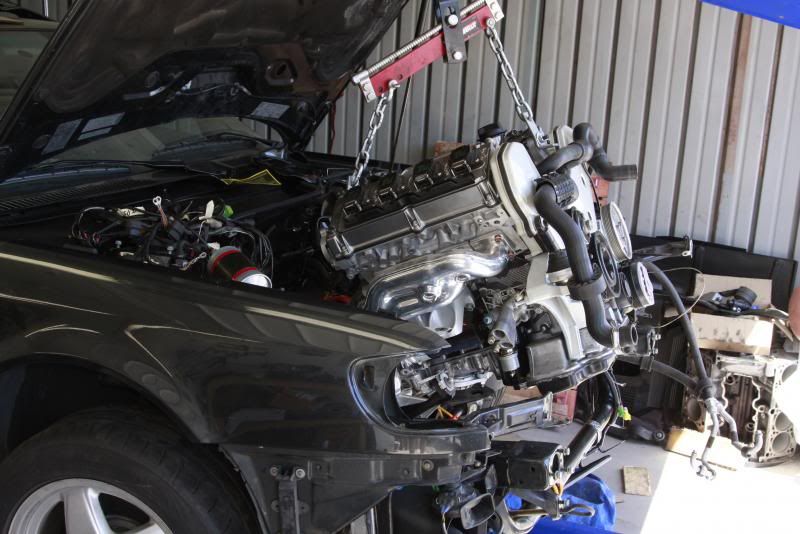
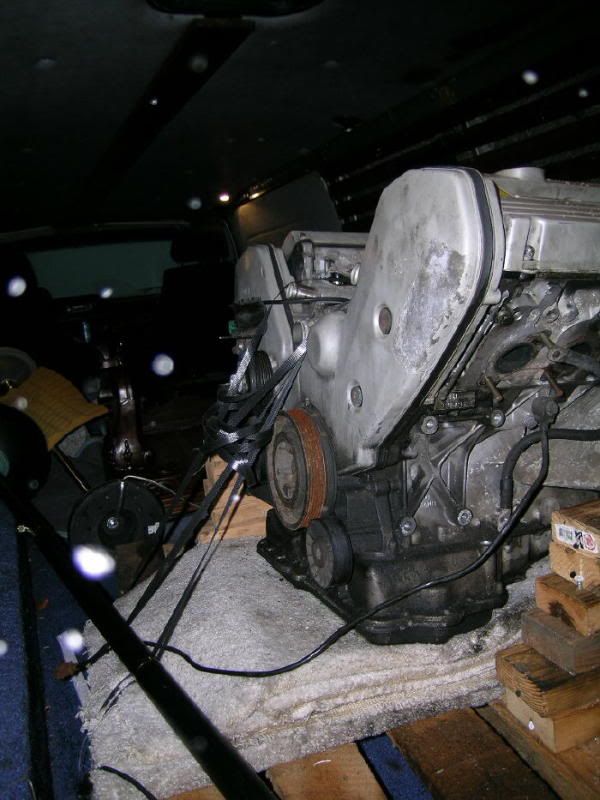
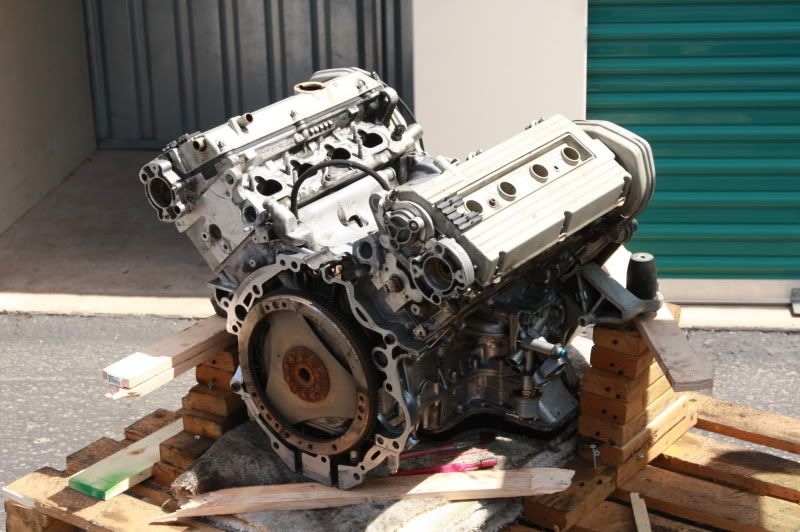
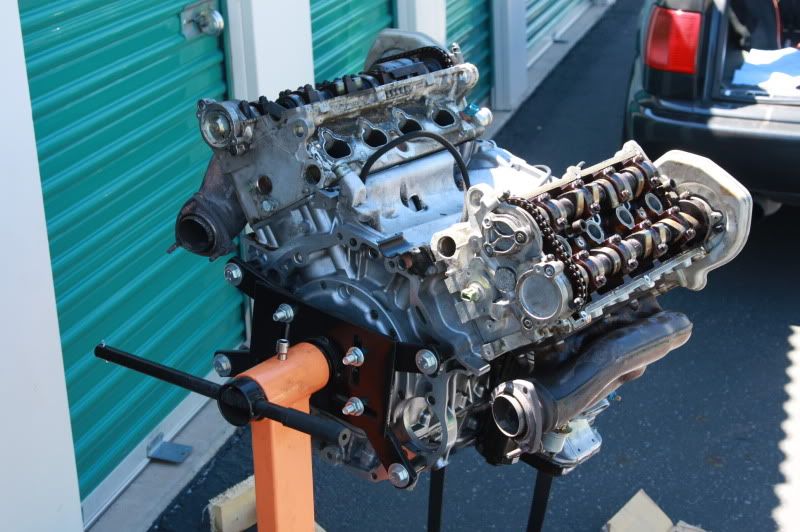
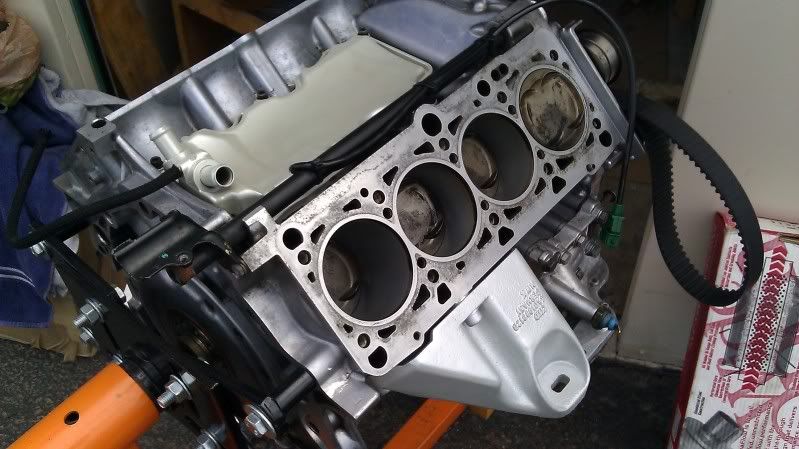
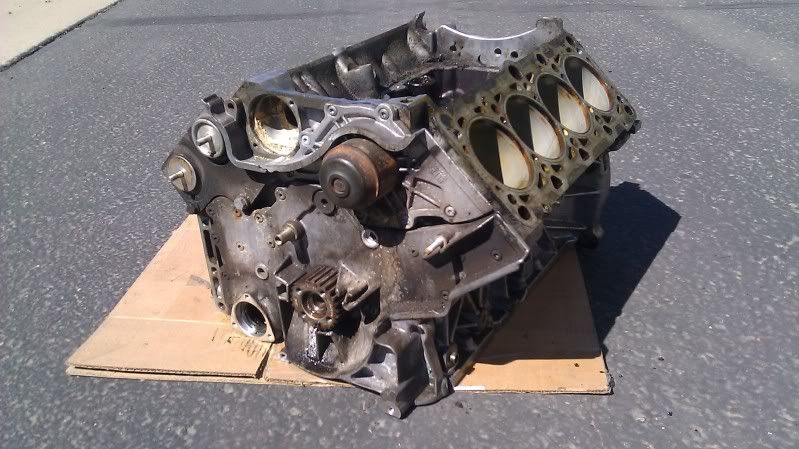
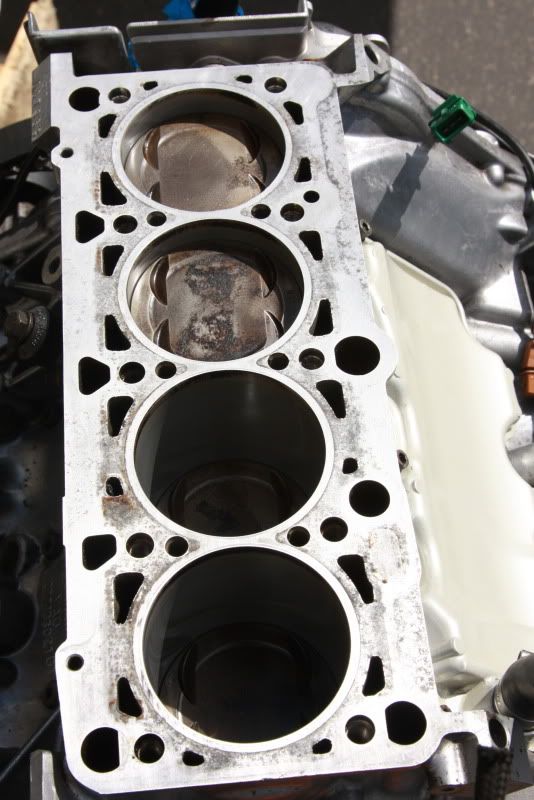
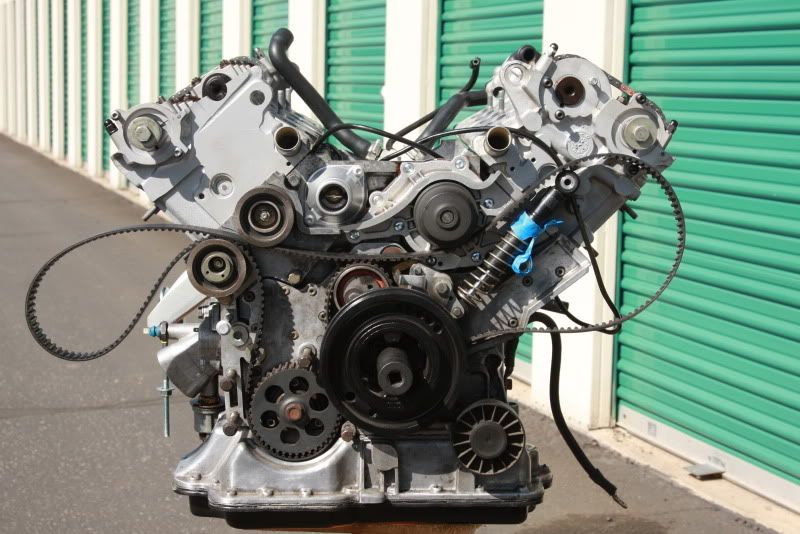
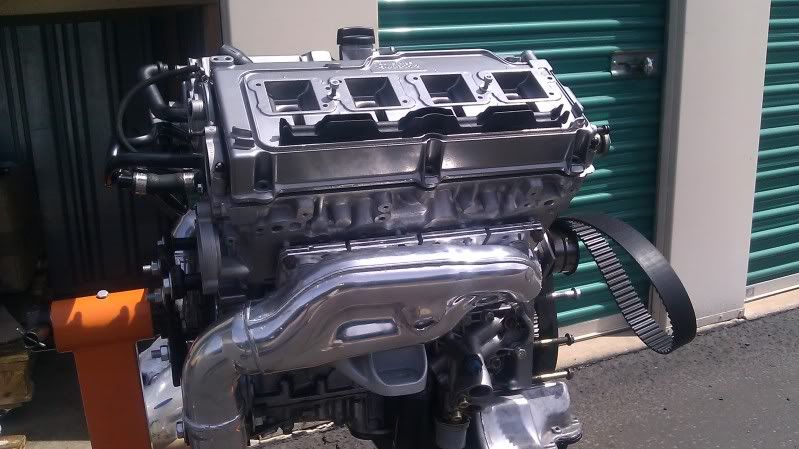
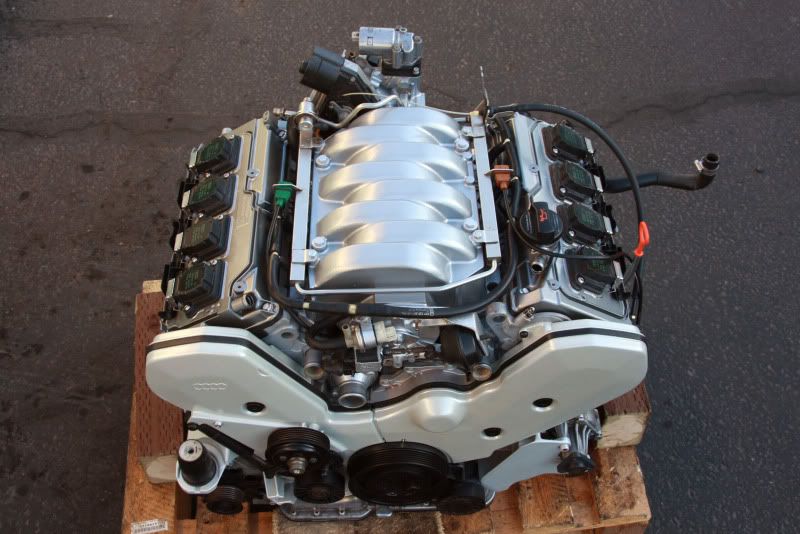
In May I located a good used ABZ engine so that will be the donor for the top-end parts. Just arrived in Phoenix from Florida and the tear-down commences...

Image

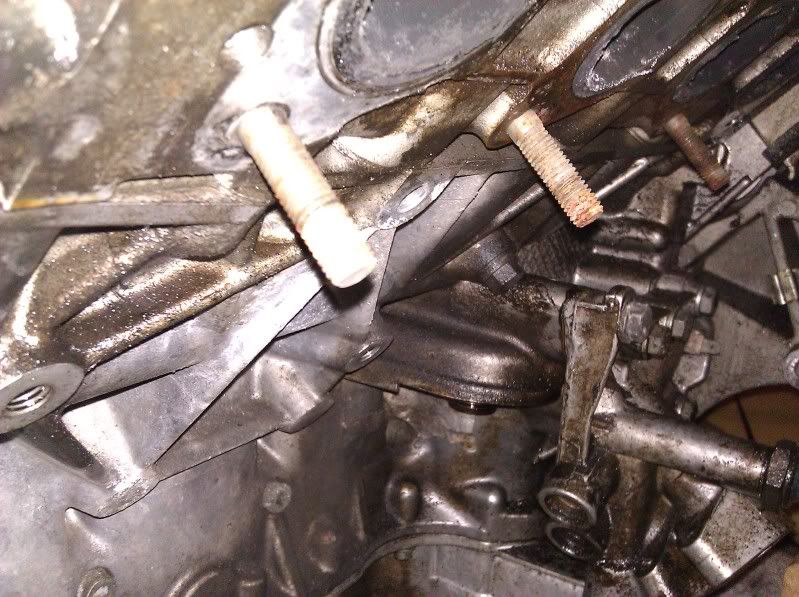
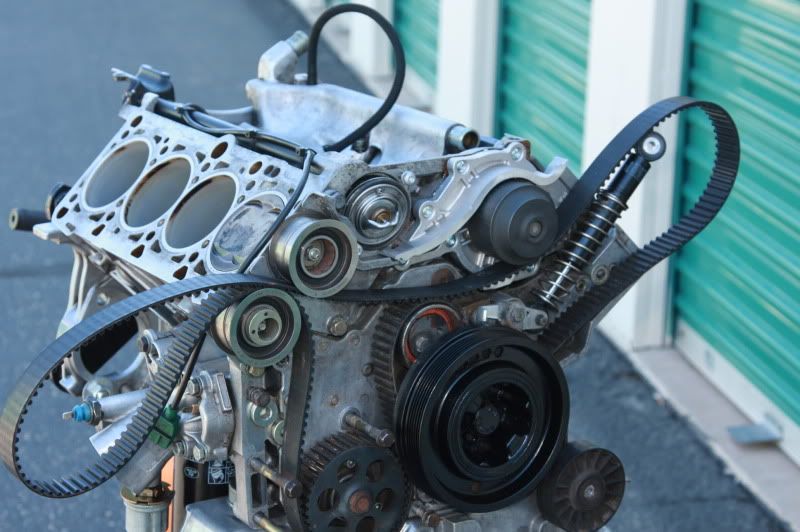
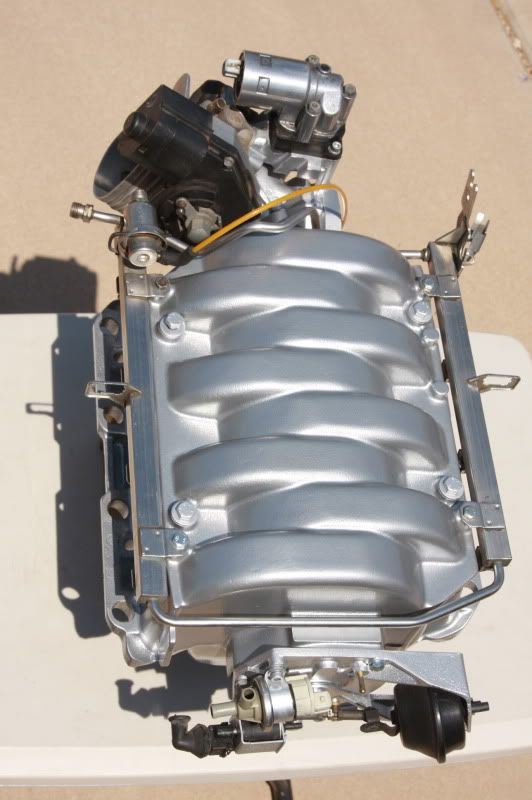
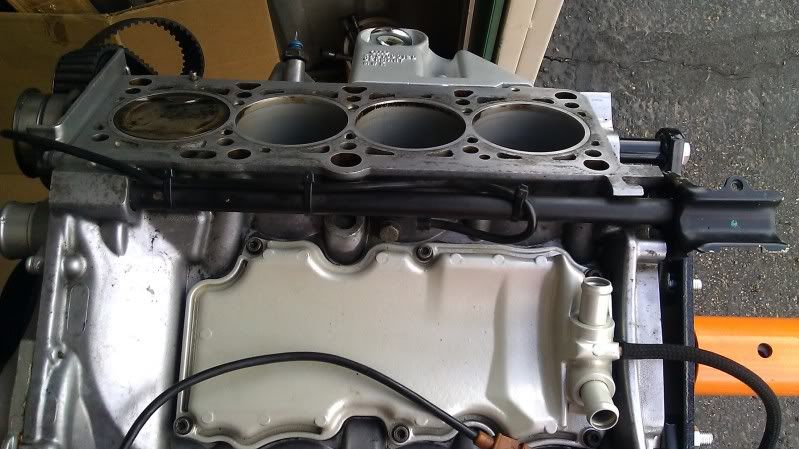
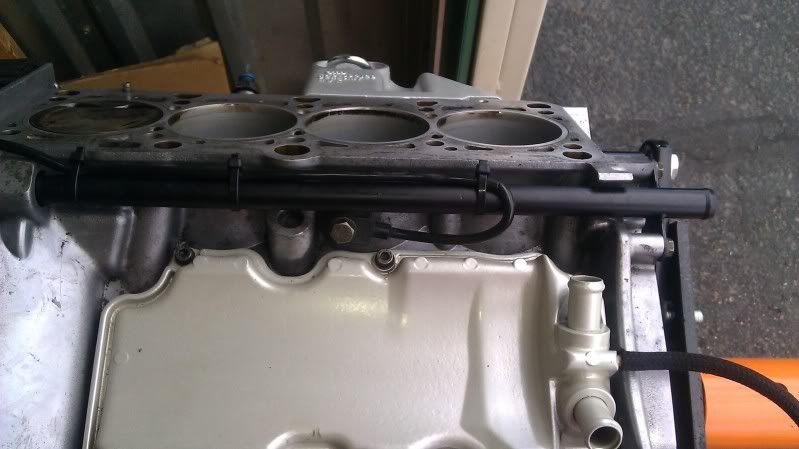
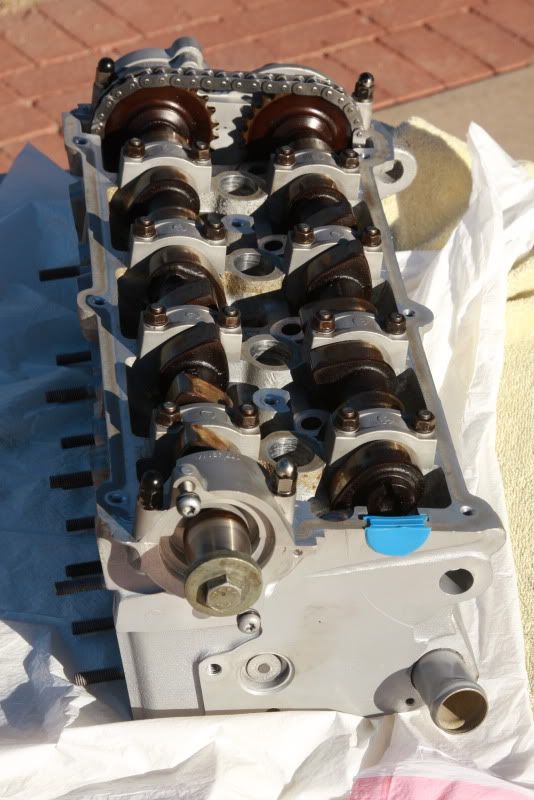
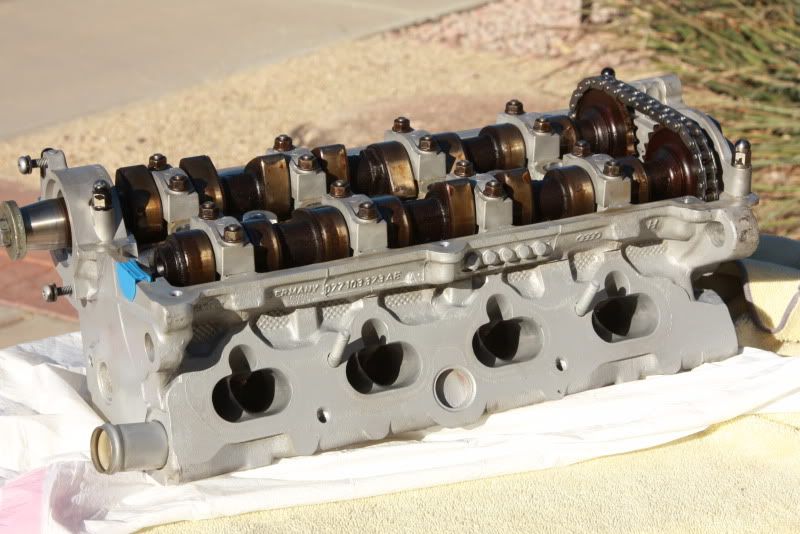
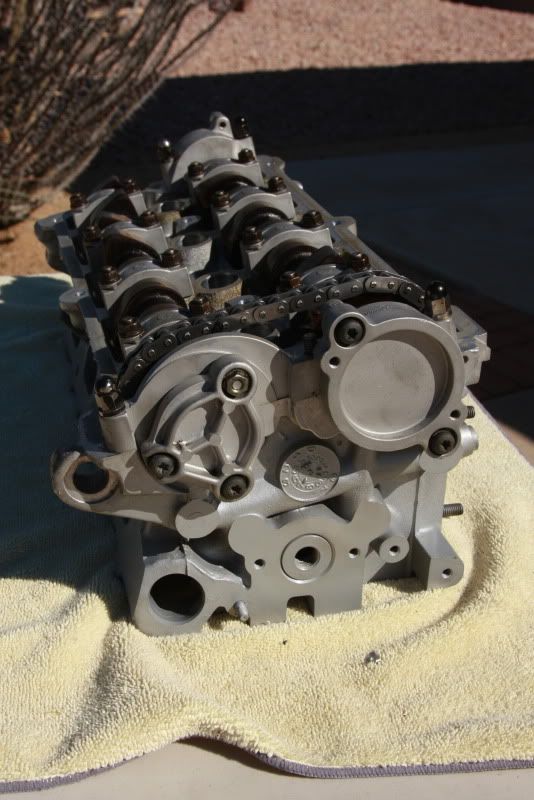
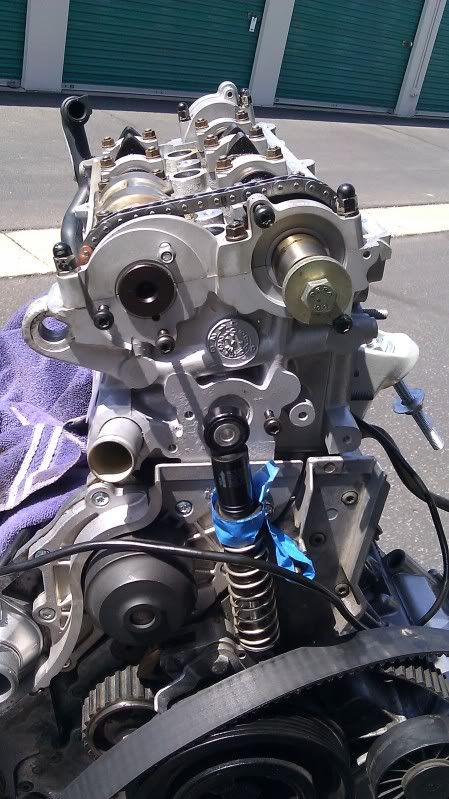
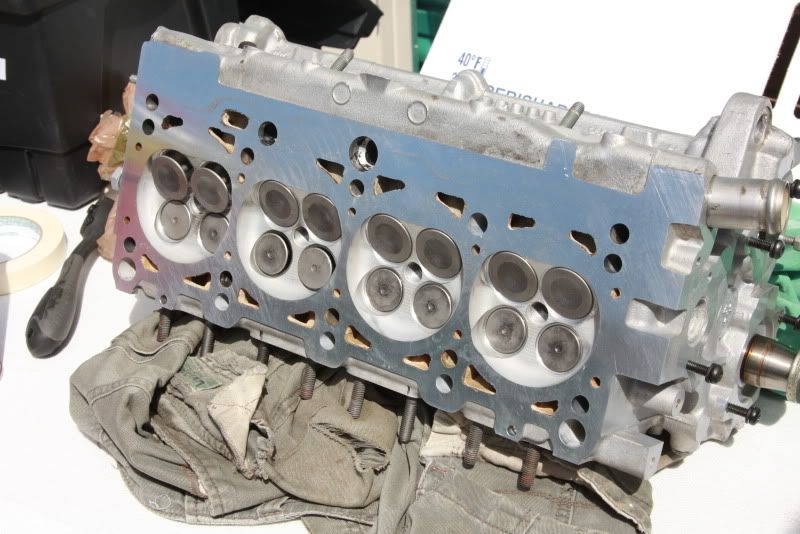
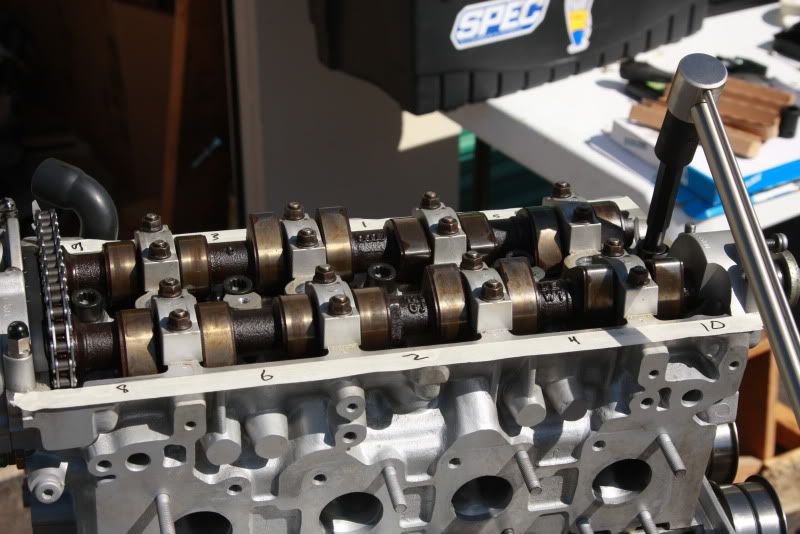
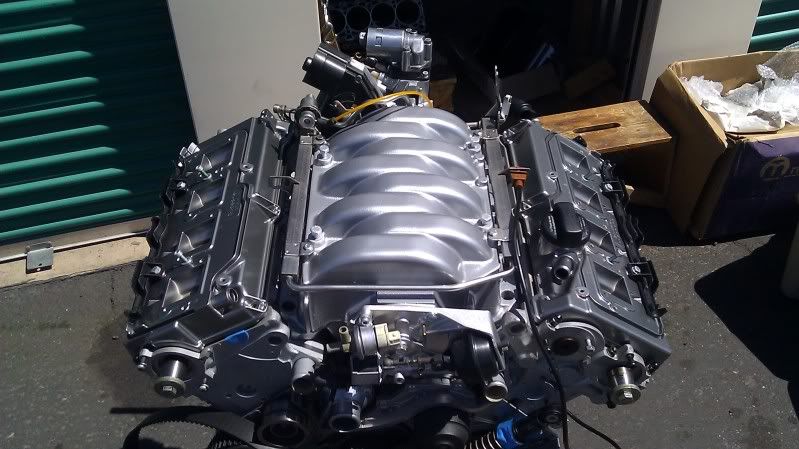
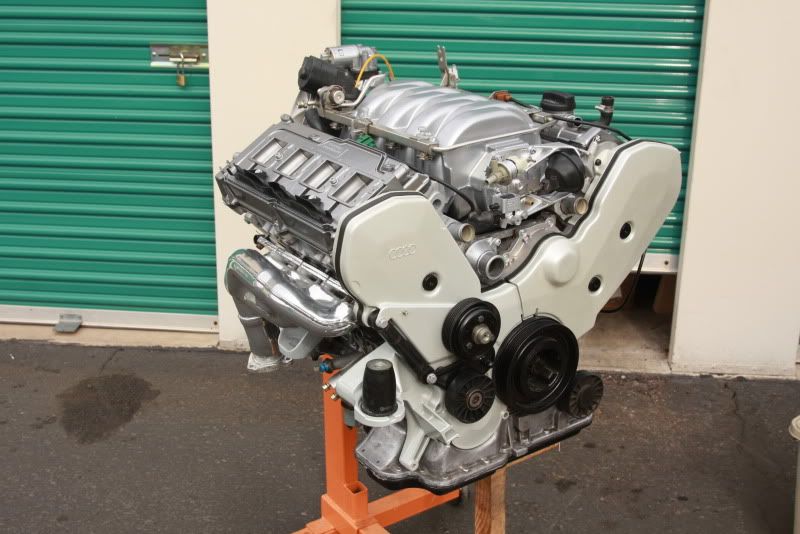
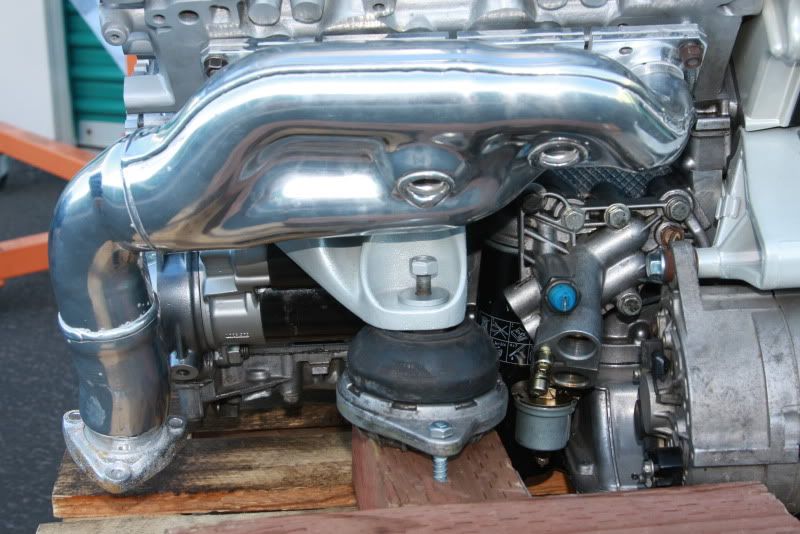
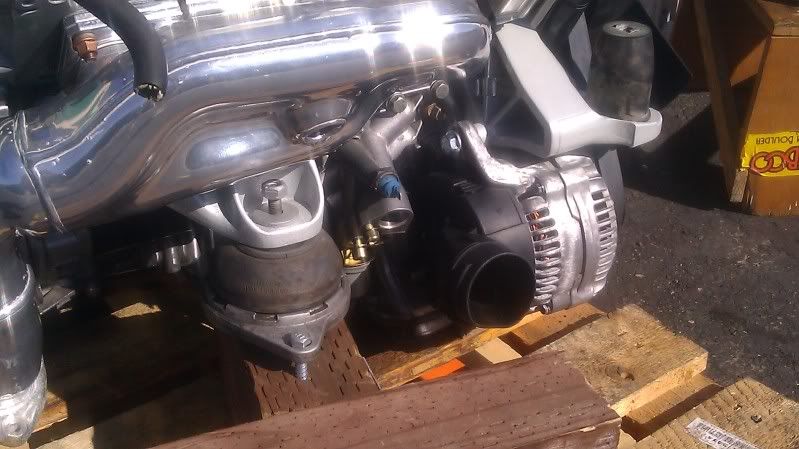
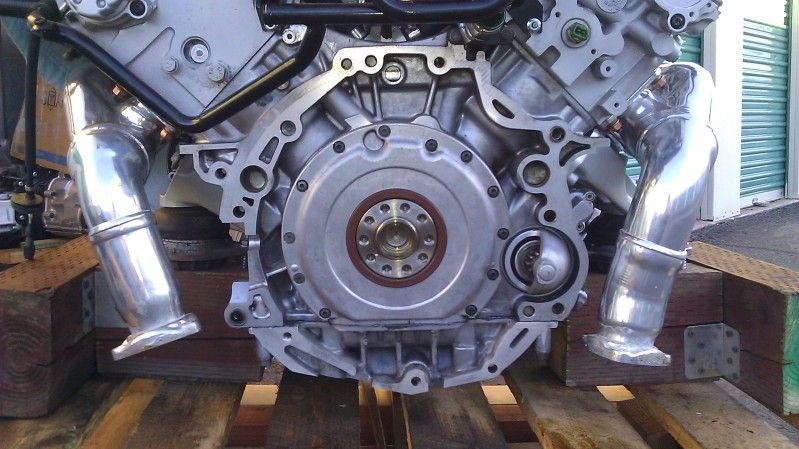
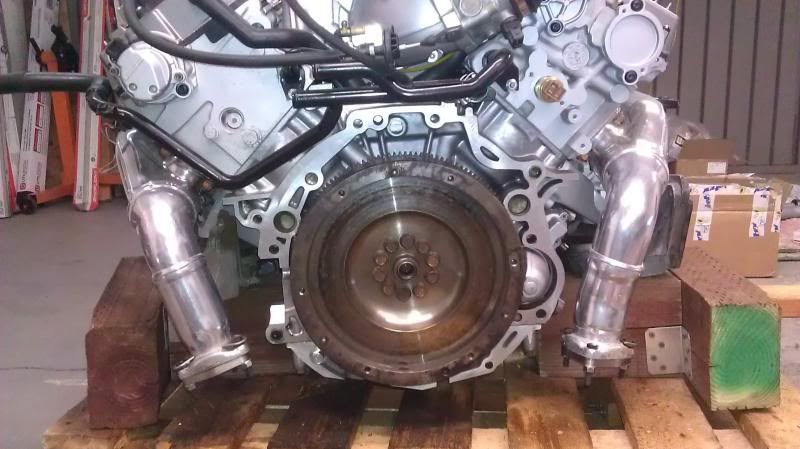
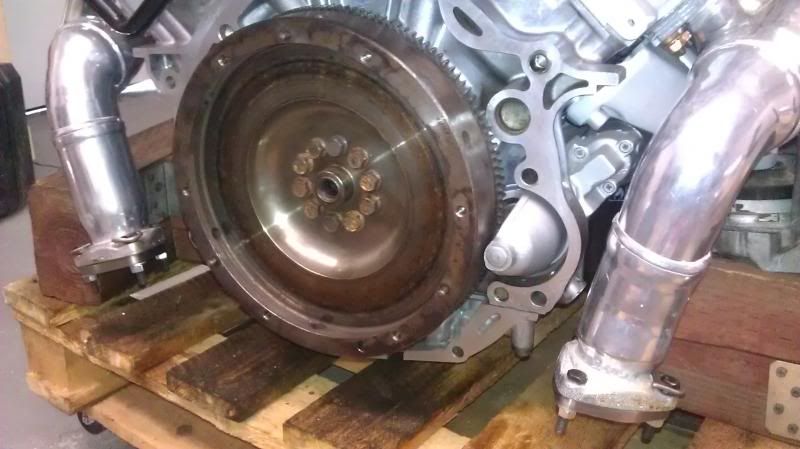
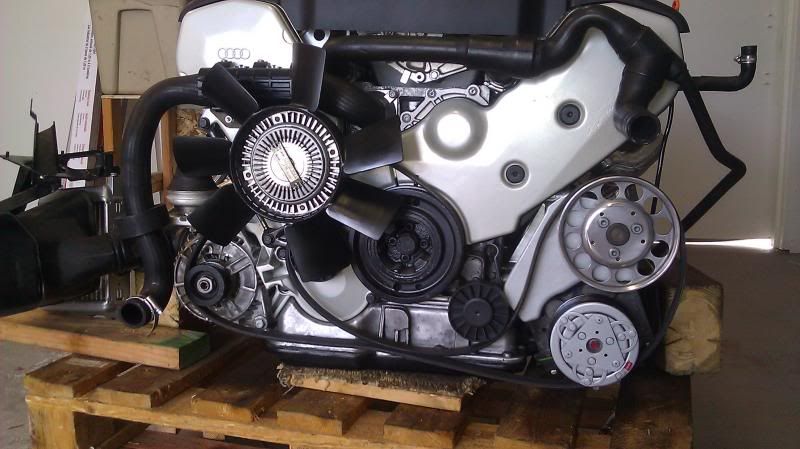
The coil-pack heads from the ABZ test-fit on the block:

Image

Image

Image

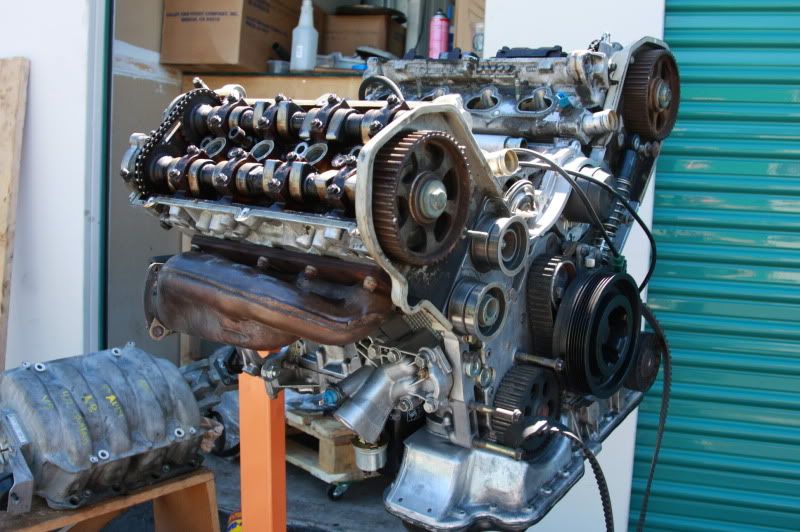
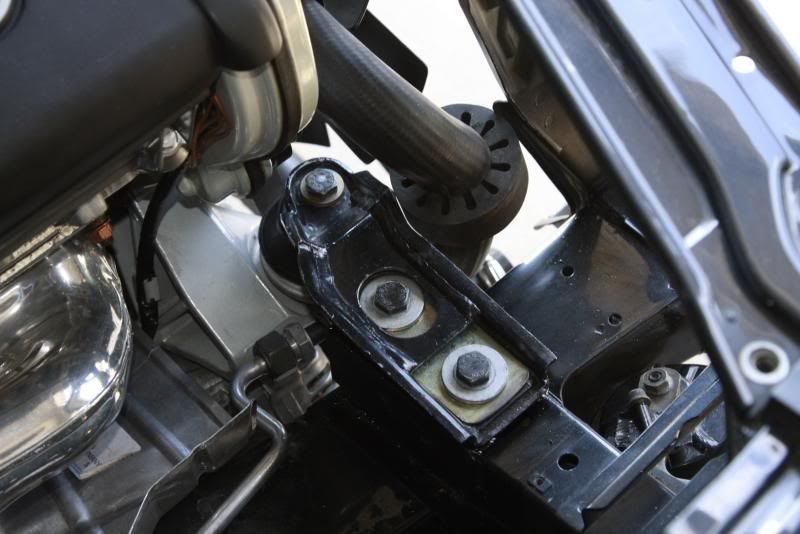
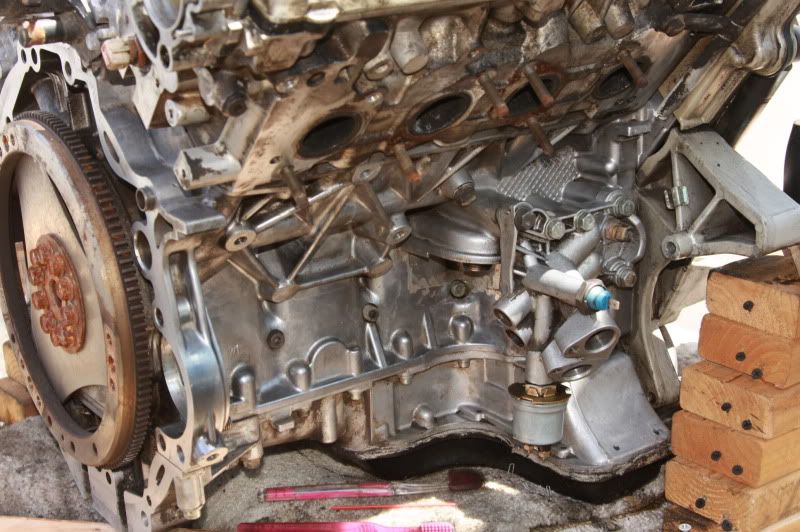
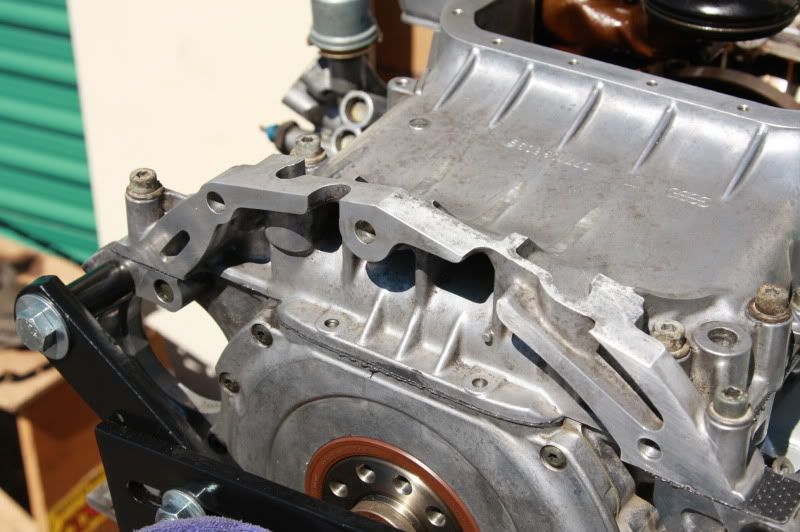
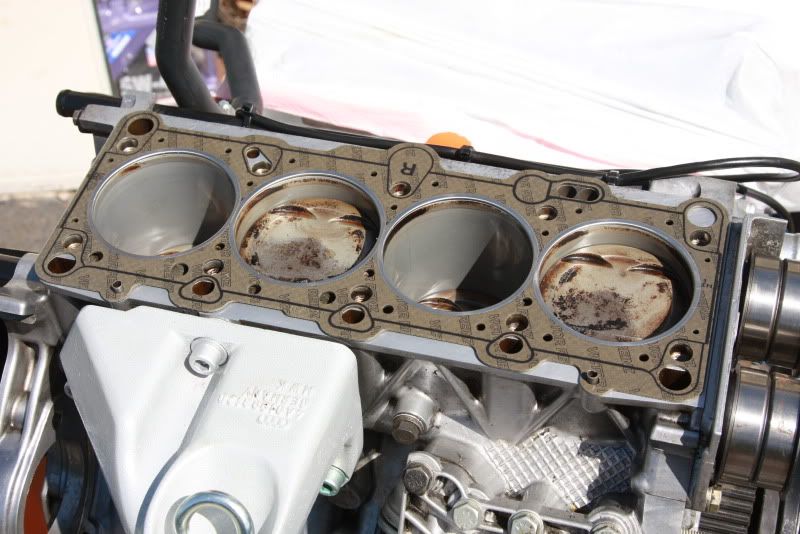
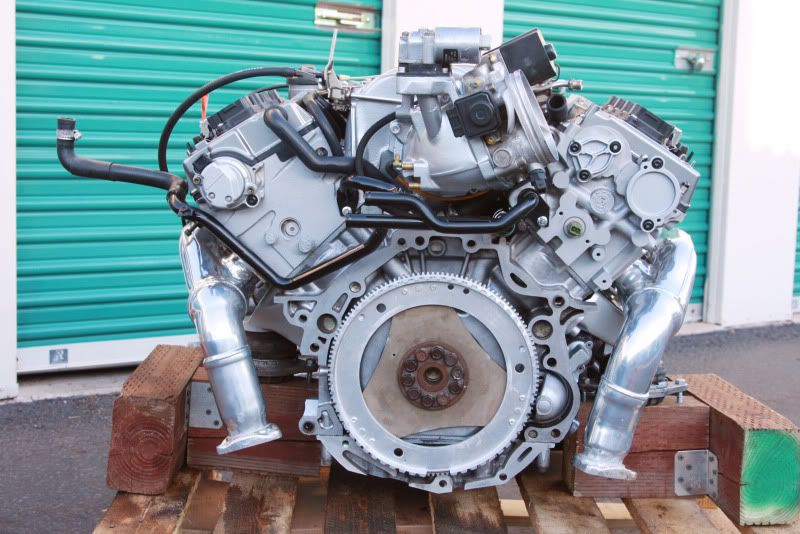
Plenty of room for the engine mounts it appears. Boy, this engine was dirty! Definitely the original timing belt and a bit of sludge in the engine, looks like I'll be scrapping the block but will investigate further. Nice to have all the misc. nuts and bolts, fuel rail, exhaust manifolds in one engine instead of having to source them individually. Lots of work to do, this will be a summer of bead-blasting and powder coating before the heads get rebuilt in the fall. Can't wait....

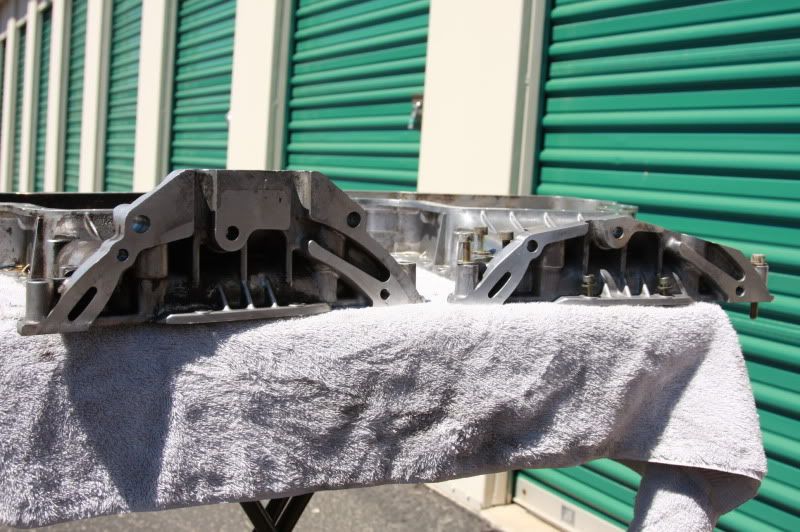
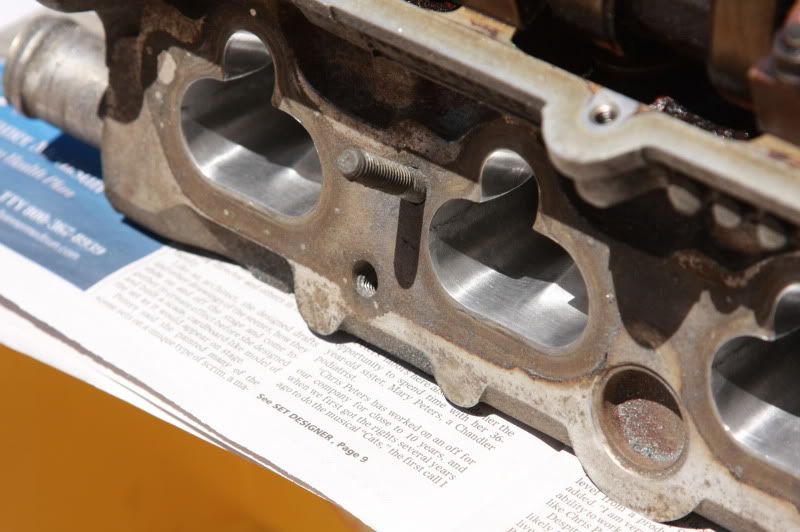
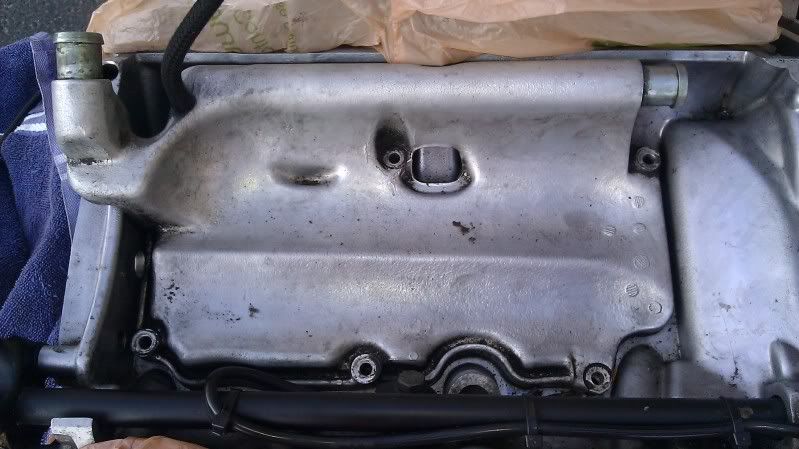
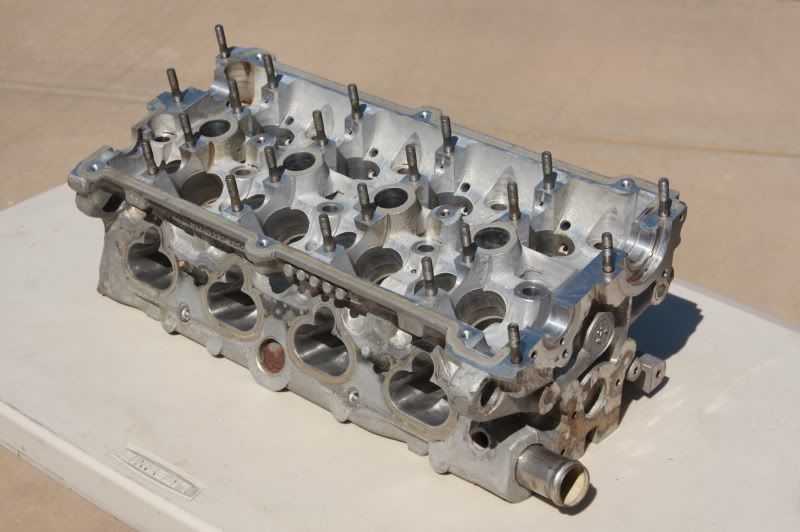
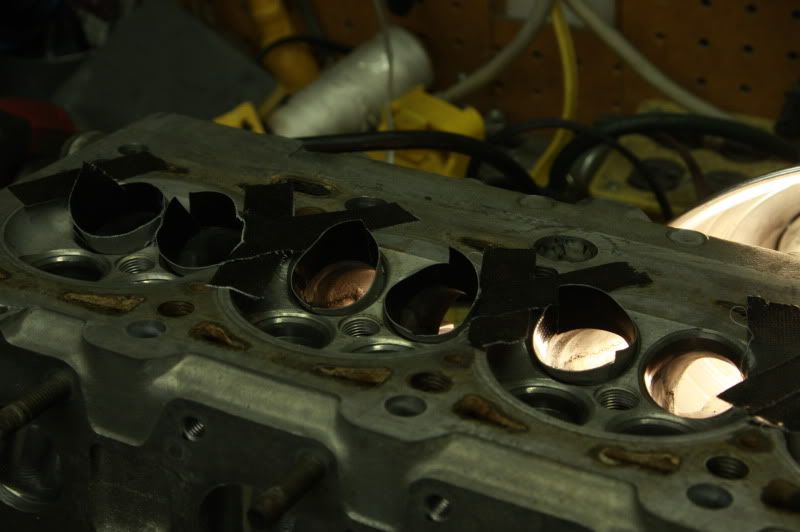
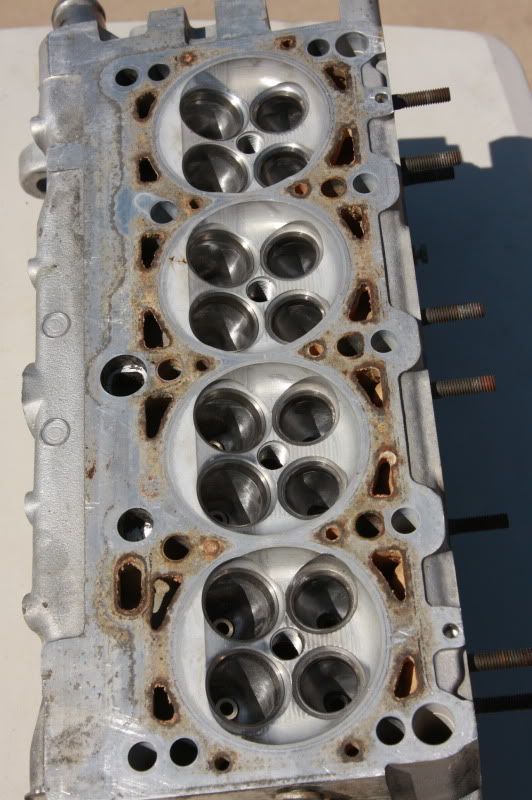
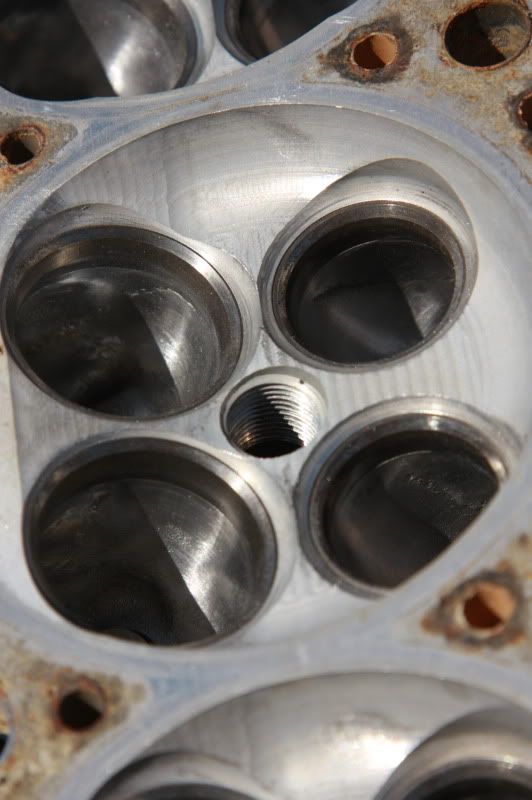
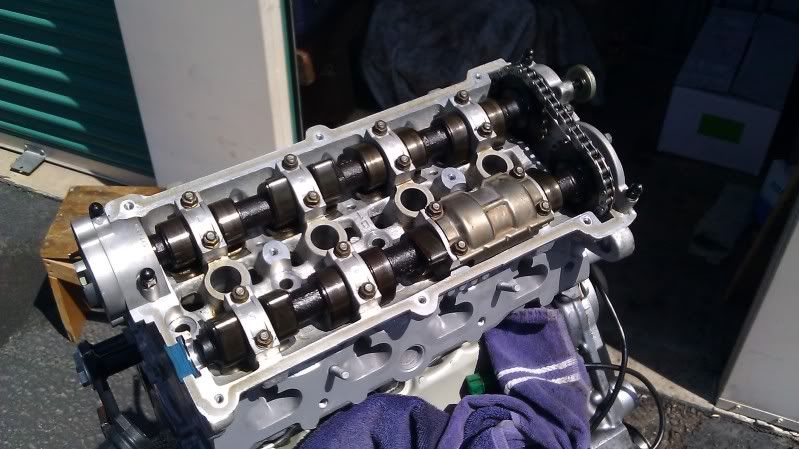
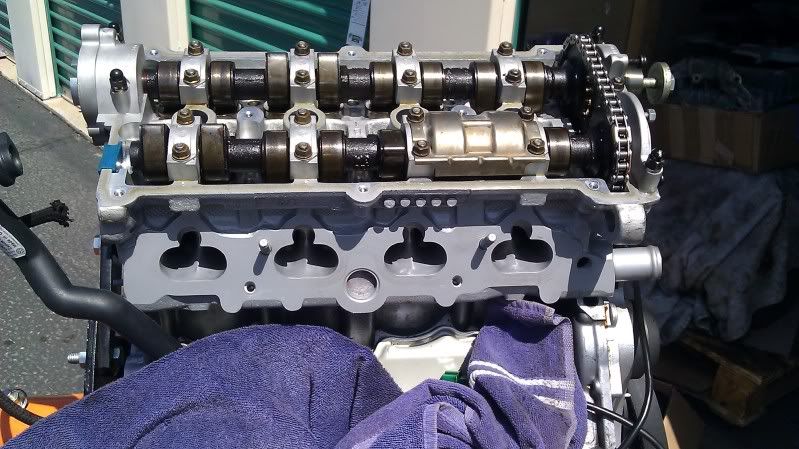
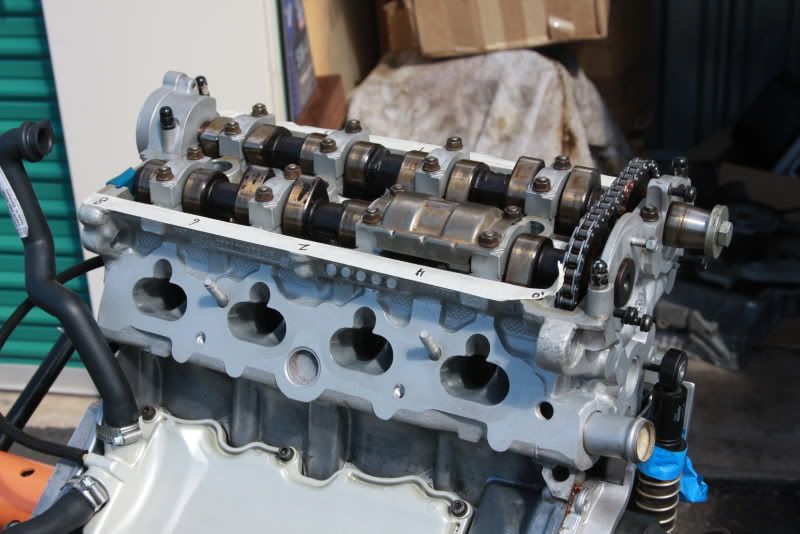
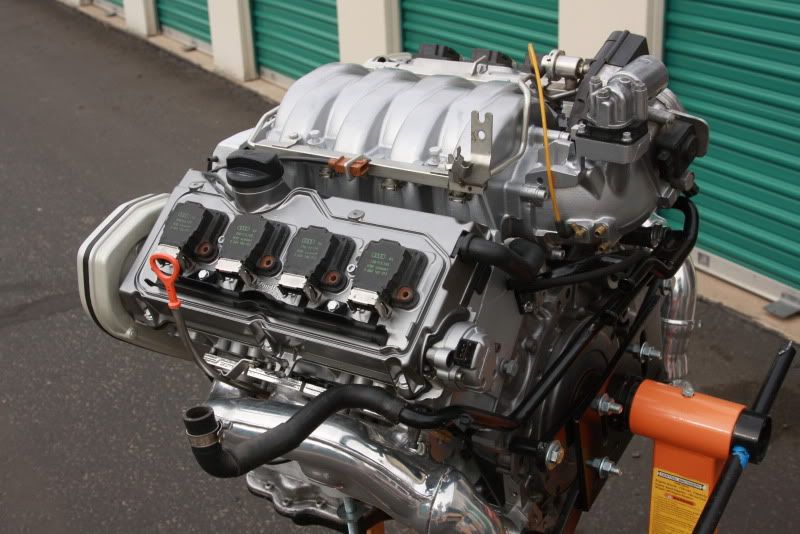
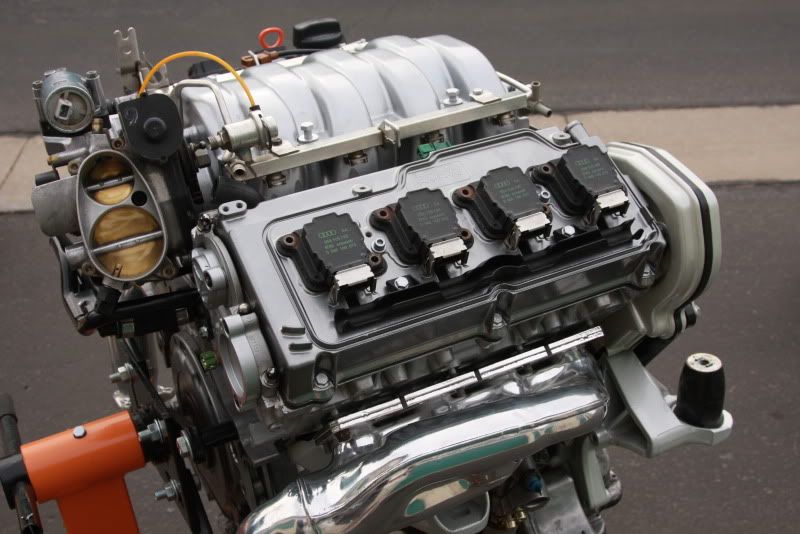
P.S.- Got the heads cleaned up and the intake ports sanded and reworked a bit:

Image

Image

Image

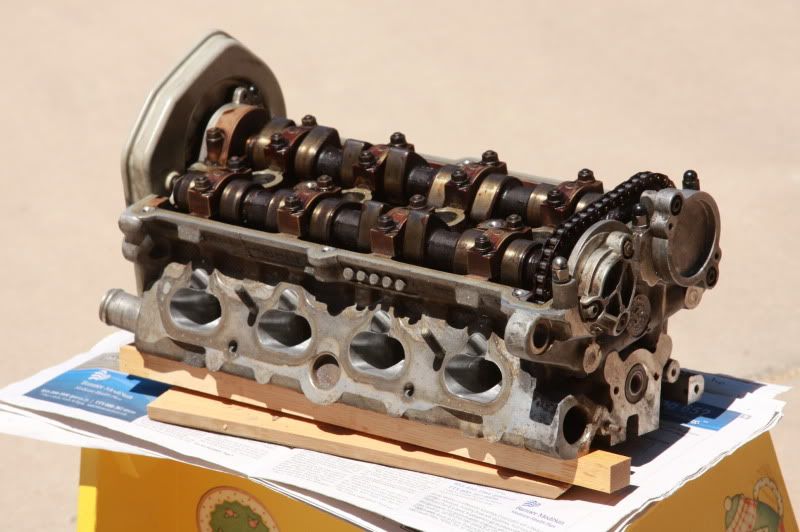
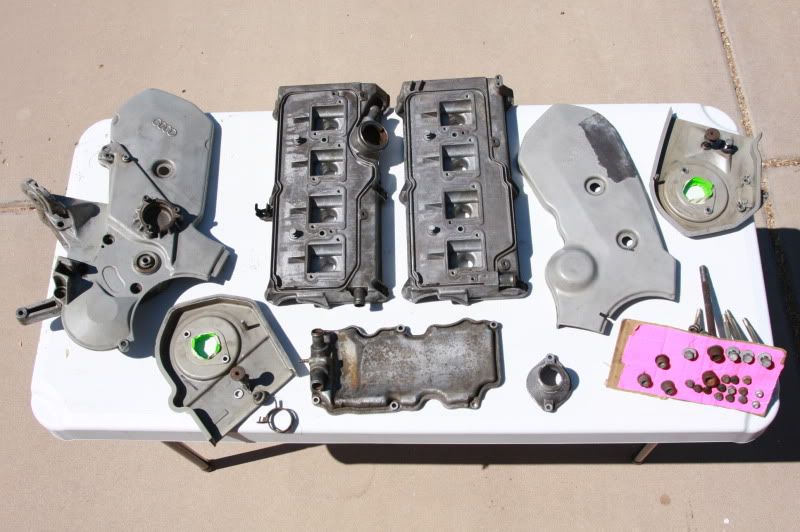
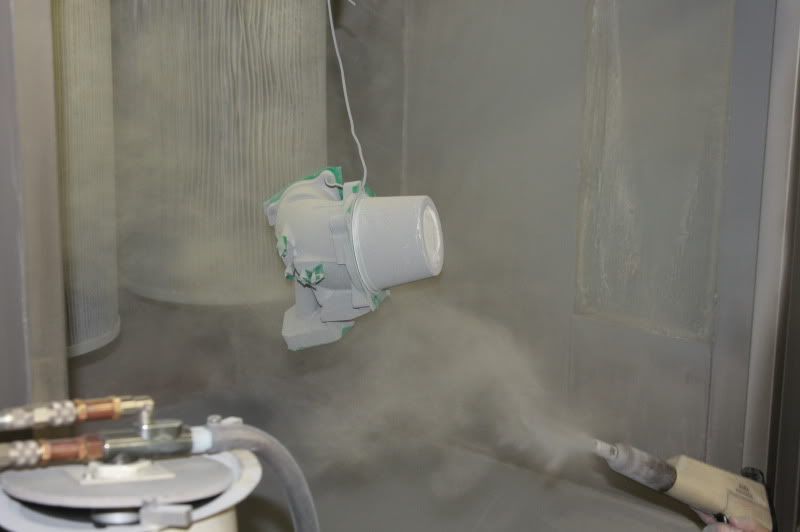
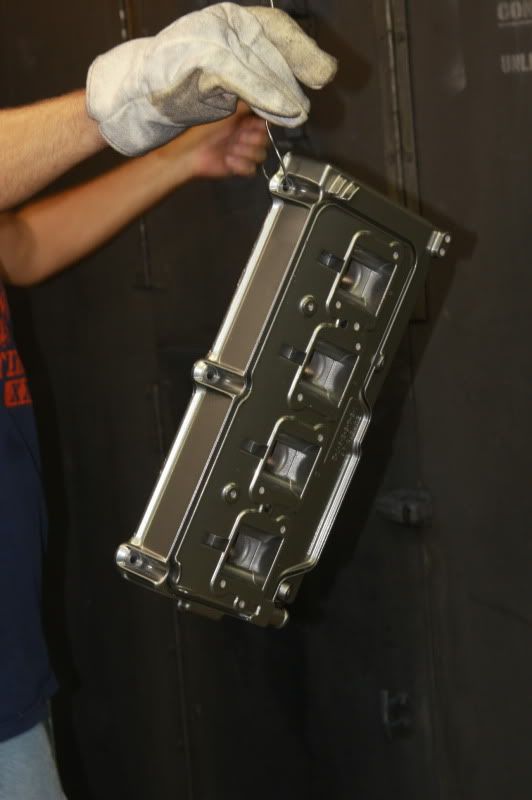
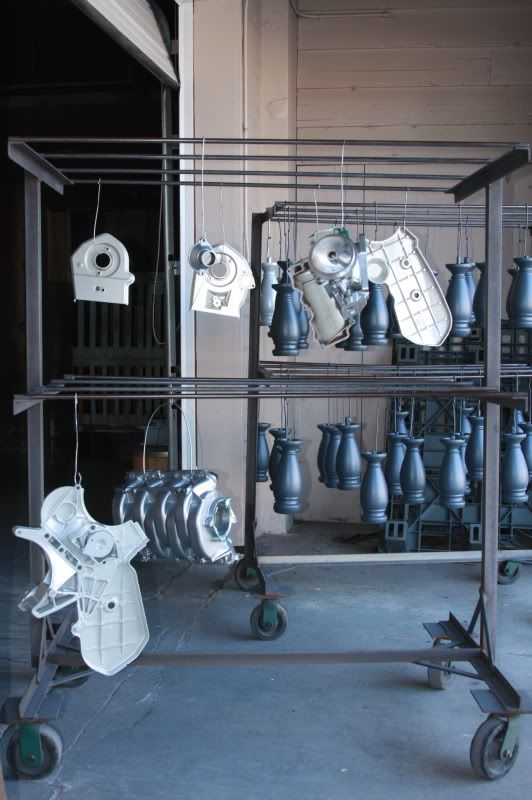
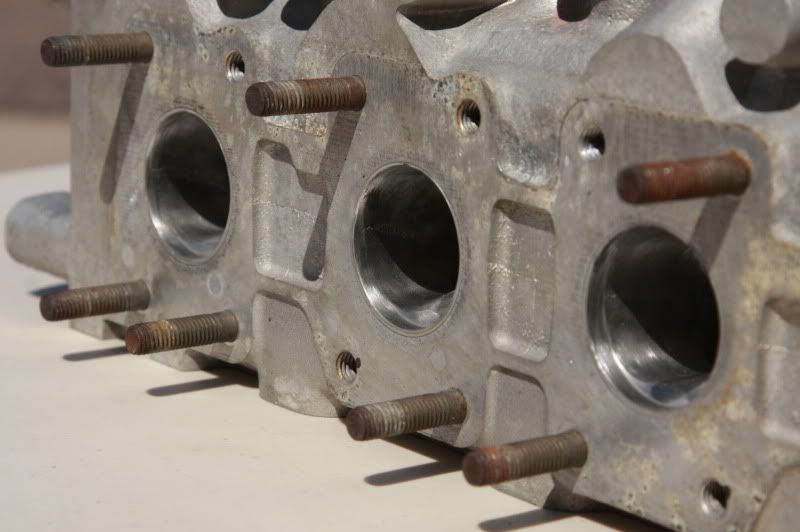
Ready for bead-blast and powder coat:

Image

*****************************************************

A partial summary of the parts necessary to do this swap (so far):

ABH short block with the manual gearbox-specific "E" version upper oil pan
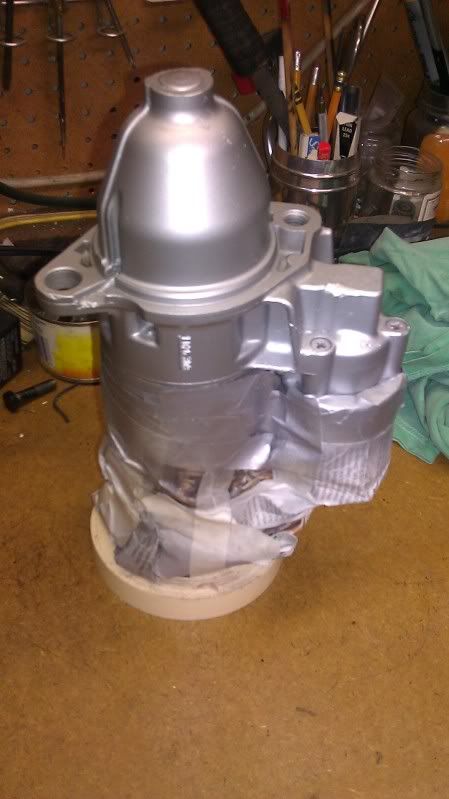
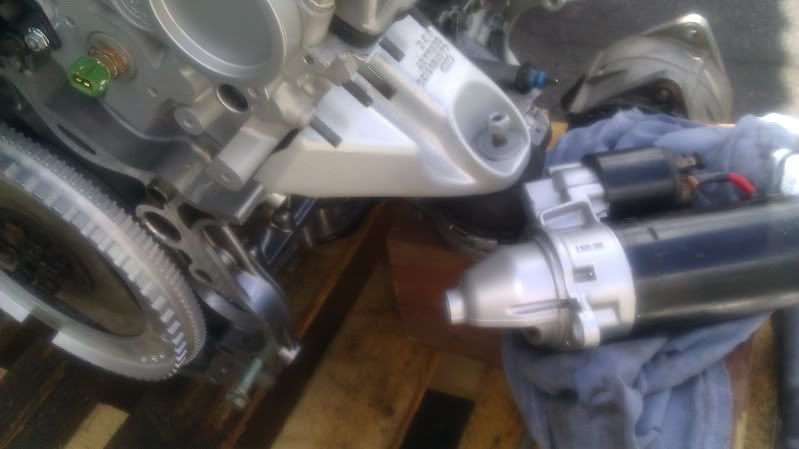
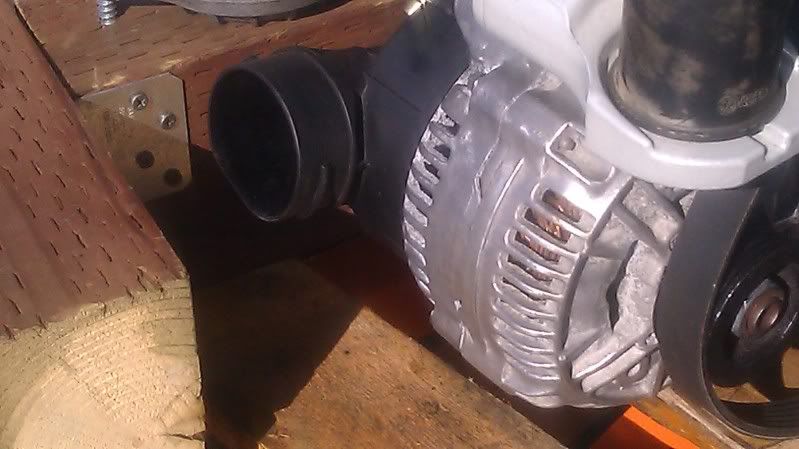
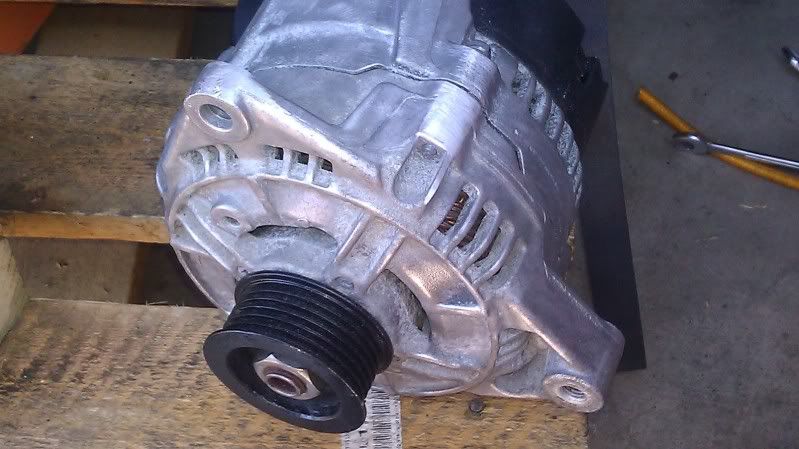
ABH starter and 110A alternator
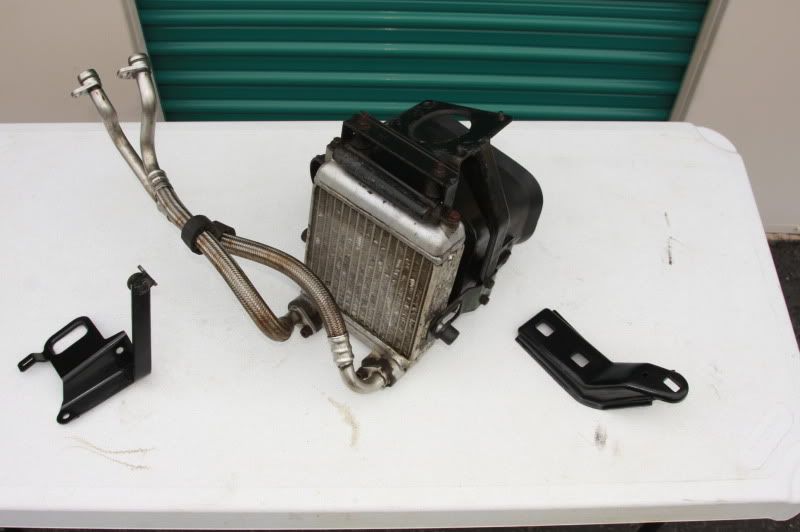
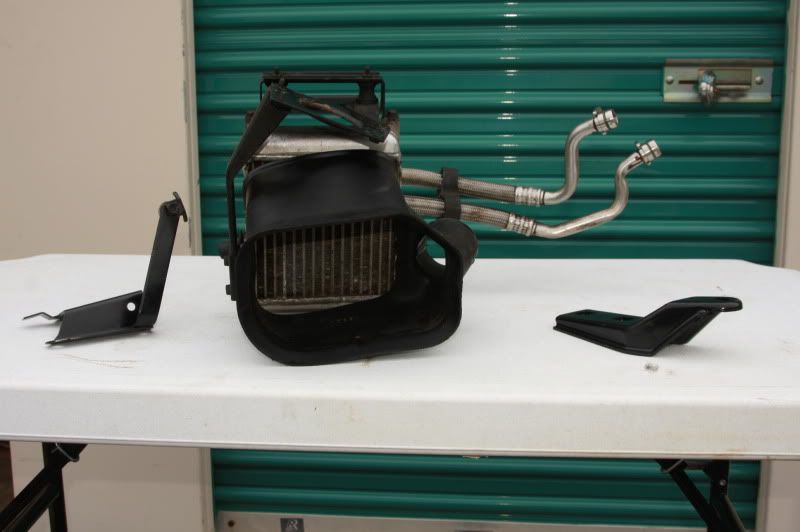
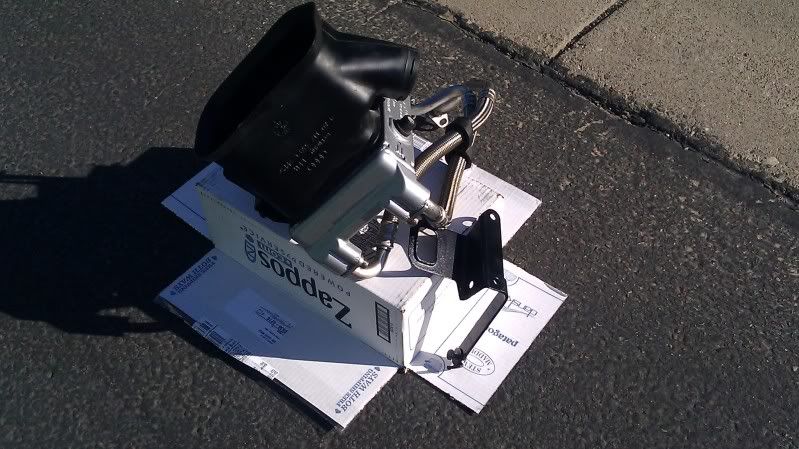
UrS6 V8 oil cooler
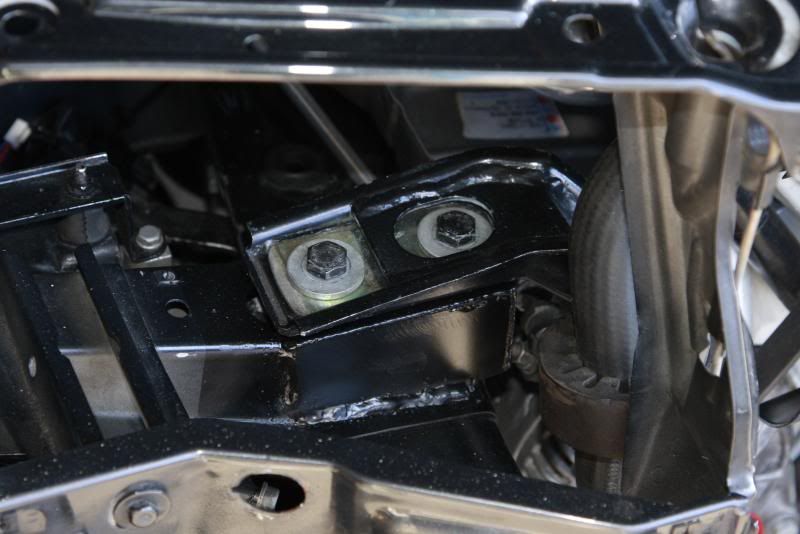
UrS6 V8 engine mounts and a/c bracket
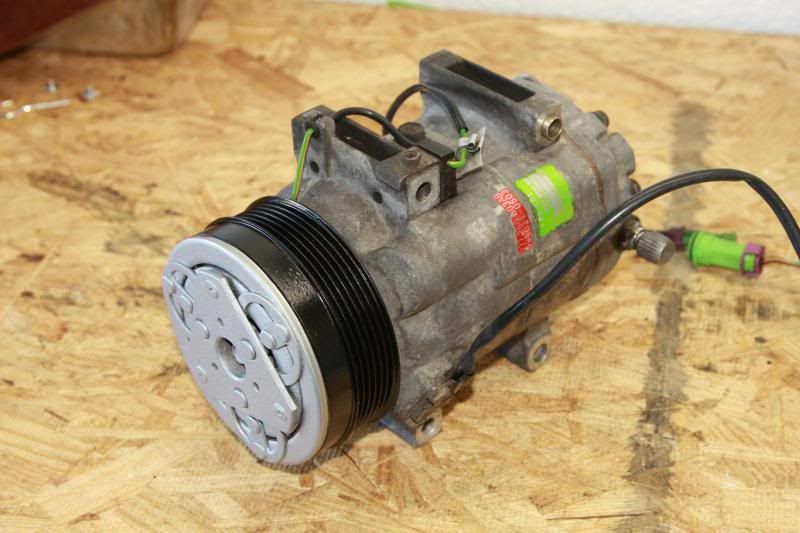
UrS6 V8 A/C compressor/hoses
UrS6 V8 power steering hoses
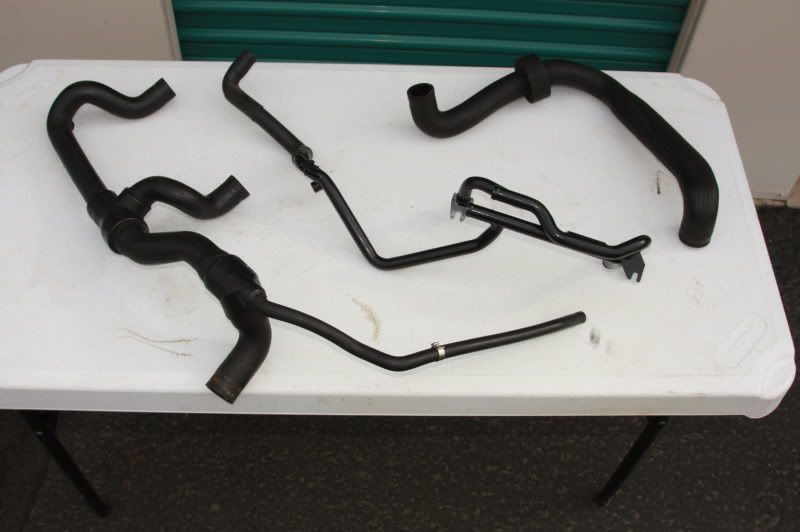
UrS6 V8 rear coolant pipe and assorted coolant hoses
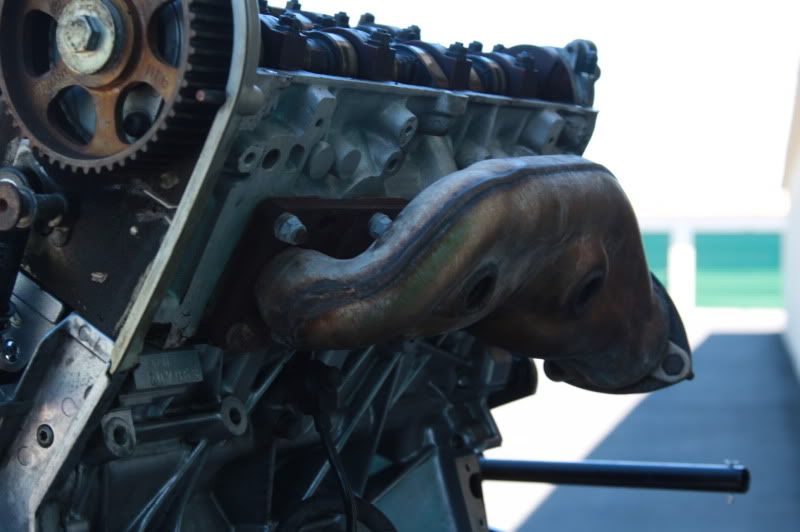
ABZ cylinder heads (rebuilt, ported and polished)
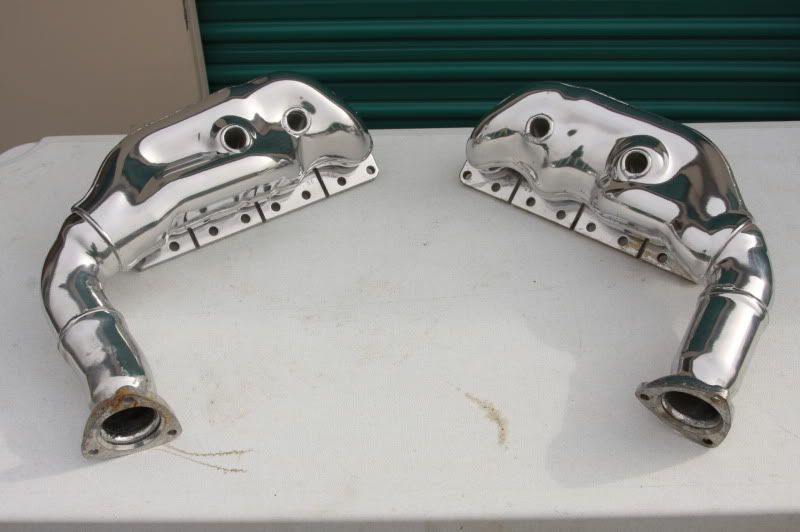
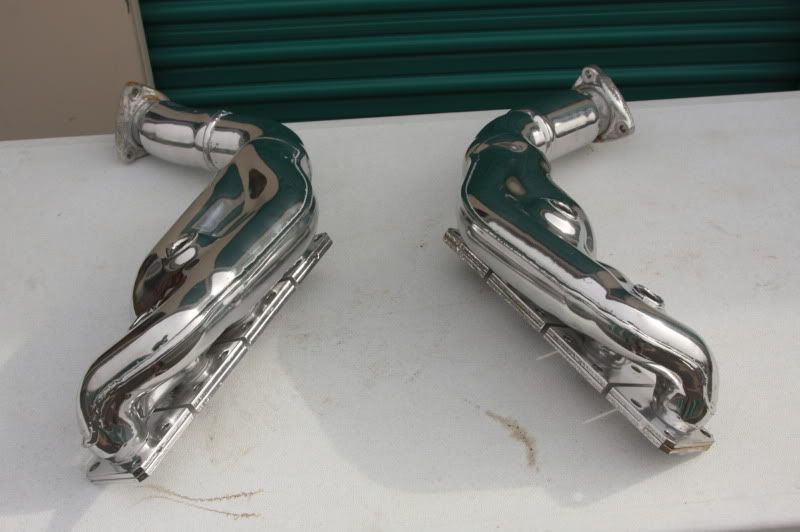
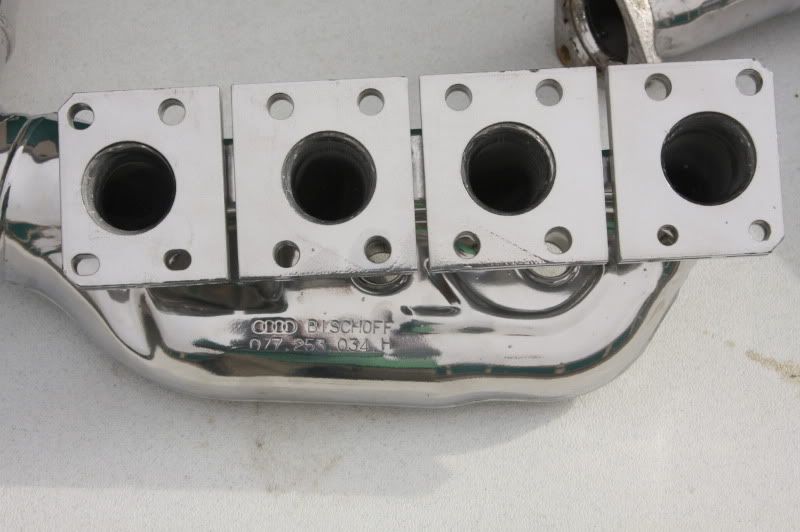
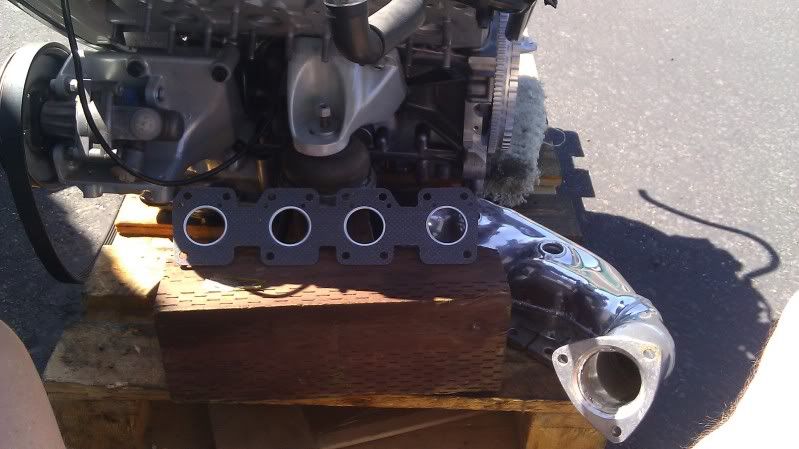
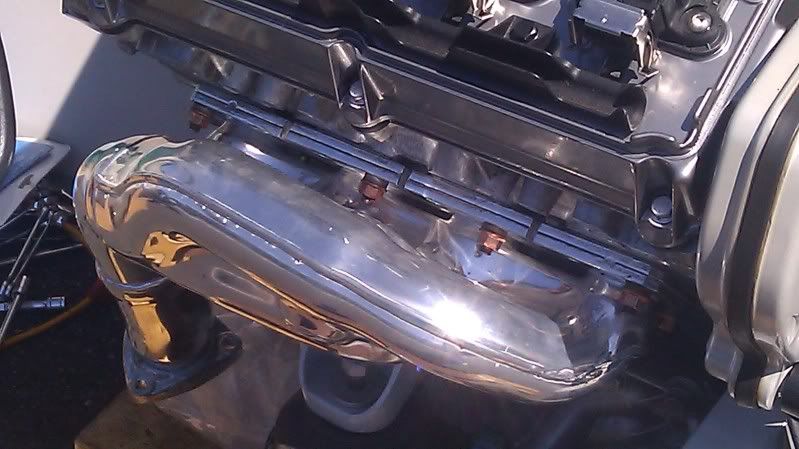
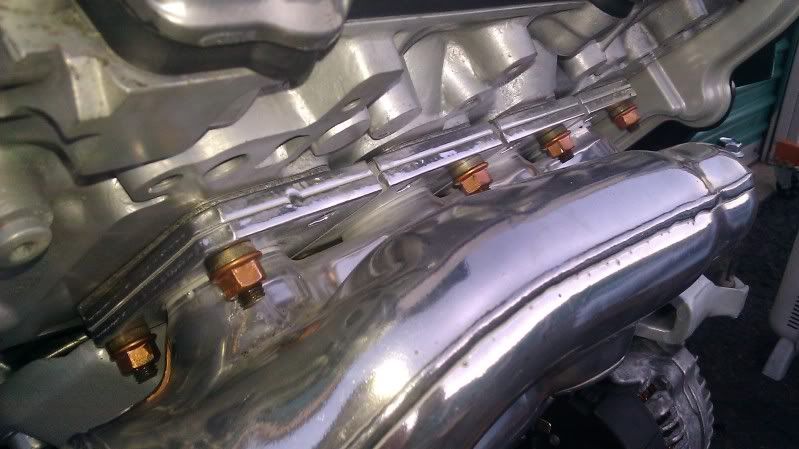
ABZ exhaust manifolds (ceramic coated)
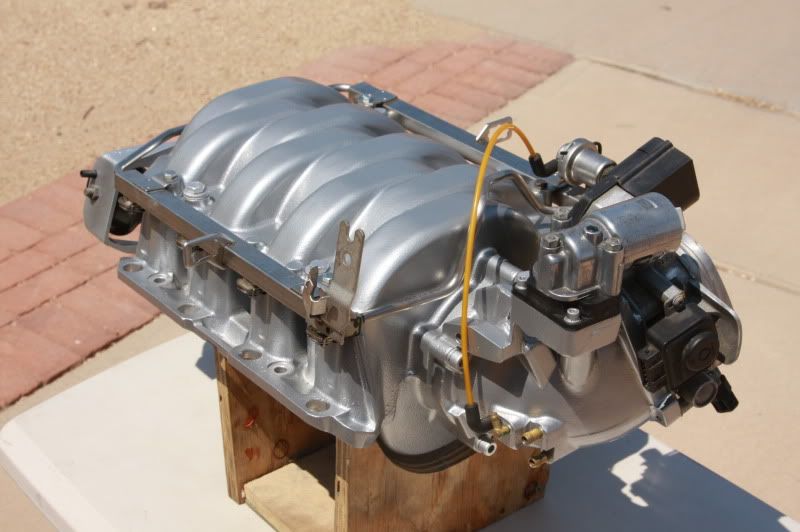
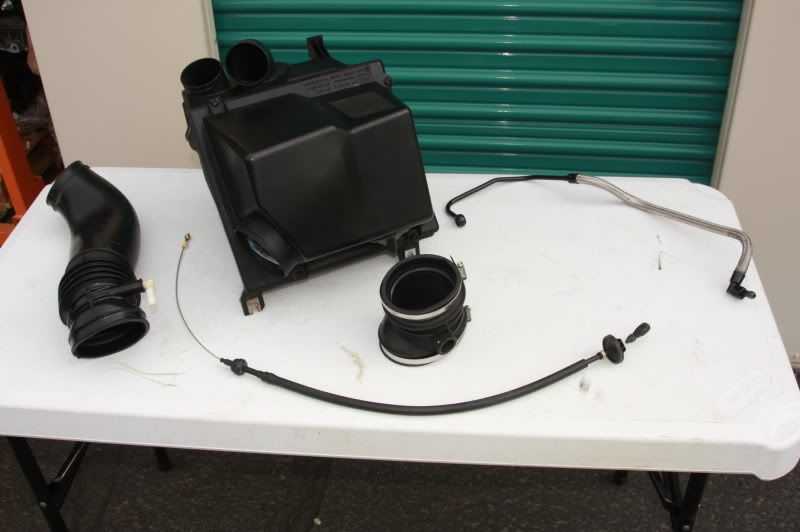
ABZ intake manifold (partial port and polish), A8 throttle body, ISV, S6 Plus throttle cable
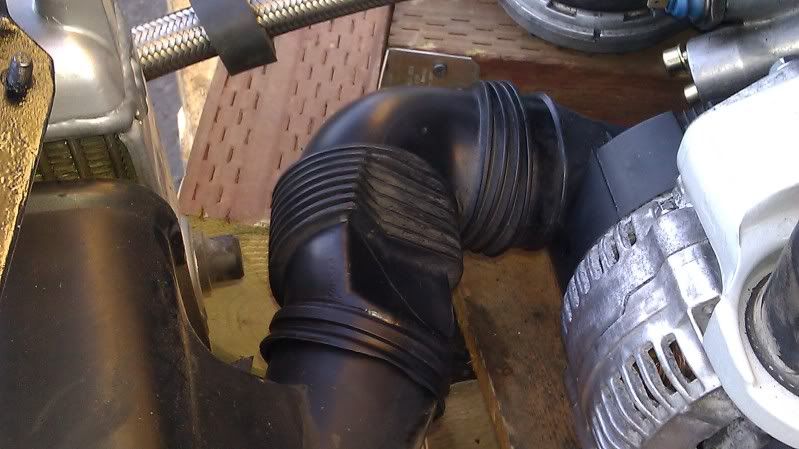
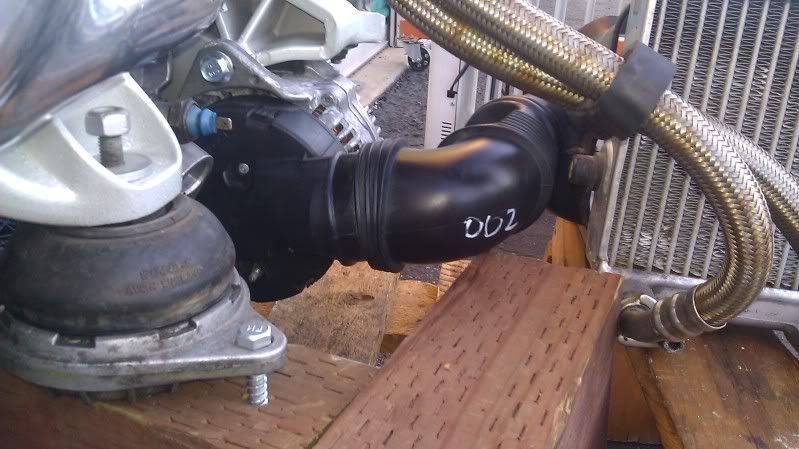
A8 Airbox, MAF and plenum hoses
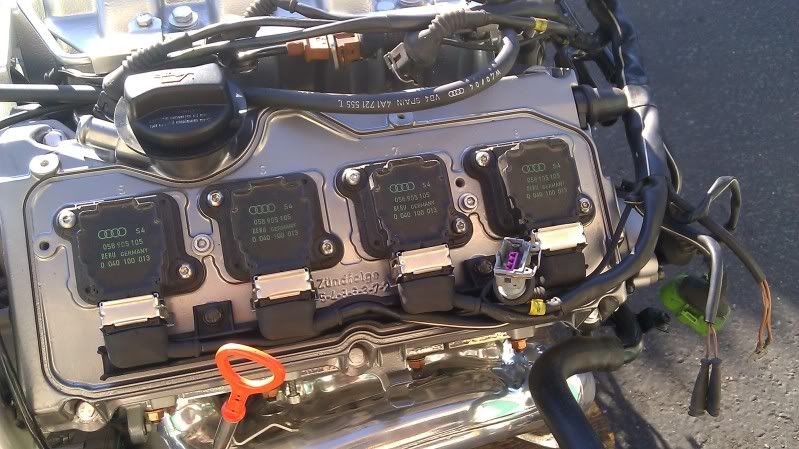
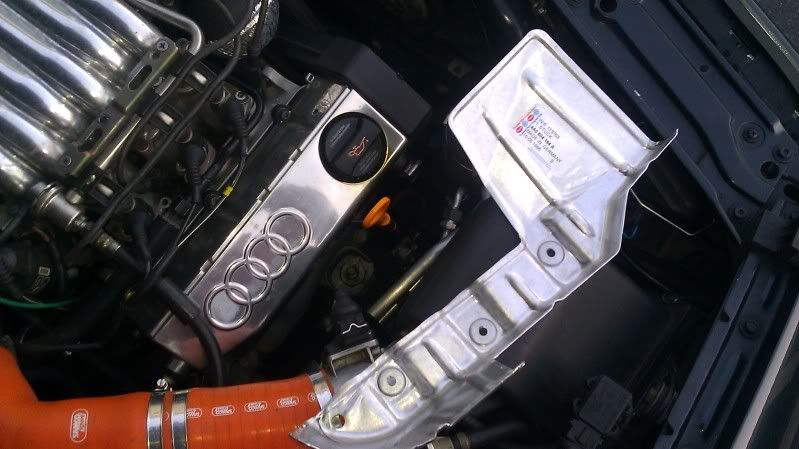
S8 red V8 engine cover (I got the last one in the U.S. apparently)
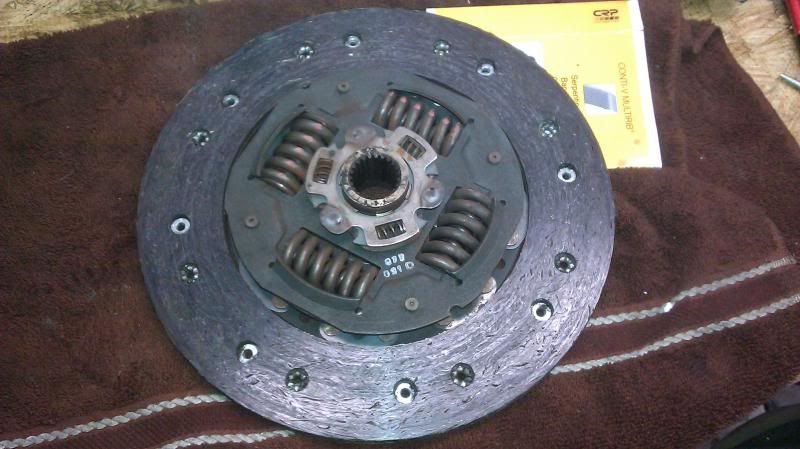
ABZ flex-plate with 60-2 ring and 034 flywheel insert for 228mm clutch
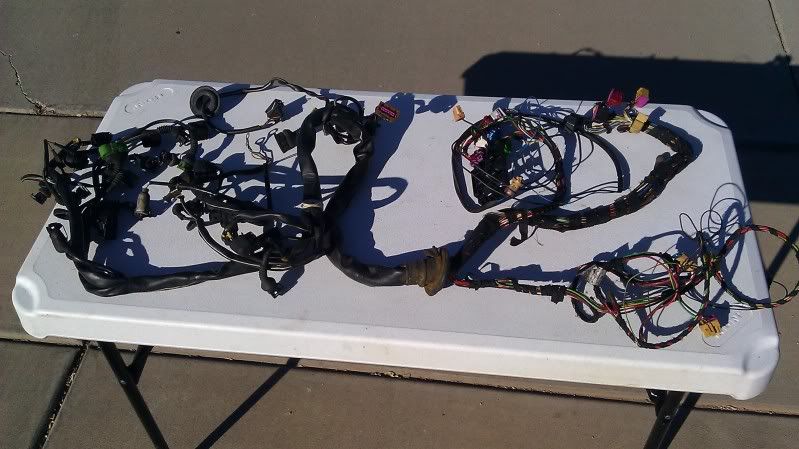
VEMS engine management with A8 engine harness (the exact harness has yet to be determined....)

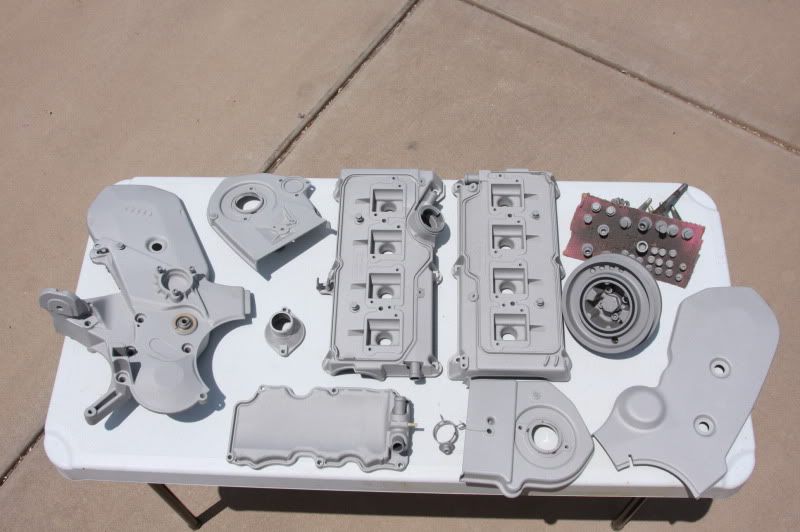
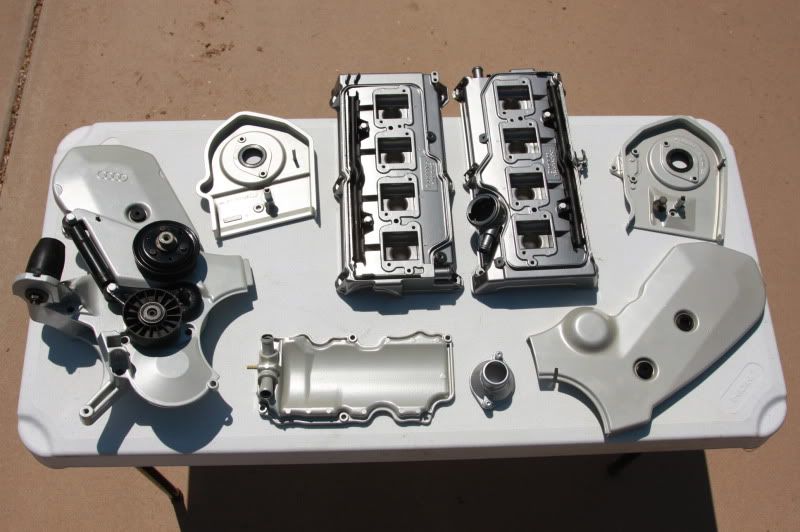
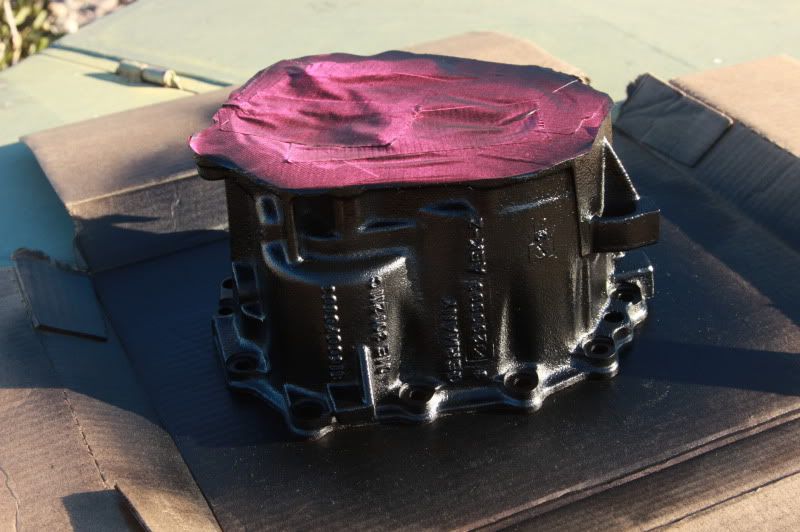
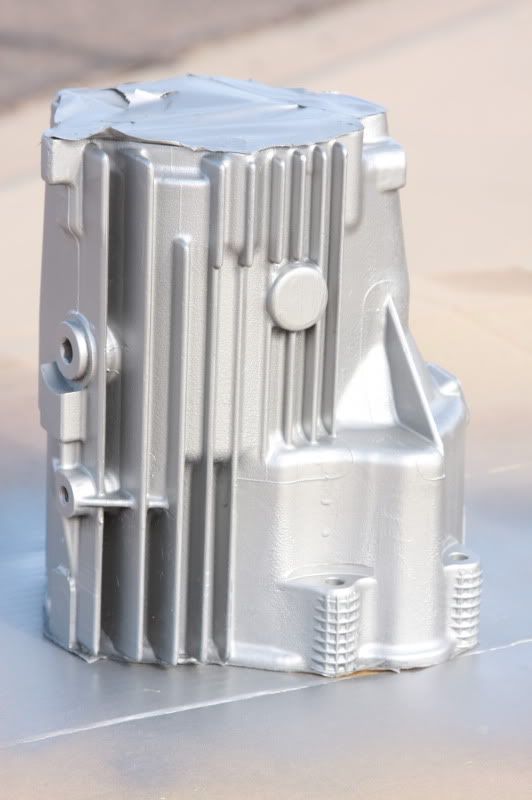
*The engine mounts, intake manifold, timing belt covers and valve covers will all be bead-blasted and powder coated. Exhaust manifolds will be ceramic coated*
----------------------
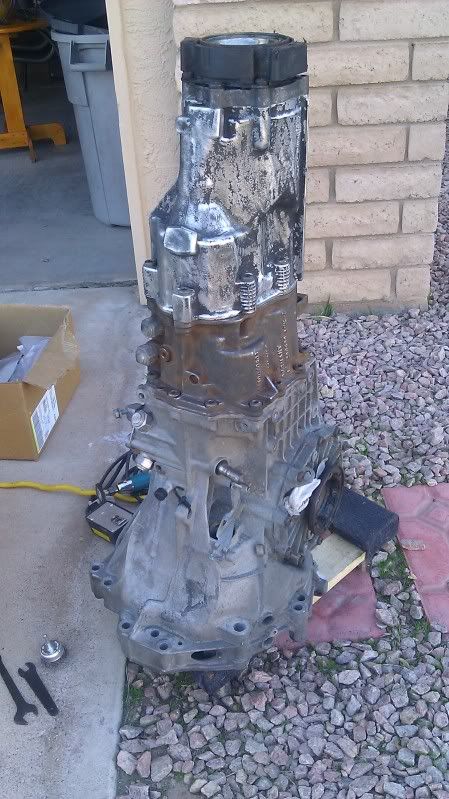
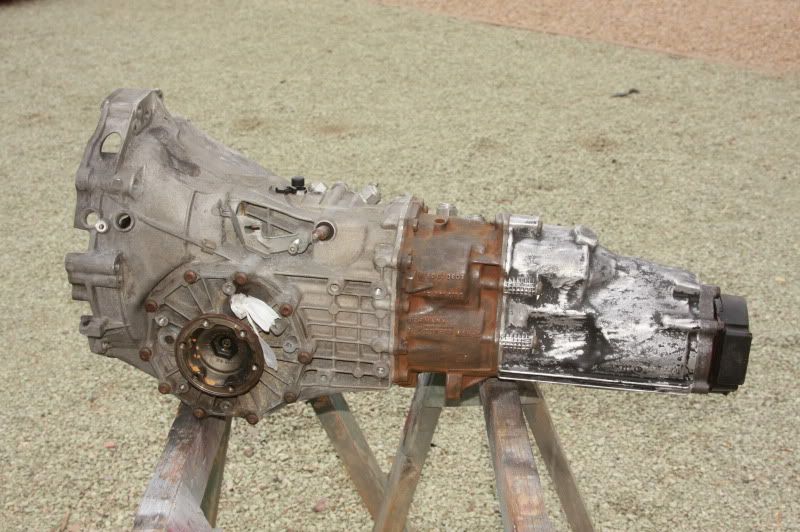
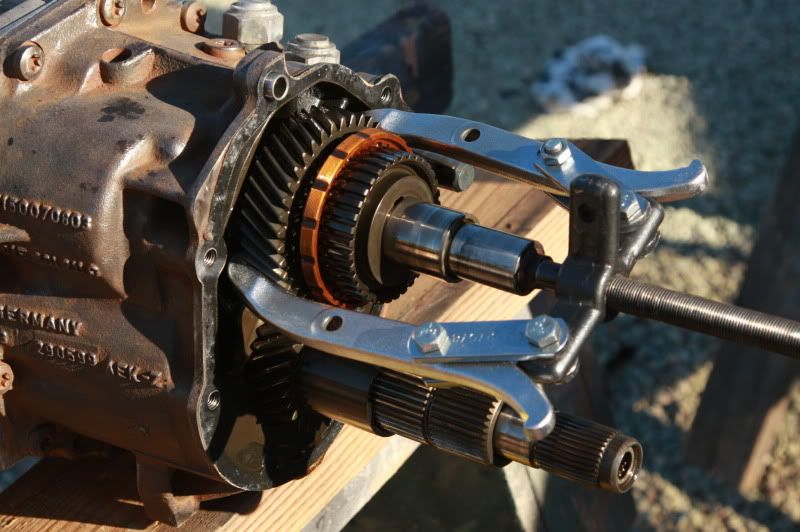
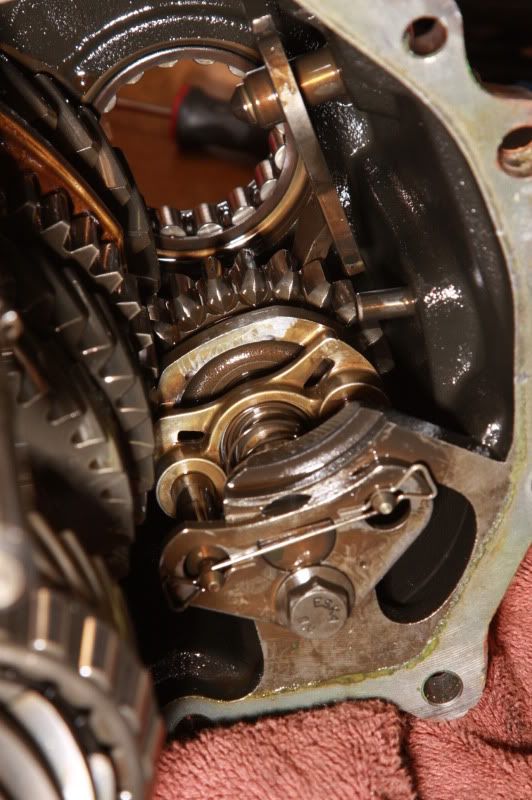
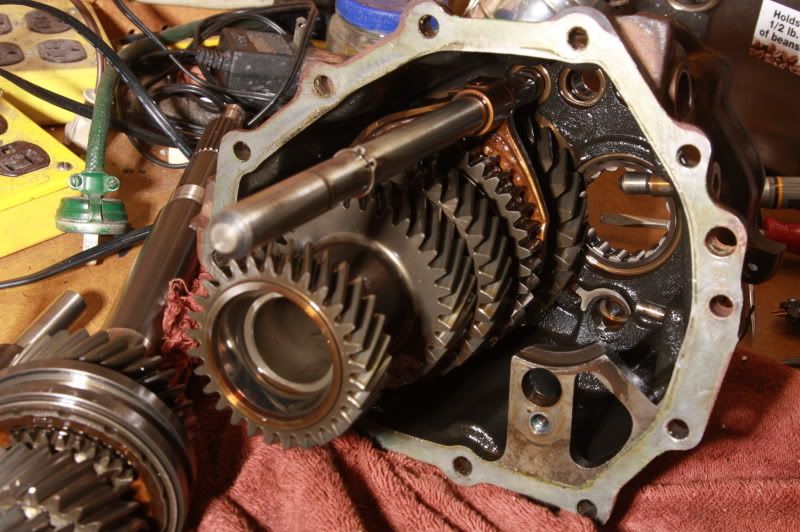
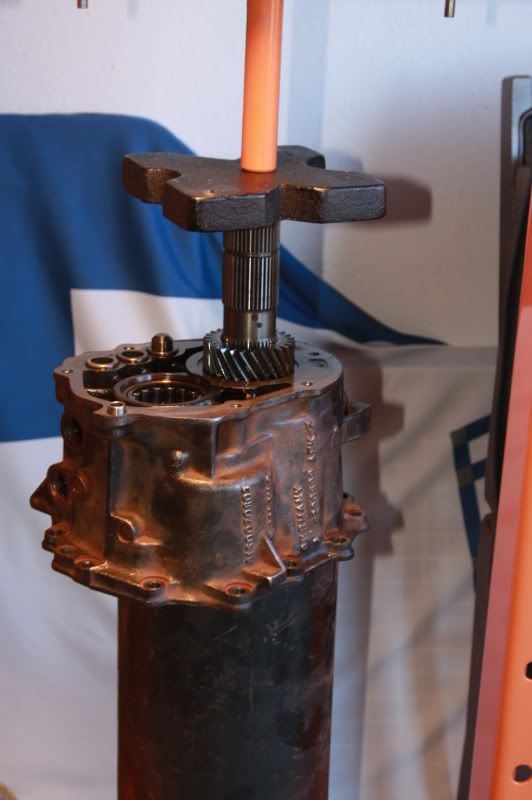
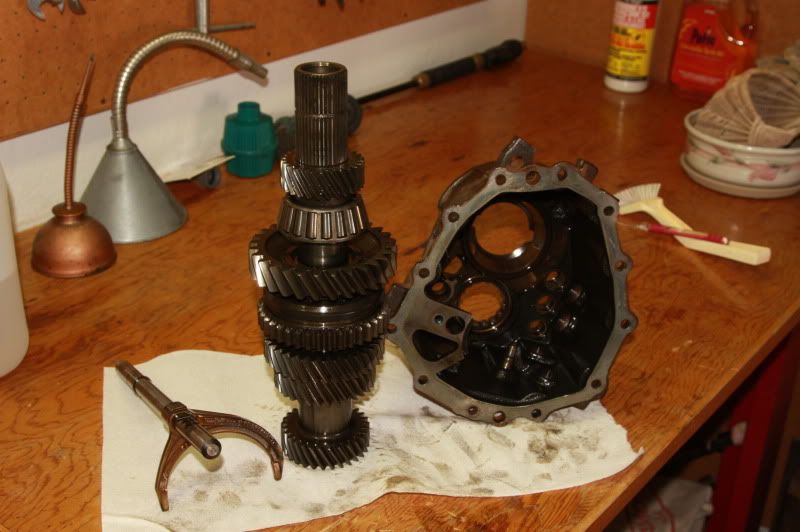
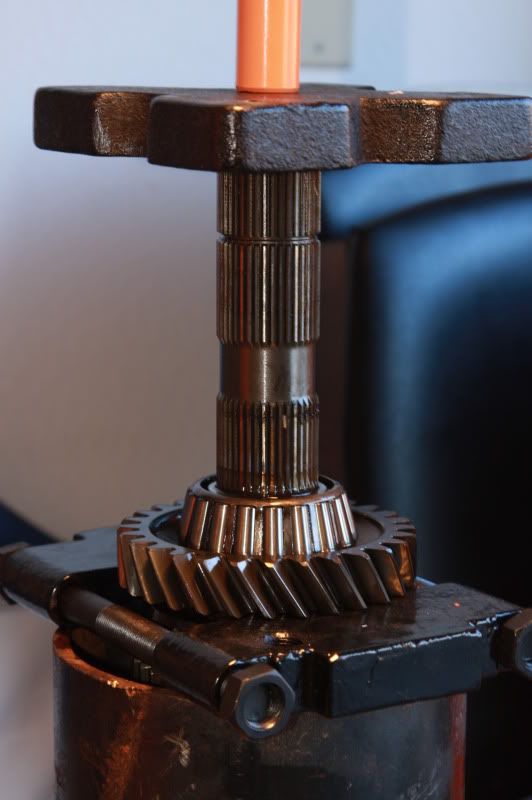
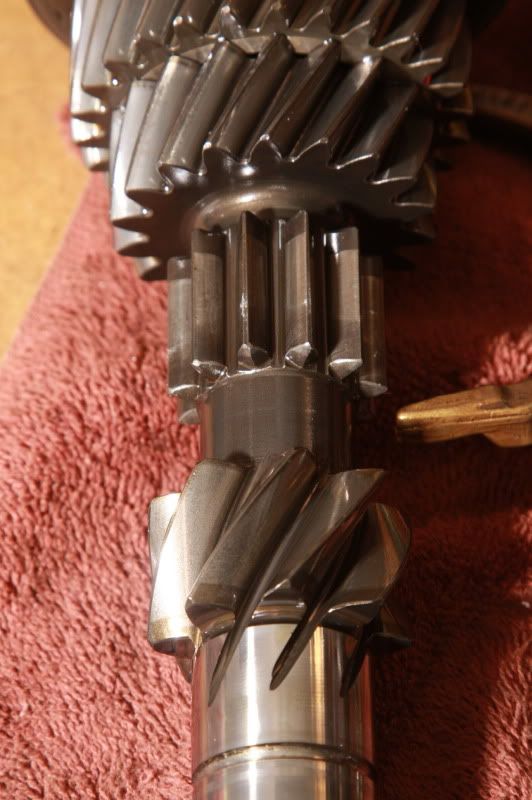
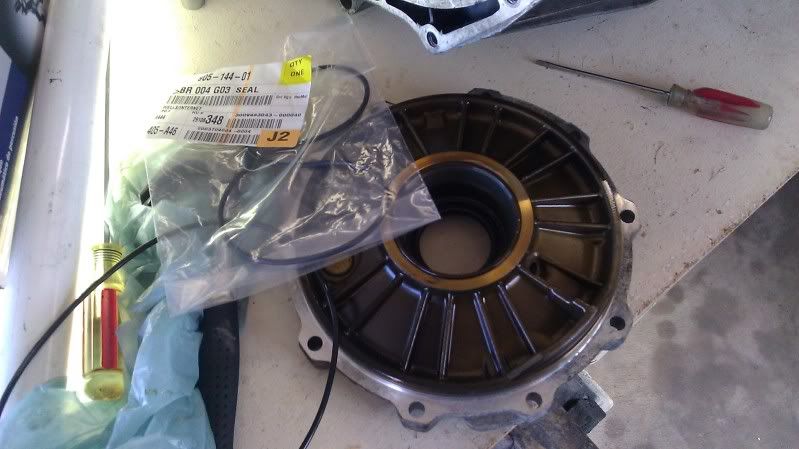
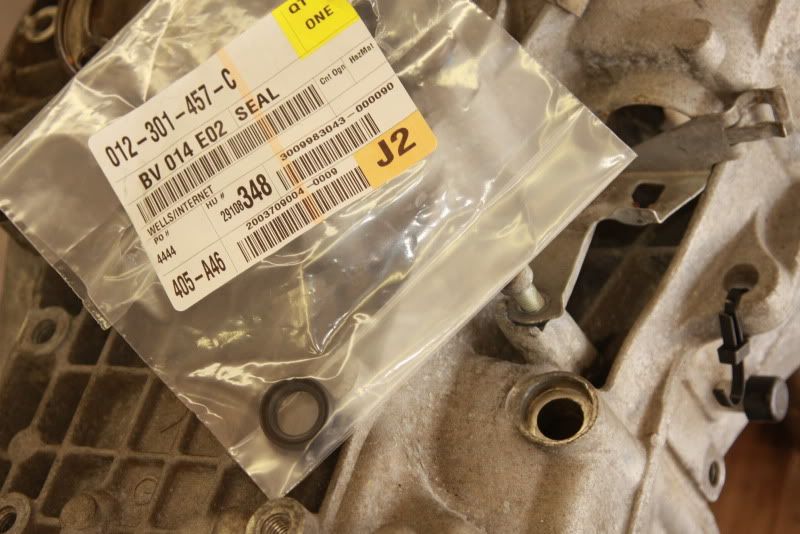
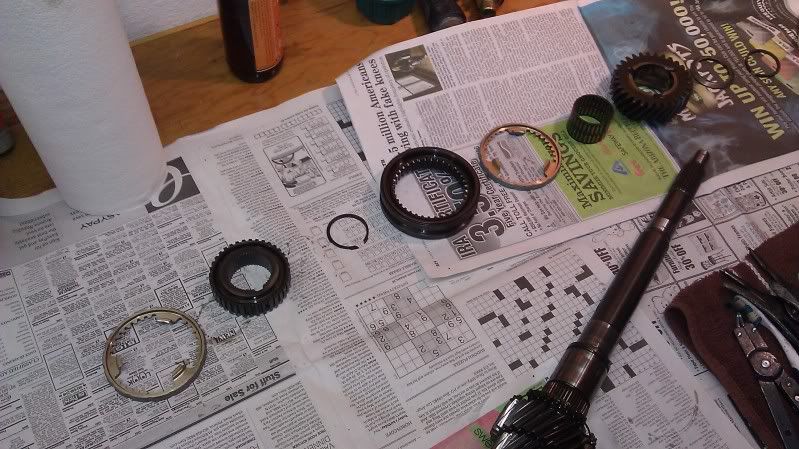
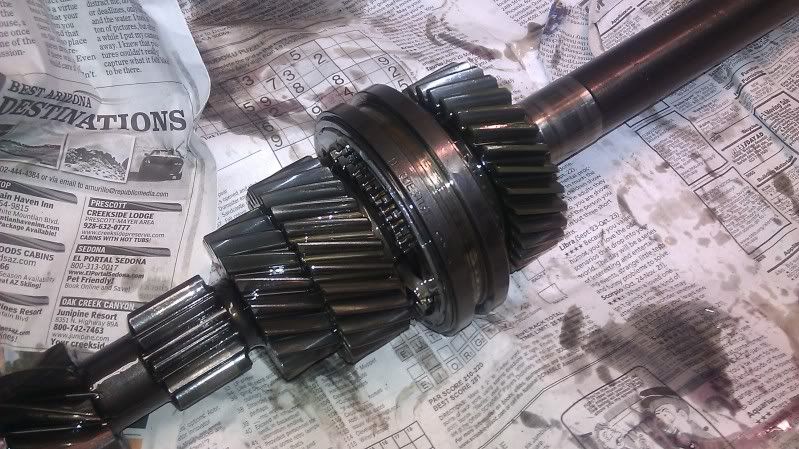
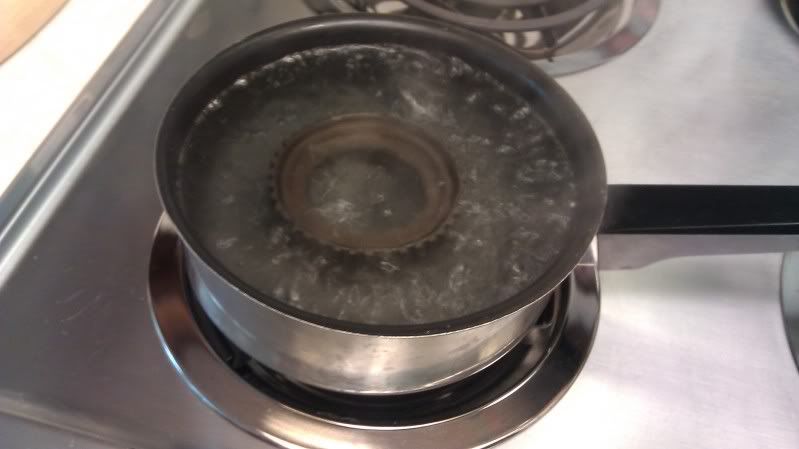
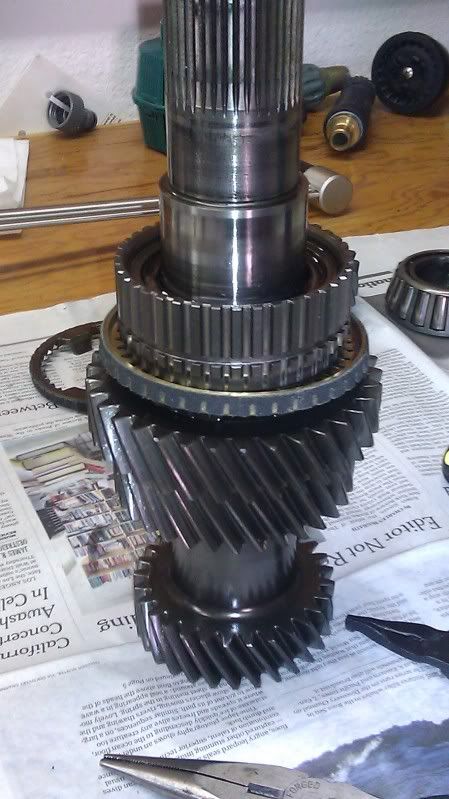
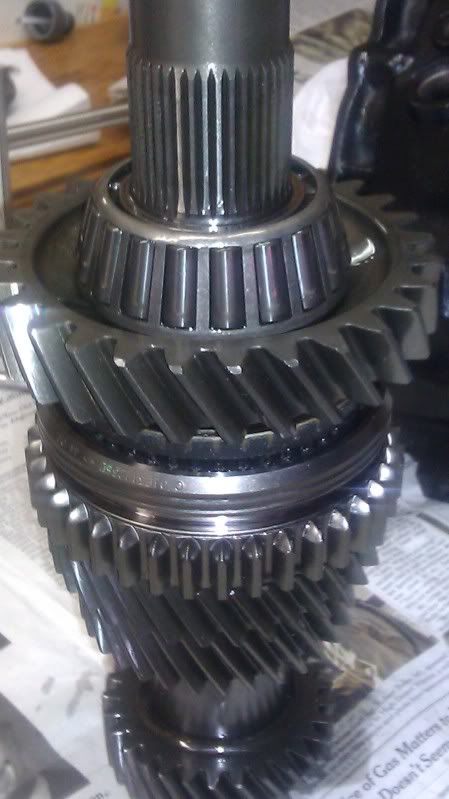
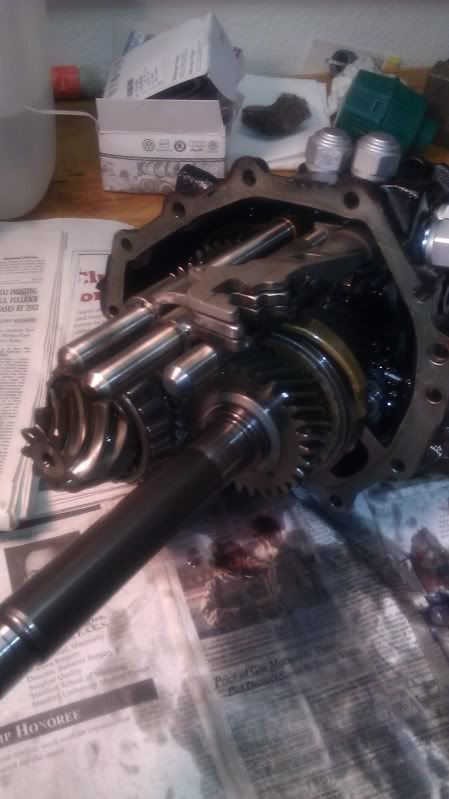
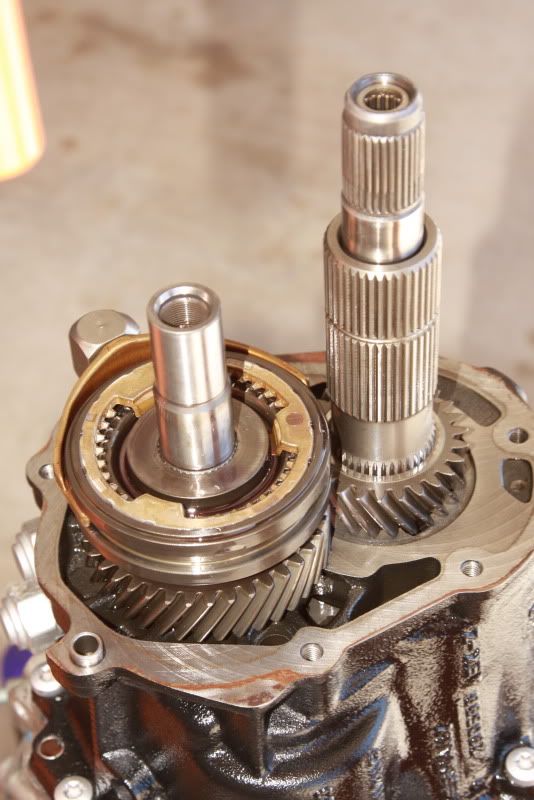
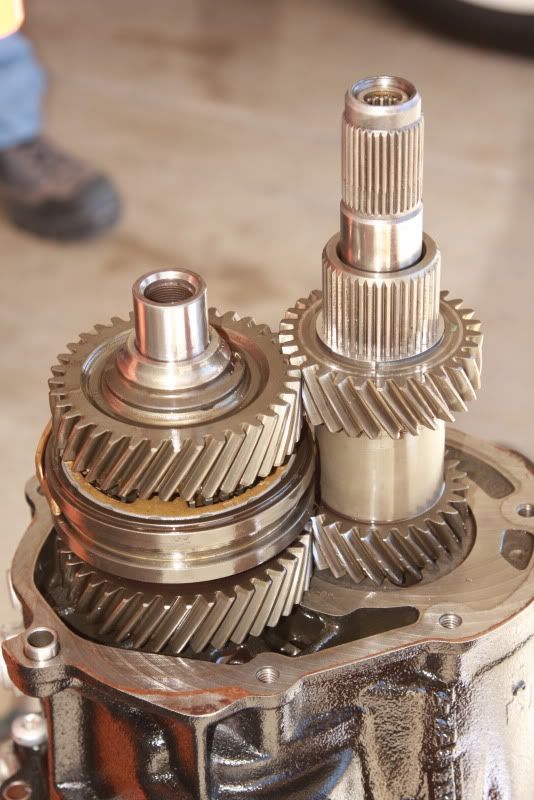
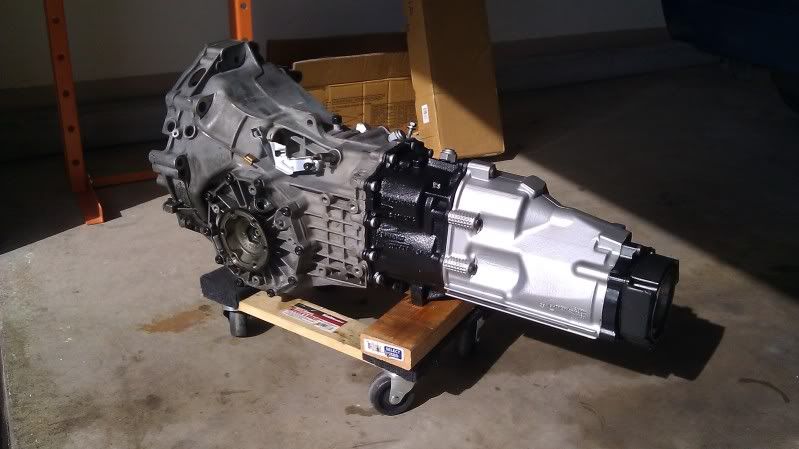
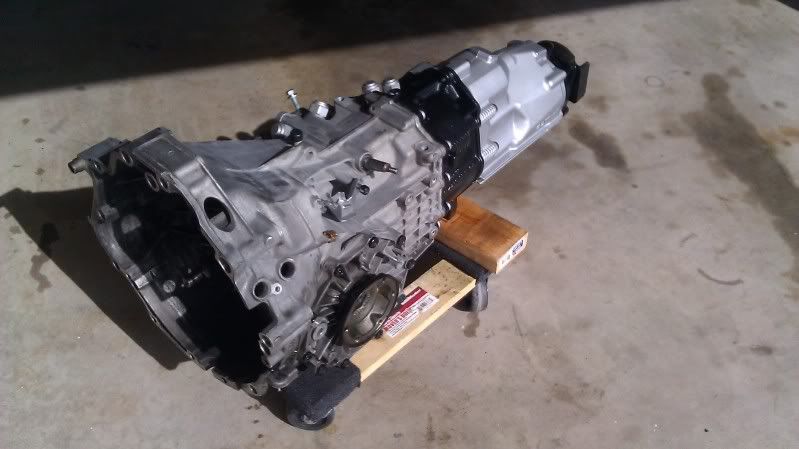
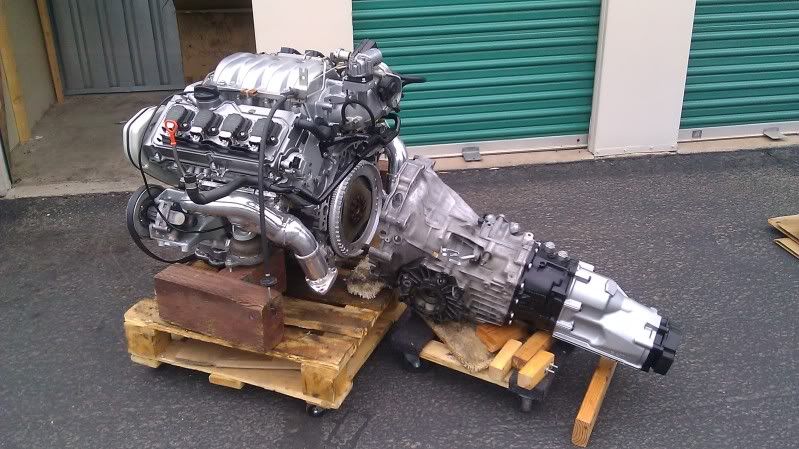
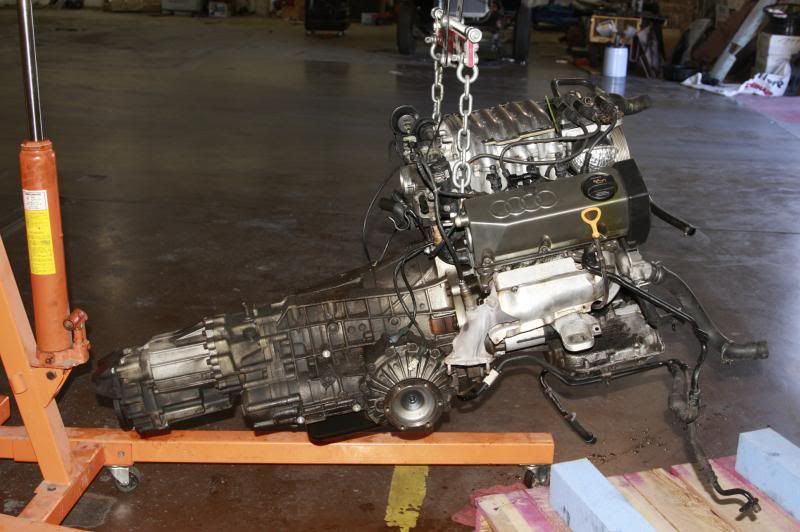
EDU 01E 6-speed transmission
Southbend Stage 2 UrS6 clutch
-----------------------
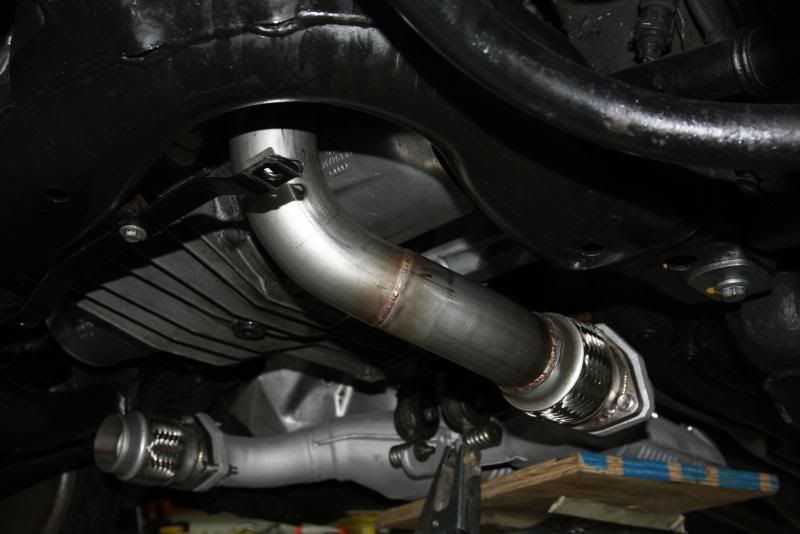
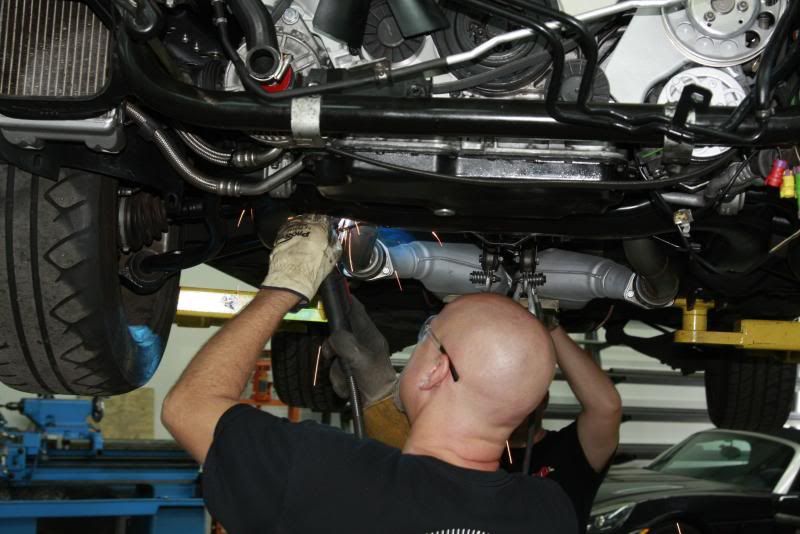
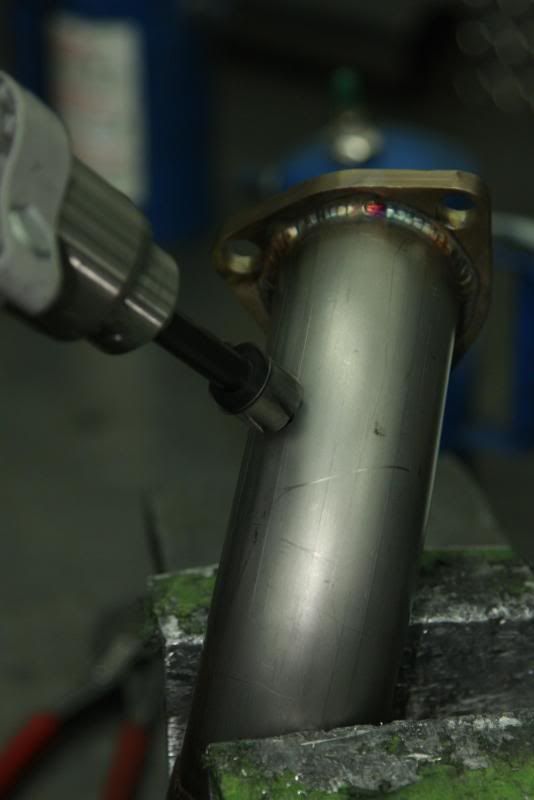
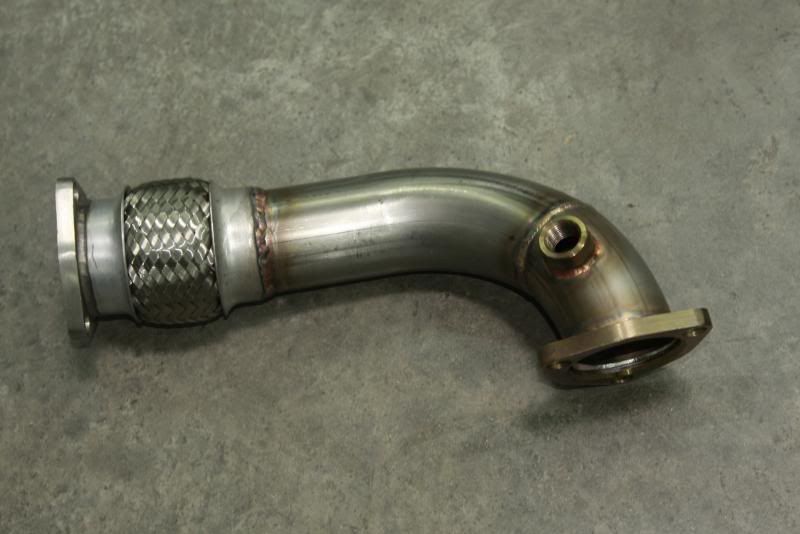
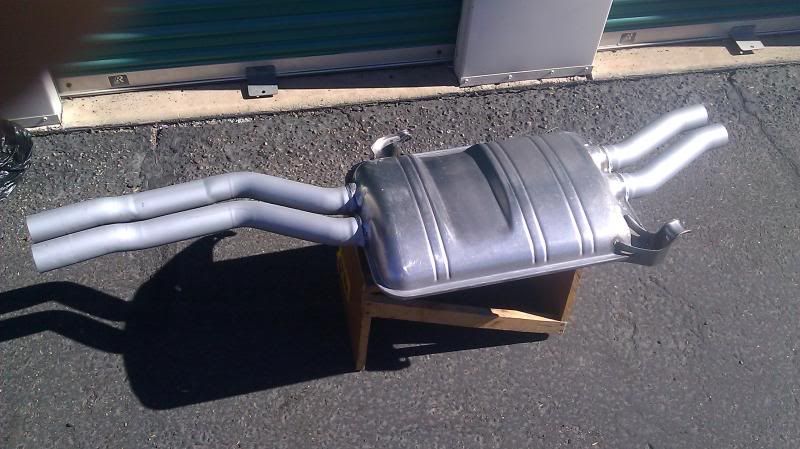
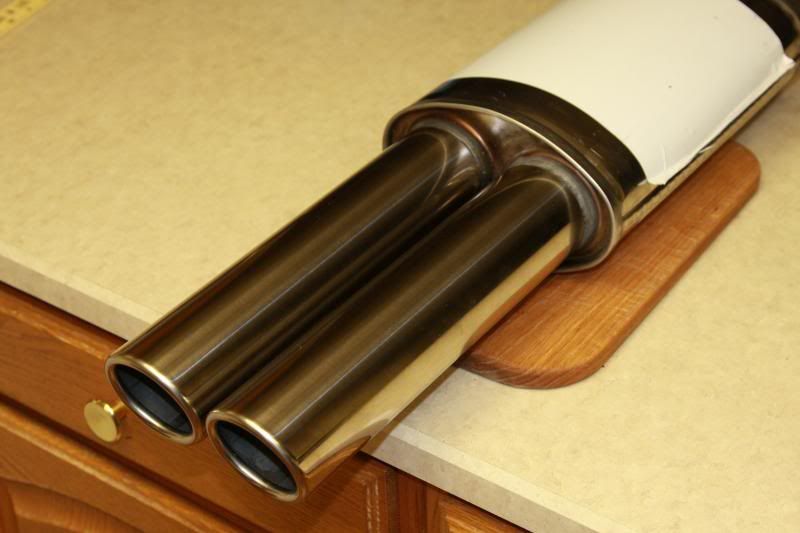
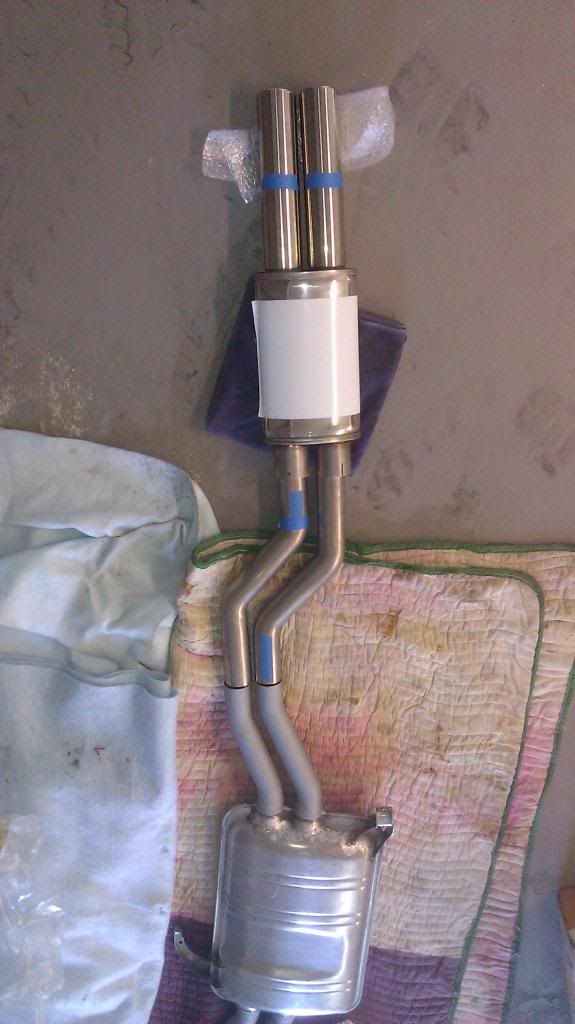
Custom twin-pipe 2.25" 304 stainless exhaust with Magnaflow and Jetex resonators, similar in design to the BN-Pipes UrS system.

Re: Building a 4.2 for my C4 project...

Posted: Fri Sep 02, 2011 12:40 pm
by islingtonaudi
Well, Stage 2 of the build begins. Had several weeks off to visit family and get some parts powder coated. I had gotten the donor parts from the ABH and ABZ engines bead-blasted and made a trip down from Northern Michigan to Ohio to visit a friend's factory where they powder coat hundreds of parts a week. I decided to use 3 colors for this, a nice silver/grey I had used on the engine mounts that would also be used on the timing covers and valley pan. For the intake manifold and thermostat cover I used a nice bright silver/chrome powder and for the valve covers a smoked chrome polyester powder. A fun process to watch and the end result was pretty sweet:

Image

Image

Image

Image

Image

Here's some side by side comparisons between the old ABZ timing covers and the newly coated ABH ones, it was well worth the trouble and just a bit lighter in color but quite close:

Image

Image

Intake Manifold with throttle body, ISV and fuel rail installed:

Image

Image

Image

I really like the contrasts between the different colors and I'm very happy how it all turned out. Got the valley pans swapped out, you can see the difference in their shapes and how it's vented on the ABH vs. ABZ. The valve covers on the early V8s have their vent inlets at different locations and the S6 Plus engine used the newer style pan with the newer coil-pack heads. Nice that it was a direct swap:

ABH:

Image

ABZ:

Image

I've read that the early V8s had oil consumption issues related to the crankcase breather system, perhaps this newer design helped with this, we'll see....

The thermostat cover reinstalled:

Image

The front to rear coolant pipe from the ABZ engine was repainted, given a new o-ring and swapped in. Comparing the two the ABZ version gives more clearance in the back of the engine, that roundish bracket won't be needed in my swap. I want as much space to the firewall as I can get, the rear coolant pipe I've sourced from a German UrS6 V8 will connect up to this and the heads and leads to the coolant reservoir:

ABH:

Image

ABZ:

Image

Motor mounts installed, the block will be moved back to the pallet for the next round:

Image

Image

Next up is rebuilding the heads so I can get her back together. This will entail all new seals, timing chains, guides and perhaps a few new lifters where necessary. Stay tuned...

Re: Building a 4.2 for my C4 project...

Posted: Fri Jan 13, 2012 4:37 pm
by islingtonaudi
It's been several months since my last update, quite a bit has transpired on the project but all for the good. Work on the road and being away from my build space has prevented any actual progress on the V8 project but a lot of parts have been acquired out of Germany and practically everything I will need is now on this side of the Atlantic. What amazes me is how many small parts are required to make this swap viable and relatively seamless. This includes all of the proper hoses for both power steering, fuel and air conditioning. I also have been fortunate to acquire a few vital parts from a genuine S6 Plus out of Austria which include the exhaust manifolds, a new accelerator cable, an underhood engine cover and most critical, an entire uncut engine harness! That was a real score, 100 Euros and quite a deal in my opinion. These days the Euro is a bit weak against the dollar so I've been ordering up as much stuff as I've been able to put off until now.

I had the S6 Plus manifolds ceramic coated and came out beautifully:

Image

Image

Image


Unique S6 V8 tie-rods with an unusual shape apparently to clear the distributors on early V8 C4s but these were also specified for the S6 Plus. Gave them a fresh coat of red paint (yes, that was the factory color) and will add some visual interest to the engine compartment:

Image

Front and rear coolant hoses specific to the C4 V8 cars. Notice the long thin hose that goes up to the C4 coolant reservoir. On the V8Q the hose goes to the passenger side for the coolant reservoir. Now everything will fit perfectly. One of the best deals I've gotten on this project was the rear metal coolant pipe in the middle for 1€ on German Ebay, score!:

Image

A8 Air-box and plenum with rubber elbow to throttle body, S6 V8 stainless braided fuel line and a brand new S6 Plus throttle cable:

Image

Fuel line with new black paint:

Image

S6 Plus engine harness, uncut:

Image

Oil cooler for the V8 on C4 cars, this one's from an S6 and a front engine mount:

Image

Front View, I love the air ducting for it, looks pretty serious:

Image

With fresh paint and clean up:

Image

Still have a few more things to source from Germany, an air-conditioning compressor and the a/c hoses from an S6 V8. Also got a used 01E 6-speed from a 2000 A6 2.7tt I'll be rebuilding it this spring, need to source new synchros and a new 1-2 shift collar that's locked up on this one. For $300 you can't go wrong:

Image

Will be finally rebuilding the heads in February, have all the parts and just need to get them to the machine shop here in Phoenix. Will take a lot of pics of the rebuild process for both heads and 6-speed so stay tuned....

Re: Building a 4.2 for my C4 project...

Posted: Tue Jan 31, 2012 1:16 am
by islingtonaudi
Started my rebuild on my 6-speed EDU manual transmission that came out of a 2000 A6 2.7tt up in the Northeast. This is the later version of the original 01E 5-speeds found in all UrS4/6 cars but the 6-speed found in the C4 S6 cars in Europe was never offered over here. This particular iteration of the 01E was offered in the C5 A6 cars and the B5 S4 models with the V6 twin-turbo engine. Unfortunately for a lot of owners these boxes experienced chronic issues with the 1-2 shift collars jamming rendering them unusable until rebuilt. Audi and Getrag remedied the issue with a redesigned 1-2 shift collar/hub and also more aggressive synchros for all gears, especially for the 1-2 synchros. The result is much crisper shifting and it's a really great improvement but not cheap if you're having someone like Advanced Automotion or JHM sell you a rebuilt one. Both companies do offer a DIY rebuild kit with all the necessary parts but at close to a grand I thought I might be able to do better. So after some talking to my guy in Germany who has provided me many of my used C4 S6 parts for this build he has come through with genuine VAG parts at a considerable cost savings and with the the weak Euro now is the time to buy! But before the new parts can go in the old parts have to come out so the transmission must be completely disassembled. JHM has produced a very useful rebuild video that is a streamlined version of the Audi factory procedure and both are necessary to do it correctly. What's nice is that Jason at JHM has found some clever substitute tools/methods to get the job done quite economically but anyone doing this rebuild MUST have access to a press to push apart gears/shafts in order to swap synchros, springs, etc. I bought a cheap Harbor Freight version for $100 on sale as well as a bearing splitter, a foot long section of large steel pipe to gain room for pressing and an 8" steel pipe with end cap from Home Depot which is used to press things back on:

Image

The patient in the E.R., ready to be opened up:

Image


The tear-down process involves removing the tail section, the center diff and the rear cover. The JHM video uses a homemade tool I replicated, made the process a breeze:

Image

With the rear cover off you have full access to 5th and 6th gears. All but one of these can be removed with a gear puller, the last one (6th gear) must be pressed off:

Image

Image


Next you separate the front and center case. Now the main and secondary shafts can be removed along with reverse gear:

Image

Image

Now 6th gear is pressed off freeing the shaft with the bad 1-2 collar:

Image

Image

Now the fun begins pressing apart the shafts to remove the problem 1-2 hub and collar as well as the 1-2 synchros. On the mainshaft the shift collar is fine but the 3-4 synchros will be swapped out. The old synchros are mostly brass but will be replaced with composite synchros that dramatically improve shifting:

Pressing off the the larger side of 1st gear, that bearing on top is on VERY tight, will be heated in boiling water before going back on:

Image

Pressing off the 1-2 hub:

Image

First gear looks very nice, no wear to speak of and when I saw this I knew I had scored a great box to rebuild. A lot of these have been abused and that 1st gear will be very worn and grooved, mine looks like new:

Image

Replacing all the seals, here's the front diff cover and o-ring:

Image

Image

Shift shaft seal, a pain to get out:

Image

Painting the center and rear covers, if you haven't realized it by now I don't like old, crusty parts:

Image

Image

I'm also going to cryo the new 1-2 collar/hub, the larger 1st gear and 3-4 collar so it should a bit more durable. Now waiting on parts, more to come...

Re: Building a 4.2 for my C4 project...

Posted: Mon Feb 13, 2012 2:14 am
by islingtonaudi
Got a shipment of parts from Germany finally, some small bits for the V8 and all the synchros for the gearbox. I'll be using the upgraded composite synchros for all gears, here's a comparison of the older brass style vs. the new composite style for gears 3-6:

Image

Got the 3-4 shift collar back from cryo, all that needs to be done is press off the 3-4 shift hub, install the new spring and synchro and press the hub back on. The factory procedure is to heat the part up to 100°C. and press it back on, a pan of boiling water does the trick:

Image

All the parts laid out for reassembly:

Image

Install the shift collar, new synchro and spring on the other side of the collar and put snap rings in place and she's done:

Image

Image

Now waiting for the new 1-2 shift collar and hub, after cryo they'll go back on and the gearbox can be finally reassembled. Stay tuned....

UPDATE: All the parts came in from Germany, got the new 1-2 shift collar cryo'd and installed, heated up the shift hub to press it on:

Image

New synchro installed and hub pressed on:

Image

Complete 1-2 gear reassembled:

Image

Reverse gear reinstalled:

Image

Input shaft with 3-4 gear reinstalled with shift forks:

Image

With the front and center cases reunited 5th and 6th gears can be reinstalled. Here's the 5-6 shift collar with the new composite "F" synchros:

Image

With 5th gear done and the snap ring reinstalled, done a lot of those on this build:

Image

All that's left is reinstall the rear case, torque the super-tight bolt (105 ft./lbs.) and the tail piece with new seal. Here's the final result:

Image

Image

Been a fun project, just got my Apikol short shifter rod and will probably go with the 034 short shifter as well. Should be sweet....

ON WITH THE HEADS!

Posted: Tue Mar 27, 2012 1:12 am
by islingtonaudi
Well now that the 01E project is done it's time to re-focus on the heads for the V8. These are the ABZ heads I got from my donor engine, they definitely were in need of a rebuild and I had a chance to clean up the intake ports a bit last summer but they've sat in boxes since. Finally got the time and $$ to get them down to B & B Machine in Mesa, Arizona for a complete tear-down and rebuild. My approach with the rebuild was a complete disassemble, cleaning and checking of guides, lifters and a regrind of the valve seats. Once they were torn-down I was able to "borrow" them for a long weekend to get the ports and valve bowls cleaned up substantially more as well as the exhaust ports. With the ceramic coated exhaust manifolds and the better flowing ports I expect some decent gains in power.

Before:

Image

After tear-down:

Image

Intake and exhaust bowls cleaned up a fair amount, the valve seats had to be CAREFULLY worked around to not damage them:

Image

Image

Image

The exhaust ports nice and shiny but not too smooth, they need some texture. I kept them around 80 grit:

Image

The verdict from the shop was the exhaust guides were toast (no surprise) but the intake guides, valves and lifters were fine. With new guides in place 3-way valve seats were ground and new stem seals and timing chains finished it off. The shop wisely chose to not bead-blast these since the risk of abrasive grit getting stuck in the oil passages was too great. They gave them an extra soak in the parts cleaner and a fresh coat of paint. Look like new!

Finished passenger side head:

Image

Image

Image


Driver's side head being test-fit to the block. Looks a bit better than when it came off the old ABZ block:

Image

Image

Image

Image

Just need to do a few more things before the heads are bolted back on. Was originally going to move the block back to the pallet before installing the heads but realize it's easier to work on an engine stand. Besides I have this paper weight taking up space on my wheeled pallet, this needs to go to the recycler....:

Image

Heads went on finally, gave the block and head surfaces a good cleaning and with new Reinz head gaskets and head bolts was very easy on an engine stand:

Image

Image

Image

It's important to mark the head bolts order of tightening, very specific sequence:

Image

Image

Image

Image

Kind of looks like an engine...:

Image

Test fit of the S6 Plus ceramic-coated exhaust manifolds:

Image

With the intake manifold and valve covers, so sweet....:

Image

Image

Image

The rear coolant piping is now installed, new paint, o-rings and hardware:

Image

Setting the timing with VAG 3341 cam locks, pretty fool-proof:

Image

Image

New seals for the rear timing covers:

Image

Image

Covers on, sprockets next...:

Image

Sprockets on, timing set and the engine turns by hand with no issues:

Image

Front timing covers test-fit, really look nice with a brand new powder coat finish:

Image

Image

Image

Image

Coil-packs added make it look like a real engine finally:

Image

Image

Engine is too heavy to leave on the stand so will be moved next week so final assembly can proceed. Stay tuned...

Final Assembly begins! Details, details...

Posted: Tue Apr 17, 2012 2:11 am
by islingtonaudi
Finally got the engine off of the stand and back onto the rolling pallet. I get nervous with all that weight and shiny stuff on a slightly flimsy engine stand so I'm glad it's back on terra firma now. Used the old engine mounts and some wood blocks to get the whole shebang off of the pallet enough to not have the weight of the engine on the oil pan and it also just clears the ends of the exhaust manifolds. Love when a plan comes together....

Image

Now I can focus on the small stuff, got the flex-plate back on as a test-fit and cleaned up the starter and reinstalled it:

Image

Image

Image

It's a tight fit in there, the oil filter is about 1/2" in front of the starter. Also got the 110 amp alternator installed:

Image

The large bracket to hold that holds the power steering pump and a/c compressor is also on now, still need to source the proper a/c compressor from Germany but I have one in mind. A nice top view, couldn't resist adding a dose of orange to the oil filler cap. Tedious hand painting but came out nice...

Image

Image

Also got the coil-packs test fit with stainless allen head bolts, a nice clean look:

Image

The intake/exhaust manifolds are still not permanently on but will be when I receive a couple more gaskets. Need to pull the fuel rail to install the intake and fuel injectors. Still need to figure out my injector choice, I have found a source for the Euro-spec S8/ S6 Plus Bosch injectors, a bit higher output vs. the stock ABZ versions. I plan on hitting 7k rpm and a bit more fueling might be a good thing. Think of the sound in "Ronin"...


JULY 2012: Here's the engine and 01E 6-speed *sort of* mated up:

Image

The emphasis now is getting the proper flex-plate from a '99 A8 so that the 034 flywheel insert actually fits it properly. Once that's done I can focus on the clutch and bolting the whole enchilada together. Exhaust system is another item I need to address this fall...

SEPT. 2012: Getting closer....

Posted: Wed Sep 19, 2012 6:56 pm
by islingtonaudi
After a nice summer away I've had a chance to make a few mods. After getting a look at a real-deal S6 Plus on the east coast I realized I needed to modify a few things. One thing I definitely needed to change was a the old 110 amp alternator, decided on a 120 amp A8 version with the rear air duct, it mates up nicely with the oil cooler duct intended for it:

Image

Image

Image

Image


Installing the new alternator wasn't without its challenges, the A8 version isn't intended for the early V8Q timing cover and the case interferes a bit. Nothing a bench grinder can't cure...

Image

Image

I also got new exhaust manifold gaskets so time to put on the manifolds finally:

Image

Image

Image

Also did a test fit of the S6 Plus harness for fun, fits great and just a couple of connectors I need to figure out still:

Image

Image

Image

Got my S6 Plus heat shields, one brand new NOS from Germany. Love the 1996 build date sticker on it:

Image

Image

Front coolant hose bracket out of a junkyard V8Q, a little clean up and paint and ready for duty:

Image

Got the rear bushing out of the crank that was installed for auto transmission V8Qs. Tried an old-timer's method of filling the blind hole with axle grease and pounding on the grease with a tight-fitting socket. Hydraulic pressure did its charm. Took a while but worked well:

Image

Image

Image

Image

The end result is a crank waiting for an S6 Plus flywheel and clutch...

Image

Home Stretch, lots of small things left to do...

Posted: Fri Mar 15, 2013 3:51 am
by islingtonaudi
Well it certainly has been a long journey getting to this stage but I now have the engine close to being install-ready. I've gotten a lot of parts from Germany over the past month and now some final assembly to do and then we can bolt the engine and transmission together! Originally I had planned to use the 034 flywheel insert with a standard UrS4 228 mm clutch but decided I'd stick with a heavier steel flywheel as the factory specified. This meant using the 28 lb., flywheel found on the C4 S6 V8 cars. So I focused my sights on a shiny new S6 Plus piece and all would be fine. Hmmm...
The long-awaited flywheel arrived from Germany but not without a major hitch....the price of the genuine S6 Plus/S8 flywheel ( "J" designation vs. "H" for a standard C4 S6 V8 M.T. car) skyrocketed over the past 6-8 months and now is around $1400 vs. $500 or so last summer! So Plan B.... fortunately my supplier in Germany of quality used parts had a nice used flywheel with an almost new clutch for 275 €, around $400! A huge savings but with a catch: there's no 60-2 tone-ring machined into the circumference of the wheel. So without that ring the car won't start or run. Hmmm....what to do? Fortunately a well-respected vendor has stepped up to machine the flywheel to the proper spec and hopefully I'll have it back by mid-April. Before I shipped it I had to mount it up just once to see how it fit. Looks like it belongs:

Image

Image

Used clutch but in great shape:

Image

Image

That clutch has probably less than 20k miles so though buying a used clutch is not my first choice, it saves me a lot of money and the peace of mind that I'm getting a genuine VAG clutch. It should work just fine for my driving. I also got the proper a/c compressor from my friend Holg in Germany, it was a nice Ebay score over there for only 20 €, about 80 € less than the going price. As long as it works I'm happy, got her cleaned up and ready to go on the car:

Image

Image

Image

Mounted up:

Image

Another hurdle I've encountered with this project is the exhaust system. I had originally thought I would build a custom 2.25" 304 stainless system cat-back but after a lot of thought and input from other people I decided that I would do a semi-custom system utilizing a substantial portion of a stock UrS6 exhaust system. The original S6 Plus used a system very similar to the UrS turbo cars, even more so than the standard S6 V8 cars from '94-'96. So I decided that I would use the stock UrS6 center resonator with the stock dual piping forward and aft of the muffler but then tie in 304 stainless going forward. To the rear I'd use a Jetex DUO63 2.5" dual inlet/outlet rear muffler with Fox 70 mm tips. Keeping a stock mid-muffler would have the most benefits for eliminating drone and the rear Jetex unit should give a bit more growl to the exhaust note without being excessive. I also need to come up with an x-pipe to deal with the unbalanced frequencies from the V8 so Hank Iroz is building me a custom solution, should be sweet. Here's the mock-up for the back half of the exhaust:

Image

Image

Image

Under the knife: out with the old and the clean up begins...

Posted: Mon Apr 08, 2013 11:31 pm
by islingtonaudi
Finally the big day arrived for the old V6 and auto transmission to come out. Was fortunate to have a DIY rental space with lifts/tools provided for $20 an hour. Made it A LOT easier to get the exhaust, drive shafts, all the small bits out of the car before the engine/trans could be removed as a unit. Took a solid two days to get the whole thing done but mostly came off without a hitch:

Image

Image

Image

Image

Image

I have a long list of things that need to be accomplished before the V8 goes in:

-power steering rack removed for rebuilding by Jorgen in Michigan, V8-specific hoses run for the power steering system
-fuel lines modified for the V8
-subframe bushings replaced with poly versions
-all V6 specific wiring and a/c hoses removed and replaced with V8 versions, a/c drier relocated behind washer bottle
-S6 Plus wiring harness installed
-UrS6 steering damper installed with S6 V8 tie rods from Europe
-original headlight washer plumbing removed
-engine compartment cleaned and paint polished before install of new engine
-heat shields and engine mounts installed

Lots more but you get the idea....

Cleaning, painting, polishing....

Posted: Mon Apr 29, 2013 1:28 am
by islingtonaudi
Well the past 2-3 weeks since the engine pull has seen quite a transformation in how the engine compartment looks. It was certainly an oily mess with about 16 years of daily driving and a leaking V6 and especially the power steering rack which must have leaked a case of fluid over the past decade into the engine compartment and transmission. So it was a matter of getting dirty and spending time going through all the nooks and crannies with tooth brushes, paint thinner and Brakekleen trying to get all the grime off. Slowly the original car emerged and as parts came off it was fun to see the bare bones of my A6:

Image

OIl cooler installed, a/c piping starting to be re-routed:

Image

Image

S6 master cylinder reservoir, offset for the strut tower bar:

Image

Engine mounts installed after new subframe bushings:

Image

Coolant, p.s. and washer reservoirs reinstalled:

Image

Image

P.S. rack rebuilt by Jorgen, goes back in after the new harness has been run. Still need to fabricate a custom feed line from pump to rack but getting there...

Image

Rack back in, S6 V8 tie-rods installed, the curve in them is to clear the distributors on the early V8 engines, mine has coil-pack ignition so never mind...

Image[/URL]

Open wide....

Posted: Thu Jun 06, 2013 9:57 pm
by islingtonaudi
After a long six weeks of clean-up and running new lines and modifying existing A6 things to work with the new powerplant the V8 was ready to go in. Enlisted the help of a couple friends and we had it done in around 2 hours:

Image

Image

Image

Image


No major hitches except a broken oil pressure sender and a bent heat shield but everything went in smoothly and most importantly, everything seems to fit if a little tight on the driver's side heat shield:

Image

That can be remedied down the road, got all the mounts bolted up tight and the harness connections on. With a test fit of the radiator it looks like a real engine:

Image

Image

I sourced some brand new OEM S6 Plus fuel injectors but they are a standard 14 mm diameter and require shimming to fit in the U.S. ABZ intake manifold. EFI Express and their anodized aluminum shims make the injectors fit like a charm:

Image

Image

Image

Fuel rail and manifold installed and connections made:

Image

Covers on, a nice factory appearance:

Image

Still lots to do, finishing up the wiring and getting the shift linkage hooked up before VEMS is installed in late June.

Exhaust begins...

Posted: Sat Aug 17, 2013 11:27 am
by islingtonaudi
Got the car out of the storage in mid-July after a long June break for some work up in Washington St. The plan originally was to fabricate custom down pipes and install the exhaust in one shot but a couple of hitches prevented that. First problem was the center prop shaft I sourced from a 1994 100csqm was about an inch too long, did some checking and the center prop shaft from the UrS4/6 is the correct one. That said the drive shaft I have is in great shape with nice CVs and a good center bearing so I've decided to get it shortened in Sept., when I return from my summer break. Thus it precludes me from being able to button up the car until then but at least I was able to get the down pipes fabbed up. In my searches I discovered a great shop in Mesa, Az., called Redline Performance Mfg., who do a lot of custom exhaust work for customers and other shops as well. They also have a mandrel bender, pretty hard to find so I felt I was in good hands. They managed to have some 2.25" odds and ends laying around from other jobs which worked perfectly for our needs. In a couple hours they were done:


Image

Image

02 bungs:

Image

Image

I also needed to address the front torque mount, measured up and had cut some 16g steel plate which worked great, a bit of engineering and a perfectly usable mount:

Image

Image

Some paint and a factory appearance:

Image

Image

Everything should be buttoned up by the end of Sept., and we'll get her running finally....

Re: Building a 4.2 for my C4 project...

Posted: Tue Jul 01, 2014 9:06 am
by EDIGREG
bumping this up to welcome Doug to TPP...even if he joined involuntarily :)

Re: Building a 4.2 for my C4 project...

Posted: Tue Jul 01, 2014 9:43 am
by WOMBAT
beautiful....

Re: Building a 4.2 for my C4 project...

Posted: Tue Jul 01, 2014 10:41 am
by Hank
Nice car Doug

Re: Building a 4.2 for my C4 project...

Posted: Tue Jul 01, 2014 2:26 pm
by Dave
Cant wait to see it at BBQ5 this year!

Re: Building a 4.2 for my C4 project...

Posted: Tue Jul 01, 2014 2:43 pm
by Hank
^^^^^ this

Re: Building a 4.2 for my C4 project...

Posted: Tue Jul 01, 2014 6:12 pm
by loxxrider
Wow, this is cool. Thanks for sharing!

Re: Building a 4.2 for my C4 project...

Posted: Wed Jul 02, 2014 3:55 pm
by Foscora
WOW ! Great job !

I didn't know S6+ weren't sold in the US :wtf:
A close friend has one, it's a really cool car & engine ! I just love it's endless revving (compared to most V8) & sound !

Now you car really needs à S6Plus logo ! You deserve it ! 8-)

Re: Building a 4.2 for my C4 project...

Posted: Sat Jul 05, 2014 4:01 am
by macspring
Can't wait to see and hear a video of it running and driving, now that I fully appreciate what went into it's gestation and birth.

Would like to convert one of my urS6 cars from AAN, but ironically after seeing what's involved, it's way way too much for me.

Well done, and really enjoy the torque and the sound.

Regards.

Re: Building a 4.2 for my C4 project...

Posted: Mon Aug 04, 2014 10:09 pm
by islingtonaudi
Thanks for the kind words, I need to do a major update of the build thread. Car is running and running VERY well, presently in Northern Michigan for the month of August and then on to S-Fest later this month. Drove it over 2500 miles from Arizona to Michigan without issue and have been really enjoying the torque and power of the V8, pretty incredible. Not a bad sound either. I'm building another V8 from my good spare block, a fairly drop-in swap and a UrS car would be the perfect donor... :)

Here's a sound clip:

https://www.youtube.com/watch?v=kJ2K-2Y-5Fw

Re: Building a 4.2 for my C4 project...

Posted: Sun May 24, 2015 1:18 pm
by Dynasty
Hello

I am in the process of replacing the timing belt on a AEC V8 and have a question regarding the VAG 3341 timing tool. Did you use this tool to hold the cam shafts in place when torquing down the bolts for the cam shaft sprockets?

Regards Eivind