
Her Mars Red 83 Urq ...23psi of manual boost...vid
Re: Her Mars Red 83 Urq gets fender painted and reassembly
I have a summit rear coming that I think will work and Sean has a center section that he says I can use, so even if I ran it with just the center and the old rear (same as no rear) it would work in a pinch. It wouldn't take much to straight pipe the center and replace the rear.....it's just the time involved. I suppose I could save a little time by having a shop weld in the rear, but until it's running I can't even entertain the thought of driving the car to a muffler shop. I'll figure something out!! Right now I'm more concerned with the running part. 
-
Quattro v1.0
- Posts: 405
- Joined: Wed Feb 27, 2013 11:08 am
Re: Her Mars Red 83 Urq gets suspension/brake love.
quattro87 wrote: Right now I'm more concerned with the running part.
PSSsshhhhhhhhh
...just trying to psych us out ;o]
Re: Her Mars Red 83 Urq gets suspension/brake love.
Is it working? It wasn't me that told everybody there would be 4 Vegas Urqs there. I might just go fishing with my brother. Are you up for it David?
-
Quattro v1.0
- Posts: 405
- Joined: Wed Feb 27, 2013 11:08 am
Re: Her Mars Red 83 Urq gets suspension/brake love.
You are just getting a stock car running. It's not like it's 5am and you are welding up a fuel pressure regulator on your way to a destination 700 miles away ;o]
Re: Her Mars Red 83 Urq gets suspension/brake love.
Re: Her Mars Red 83 Urq gets suspension/brake love.
Well guys, I've been pretty quiet lately. It's not because I've not been doing anything on Her Urq, but because I've been SOOOO busy that I just haven't had the time to post. Besides it looks to me like the OTHER Iroz Red Urq that has been taking headlines lately would be hard to keep up with, but to keep this project documented I will try to put down what the last couple of weeks has been for this car.
Warning.. The following is long winded, with a bunch of crap to get to where I'm now at (still not ready for the weekend) so if you want to skip to the end feel free. If you are an Urq owner and especially a stock Urq owner at least skim the first bit.
The last few posts have been trying to get the exhaust squared away, finish the head that had 3 broken studs, and paint the passenger front fender, that side of the engine compartment, and the core support. One thing about painting is that when you have stripped the paint you are pretty much committed, so with that reality I figured that while waiting for the head gasket to arrive and before the motor got put back together I would get the painting done. So I started prepping for a quick in the garage job to get it to where the fender didn't stick out so badly from the rest of the car. I had originally wanted to paint the whole car, but because of the head problem I ran out of time.
Getting ready to paint....I thought that I would show you the new ARP studs along with the paint prep.
The inside engine bay where some rust neded to be taken care of while in there.
Re: Her Mars Red 83 Urq gets suspension/brake love.
is it done yet?

Re: Her Mars Red 83 Urq gets suspension/brake love.
i saw sean's post on qw...so this is number #283?...
i think we could have been friends many years ago...
Attachment:[/quote]
1213 (Medium).jpg [ 61.33 KiB | Viewed 683 times ]
[/quote]
looking good. now let's get these things done! we're running out of time!
i think we could have been friends many years ago...
Attachment:[/quote]
1213 (Medium).jpg [ 61.33 KiB | Viewed 683 times ]
[/quote]
looking good. now let's get these things done! we're running out of time!
Re: Her Mars Red 83 Urq gets suspension/brake love.
1213 (Medium).jpg[/quote]cbrydon wrote:i saw sean's post on qw...so this is number #283?...
i think we could have been friends many years ago...
Attachment:
looking good. now let's get these things done! we're running out of time!
I don't quite know how hand assembled works, but you would have to think we were close at some point.
You are right in that we are running out of time. Don't I know it. I started to update, but they actually want me to do something here at work. About now I'm wishing that I would have gone to sleep before 1am this morning. You know, that running out of time thing.
Re: Her Mars Red 83 Urq gets suspension/brake love.
Did you get the master cyl ordered?
-
Quattro v1.0
- Posts: 405
- Joined: Wed Feb 27, 2013 11:08 am
Re: Her Mars Red 83 Urq gets suspension/brake love.
My blue car is DA900362. Johns car with the Master(cyl)Disaster is #283.
Im running into my own issues now...
Im running into my own issues now...
Re: Her Mars Red 83 Urq gets suspension/brake love.
Ok, back to the update. So I get the original solid lifter head cleaned up and managed to get the 3 exhaust studs along with the two studs from the water neck drilled out and removed. None of them would would just easy out, but I drilled pretty good centers and retapped them. While I had it off I took it apart and hand lapped the valves in and installed new valve seals.
Aaron do you recognize the homemade valve seal pullers?
It looked so pretty on the bench. I should have had a seat and valve grind, but time was getting short and I didn't want to go through the reshimming process to set valve lash.
So I'm all excited that the motor is going to be going back together with 2 weeks still left before the GTG. I put the exhaust manifold on while still on the bench with all new studs, washers, and copper nuts. I do final torque on the 1 and 2 cylinder and pull the bottom threads out of both. Now what? I figure that have way too much time in this head to give in now, so I figured that I would weld up the holes, drill, and retap. I really liked the idea of the original head and solid lifters, plus it was in such good shape as far as varnish and wear.
Welded holes
drilled
After the third hole pulled and I didn't get a good fill but had a pocket in the new hole that couldn't be tapped I threw in the towel. These were holes that were pulling threads with new copper coated nuts before they were even getting tight on the manifold. Two of them pulled just getting past the self locking portion of the new nuts.
With a week left I decided I needed to go to plan B last Saturday. I have a hydraulic 20v head that came from His Urq that had a seized bottom end and water in the cylinders. I had originally shied away from it because of being hydraulic and I didn't know if the seat/valves had pitted from the moisture in a wet seized motor. I wish that I would have gone that way to begin with and had the time to go through it. Instead I just rotated the cam so that I could kind of look at the seats for obvious pitting. The kicker is that Sean claims that the head had less than a few thousand miles on it since it was rebuilt. It was out of an early 80s 5ktq so the water ports would match without any problem. I cleaned the runners with a bottle brush and brake cleaner and called it good.
Cleaning plan B head
I'm not sure what the injector shrouds came out of, but they were not WX or MC. They were long shrouds, but an MC injector wouldn't fit into them and they didn't have provisions for the lower o-ring. They looked like they would work so in they stayed especially since the hole size was different than the WX and I wouldn't be able to use the short WX shrouds.
After I installed the head and had the ARPs torqued to 75lbs, I decided that it was time to change out the motor mount that could still easily be reached. It was completely torn apart and had to have two wrenches, one holding the bottom from turning the the other cranking on the nut. When it was out it wasn't good for anything except apparently a lookout post.
The logical step at this time would be to start putting the turbo, intake and CIS back together, but I had the problem of not knowing where I put the oil filter housing nut so I wouldn't lose it. I looked for ever and finely decided to change out the other motor mount so I would have two new ones that sat the same height.
New on the left old on the right.
What a pain to get to the driver's side mount. I finely got enough articulation and leverage to break it loose, only to find that it was the pressed in stud that had broken loose instead of the nut. I'm beginning to think at this point that this car wasn't supposed to go to the GTG, after all my wife says that if I give it to her she will sell it. I thought maybe I could weld two welding rods together to get enough length to reach down to the mount and tack the top side, but decided that I needed to go back to doing something about the oil filter housing nut. After looking one last time it was decided that I would have to steal the one off of my spare motor that came in the good looking blue van. Of course the PO hadn't drained the oil before removal so I was stuck with a motor on a palet with no way to get to the plug other than a hoist. How much of a mess could 5 quarts of oil really be? I decided enough to warrant a catch basin which I had hidden under the coupe gt so as not to look so messy to the wife. (it probably didn't help) I go out to drain it into a container so that I would have plenty of room and this is what I find.
I didn't know whether to be hot or happy, but decided to move full forward on getting the turbo, intake and that side of the motor put back together and leave the motor mount for a better time.
Work is calling so I'll post up the rest of the saga at a different time.
Re: Her Mars Red 83 Urq gets suspension/brake love.
The master cylinder is ordered, but you are jumping the gun on the story.
Re: Her Mars Red 83 Urq gets fender paint and reassemble wor
So now armed with the nut to attach the oil filter assembly I go to work. Well that's really not true as I developed an eye problem and just couldn't see going to work Monday morning and instead dove into the Urq.
The oil filter assembly
Once installed I moved onto the turbo and downpipe. When I removed the turbo I hadn't intended on removing the head so I had to remove the downpipe, turbo, and then exhaust manifold. In removing the nuts from the turbo to downpipe one of the studs wheeled out instead of just the nut. No worry....happens all the time. Not on this project. On inspection while getting ready to install I look at the thread and the bolt.
They both are trashed.
I don't even think that it could have been retapped. I kind of wanted to upgrade to a water cooled turbo, but didn't have the parts or time, but did have a pretty worn K26 water cooled turbo off of an old 5ktq. The hotside housings were identical and a couple hours of soaking nuts in Kroil the housings were swapped with 4 perfect studs.
I then went on to the downpipe then the intake and finely the CIS with all the hoses and crap to figure out. By the time Sean stopped by on his way home from work Monday afternoon I was looking pretty decent on the motor.
We hooked up a few sensors and a few hoses and such and decided to put some fluids in it and see if it would run. I put a new gallon of antifreeze in and new oil and went for a start.
Although it ran we immediately saw a puddle of antifreeze and a puddle oil on the ground and not little leaks. The oil ended up being the turbo oil filter not quite tight enough. They are hard to get a good grip on without a tool. The water was a leaking radiator. Now mind you I had run this car around the block a bunch of times as well as letting it idle for 10 or 15 minutes at a time and never had any leakage. It's like I tear this car down to give it some love and she's pissed that she has to do something besides sit around like the last 20years. The fix for the radiator was a brand new Ron Davis aluminum radiator that my wife had given me for Christmas last year for my car. It was just sitting on the shelf begging to be used. For those of you that haven't seen a Ron Davis radiator, I highly recommend them. What a great piece of craftmanship and bolt in all the way. I was impressed. Rumor has it that I know someone pretty well that can weld decently, but he hasn't made me a radiator yet.......I do believe he had something to do with his mother buying me one for Christmas however.
Before replacing the radiator I cleaned up a bit, but figured that the time had come to change the motor mount seeing as it was now wide open to be able to tack the loose, spinning stud. I weld tacked it, replaced the mount, primed and painted it back red.
Re: Her Mars Red 83 Urq gets fender paint and reassemble wor
Aaron this is just for you to prove that I do have a running Urq coupe in my garage.
Link to video
Link to video
-
subvertdesign
Re: Her Mars Red 83 Urq gets fender paint and reassemble wor
Looking good John! It's nice to see (and hear) them come back to life.
-
cuatrokoop
Re: Her Mars Red 83 Urq runs but doesn't stop
Good progress John!
-
speeding-g60

- Posts: 2152
- Joined: Fri Mar 01, 2013 10:46 am
Re: Her Mars Red 83 Urq runs but doesn't stop
haha. excellent. he remembered..... 
-
bimmerboy
Re: Her Mars Red 83 Urq runs but doesn't stop
Looks nice!
Re: Her Mars Red 83 Urq runs but doesn't stop
Geez...you guys are way too ambitious...last minute paint jobs, tranny swaps, head swaps, turbo upgrades, sems installations,...the list goes on and on...
...and you seem to be able to keep up with your build threads to boot...
c'mon...you're making everyone else look bad...
I may be divorced AND unemployed by the time I get down there, but I'll be there!
Paint looks great and it's nice to hear those mechanical lifters again...
...and you seem to be able to keep up with your build threads to boot...
c'mon...you're making everyone else look bad...
I may be divorced AND unemployed by the time I get down there, but I'll be there!
Paint looks great and it's nice to hear those mechanical lifters again...
-
dbldmnd
Re: Her Mars Red 83 Urq runs but doesn't stop
Awesome, John!! I have been watching your progress and it is great to see you overcome each roadblock and move forward. The car looks great! Enjoy the event and post lots of pictures.
-
Dave
-
Dave
Re: Her Mars Red 83 Urq runs but doesn't stop
Thanks guys and I hear you on the divorce and unemployed line of thought.
I thought I had posted about the brakes that Dave alluded to, but on scanning back through it somehow didn't post. The other day when Sean was over I had asked him to bring his pressure bleeder to do the brakes. The calipers were all either new or rebuilt, so I knew it would take a lot of pumping to get filled back up. We hooked it up and I crawled under the car to bleed the rear passenger caliper. I was hardly getting anything out and yet I could hear the fluid/air in the lines. Sean said something about going through a lot of fluid about the time I turned to look at the three foot puddle that was spreading fast under the rear drivers corner. A line had split close to the line to hose interface connection. I guess trying to loosen 25 yr old rust to change hoses and calipers took it's toll.
It might have also had something to do with this little cleaning incident.
I then had to figure out how to get the tee under the car apart with that same Wisconsin rust so that I would only have to replace from the tee to the left/rear caliper. Sean was good enough to cut and flare a piece of tubing that he had at home after I gave him the measurement for length. I bent it like the old one and had it repaired and ready to pressure bleed by midnight Saturday night. The only problem was I still couldn't get the pedal to feel anything but mushy, even after bleeding each corner 4 times. I finely threw in the towel and went in showered and cooked breakfast for my wife seeing as the sun had already come up.
A thanks goes out to Sean for the line, the bleeder, and for coming back over Monday after work to try an old fashioned bleed with two people. It's not like he doesn't have his plate full also. We determined that the master cylinder was bad and that is Dave was talking about earlier in this thread. I should have one on the doorstep when I get home tonight after work. Hopefully I will have brakes and be ready to roll tomorrow.....at least that's the plan.
Re: Her Mars Red 83 Urq runs but doesn't stop
Powdercoat the wheel and centercap to look like the bead blasting?
Re: Her Mars Red 83 Urq runs but doesn't stop
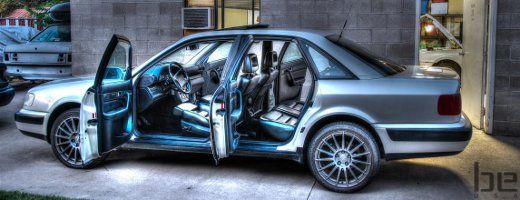
I cleared the bead blasted wheel to see what it would look like, but the plastic center cap paint match was too far off, so rather than trying to match the clear bead blast look I bought a bright two stage paint and just painted the wheels and centercaps. The cleared over raw aluminum wheel looked way good by the way, but I'm happy with how they turned out.
-
Quattro v1.0
- Posts: 405
- Joined: Wed Feb 27, 2013 11:08 am
Re: Her Mars Red 83 Urq runs but doesn't stop
I'll tell you all right now that John already gets the award for dedication to a project. This car has not been appreciative of the amount of work he has put into it so it can be driven for our event. Back in the days when Audifans was our only source of therapy, we'd refer to these cars as the "Bitch Goddess" and I have not seen one that fits the bill better than this one so far lol
By the way, if the wife sells it once you're done, can I be on top of the list?
By the way, if the wife sells it once you're done, can I be on top of the list?