Aarons RWD car - 5-26: more tin and racing saturday
Re: Aarons RWD car: 4-13 full picture updates
damn nice work aaron. can't wait to see this on the track
Ed
-
speeding-g60

- Posts: 2152
- Joined: Fri Mar 01, 2013 10:46 am
Re: Aarons RWD car: 4-13 full picture updates
THANKS! i cant wait to drive it..... rumor has it that it will be registered, and it DOES have DOT legal drag radials on it 
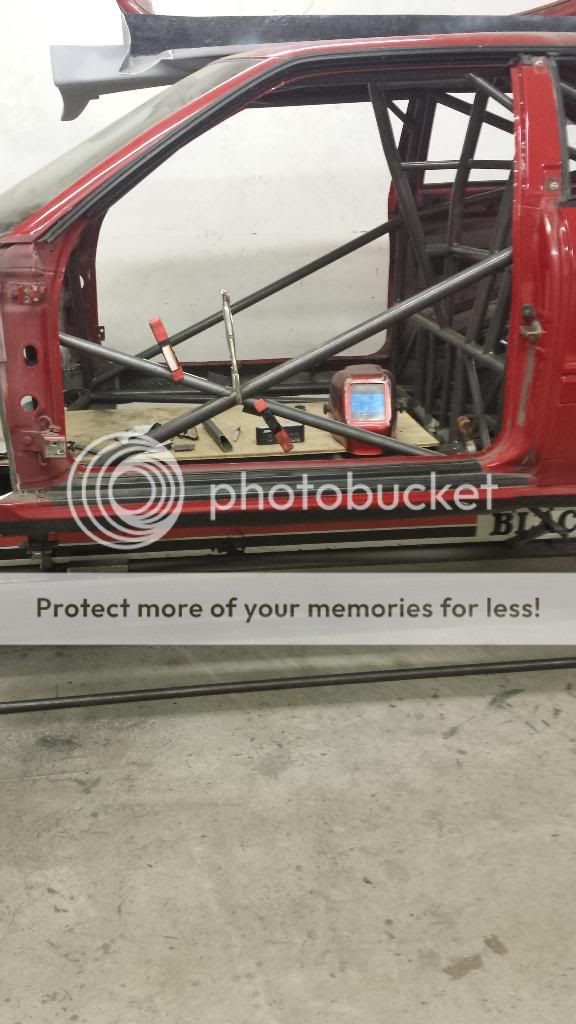
So, I started the door bars yesterday. They get X-braced in, and also made (almost complete) the two diagonals for the rear upper halo (Pro-Mod halo). Need to finalize the door bars so I can make the driver cage outer bar and diagonal to sill bars.
This stuff, is pretty fun to do.


So, I started the door bars yesterday. They get X-braced in, and also made (almost complete) the two diagonals for the rear upper halo (Pro-Mod halo). Need to finalize the door bars so I can make the driver cage outer bar and diagonal to sill bars.
This stuff, is pretty fun to do.
-
boost_addict
- Posts: 49
- Joined: Tue Apr 22, 2014 11:55 pm
- Location: N of Philly
Re: Aarons RWD car: 4-16 pic updates
I have a couple friends who build pro-mod chassis for a living, utmost respect for chassis builders.. that is amazing work.
id put a 3.6 vrt in it tho.
im surprised your not putting an 07k in really..
id put a 3.6 vrt in it tho.
im surprised your not putting an 07k in really..
91 VEMS CQ vr6 6766 o1e s2.
01 GTI vr6 vems 6262
01 2500 Cummins hx40. Tow Rig, vems round 80psi
01 GTI vr6 vems 6262
01 2500 Cummins hx40. Tow Rig, vems round 80psi
-
speeding-g60
- Posts: 2152
- Joined: Fri Mar 01, 2013 10:46 am
Re: Aarons RWD car: 4-16 pic updates
many many people ask why not this motor, that motor, and its a position that is easy for me to defend. because i already have the fully built race motor sitting here doing nothing. i already have the tuning done. i have the knowledge and experience with the 4cyl 20v stuff.
but, for all of those (which is most everyone actually) who DO want a different motor, they can rest assured that when/if i want a different one it will be semi easy. i/we are setting the wchassis up to take any motor, by using the mid-plate mount as a reference point./ so a HUGE turbo or twin turbo 4.2L 40v V8 is not out of the question. or a twin turbo LS motor. or anything really.
but, Brian, since you replied you got some pictures.... let us catch up a few days worth shall we?
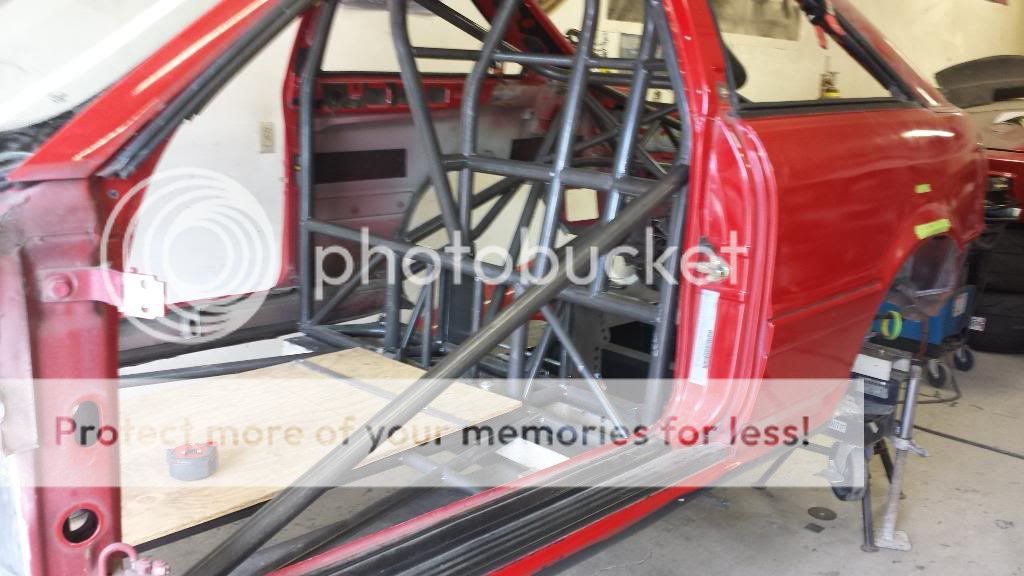
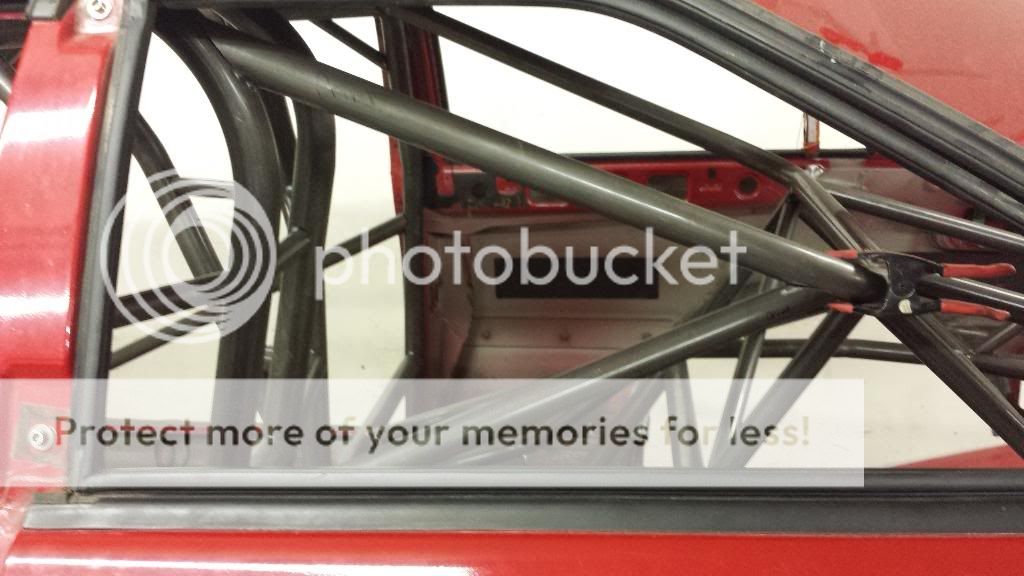
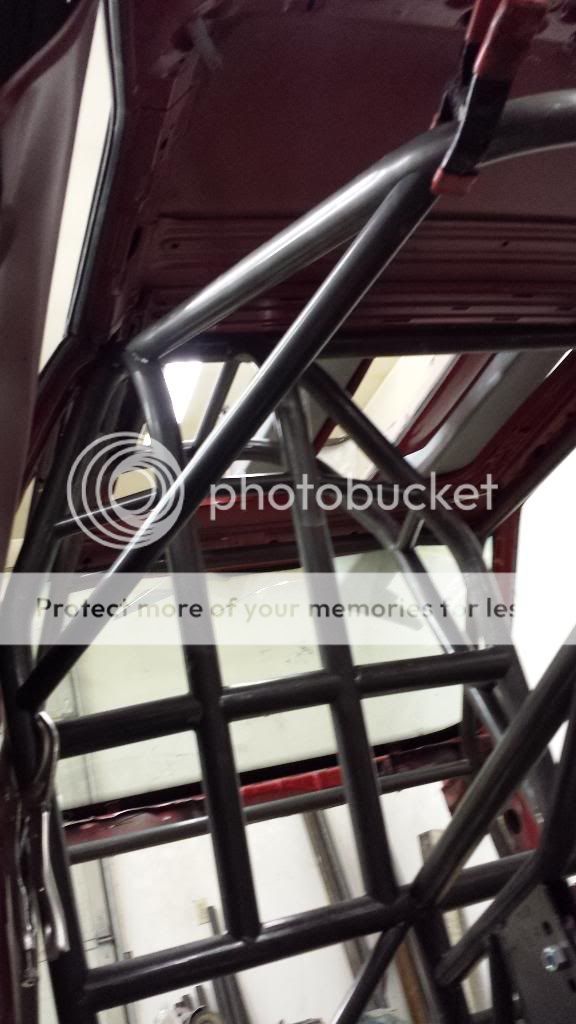
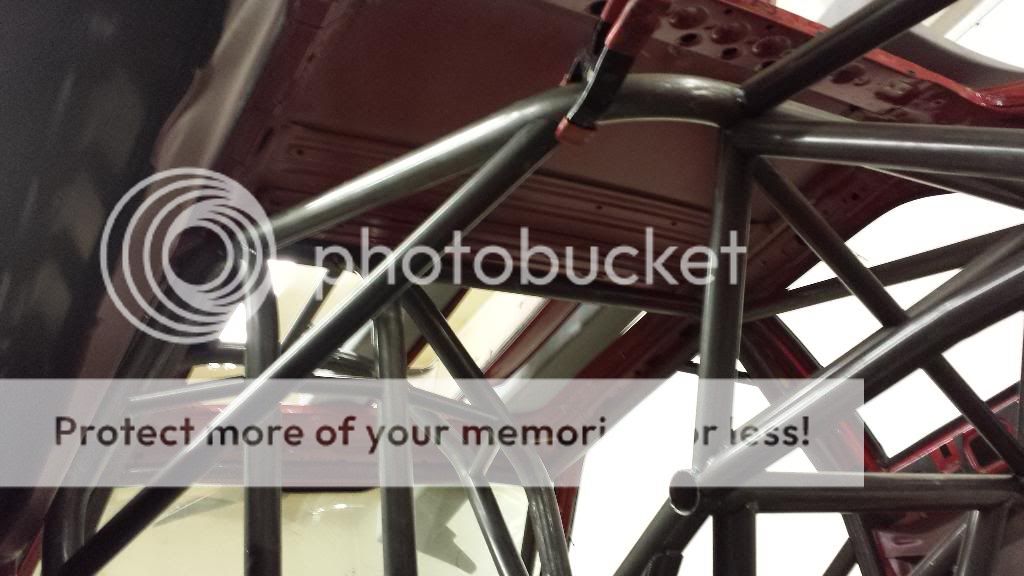
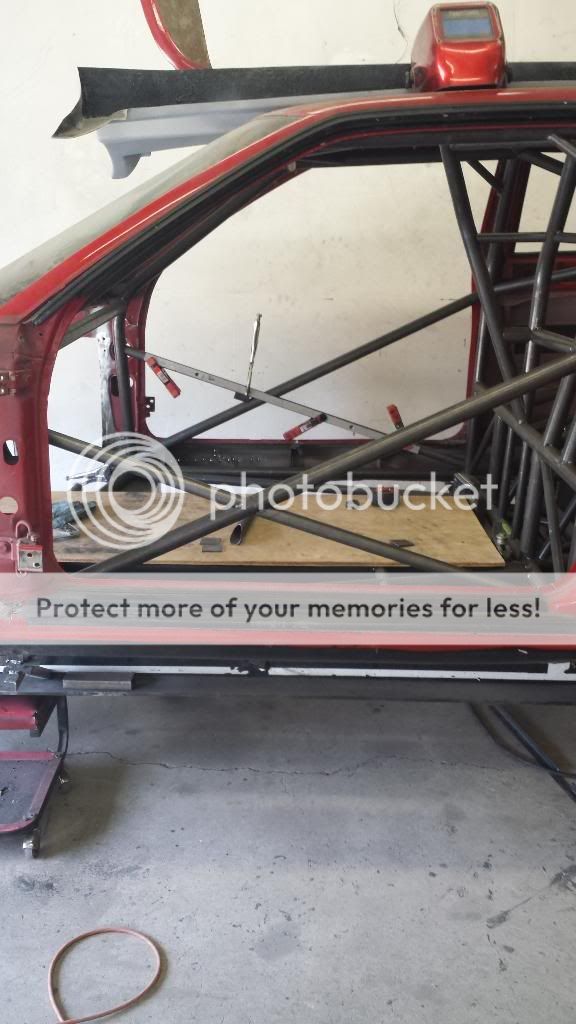
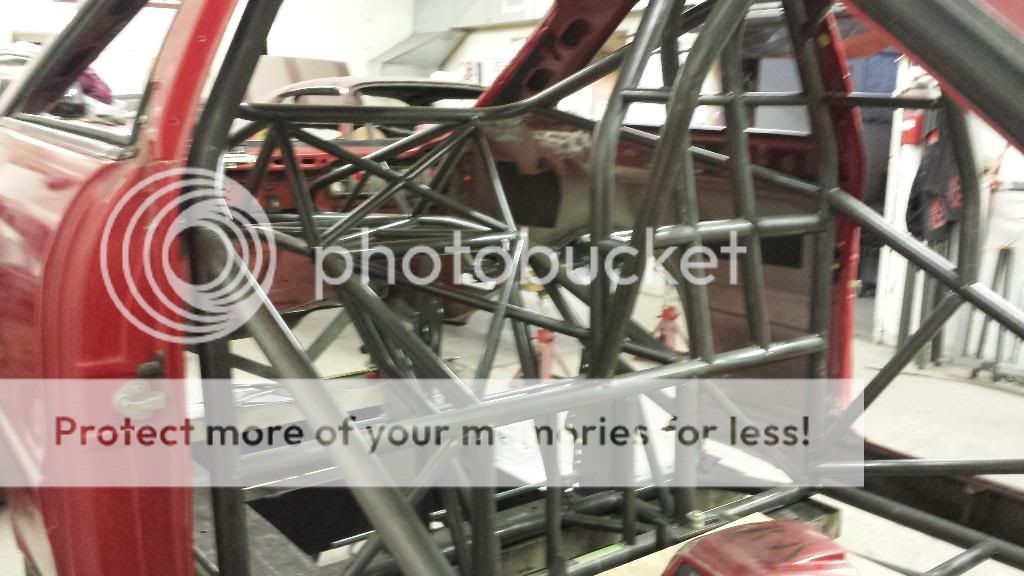
Worked on the roof bar braces and diagonal. Rules are fairly lenient on that bar, so that is how I made it. Good place to tag the chute lever on to as well. And I started fitting the door X-bars. Also got the two lower bars to the Pro-Mod rear halo in as well.


but, for all of those (which is most everyone actually) who DO want a different motor, they can rest assured that when/if i want a different one it will be semi easy. i/we are setting the wchassis up to take any motor, by using the mid-plate mount as a reference point./ so a HUGE turbo or twin turbo 4.2L 40v V8 is not out of the question. or a twin turbo LS motor. or anything really.
but, Brian, since you replied you got some pictures.... let us catch up a few days worth shall we?
Worked on the roof bar braces and diagonal. Rules are fairly lenient on that bar, so that is how I made it. Good place to tag the chute lever on to as well. And I started fitting the door X-bars. Also got the two lower bars to the Pro-Mod rear halo in as well.
-
speeding-g60
- Posts: 2152
- Joined: Fri Mar 01, 2013 10:46 am
Re: Aarons RWD car: 4-16 pic updates
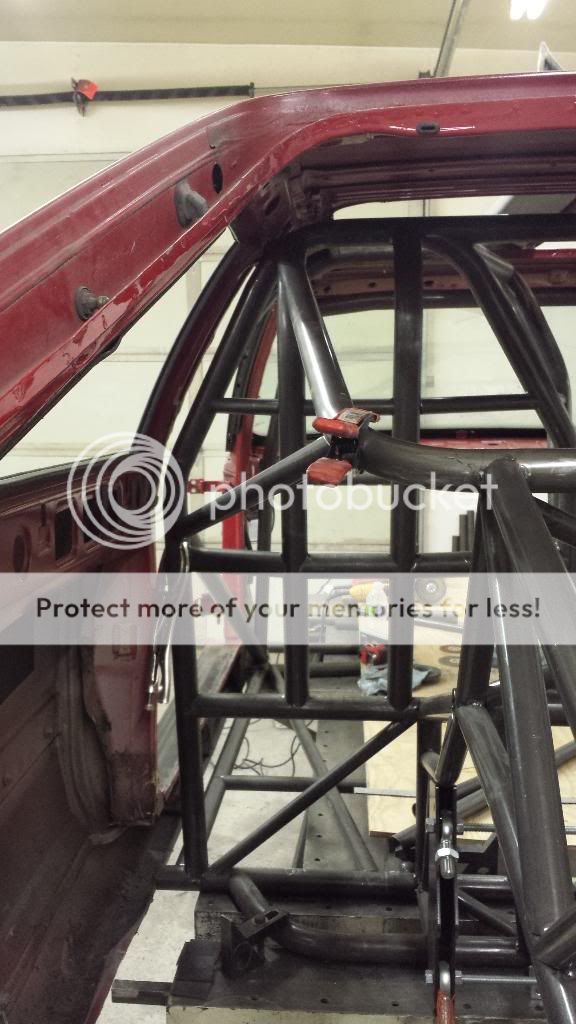
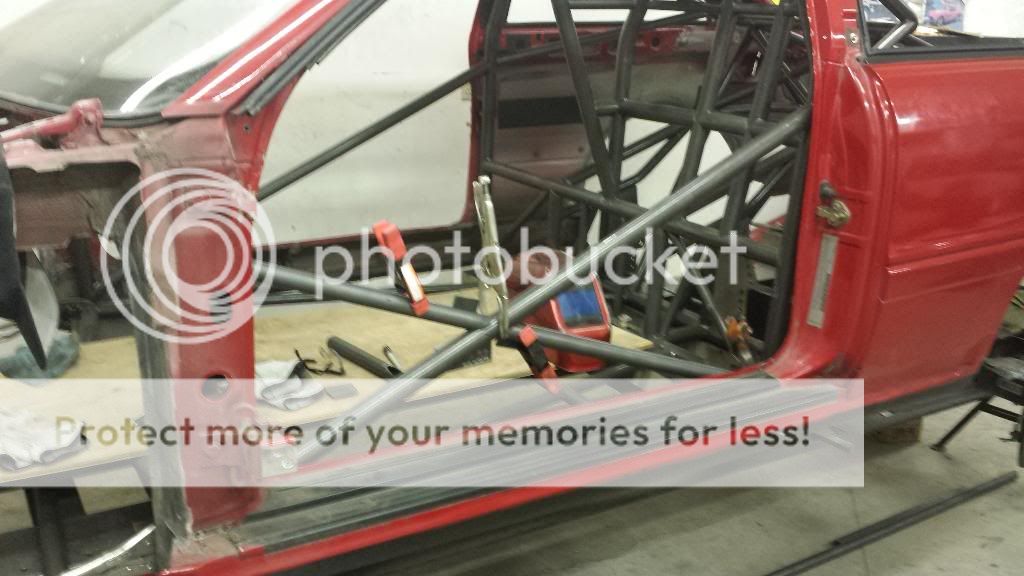
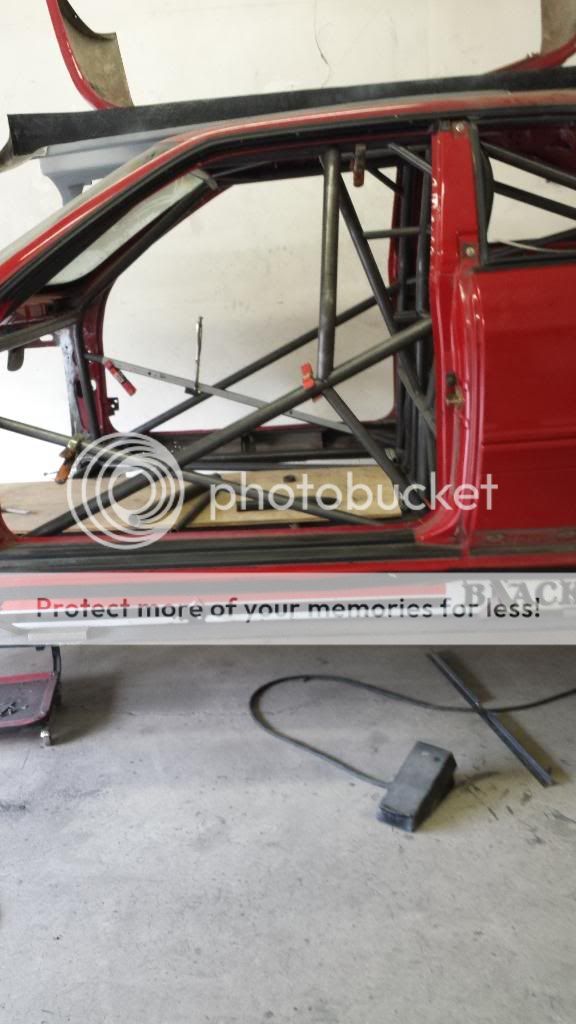
Worked on more. I have to redo the lower x brace on the passenger side, its a hair too short.
Made the driver funny car cage bars today as well, that should be almost done; one more 1″ tube around the head area.
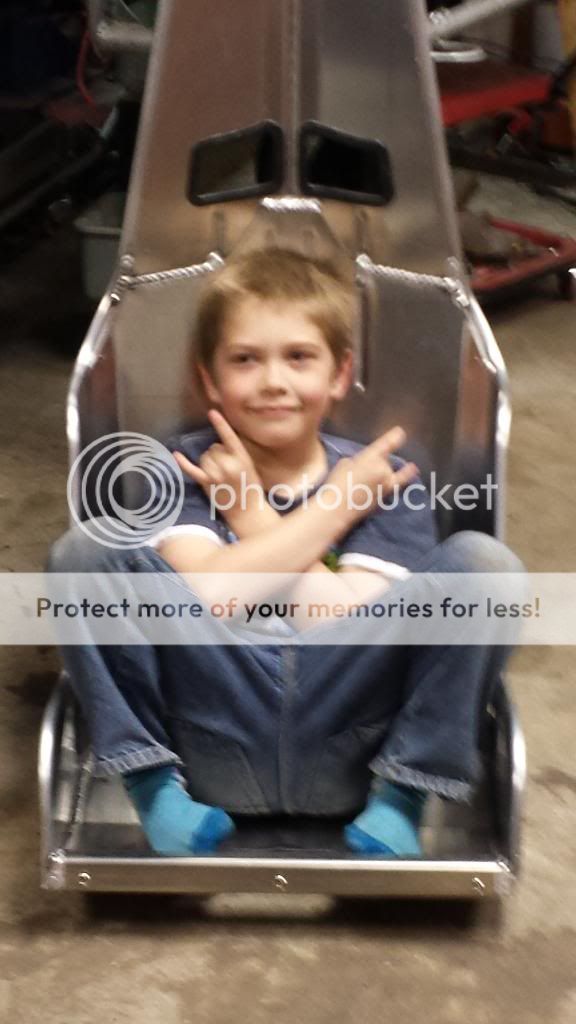
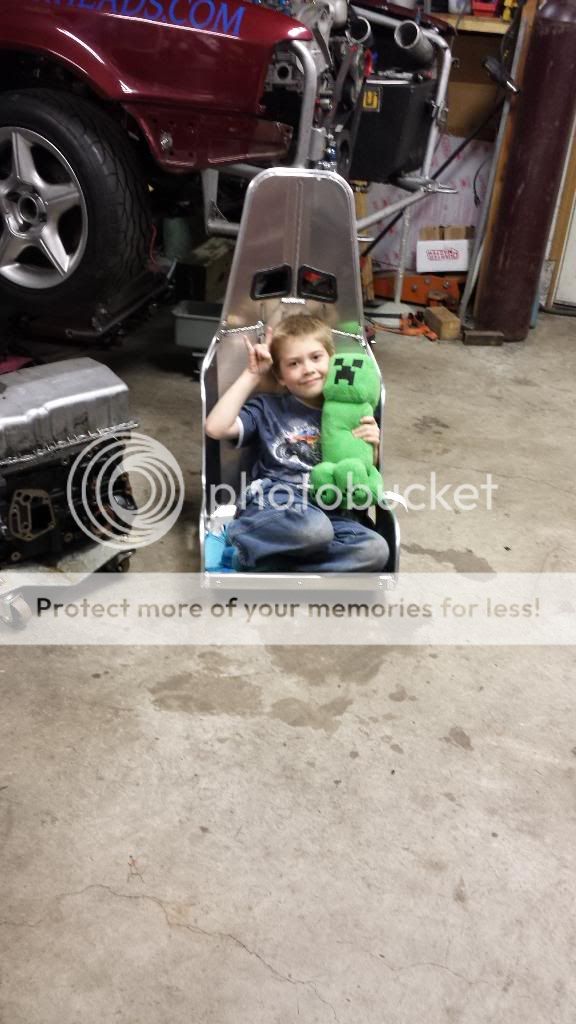
I wonder what I am going to be able to work on tomorrow hahaha. Also, the Kirkey seat showed up today….. Maybe I will get to mount that thing haha. Chub had to have his picture taken with the new car part and his Minecraft Creeper guy.

Made the driver funny car cage bars today as well, that should be almost done; one more 1″ tube around the head area.
I wonder what I am going to be able to work on tomorrow hahaha. Also, the Kirkey seat showed up today….. Maybe I will get to mount that thing haha. Chub had to have his picture taken with the new car part and his Minecraft Creeper guy.
-
speeding-g60
- Posts: 2152
- Joined: Fri Mar 01, 2013 10:46 am
Re: Aarons RWD car: 4-16 pic updates
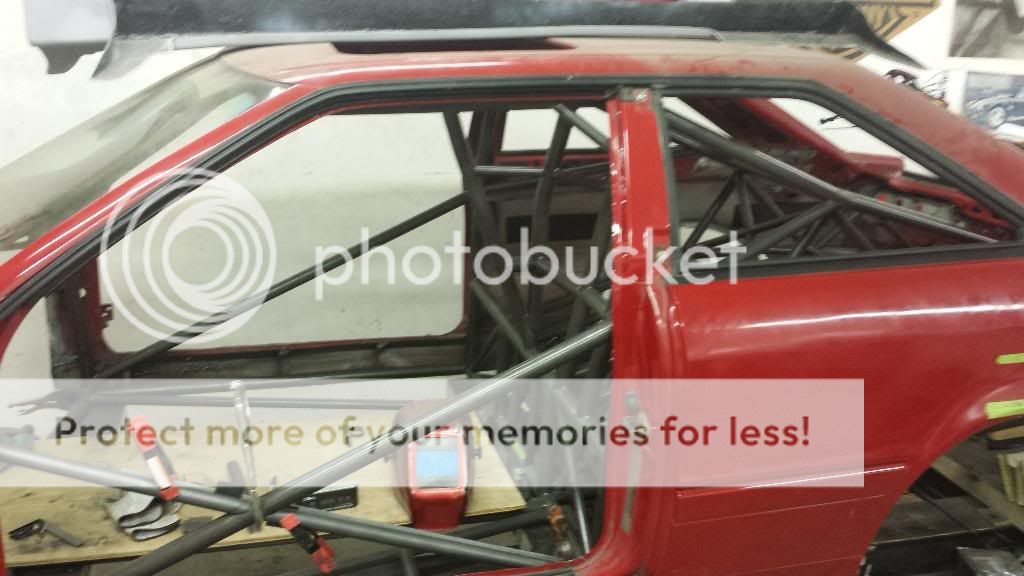
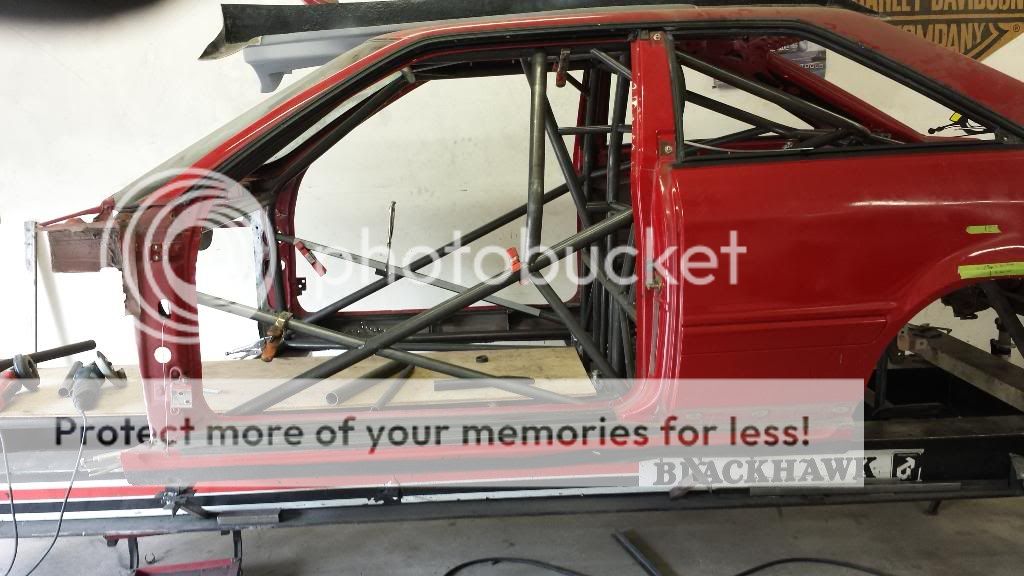
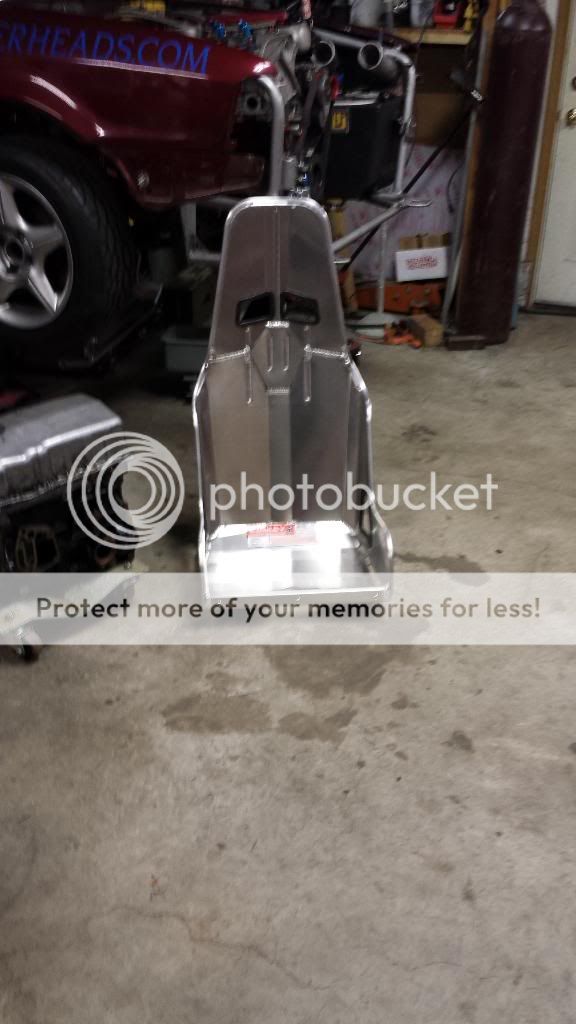
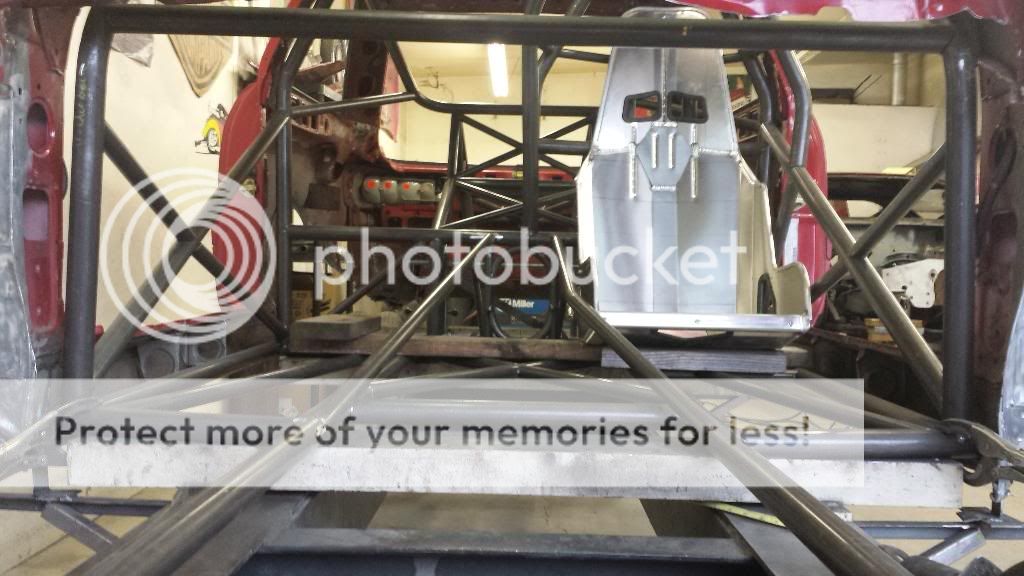
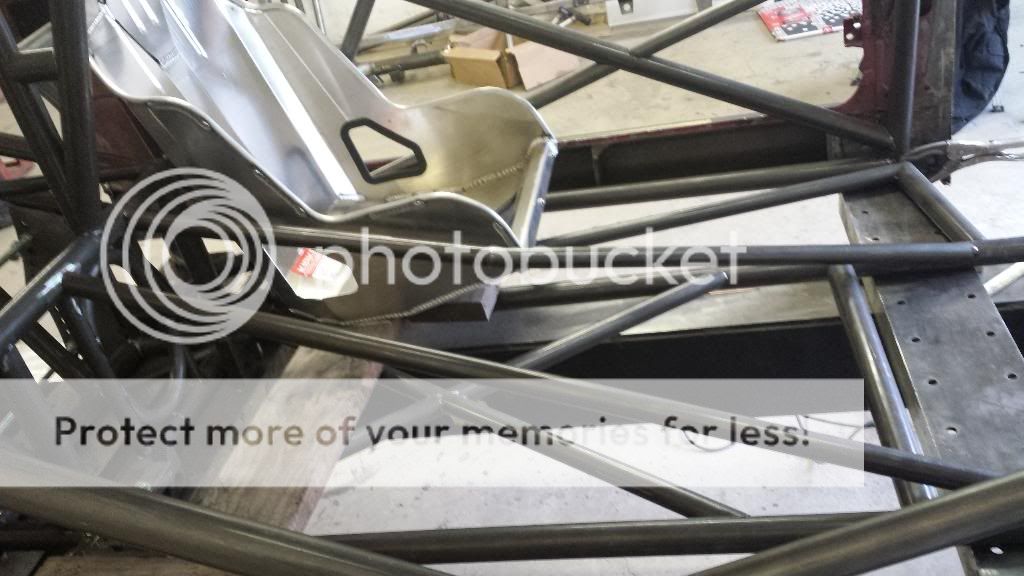
I got quite a lot done I feel today. Started the day with a test fit of the seat, a Kirkey fat guy model 41900. And it looks quite good in there.


Then I finished the lower leg of the outer driver protection, made the upper helmet bar on that side, and remade the passenger side lower X-brace piece. 1/8″ too short so I remade it. It looked “off”.

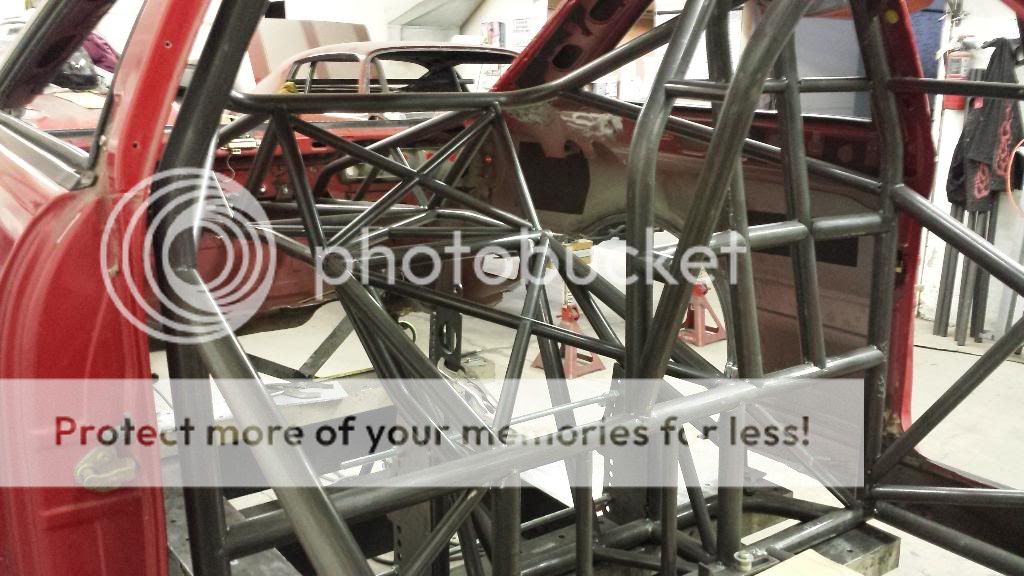
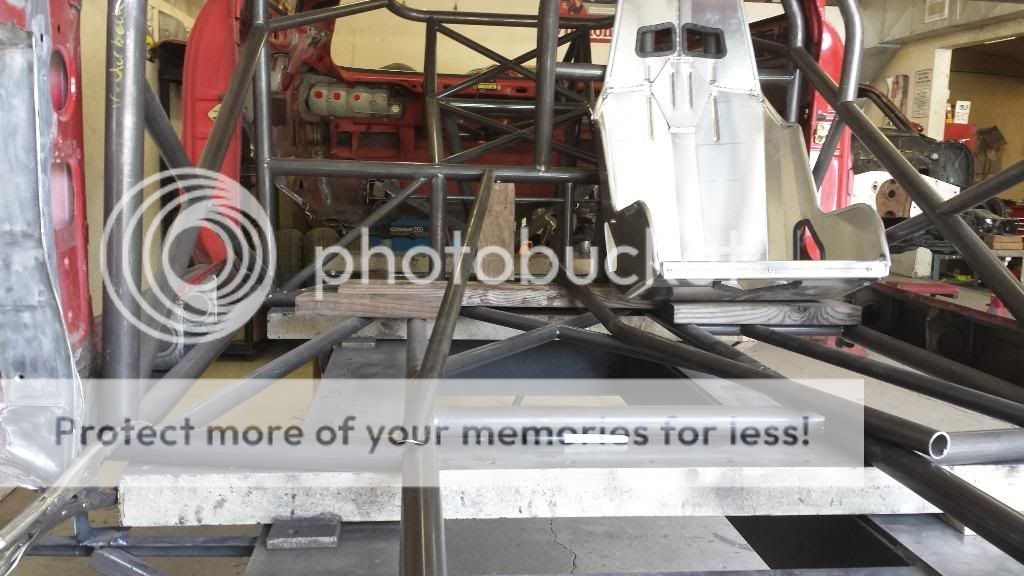
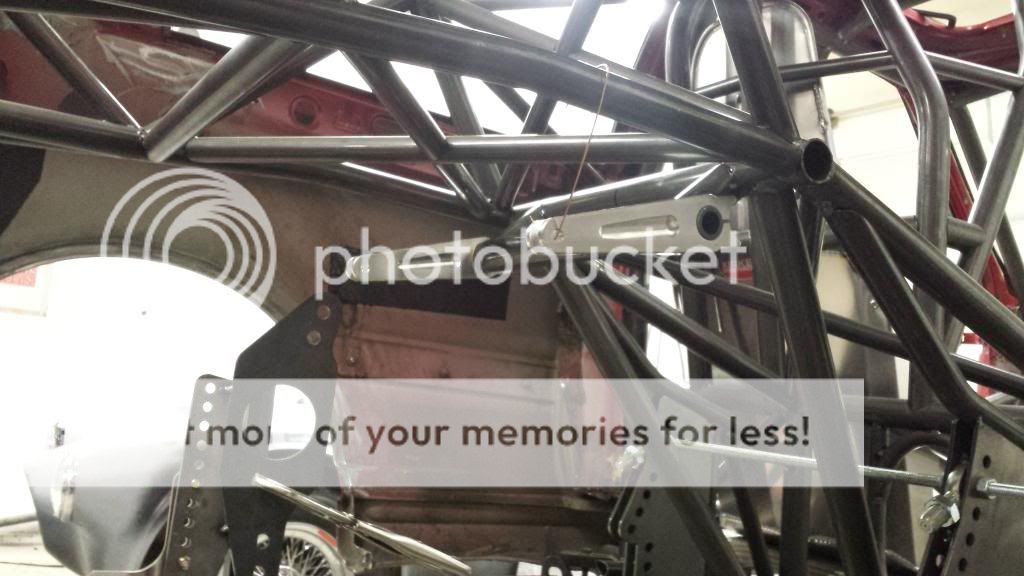
Then I started working on X-bracing some of the rear framework. It was not “needed” or “required” but it looks good AND it really adds strength to this whole area. Plus, I am not welding it, so whatever. Just more money haha.
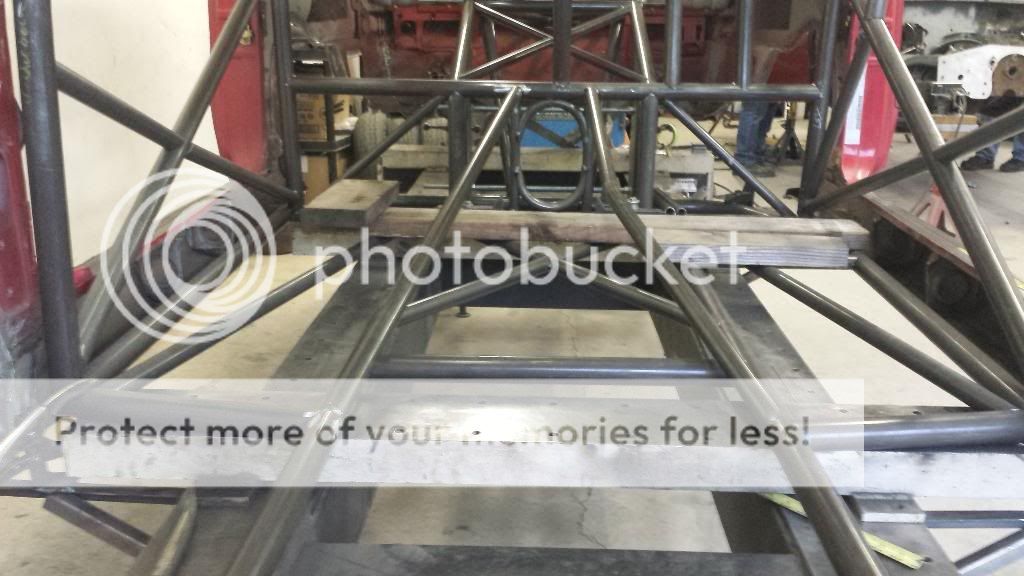
I did the area over the 4-link front plates first.
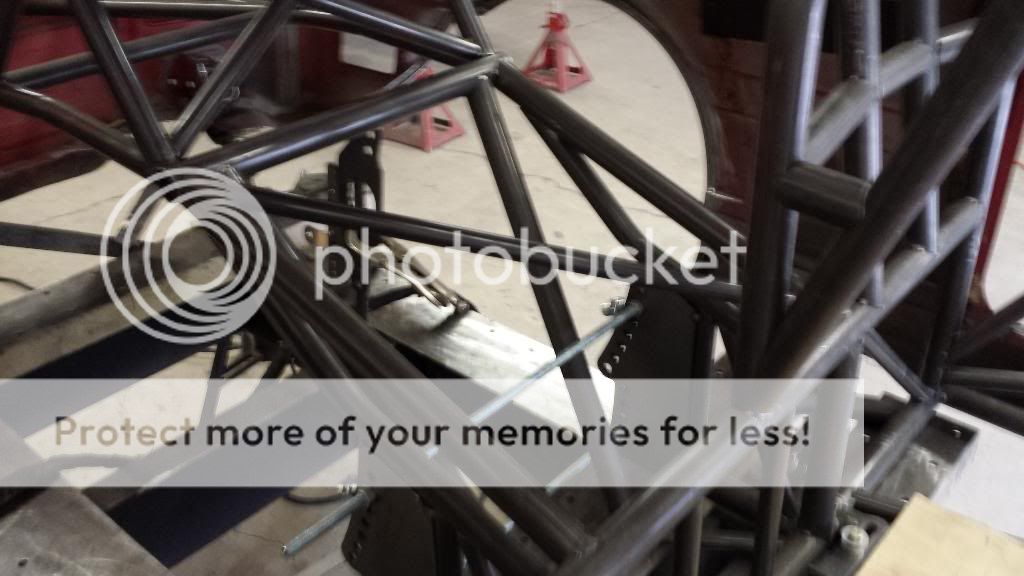

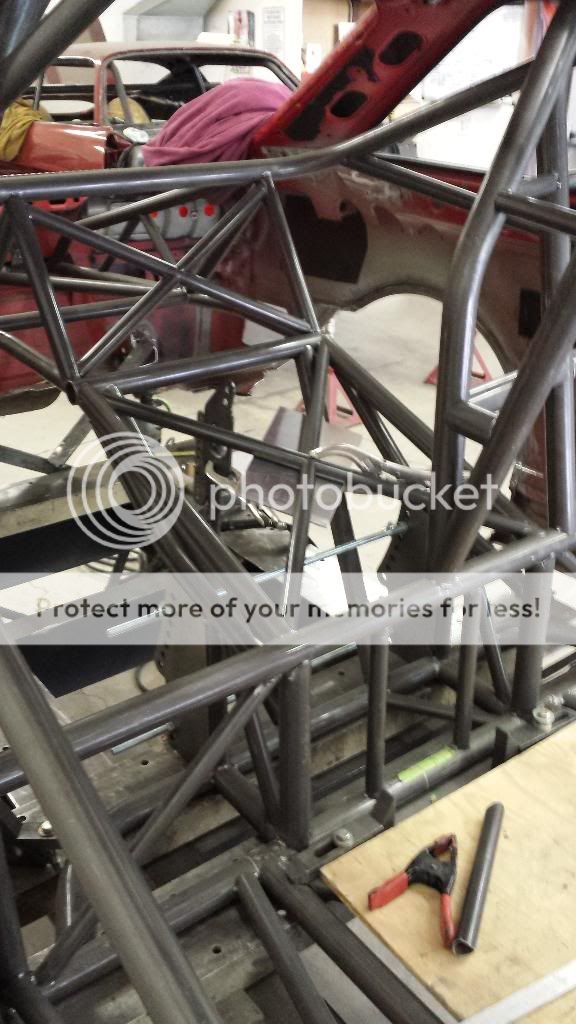
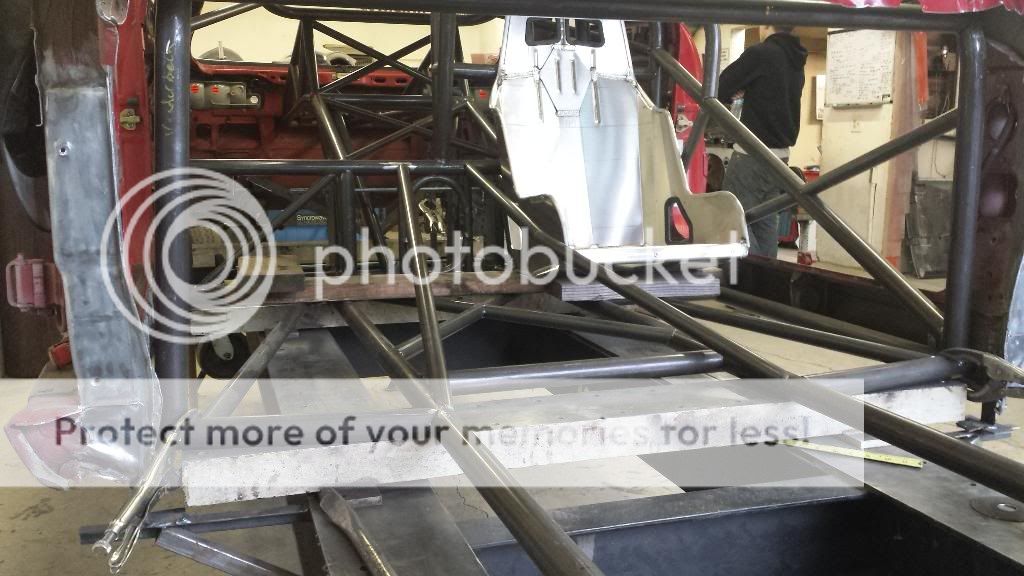
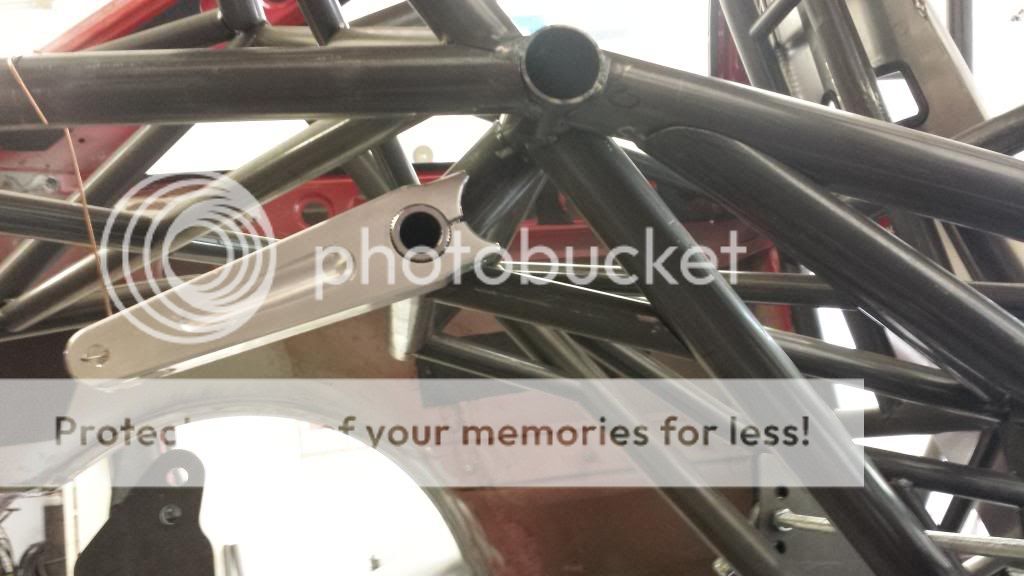
Next I worked on X-bracing the square directly over the rear end, where the front crossmember will be for the anti-roll bar and the rear crossmember (of this square) will be for the upper shock mounts. Both of these were coped to hold the bars flush, for tin work in the future.
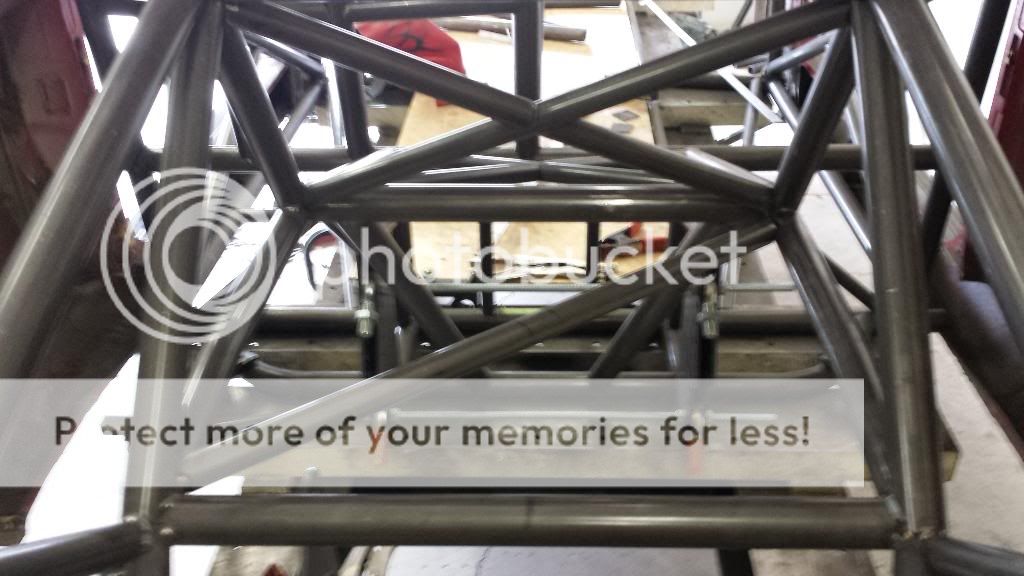


And a couple shots of all of the current progress. Tomorrow I will be working on the seat mounting and the upper dual rails for the tunnel.

Then I finished the lower leg of the outer driver protection, made the upper helmet bar on that side, and remade the passenger side lower X-brace piece. 1/8″ too short so I remade it. It looked “off”.
Then I started working on X-bracing some of the rear framework. It was not “needed” or “required” but it looks good AND it really adds strength to this whole area. Plus, I am not welding it, so whatever. Just more money haha.
I did the area over the 4-link front plates first.
Next I worked on X-bracing the square directly over the rear end, where the front crossmember will be for the anti-roll bar and the rear crossmember (of this square) will be for the upper shock mounts. Both of these were coped to hold the bars flush, for tin work in the future.
And a couple shots of all of the current progress. Tomorrow I will be working on the seat mounting and the upper dual rails for the tunnel.
-
speeding-g60
- Posts: 2152
- Joined: Fri Mar 01, 2013 10:46 am
Re: Aarons RWD car: 4-16 pic updates
Even on Easter.... No rest for the wicked. Or determined. Or whatever. I did some work, but also helped him tear down the Model T motor he is doing a full restore on. 1924 technology sure has come a long ways. The crank trigger setup on it is amazing for 90 years ago!!!! No water pump, nor oil pump.
I chopped a slice out of the brand new seat, and then we decided that now was the time to put in the loop system in the bulkhead if I wanted it in there. And what a PITA that was to do. I made three 180′s and wrecked the first one completely. I cheated and unwelded one side of the box to make it happen.
And then I started the double rails…. I got the passenger side done, and the driver side was giving me grief. It is finished now but I need to unweld (tacks only) the passenger side and shorten it now to match. The hard part, aside from the 17° angle cope at the rail end, is that the driver side has a bend in it and has to be timed just right; and it needs to remain level all the way, which it won’t in my mind, but its ok by me however it gets done.
-
speeding-g60
- Posts: 2152
- Joined: Fri Mar 01, 2013 10:46 am
Re: Aarons RWD car: 4-16 pic updates
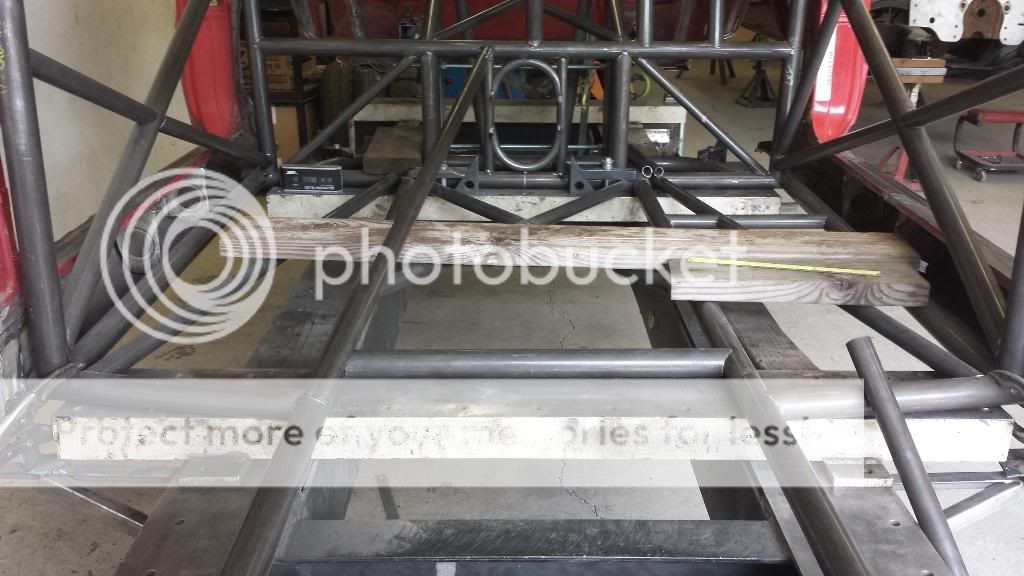
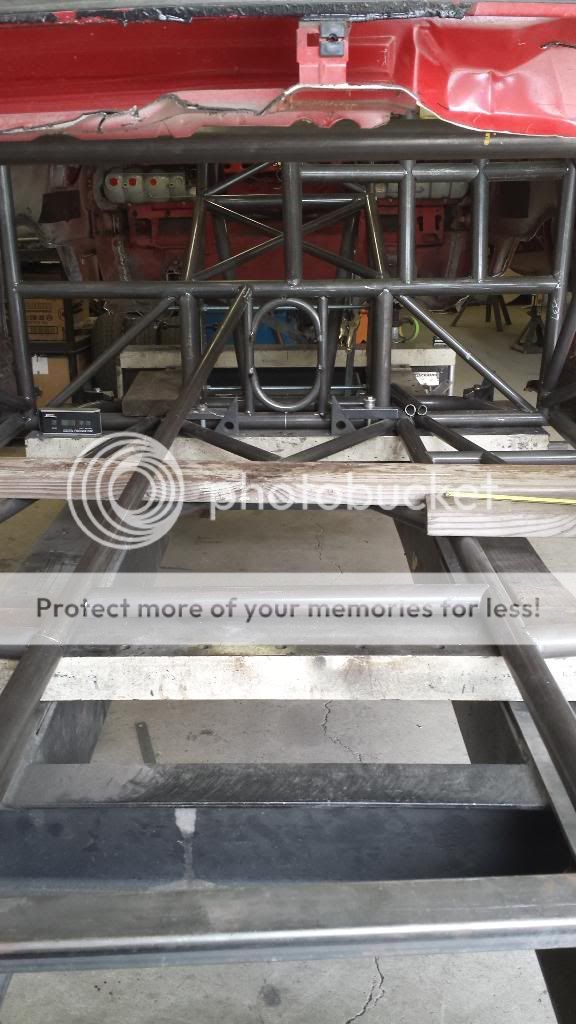
Got the double rails for the tunnel in, and started the corner braces.
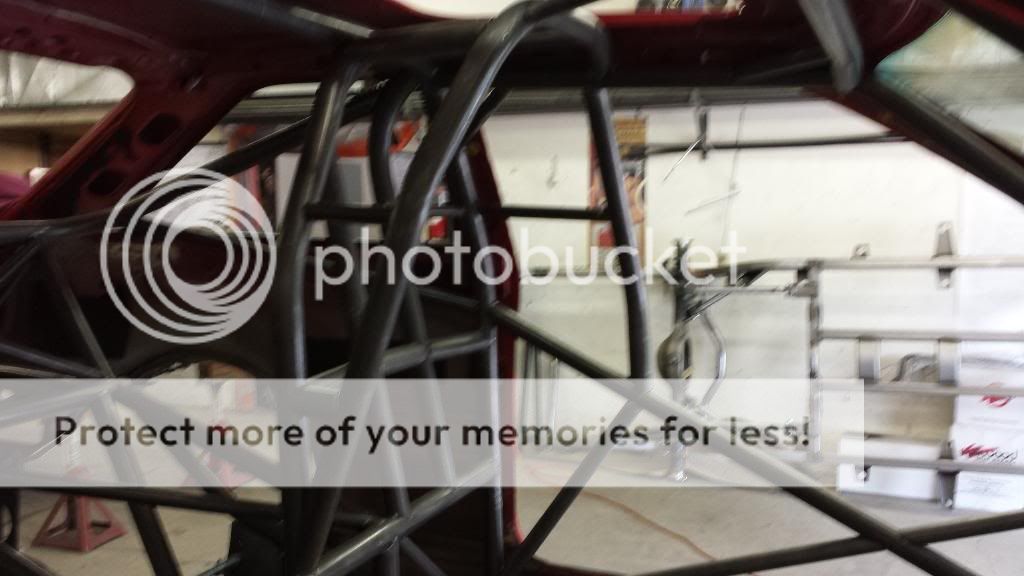
Also got a couple more corner braces started, and the stubs for the anti-roll bar setup started as well. And had a visitor, who wanted to try out the view.


E-ticket ride parting shot.
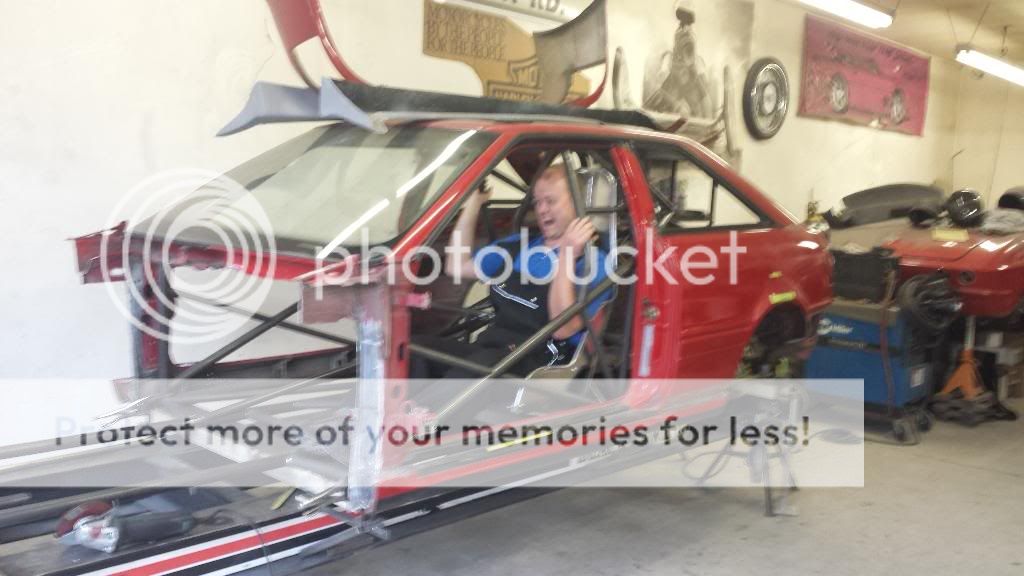
Also got a couple more corner braces started, and the stubs for the anti-roll bar setup started as well. And had a visitor, who wanted to try out the view.
E-ticket ride parting shot.
-
the german
- Posts: 720
- Joined: Sat Feb 15, 2014 11:03 pm
- Location: Bellevue, WA
Re: Aarons RWD car: 4-16 pic updates
Great progress Aaron! One question for you on the cage design-
The floor braces going straight across the chassis are not aligned with each other. Similarly, the X bracing behind the center cross tube is just hanging out in some open space rather than connecting to nodes. Is there a reason for this?speeding-g60 wrote:
Kirk
1990 ABZ CQ
1990 lifted CQ
2005 S4 6MT
2011 A4 2.0T Avant (ok, it's my wife's car but it's sexy and I love it)
1990 ABZ CQ
1990 lifted CQ
2005 S4 6MT
2011 A4 2.0T Avant (ok, it's my wife's car but it's sexy and I love it)
-
speeding-g60
- Posts: 2152
- Joined: Fri Mar 01, 2013 10:46 am
Re: Aarons RWD car: 4-25 pic updates
there are specs that SFI puts out for different levels of cage.
#1: the center is not done yet, it is floating waiting for the mid plate. it will be forward of its position now but still behind. once it is placed, it does get gusseted to make those three bars more "continuous".
#2: the center rails require an x-brace. and the side floors require a diagonal only, but the driver side also requires the straight bar from sill to rail. there is no requirement for it to "connect or intersect" with other stuff. that x-brace is for stability in the main rails. the notes for it say "the floor x-brace in the main rails must be at least as long as the width of the rails".
every bar is labelled in the book, with minimum size and position. then there are notes to reference what and why and how.
i have a full kit from Art Morrision, but it is as basic as basic can be and still meet SFI. and much of the x-bracing and Pro-mod type stuff is extra.
these are NOT MY PICTURES, just so you can get an idea of how that all works, Kirk. good questions BTW.


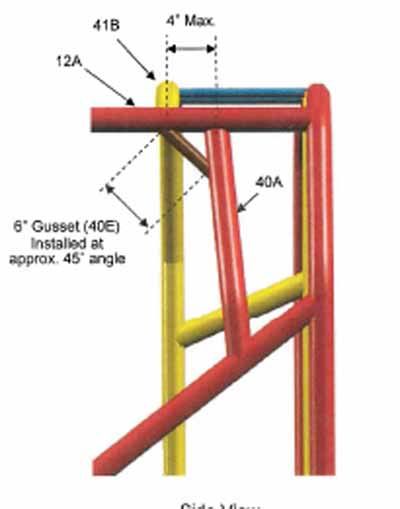
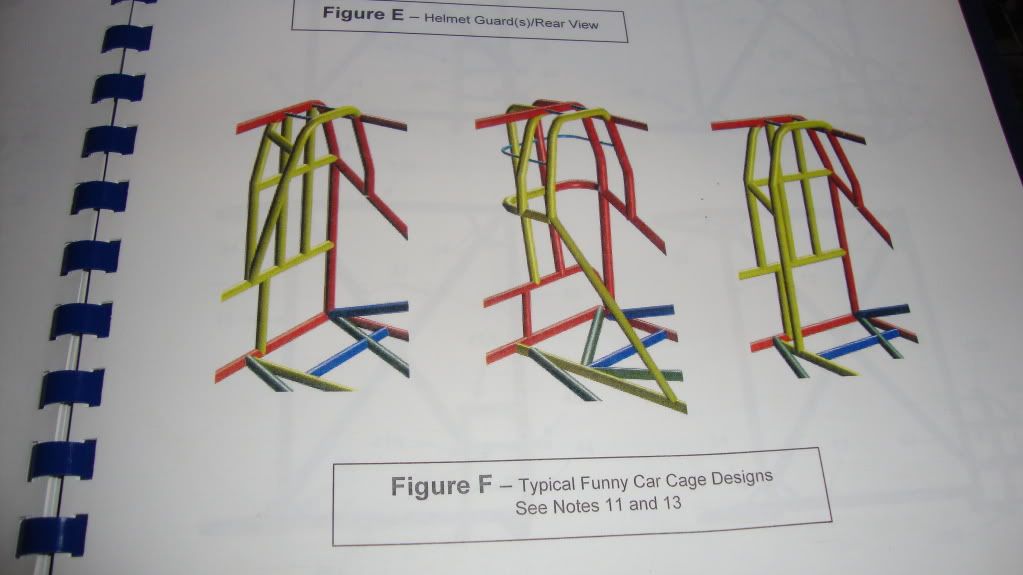
and these two are examples of the plans that come with a kit, the blueprints, not what SFI specs are. and they will (should) be made to the most current SFI specs.


#1: the center is not done yet, it is floating waiting for the mid plate. it will be forward of its position now but still behind. once it is placed, it does get gusseted to make those three bars more "continuous".
#2: the center rails require an x-brace. and the side floors require a diagonal only, but the driver side also requires the straight bar from sill to rail. there is no requirement for it to "connect or intersect" with other stuff. that x-brace is for stability in the main rails. the notes for it say "the floor x-brace in the main rails must be at least as long as the width of the rails".
every bar is labelled in the book, with minimum size and position. then there are notes to reference what and why and how.
i have a full kit from Art Morrision, but it is as basic as basic can be and still meet SFI. and much of the x-bracing and Pro-mod type stuff is extra.
these are NOT MY PICTURES, just so you can get an idea of how that all works, Kirk. good questions BTW.
and these two are examples of the plans that come with a kit, the blueprints, not what SFI specs are. and they will (should) be made to the most current SFI specs.
-
the german
- Posts: 720
- Joined: Sat Feb 15, 2014 11:03 pm
- Location: Bellevue, WA
Re: Aarons RWD car: 4-25 pic updates
Got it, thanks for the thorough response! So for the floor X, are you making it just slightly longer than the width of the rails to satisfy rules while minimizing weight?
Kirk
1990 ABZ CQ
1990 lifted CQ
2005 S4 6MT
2011 A4 2.0T Avant (ok, it's my wife's car but it's sexy and I love it)
1990 ABZ CQ
1990 lifted CQ
2005 S4 6MT
2011 A4 2.0T Avant (ok, it's my wife's car but it's sexy and I love it)
-
speeding-g60
- Posts: 2152
- Joined: Fri Mar 01, 2013 10:46 am
Re: Aarons RWD car: 4-25 pic updates
pretty much just satisfying the rule of longer than wide, not a weight driven decision. that, and location for transmission mount and drive line loop setup as well.
and i am not going for every last ounce here either.
for instance, the rules call for mostly 1.5" tubing in the driver portion, the yellow bars there. and red (in that picture set) is 1.625 tubing. my kit was built with mostly all 1.625 so i just went with it. if i were trying to squeeze every last ounce out, i would go to the MINIMUM required by the book.
if i find i need maybe #30 less weight in the car overall, i will run a smaller battery, done deal. this stuff is pretty freaking light as it is.
another example is some of the other material calls for minimum 1" but i used 1.25" as that was what was provided for me with the pre-bent, minimum spec'd, still sfi legal, kit.
so, while the driver portion of the cage, the basket around the driver, looks uniform, it was overbuilt in materials. it could have been lighter and smaller, like most of them out there are built. whatever.....
so all that yellow bar in the pix. that is 1.500" tubing. my kit came with one single length of 1.500", and it was not part of the funny car portion. i will get my list and scan it, and we can see the differences.
but we do not feel we need every last ounce here, is the bottom line. so criteria for it are mainly to meet spec, then use what we have/got sent, have to make it look good and overbuild it. so like the rear halo and Pro-mod stuff, well above and beyond the designed setup. all the extra x-bracing and diagonals, that is for stability and strength. any extra structural support will just make the chassis work that much better, the body is only along for the ride now. this jungle gym is all the magic.
-
speeding-g60
- Posts: 2152
- Joined: Fri Mar 01, 2013 10:46 am
Re: Aarons RWD car: 4-25 pic updates
i think this week, since i am not working on the car at all, i will get the plans, and scan them in. and then i will modify them to show as-built, that way i and we have a comparison of "bare minimum requirement" and what we are building.
but, i am taking mental notes along the way, or at least trying to remember what he tells me. he builds really fast cars and has been doing it for years, so he has some little bit of experience.
here are a few of his builds. the red Camaro sports a 903 cu/in Sonny motor on spray.
a show car he did
http://motorcardigest.com/don-and-teres ... erfection/
http://www.lulays.com/willys/
this was one that was just at his shop this month.
and this is one he built that i get invited to race with at a private track rental each year.
and this is another car he built.
http://www.whitefamilyracing.com/
http://www.aasupercharged.net/who-we-ar ... ott-white/
http://www.racingjunk.com/Nostalgia/286 ... -AA-S.html
he has a few builds under his belt, and i am glad i get to be so much a part of it instead of just writing a big fat check for it.
-
the german
- Posts: 720
- Joined: Sat Feb 15, 2014 11:03 pm
- Location: Bellevue, WA
Re: Aarons RWD car: 4-25 pic updates
nice- this funny car stuff is totally foreign to me so it's interesting to see
Kirk
1990 ABZ CQ
1990 lifted CQ
2005 S4 6MT
2011 A4 2.0T Avant (ok, it's my wife's car but it's sexy and I love it)
1990 ABZ CQ
1990 lifted CQ
2005 S4 6MT
2011 A4 2.0T Avant (ok, it's my wife's car but it's sexy and I love it)

Re: Aarons RWD car: 4-25 pic updates
Still good to see your updates mate, I do try and keep up when I get the chance. Back in England currently for a bit then i'll be back over. Thanks once again for the 6 speed bracket you sent me whilst I was over. Keep the updates coming 
-
speeding-g60
- Posts: 2152
- Joined: Fri Mar 01, 2013 10:46 am
Re: Aarons RWD car: 4-25 pic updates
been off from the project for the past couple weeks, although i did stop in and see it Friday on the way home.
my real job kept me busy busy with long hours and i tenderized my shoulder somehow, so i have been taking it easy. and now, i am sick haha. typical of how life works.
Re: Aarons RWD car: 4-25 pic updates
yeah i'm going to have to wait till I can start a project in america till i've got a job etc so that will be a while yet.
I've seen a few different ways of widening the cars.
either
cutting the whole quarter out to the middle of the number plate section then pulling it out and fitting extra metal in
or
cutting a T shape in the panel and pulling the two sides outward and filling the extra with metal to make urq style archs
I did use to have pictures of both styles but they are on my old laptop I don't use much
-
speeding-g60
- Posts: 2152
- Joined: Fri Mar 01, 2013 10:46 am
Re: Aarons RWD car: 4-25 pic updates
oh this will all tuck underneath. the wheel arch will be widened (front to rear) or opened up more by 6". the front gets lengthened 4" or so. that will be the interesting part.
Re: Aarons RWD car: 4-25 pic updates
look forward to seeing the updates
-
speeding-g60
- Posts: 2152
- Joined: Fri Mar 01, 2013 10:46 am
Re: Aarons RWD car: 4-25 pic updates
doin some work like always. actually been not doin work.
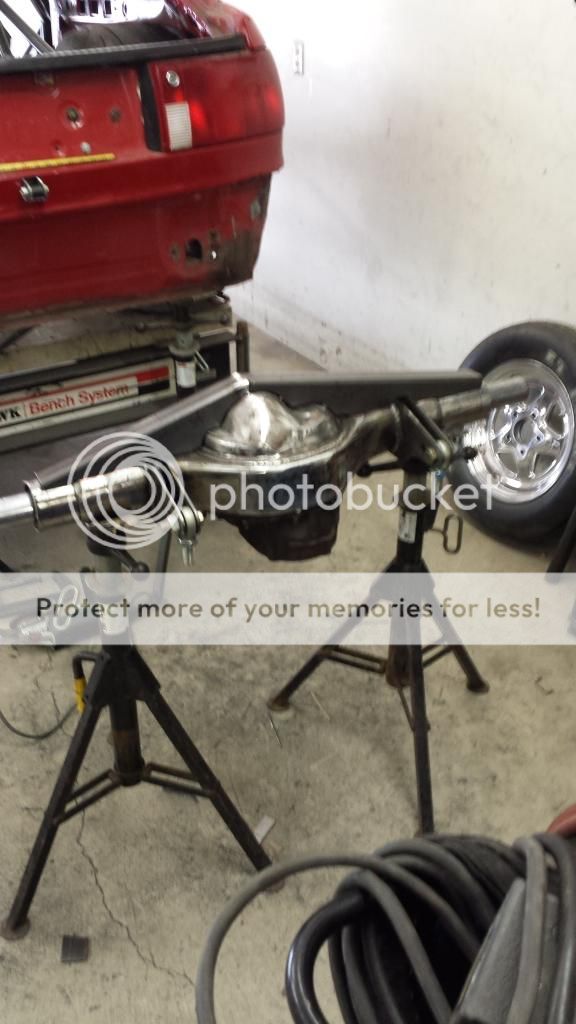
fitting the rear wheels in to measure the width to make the axle.


and added the anti-roll bar.

fitting the rear wheels in to measure the width to make the axle.
and added the anti-roll bar.
-
speeding-g60
- Posts: 2152
- Joined: Fri Mar 01, 2013 10:46 am
Re: Aarons RWD car: 4-25 pic updates
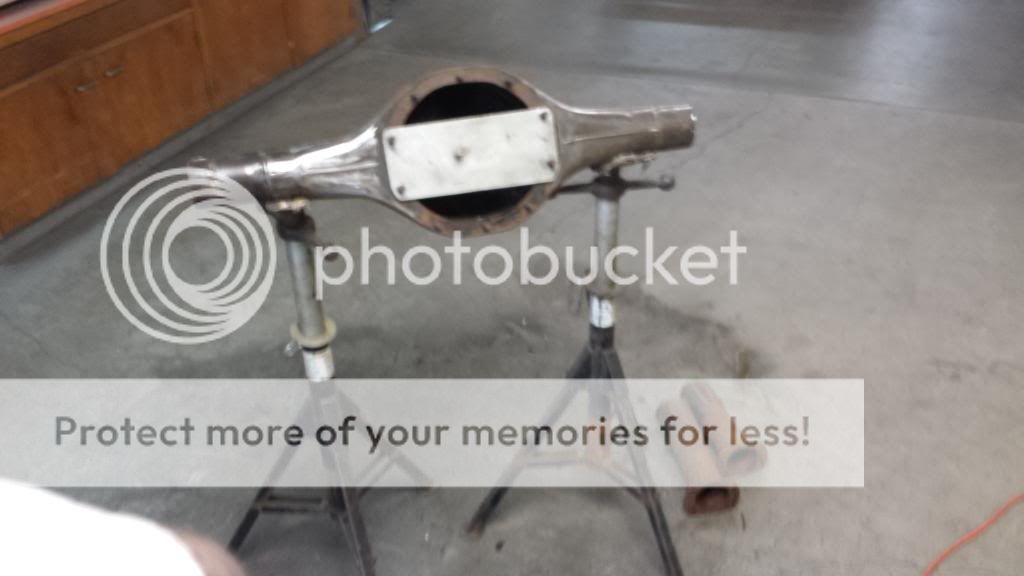
and i have been working on the rear axle now. started with the first move cleaning it up a little and chopping a foot off each end, roughly. and it all progresses from there.
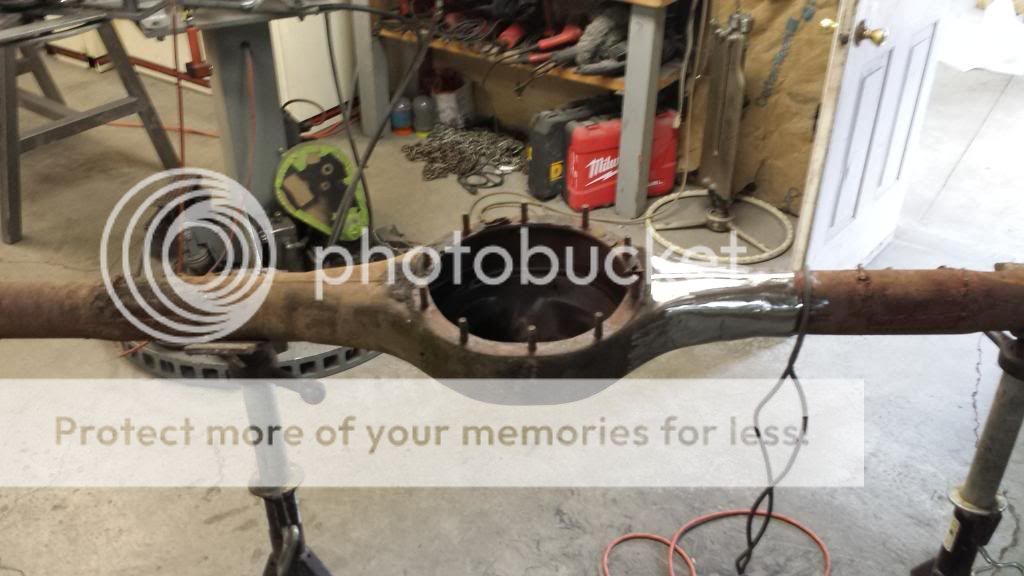
now have it set up with the welding jig in place.


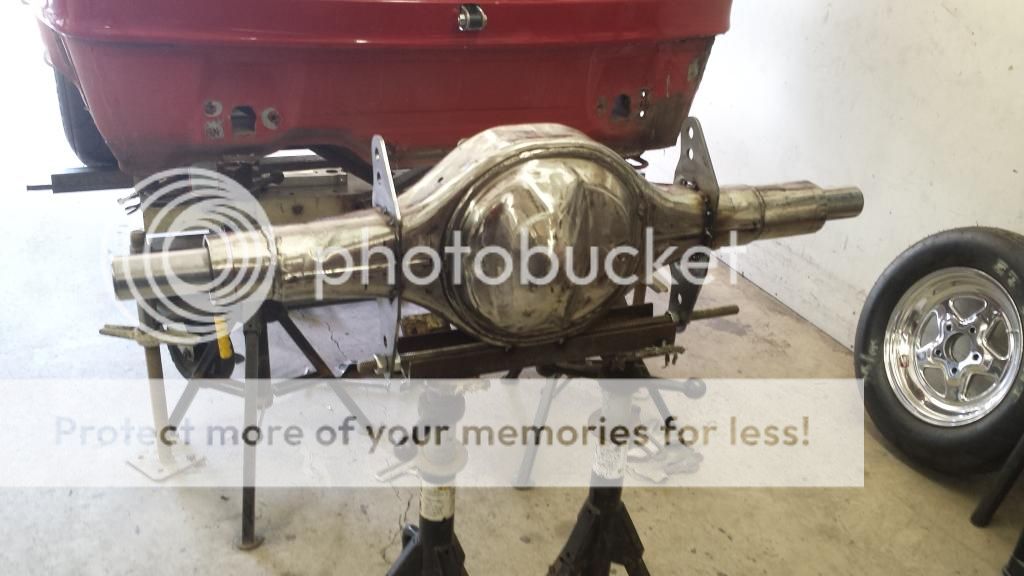
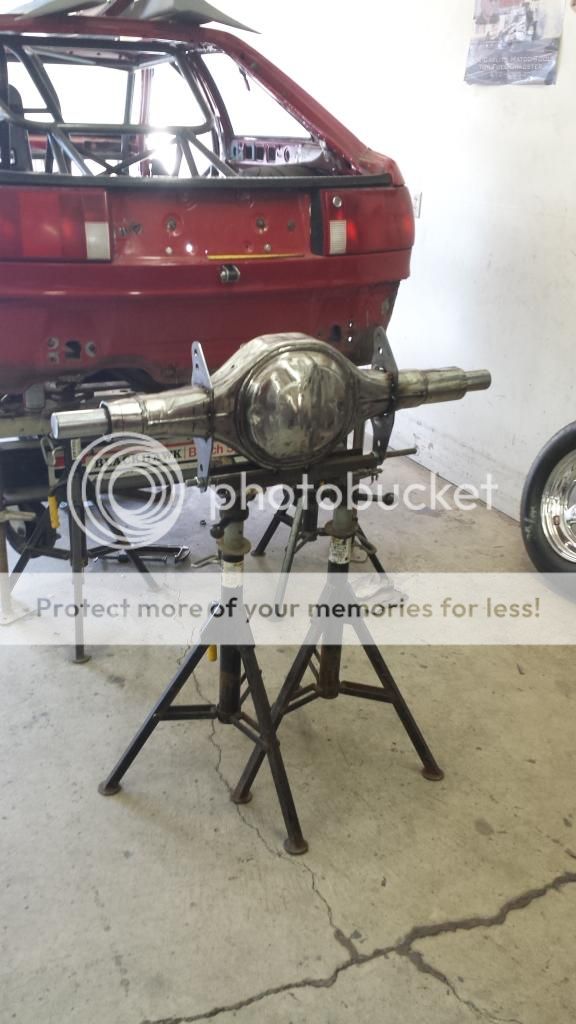
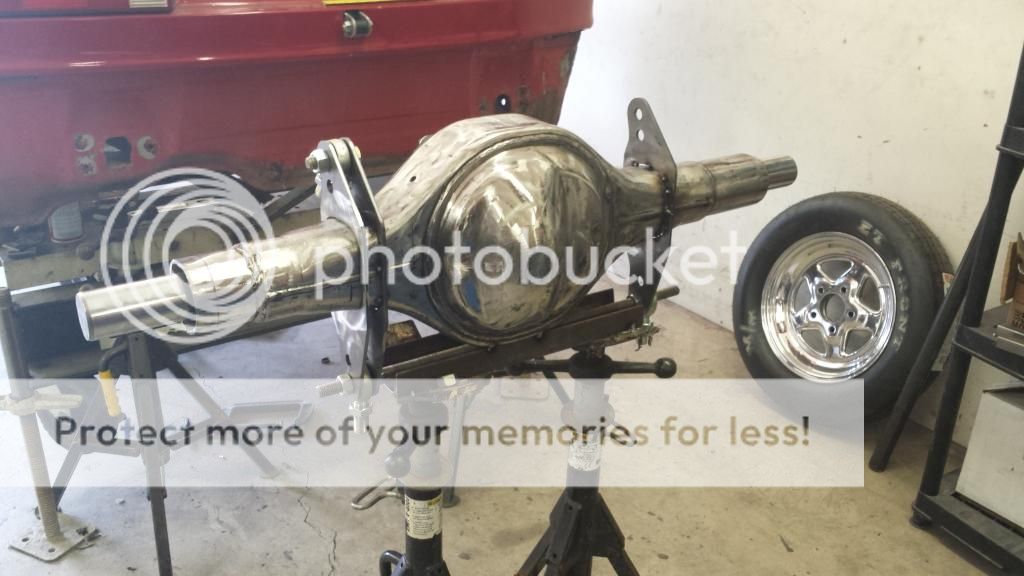
now to start on the truss.


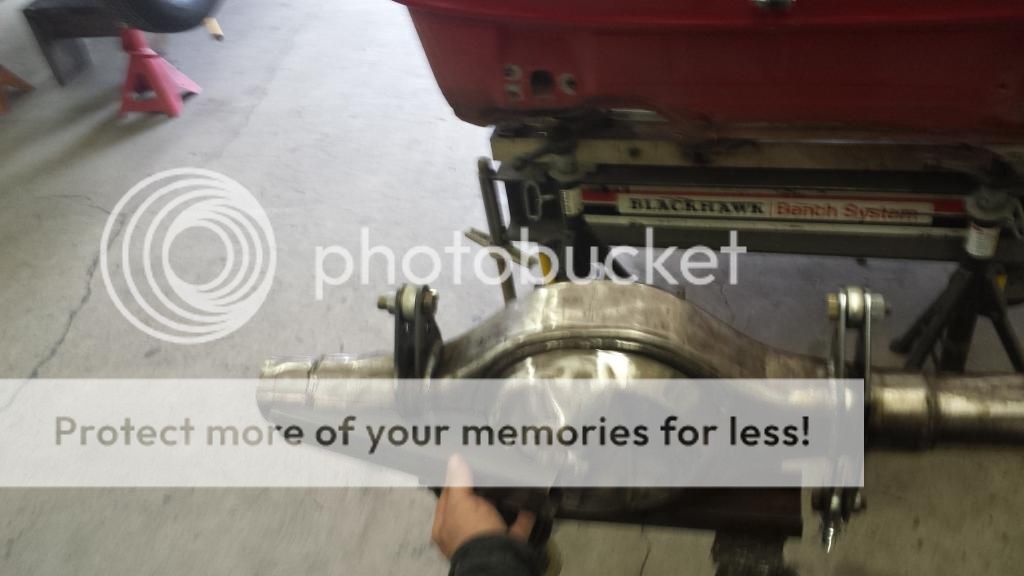

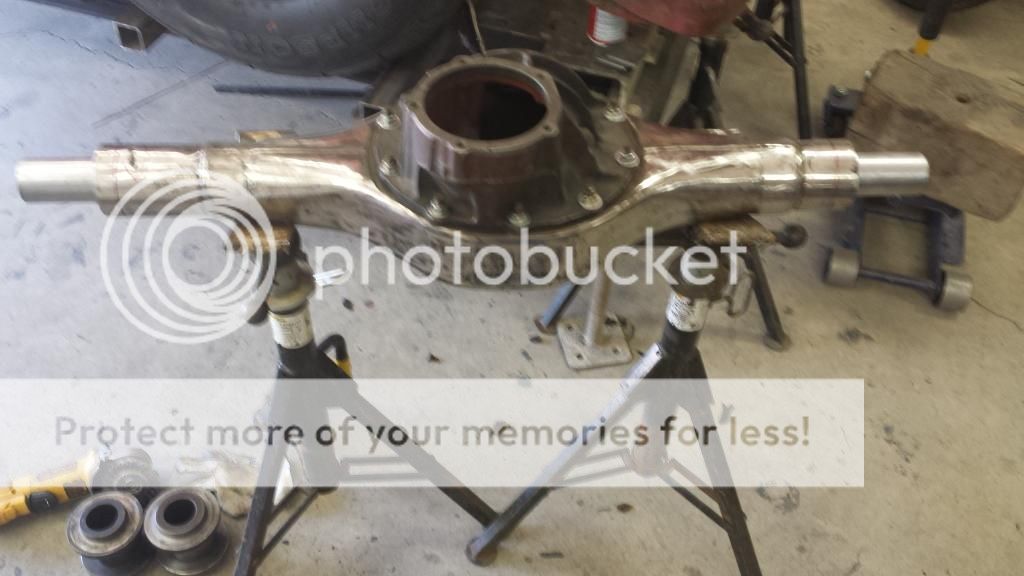
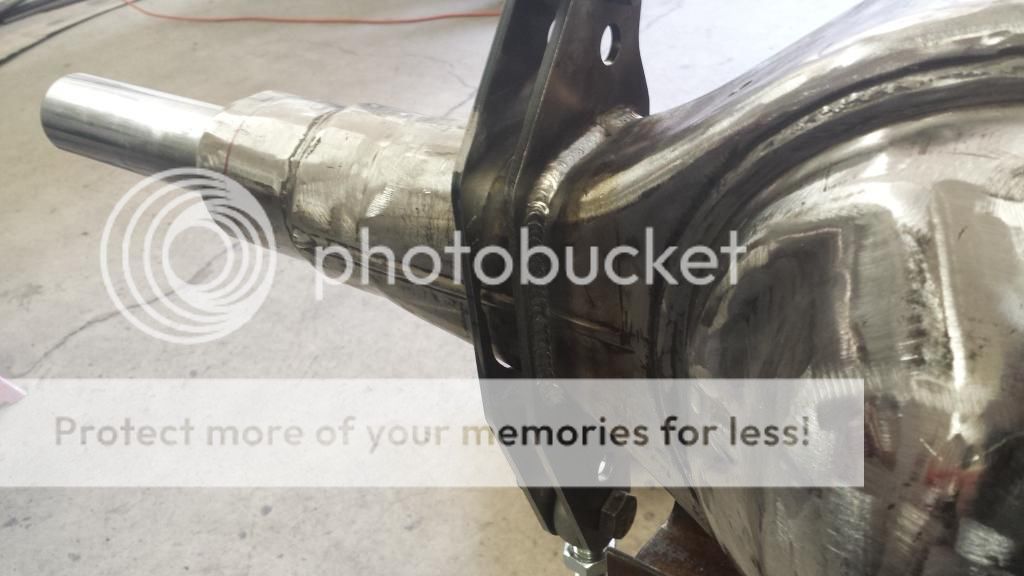
and plating the four link bars

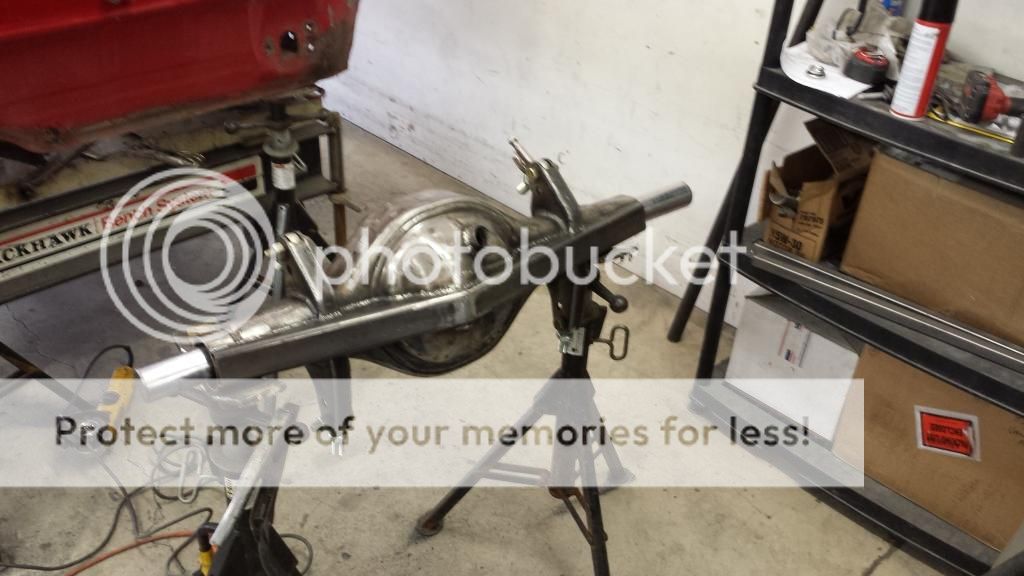
thats about where i left it today, i may go there tomorrow to setup the shockplates and wheelie bar mounts. i may not.
now have it set up with the welding jig in place.
now to start on the truss.
and plating the four link bars
thats about where i left it today, i may go there tomorrow to setup the shockplates and wheelie bar mounts. i may not.

Re: Aarons RWD car: 5-17 rear axle building pix
Nice work, as usual... wondering about the "roughly" comment on the cutting a foot off each end of the axle:
Are you fitting the drive axles to the diff or the other way around?
Are you fitting the drive axles to the diff or the other way around?
Find me on Instagram @pry4sno
|| 2010 Golf Sportwagen TDI /// #farmenwagen
|| 2002 Dodge Ram 2500 24vt 4x4 #bertancummins
|| 1992 80 quattro 20v /// Eventual AAN'd Winter Sled
|| 1990 Coupe quattro /// Because Racecar
|| 2010 Golf Sportwagen TDI /// #farmenwagen
|| 2002 Dodge Ram 2500 24vt 4x4 #bertancummins
|| 1992 80 quattro 20v /// Eventual AAN'd Winter Sled
|| 1990 Coupe quattro /// Because Racecar
-
speeding-g60
- Posts: 2152
- Joined: Fri Mar 01, 2013 10:46 am
Re: Aarons RWD car: 5-17 rear axle building pix
rough cut was to determine how much cleanup and make it easier to move around. i fine-tuned it another inch and squared up later (today actually).
the rear end is being built to required overall width between wheels, the rear end is built and the axles are ordered last. at least thats how it has been so far, i never ordered any axles yet. when i do they are 40 spline, gun drilled, and possibly lightened flanges.
so we measured 41.25" from hub face to face.
subtract .125" for each brake rotor hat.
subtract 2" per side for hub stick out (i do not remember the term exactly)
subtract 2.5" per side for axle tube ends.
leaving me cut and prep overall length of 32", equal distance from pinion center to axle end. my rough cut was ~17" from pinion center out to each end, leaving me plenty of material to fine tune.
hope that clears up the method so far
-
speeding-g60
- Posts: 2152
- Joined: Fri Mar 01, 2013 10:46 am
Re: Aarons RWD car: 5-17 rear axle building pix
Tapa talk connected now.
Picture testing. That is the head section of a big telescopic boom crane we were using last week. That is the tip of the main boom. That big.

Sent from my SCH-I545 using Tapatalk
Picture testing. That is the head section of a big telescopic boom crane we were using last week. That is the tip of the main boom. That big.
Sent from my SCH-I545 using Tapatalk
-
boost_addict
- Posts: 49
- Joined: Tue Apr 22, 2014 11:55 pm
- Location: N of Philly
Re: Aarons RWD car: 5-17 rear axle building pix
so badass
91 VEMS CQ vr6 6766 o1e s2.
01 GTI vr6 vems 6262
01 2500 Cummins hx40. Tow Rig, vems round 80psi
01 GTI vr6 vems 6262
01 2500 Cummins hx40. Tow Rig, vems round 80psi