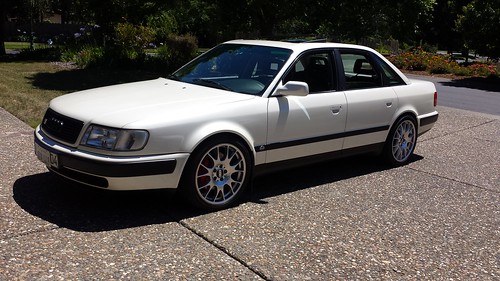
Dace's '94 //s4 - Now For Sale!
Re: Re: Dace's '94 //s4-What type of vacuum hose to use?
Well, there is always -3 PTFE tube :-D ~1/8th ID may be slightly overkill though.
-
UrSobsessed
- Posts: 286
- Joined: Wed Feb 27, 2013 3:07 pm
Re: Re: Dace's '94 //s4-new oil pump, or not new oil pump?
That is my question. After going through all of the things with this car, I'm wondering if I should have a new oil pump put in when my bottom end is swapped out for an non oil consuming version. My oil pressure readings have been a little lower ever since replacing all of the sending units 40k ago, which has me wondering if I should invest in a new oil pump. Insurance, of sorts. Dave Jones said mine looked really clean when he tore it apart, aside from some loose internal screws...
Wuttchall think?
Wuttchall think?

Re: Re: Dace's '94 //s4-new oil pump, or not new oil pump?
Spares are handy...
Find me on Instagram @pry4sno
|| 2010 Golf Sportwagen TDI /// #farmenwagen
|| 2002 Dodge Ram 2500 24vt 4x4 #bertancummins
|| 1992 80 quattro 20v /// Eventual AAN'd Winter Sled
|| 1990 Coupe quattro /// Because Racecar
|| 2010 Golf Sportwagen TDI /// #farmenwagen
|| 2002 Dodge Ram 2500 24vt 4x4 #bertancummins
|| 1992 80 quattro 20v /// Eventual AAN'd Winter Sled
|| 1990 Coupe quattro /// Because Racecar
-
UrSobsessed
- Posts: 286
- Joined: Wed Feb 27, 2013 3:07 pm
Re: Dace's '94 //s4-plugging away...
I've been chipping away at my "winter"(lol) project. Work has been killin' me this summer or I would be a lot closer, if not finished by now. This phase includes an EM, downpipe, IM and a water/meth system.
While doing the turbo water lines, I decided to make a hard line that runs from a banjo on the water manifold around to the turbo side, eliminating the little piece of hose under the intake manifold. After some trial and error I came up with this:

The ends are Swagelok=>-AN assemblies. The Swagelok stuff is really nice and easy to use, not to mention reuseable. Some pix of the install:


I kinda hated sending off Hank's EM and DP to have them coated since they are pretty much works of art, but from all I've read Swaintech does a really nice job. It looks great and should perform even better. I didn't have the turbo hotside coated but with how easy it is to remove it, I can do that at any time in the future. The hiccups that I've had so far are one of the threads for an EM stud in the head stripped out , and the IM has some fab issues that warranted it's return for correction. The bottom end of the motor is getting replaced(hopefully soon) due to oil ring issues so when it's out I'll have the stripped theads timeserted. I can't get in there with any drill I have even though it's in a pretty easy location to access. What I have done so far..
Coolant feed at the block:

Built lines:

Whurr I'm ats now:


n75 placement:

I'm also installing Hank's IM but had to send it back due to some issues with fabrication. It should've arrived at his shop today. Hopefully there'll be a quick turnaround on it so I can get this thing up and running again! When I get it back, I'm going to see if I can fab up a workaround for the cruise control system. I rarely use it but I take this car on road trips and leaving my foot on the pedal on looooong stretches of road sucks<read: Kansas>.
There's not a whole lot of fabrication or general bad-assedness that most of you guys are doing on here but it sure is a lot of fun to do this stuff! So much of what I see on here is definitely inspirational though! I can't wait to get this thing on the road! Did I already say that?
While doing the turbo water lines, I decided to make a hard line that runs from a banjo on the water manifold around to the turbo side, eliminating the little piece of hose under the intake manifold. After some trial and error I came up with this:
The ends are Swagelok=>-AN assemblies. The Swagelok stuff is really nice and easy to use, not to mention reuseable. Some pix of the install:
I kinda hated sending off Hank's EM and DP to have them coated since they are pretty much works of art, but from all I've read Swaintech does a really nice job. It looks great and should perform even better. I didn't have the turbo hotside coated but with how easy it is to remove it, I can do that at any time in the future. The hiccups that I've had so far are one of the threads for an EM stud in the head stripped out
Coolant feed at the block:
Built lines:
Whurr I'm ats now:
n75 placement:
I'm also installing Hank's IM but had to send it back due to some issues with fabrication. It should've arrived at his shop today. Hopefully there'll be a quick turnaround on it so I can get this thing up and running again!
There's not a whole lot of fabrication or general bad-assedness that most of you guys are doing on here but it sure is a lot of fun to do this stuff! So much of what I see on here is definitely inspirational though! I can't wait to get this thing on the road! Did I already say that?
Re: Dace's '94 //s4-plugging away...
lookin good. whats with the mix-n'match on the black and red anodized hose ends? just what you had or a color choice?
Marc Swanson
Proprietor, EFI Motorsport
Proprietor, EFI Motorsport
-
UrSobsessed
- Posts: 286
- Joined: Wed Feb 27, 2013 3:07 pm
Re: Re: Dace's '94 //s4-plugging away...
Thanks! Fittings were pretty much what I had. I'd rather use the Earls stuff(that's everywhere else) in matching colors but that was another $100 I didn't want to spend. Maybe I will if these Jegs pieces leak...
-
TimS6Avant
- Posts: 8
- Joined: Thu Jun 26, 2014 6:33 pm
Re: Dace's '94 //s4-plugging away...
So many pretty colorful shiny things happening in here. Me like
-
UrSobsessed
- Posts: 286
- Joined: Wed Feb 27, 2013 3:07 pm
Re: Dace's '94 //s4-plugging away...
Thanks Tim! How's your 'lil project coming along?
-
TimS6Avant
- Posts: 8
- Joined: Thu Jun 26, 2014 6:33 pm
Re: Re: Dace's '94 //s4-plugging away...
Ahhh... My office at home is full of half opened part boxes... That's about it. HOPEFULLY in the next couple weeks i'll have it done :/
-
UrSobsessed
- Posts: 286
- Joined: Wed Feb 27, 2013 3:07 pm
Re: Dace's '94 //s4-plugging away...
Thanks! Can't say where some of the inspiration came from...
-
UrSobsessed
- Posts: 286
- Joined: Wed Feb 27, 2013 3:07 pm
Re: Re: Dace's '94 //s4-plugging away...
Damn Tim! Fully open those boxes and get that shit done!
-
UrSobsessed
- Posts: 286
- Joined: Wed Feb 27, 2013 3:07 pm
Re: Dace's '94 //s4-progress...
Ok then. I got this thing running again! Finally! After getting the IM back to have the very warped throttle body flange reangled and replaced, I was able to put a few things together like putting the IAT sensor in the intake hose pre-throttle body and see if I could make the cruise control work.
For the IAT port, I got the silicone port system from [url]siliconeintakes.com[/url]. I had to cut it down so that the sensor would stick down into the hose enough to get a reading.
Some pix of the install:
Cut port:

Port installed in hose:

I drilled out a 1/2" => 1/8"NPT adapter to hold the IAT and put a ring under it to hold the sensor in place:

This is how much of the sensor is exposed in the airway:

Not as much as I'd like but it does work. I already notice a big difference in how much it doesn't heat soak, especially at idle.
This is the "frankenhose" installed with the sensor and the water/meth injector:

Note the blue gunk on the IM/TB connection. After install, there was a really loud screaming that turned out to be a leak at this connection. Sux. The flange wasn't nearly as warped as the first one, but without some product, it wouldn't seal. I used some Permatex stuff I've never used before but is resistant to fuel, etc. so I tried it. I might have to go back in there with something more solid.
For the cruise control, all I had to do was to drop the actuator down an inch and get some M4 threaded rod because the stock rod was 1/2" too short.
The bracket to lower the actuator with actuator installed on the factory bracket:

The threaded rod with the stock rod. I used a cap nut to protect the actuator diaphragm locked against a nylock nut. The nylock nuts' round top moves smoothly in the plastic part that connects to the actuator:

The complete assembly:

It can be seen here(not to well, but that's the idea :

One thing I did which turned out well is using some air brake line and fittings as a reference line for the BOV. I got the idea from Marc(thanks!). The stuff is really easy to work with. Hopefully, the fire sleeve I used around it behind the timing cover will protect it from the heat.
Some pix of the connections:
At the IM:

and the BOV:

The car started right up after being down for 3 months. This car has always been good like that. <=substitution for knocks on wood
A couple of things that I need to work out are the throttle body=>IM connection. I think the leak might be working it's way back as I heard a high pitched whistle under boost today. It's not evident under vacuum currently but will probably be soon. Any ideas for making a better seal are welcome here.
Also, there sounds like possibly an exhaust leak at one of the v-band connnections. It's not bad but it's there. This is my first go around with v-band connections. I like how easy it is to put the stuff together but I'm wondering if the white lightning coating is affecting the connection? Getting all of the exhaust components lined up correctly was a bit of a challenge, especially with the flex joint at the wastegate. I need to loosen everything up and give it another try. Is anyone using v-band gaskets?
This is where I am currently:

Anyway, hopefully very soon Dave Jones will get my car in to replace the bottom end and I can get back to tuning this thing right!
For the IAT port, I got the silicone port system from [url]siliconeintakes.com[/url]. I had to cut it down so that the sensor would stick down into the hose enough to get a reading.
Some pix of the install:
Cut port:
Port installed in hose:
I drilled out a 1/2" => 1/8"NPT adapter to hold the IAT and put a ring under it to hold the sensor in place:
This is how much of the sensor is exposed in the airway:
Not as much as I'd like but it does work. I already notice a big difference in how much it doesn't heat soak, especially at idle.
This is the "frankenhose" installed with the sensor and the water/meth injector:
Note the blue gunk on the IM/TB connection. After install, there was a really loud screaming that turned out to be a leak at this connection. Sux. The flange wasn't nearly as warped as the first one, but without some product, it wouldn't seal. I used some Permatex stuff I've never used before but is resistant to fuel, etc. so I tried it. I might have to go back in there with something more solid.
For the cruise control, all I had to do was to drop the actuator down an inch and get some M4 threaded rod because the stock rod was 1/2" too short.
The bracket to lower the actuator with actuator installed on the factory bracket:
The threaded rod with the stock rod. I used a cap nut to protect the actuator diaphragm locked against a nylock nut. The nylock nuts' round top moves smoothly in the plastic part that connects to the actuator:
The complete assembly:
It can be seen here(not to well, but that's the idea
One thing I did which turned out well is using some air brake line and fittings as a reference line for the BOV. I got the idea from Marc(thanks!). The stuff is really easy to work with. Hopefully, the fire sleeve I used around it behind the timing cover will protect it from the heat.
Some pix of the connections:
At the IM:
and the BOV:
The car started right up after being down for 3 months. This car has always been good like that.
A couple of things that I need to work out are the throttle body=>IM connection. I think the leak might be working it's way back as I heard a high pitched whistle under boost today. It's not evident under vacuum currently but will probably be soon. Any ideas for making a better seal are welcome here.
Also, there sounds like possibly an exhaust leak at one of the v-band connnections. It's not bad but it's there. This is my first go around with v-band connections. I like how easy it is to put the stuff together but I'm wondering if the white lightning coating is affecting the connection? Getting all of the exhaust components lined up correctly was a bit of a challenge, especially with the flex joint at the wastegate. I need to loosen everything up and give it another try. Is anyone using v-band gaskets?
This is where I am currently:
Anyway, hopefully very soon Dave Jones will get my car in to replace the bottom end and I can get back to tuning this thing right!

Re: Re: Dace's '94 //s4-progress...
NICE! Fwiw there's usually a gasket between the im and tb.
Matt
18 Silverado 1500 work pig, roof rack and tonneau cover
11 Jetta sedan TDI DSG, rear muffler delete
GONE :( 87 4ktq - 4 FOX SNAKES

18 Silverado 1500 work pig, roof rack and tonneau cover
11 Jetta sedan TDI DSG, rear muffler delete
GONE :( 87 4ktq - 4 FOX SNAKES
-
UrSobsessed
- Posts: 286
- Joined: Wed Feb 27, 2013 3:07 pm
Re: Re: Dace's '94 //s4-progress...
Thanks. I have that in there. I leaks with it in there too. :/ I'll post a vid of the nasty sound when I get a chance.chaloux wrote:NICE! Fwiw there's usually a gasket between the im and tb.
Re: Re: Dace's '94 //s4-progress...
Really like what you've got going on here.
Some comments and questions:
Comments:
-- With your red/blue colour scheme going on, I'd say the VC could do well with red accents on the cooling fins & Audi logo vs. black. Maybe even blue boost hoses if you're feeling spendy haha
-- You should be able to suffice without v-band gaskets. Try loosening them without removing and tightening starting top/down, going from front to back after you're satisfied with the alignment.
Questions:
-- Do you notice any reductions in under hood temps with the White Lightning coating? Either log or observation based is fine.
-- Is the TB flange perhaps warped where it meets the IM?
-- What are your thoughts on going v-band with the TB/IM joint?
Find me on Instagram @pry4sno
|| 2010 Golf Sportwagen TDI /// #farmenwagen
|| 2002 Dodge Ram 2500 24vt 4x4 #bertancummins
|| 1992 80 quattro 20v /// Eventual AAN'd Winter Sled
|| 1990 Coupe quattro /// Because Racecar
|| 2010 Golf Sportwagen TDI /// #farmenwagen
|| 2002 Dodge Ram 2500 24vt 4x4 #bertancummins
|| 1992 80 quattro 20v /// Eventual AAN'd Winter Sled
|| 1990 Coupe quattro /// Because Racecar
-
UrSobsessed
- Posts: 286
- Joined: Wed Feb 27, 2013 3:07 pm
Re: Re: Dace's '94 //s4-progress...
I'd like to done with some of the spendy stuff, if I can. lol. <=that's a good one. 
I'll give that vband alignment a try. Makes the most sense. One thing I think got me off on the wrong foot is I tightened down the downpipe to exhaust under the car before doing the EM connections.
I can't say anything to the underhood temps yet as I haven't driven the car enough since I'm still working out the kinks in my set up.
The TB is fine as it mates up just fine to my old IM. Either the new one wasn't milled as well as it needed to be or it's warping from the welding heat. The first one was thinner and warped so badly that there was a ~2mm gap between the flange and the TB. Vbanding it could be cool but I don't really have the desire to go there at this point. Since the TB shouldn't have to come off much I feel it would be a waste...
Re: Dace's '94 //s4-progress...
Can you use a file…..and file off some of the "imperfections" on the IM and TB so they have a better mating surface area?
-
ringbearer

- Posts: 1282
- Joined: Wed Feb 27, 2013 12:50 pm
- Location: Nor-Cal
Re: Re: Dace's '94 //s4-progress...
Or board sander or pull it and have a machine shop cut it flat...
Did you use a new gasket? The old ones are compressed but the new ones are like $14.
Did you use a new gasket? The old ones are compressed but the new ones are like $14.
-
UrSobsessed
- Posts: 286
- Joined: Wed Feb 27, 2013 3:07 pm
Re: Re: Dace's '94 //s4-progress...
There're no imperfections. A board sander might help. I'd hate to take this thing off as it was a bit of a challenge to get some of the bolts tight. Pulling it will be the last thing I'll do. Sux to have to deal with this in the first place. I send it back, but I waited 9 months for it in the first place. I used a new gasket, but think a thicker gasket might do the trick. What do you guys think about doubling up the OE gasket? Hack?
-
ringbearer
- Posts: 1282
- Joined: Wed Feb 27, 2013 12:50 pm
- Location: Nor-Cal
Re: Re: Dace's '94 //s4-progress...
Get some thick soft gasket material and cut your own or...
Machine a groove in the tb for an o-ring?
Machine a groove in the tb for an o-ring?
-
UrSobsessed
- Posts: 286
- Joined: Wed Feb 27, 2013 3:07 pm
Re: Re: Dace's '94 //s4-progress...
I'll try the thicker gasket, CYO stuff first. I like the o-ring idea though so worst case, I'll consider that.
-
UrSobsessed
- Posts: 286
- Joined: Wed Feb 27, 2013 3:07 pm
Re: Re: Dace's '94 //s4-progress...
So I used some CYO gasket material and hit each side with some Permatex anaerobic gasket maker/dressing. We'll see how that holds up. The other stuff I used softened the OE gasket up to the point where it was misshaped, which could've caused the leak to reappear.
On the exhaust leak, I checked the vband connections and they were a bit suspect so I realigned them and tightened the clamps down more as the coating was, I think, hindering the ability to pull the flanges together. HOWEVER, as I was in there I remembered that the lower EM stud on #5 stripped out when I was installing the IM. Forgot, denial, whatever. The threads were weak there as it stripped just on the torque from turning the flanged stover nut. It hadn't even seated on the EM flange when it stripped. That will get fixed when the bottom end is replaced.
On the exhaust leak, I checked the vband connections and they were a bit suspect so I realigned them and tightened the clamps down more as the coating was, I think, hindering the ability to pull the flanges together. HOWEVER, as I was in there I remembered that the lower EM stud on #5 stripped out when I was installing the IM.
-
UrSobsessed
- Posts: 286
- Joined: Wed Feb 27, 2013 3:07 pm
Re: Dace's '94 //s4-Timesert an EM stud port in the car?
While tightnening down the EM nuts, one of the stud decided to start spinning before the nut had even seated against the EM. Threads were gone. Sux. I don't want to remove the head just for this. I was going to wait for the engine to come out when the bottom end get replaced and have Dave do it while it's out. Now that this replacement has been postponed yet again, I want to see if I can do this thing while it's in the car.
I'm thinking a right angle drill should get in there pretty well. The challenge looks to be keeping the drill at a right angle to the head. I bought a timesert kit and the right angle sleeve for the tap, but not sure if that'll work for the dirlling process also.
Anybody done this/have some tips tricks?