1983 URQ Alpine White/Mocha 20VT / VEMS / EFR

Document and share your build!
Afterthought
Posts: 1249
Joined: Thu Jan 16, 2014 5:43 pm
Location: Bellingham, Wa

Re: 1983 URQ: project unicorn : Pic heavy

Post by Afterthought »

PRY4SNO wrote:Upgrading the exhaust valves is almost a no brainer. My head was basically new (10,000 km) but Hank convinced me that $160 on some Ferrea valves was cheap insurance, considering the alternative costs associated with dropping a valve. During that discussion I asked him about the valve sizing and his take was that for the power range I'm shooting for it's best to keep the velocity high and stay stock size. I think you go up when you cross the gt30/gt35 threshold.


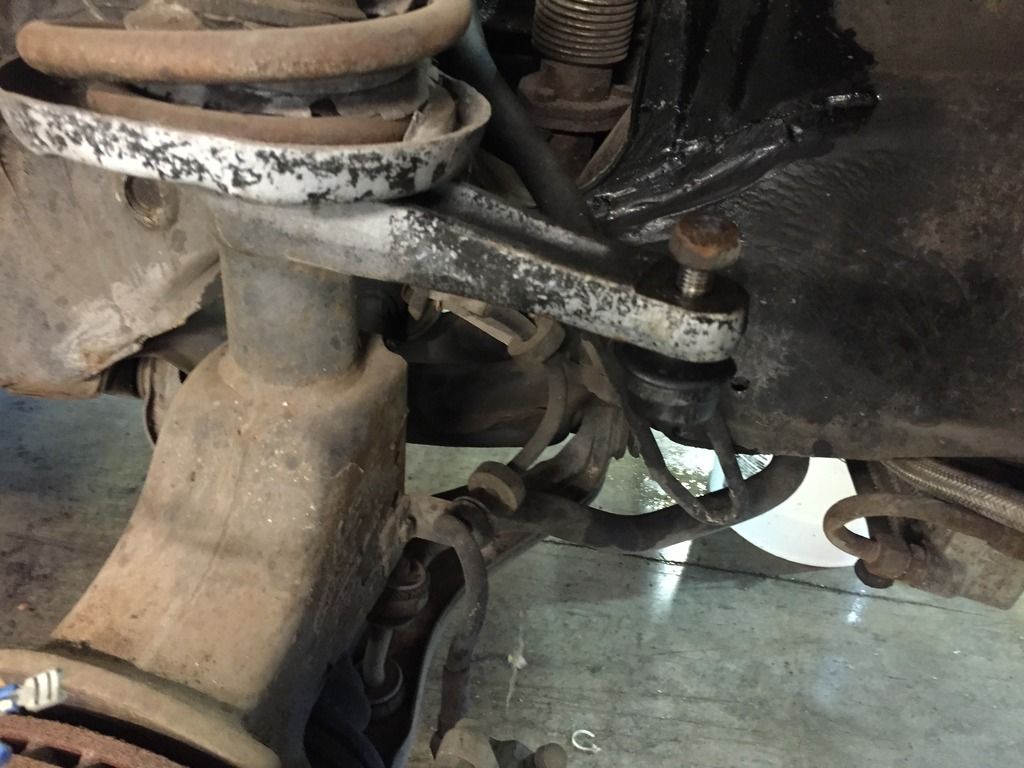
Interesting. When do you risk dropping a valve? Certain power range or is there something with the stock sodium filled valves?
It looks pretty affordable to do the Ferrea 6000 but then do I need springs and retainers too , or can I just do the valves, guides and seals?
Dave
Posts: 415
Joined: Wed Feb 27, 2013 11:46 am

Re: 1983 URQ: project unicorn : Pic heavy

Post by Dave »

you can do 'just valves' i did the same in my build. just get stock intake, and upgraded exhaust valves and call it a day.
User avatar
PRY4SNO
Posts: 2430
Joined: Sun Mar 03, 2013 5:14 pm
Location: Edmonton, AB

Re: 1983 URQ: project unicorn : Pic heavy

Post by PRY4SNO »

Haven't read/heard any specific power figures for dropping one of the sodium filled valves, but I'd wager it would be reasonable to assume anything over a stock/chipped figure would merit serious consideration.


Dave wrote:you can do 'just valves' i did the same in my build. just get stock intake, and upgraded exhaust valves and call it a day.


:metoo:

On Hank's advice I just did the exhaust valves and will redo the rest of the head at a later date, after benchmarking my build.
Find me on Instagram @pry4sno

|| 2010 Golf Sportwagen TDI /// #farmenwagen
|| 2002 Dodge Ram 2500 24vt 4x4 #bertancummins
|| 1992 80 quattro 20v /// Eventual AAN'd Winter Sled
|| 1990 Coupe quattro /// Because Racecar
User avatar
Marc
Posts: 1586
Joined: Wed Feb 27, 2013 1:33 pm

Re: 1983 URQ: project unicorn : Pic heavy

Post by Marc »

multiple boxes of goodies on the way. :thumbsup:
Marc Swanson
Proprietor, EFI Motorsport
Afterthought
Posts: 1249
Joined: Thu Jan 16, 2014 5:43 pm
Location: Bellingham, Wa

Re: 1983 URQ: project unicorn : Pic heavy

Post by Afterthought »

Marc wrote:multiple boxes of goodies on the way. :thumbsup:

Yeahhh Thanks Marc!

Marc got me set up with most everything I will need to get the engine together and going back in.
-Rods
-Bottom end gasket set
-ARP Head studs
-VEMS harness
-VEMS Econoseal configured for auditrigger
-Extra connectors for cleanliness and no splicing

Had to clean my shop up for a bit took 750 LB of stuff to the dump. Got a big spot cleared out for audi stuff.
If I can get the engine apart soon enough I'll get the block to the machine shop and get it in the hot tank and get the head(s) there so they can do a test on it.
carl
Posts: 154
Joined: Thu Mar 07, 2013 11:05 am

Re: 1983 URQ: project unicorn : Pic heavy

Post by carl »

I don't know about Ferrea so can't comment on that, but the supertechs i got were drop in, no need for new locks or extra guide clearances, etc, cheap insurance... Mind you i bought .5 oversize so the seats needed to be slightly resurfaced/recut in my case. You'll probs want better springs and ti retainers if you want to rev it high. Solid lifters are cool but abit of a pita to install to be honest for the diy without toolage, grind, measure, figure 8 sand, measure, sand some more.
Afterthought
Posts: 1249
Joined: Thu Jan 16, 2014 5:43 pm
Location: Bellingham, Wa

Pat's 1983 URQ Alpine white #603 , 20V in progress

Post by Afterthought »

Image
Image
Image
Image

Image
Image
Image
Last edited by Afterthought on Fri Sep 22, 2017 11:56 am, edited 2 times in total.
User avatar
Marc
Posts: 1586
Joined: Wed Feb 27, 2013 1:33 pm

Re: 1983 URQ: project unicorn : Pic heavy

Post by Marc »

"special" turbo freeze plug. the one with the nipple on it that feeds coolant to the turbo. I can get one for you if you need.
Marc Swanson
Proprietor, EFI Motorsport
Afterthought
Posts: 1249
Joined: Thu Jan 16, 2014 5:43 pm
Location: Bellingham, Wa

Pat's 1983 URQ Alpine white #603 , 20V in progress

Post by Afterthought »

The whole car is covered in what looks like overspray. I went ahead and took a break from what I was doing to use a clay bar and see what i'm up against to get this off.

Image
Image
Image
Image
Image


I was able to get down to where it looks like paint but it just immediately fills the clay bar with junk.
I know its possible to ruin the paint with these but should be ok as long as it slides easily and doesn't catch right??
Does anyone have any recommendations to which clay bar to buy.
Last edited by Afterthought on Fri Sep 22, 2017 9:27 am, edited 1 time in total.
Afterthought
Posts: 1249
Joined: Thu Jan 16, 2014 5:43 pm
Location: Bellingham, Wa

Re: 1983 URQ: project unicorn : Pic heavy

Post by Afterthought »

Marc wrote:"special" turbo freeze plug. the one with the nipple on it that feeds coolant to the turbo. I can get one for you if you need.


Marc I think I am going to need one, I havent been able to locate it. There are a couple odds and ends gone from the engine and I dont know if theyre in a box somewhere and I missed them or if they weren't with it. Thats the hard part with taking over these projects !

Aside from that plug I will end up needing rod and main bearings from you, but I don't know if everything looks good with stock bearing sizes am I safe to assume I can order the same ones, or do I need to wait and actually gauge the gap between the new rods and the crank?
User avatar
PRY4SNO
Posts: 2430
Joined: Sun Mar 03, 2013 5:14 pm
Location: Edmonton, AB

Re: 1983 URQ: project unicorn : Pic heavy

Post by PRY4SNO »

As long as you keep it wet and on a fresh section, the clay bar won't scratch.

AMMONYC has some good (if long) vids on youtube about paint care/restoration... worth a look if you haven't seen them yet.
Find me on Instagram @pry4sno

|| 2010 Golf Sportwagen TDI /// #farmenwagen
|| 2002 Dodge Ram 2500 24vt 4x4 #bertancummins
|| 1992 80 quattro 20v /// Eventual AAN'd Winter Sled
|| 1990 Coupe quattro /// Because Racecar
Afterthought
Posts: 1249
Joined: Thu Jan 16, 2014 5:43 pm
Location: Bellingham, Wa

Re: 1983 URQ: project unicorn : Pic heavy

Post by Afterthought »

Yeah I'll take a look. i think I'm going to be at it for a long time !
User avatar
Marc
Posts: 1586
Joined: Wed Feb 27, 2013 1:33 pm

Re: 1983 URQ: project unicorn : Pic heavy

Post by Marc »

Afterthought wrote:
Marc wrote:"special" turbo freeze plug. the one with the nipple on it that feeds coolant to the turbo. I can get one for you if you need.


Marc I think I am going to need one, I havent been able to locate it. There are a couple odds and ends gone from the engine and I dont know if theyre in a box somewhere and I missed them or if they weren't with it. Thats the hard part with taking over these projects !

Aside from that plug I will end up needing rod and main bearings from you, but I don't know if everything looks good with stock bearing sizes am I safe to assume I can order the same ones, or do I need to wait and actually gauge the gap between the new rods and the crank?


you should measure just to be sure. Chances are good (90%) they are stock size, but they could be nice looking oversize bearings with minimal wear just as easy as they could be stock bearings with minimal wear.
Marc Swanson
Proprietor, EFI Motorsport
Afterthought
Posts: 1249
Joined: Thu Jan 16, 2014 5:43 pm
Location: Bellingham, Wa

Re: 1983 URQ: project unicorn : Pic heavy

Post by Afterthought »

Pulled the rest of the stuff of the block and took it in to get hot tanked and the head looked at, have the crank checked out.

Todays project, something ive been meaning to do. Build a "paint/dirty room" so I can not have to worry about grinding dust and paint getting on stuff I have in the shop. Need to get a fan and some lights, and some flame proof blanket and I'll be good to go!
The outline
Image
Image
Image

Looked at the flywheel, wasnt really paying a ttention when i stripped it down.
looks to me like a stock single mass, 3b, for the 016 trans.
Image
Image
Afterthought
Posts: 1249
Joined: Thu Jan 16, 2014 5:43 pm
Location: Bellingham, Wa

Re: 1983 URQ: project unicorn : Pic heavy

Post by Afterthought »

Pierburg fuel pump that came with the car:
Image

So tomorrow I will be looking at the wiring some.
It's tough to troubleshoot exactly what I have because I'm not 100% sure how it was swapped over to the under hood fusebox.

Edit: Nevermind.
So I've cleared up a few things.
My car has the factory flange installed for the underhood fuse box and since my vin is #603 and it is one of the first ones to come with this.
At some point the PO noticed some hot spots on the bottom of the factory fuse panel so he swapped it over to a later 4000 fuse panel, after doing this the car would not start. So what I have should be very close to the 85 turbo quattro but may not match the diagrams 100% since these were hand wired.


http://homepage.ntlworld.com/jh.666/wiring/relays.png Harness from an 85 turbo quattro.
This is what I've got under the hood.
Image

Handy link.
http://forums.quattroworld.com/quattro/msgs/957.phtml
Last edited by Afterthought on Sat Sep 05, 2015 10:35 pm, edited 1 time in total.
Afterthought
Posts: 1249
Joined: Thu Jan 16, 2014 5:43 pm
Location: Bellingham, Wa

Re: 1983 URQ: project unicorn : Pic heavy

Post by Afterthought »

Worked on the wiring a bit today.
Upon receiving the car I installed the instrument cluster and had no lights or anything on it, no appearance of power anywhere other than brake lights.

Today I found my extra fuse panel from a 1995 audi 90. The panel is almost identical so I used this to help me with the orientation since I cant flip the one inside the car upside down, comparing with my diagrams of how everything should be. I changed only one terminal as far as I know and now have power to the inst. cluster.

I had a buddy drop by so I used his help for a minute to test the power at the fuel pump (have +12v with ignition on) and the power to the ignition coil (have +12v with ignition on) When cranking the fuel pump will turn on, but the ignition coil out is only reading about 9v. I dont know if I should even be testing this or if I fried my $20 multimeter. If I was to test the voltage out of the coil to the dist I would think it should be super high? I know 9v isnt enough to make a spark.

So Martin was kind enough to drop into my thread on quattroworld and offer his advice and it sounds like what I'm likely looking at is an issue with the ignition module. Im going to try one last thing tomorrow night and that's a new coil.

If that doesn't help or If the issue is much beyond that I may just let the games begin on the 3B swap.

Which brings me to my next couple of questions. Is the easiest way to pull the engine to drop it out the bottom with trans and subframe?
Also have you guys noticed that when the car is on the lift the doors dont close right?
Ive had lots of unibody cars but this is the oldest one I've had and that caught me by surprise. Is that normal?
the german
Posts: 720
Joined: Sat Feb 15, 2014 11:03 pm
Location: Bellevue, WA

Re: 1983 URQ: project unicorn : Pic heavy

Post by the german »

Out the bottom w/ subframe makes for easy work. Not at all surprised the doors don't line up quite right with it on a lift.
Kirk

1990 ABZ CQ
1990 lifted CQ
2005 S4 6MT
2011 A4 2.0T Avant (ok, it's my wife's car but it's sexy and I love it)
User avatar
PRY4SNO
Posts: 2430
Joined: Sun Mar 03, 2013 5:14 pm
Location: Edmonton, AB

Re: 1983 URQ: project unicorn : Pic heavy

Post by PRY4SNO »

If you don't want to cut the crossmember up front, you'll need to drop the motor out the bottom. Just raise the front as much as possible and unbutton what's there, then slip everything down and away.
Find me on Instagram @pry4sno

|| 2010 Golf Sportwagen TDI /// #farmenwagen
|| 2002 Dodge Ram 2500 24vt 4x4 #bertancummins
|| 1992 80 quattro 20v /// Eventual AAN'd Winter Sled
|| 1990 Coupe quattro /// Because Racecar
carl
Posts: 154
Joined: Thu Mar 07, 2013 11:05 am

Re: 1983 URQ: project unicorn : Pic heavy

Post by carl »

Def take it out with tranny out the bottom. Don't forget those pesky hidden things connecting to the tranny ;)
9v seems reasonable while cranking, you have an engine to turn over. The coil is a capacitor charging up, waiting on a ground to make thousands of volts, so doesn't really matter much for startup low rpm. If you haven't already, pull out all the plugs, keep em connected and grounded with a grounded bare wire around the base or touching some good grounded bare metal with electrodes in view, easier for starter, battery and you get a visual while you diagnose.

I'd check if you have a signal going from the ecu to the pos when cranking, signaling cam synch and like martin said the pos/ignition module itself going to the coil. Pos could have a bad ground. You can test the coil too by gaping by 1/4 inch the coil wire going to dist to engine ground and very quickly grounding the coil signal prong with a loose wire.
Afterthought
Posts: 1249
Joined: Thu Jan 16, 2014 5:43 pm
Location: Bellingham, Wa

Re: 1983 URQ: project unicorn : Pic heavy

Post by Afterthought »

the german wrote:Out the bottom w/ subframe makes for easy work. Not at all surprised the doors don't line up quite right with it on a lift.

So I guess I won't worry about having it on a lift for extended periods of time.
I was planning to just have everything on jack stands and lift the car right off it carefully just like with a B5 s4.
Kirk, do you know Alex down there?
User avatar
alxdgr8
Posts: 1056
Joined: Thu Feb 28, 2013 1:39 am
Location: Seattle, WA

Re: 1983 URQ: project unicorn : Pic heavy

Post by alxdgr8 »

Afterthought wrote:
the german wrote:Out the bottom w/ subframe makes for easy work. Not at all surprised the doors don't line up quite right with it on a lift.

So I guess I won't worry about having it on a lift for extended periods of time.
I was planning to just have everything on jack stands and lift the car right off it carefully just like with a B5 s4.
Kirk, do you know Alex down there?


Yeah, Kirk and I know each other. I bought my CGT from him.

Throw a Harbor Freight furniture dolly under the engine/trans and disconnect everything, then just lift the body up with the lift. Super easy!

Image
-Alex-
@vexartmedia @odd.cylinders @5cylinder_porsche
Odd Cylinders YouTube Page
1992 Porsche 968 (07K transplant in progress)
1983 Aud UrQ (MC1, GT2871R, IIc)
1985 Audi 4kq
2003 Audi S8 (Avus/Oxblood; DD; 6MT swap)
Afterthought
Posts: 1249
Joined: Thu Jan 16, 2014 5:43 pm
Location: Bellingham, Wa

Re: 1983 URQ: project unicorn : Pic heavy

Post by Afterthought »

Alex did you hvae to get the downpipe off before dropping it down? Those bolts suck, hopefully I can skip that.
Going to get started today on getting the engine ready to come out the bottom so I can get to cleaning on the engine bay and what not.
User avatar
alxdgr8
Posts: 1056
Joined: Thu Feb 28, 2013 1:39 am
Location: Seattle, WA

Re: 1983 URQ: project unicorn : Pic heavy

Post by alxdgr8 »

I think I just disconnected at the cat.
-Alex-
@vexartmedia @odd.cylinders @5cylinder_porsche
Odd Cylinders YouTube Page
1992 Porsche 968 (07K transplant in progress)
1983 Aud UrQ (MC1, GT2871R, IIc)
1985 Audi 4kq
2003 Audi S8 (Avus/Oxblood; DD; 6MT swap)
Afterthought
Posts: 1249
Joined: Thu Jan 16, 2014 5:43 pm
Location: Bellingham, Wa

Re: 1983 URQ: project unicorn : Pic heavy

Post by Afterthought »

I cut it at the cat, looks like I should be able to squeeze it out.
Made a nice little rolling pallet setup to drop everything on to.
Image
Afterthought
Posts: 1249
Joined: Thu Jan 16, 2014 5:43 pm
Location: Bellingham, Wa

Re: 1983 URQ: project unicorn : Less CIS

Post by Afterthought »

Well this morning I decided I'm done fiddledicking around with CIS.

Ive done enough troubleshooting to be confident that the wiring thats in the car is good and will get me power for my fuel pump and VEMS harness. and what not It's at the point where its going to cost me more money and time to get it up and going with the WX, and my ultimate goal was 3B anyways so I'm proceeding on to that now.

Started getting the CIS out of the way, Radiator out, disconnected drive shaft. Now I'm stuck on tie rods, Seems like there is no way these are coming off. After disconnecting all the fuel lines I didn't feel like using a torch right there but I did everything short of that (with what tools I had).

Image

Image

Image

Image

Image

Going to try and find something for the tie rod. Then get everything out of the engine bay and so some paint touch up.

What's the thought on brake booster conversion to vacuum?
Is it necesary? is it a good idea?
Its something I had thought I would do to this car but I don't know if I should worry about it now or just do it later (would be when the engine is in the car, but its more feasible financially to wait)
Thoughts?
Post Reply