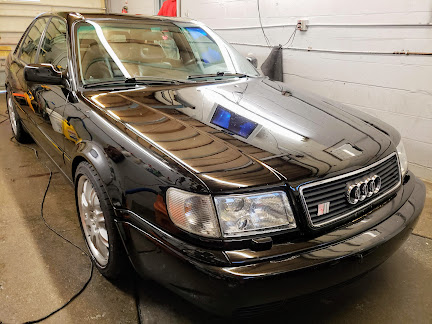
- IMG_0300.JPG (188.84 KiB) Viewed 37639 times
My audi CQ 3B S2 build
Re: My audi CQ 3B S2 build
Valve cover reworked for coil on plug , thanks to chris for the help there, alot of grinding to get the raised lines off
Last edited by araipilot on Thu Mar 14, 2013 1:45 am, edited 1 time in total.
Re: My audi CQ 3B S2 build
looking nice and shiny
- IMG_0302.JPG (214.96 KiB) Viewed 37639 times
Last edited by araipilot on Thu Mar 14, 2013 1:45 am, edited 1 time in total.
Re: My audi CQ 3B S2 build
Block is back and was oversized by .5mm for the 81.5mm JE pistons also the block was line boared, decked and cleaned. Almost ready for assembly
- IMG_0306.JPG (257.74 KiB) Viewed 37639 times
Last edited by araipilot on Thu Mar 14, 2013 1:44 am, edited 1 time in total.
Re: My audi CQ 3B S2 build
From the bottom
- IMG_0307.JPG (240.07 KiB) Viewed 37639 times
Last edited by araipilot on Thu Mar 14, 2013 1:44 am, edited 1 time in total.
Re: My audi CQ 3B S2 build
Some candy for the build almost don't want to install these works of art
- IMG_0308.JPG (246.34 KiB) Viewed 37639 times
Last edited by araipilot on Thu Mar 14, 2013 1:44 am, edited 1 time in total.
Re: My audi CQ 3B S2 build
pleasure x 5
- IMG_0311.JPG (256.83 KiB) Viewed 37639 times
Last edited by araipilot on Thu Mar 14, 2013 1:44 am, edited 1 time in total.
Re: My audi CQ 3B S2 build
Integrated engineering rods w/ pistons
- IMG_0320.JPG (286.93 KiB) Viewed 37639 times
Last edited by araipilot on Thu Mar 14, 2013 1:43 am, edited 1 time in total.
Re: My audi CQ 3B S2 build
pistons w rods
- IMG_0319.JPG (285.51 KiB) Viewed 37639 times
Last edited by araipilot on Thu Mar 14, 2013 1:43 am, edited 1 time in total.
Re: My audi CQ 3B S2 build
Crank was cleaned and polished at the machine shop. Pistons and rods installed in the block
- IMG_0321.JPG (287.63 KiB) Viewed 37639 times
Last edited by araipilot on Thu Mar 14, 2013 1:42 am, edited 2 times in total.
Re: My audi CQ 3B S2 build
ARP Main studs and APR head studs were used, also coated RS2 main and rod bearings used in assembly.
- IMG_0325.JPG (275.37 KiB) Viewed 37639 times
Last edited by araipilot on Thu Mar 14, 2013 1:42 am, edited 2 times in total.
Re: My audi CQ 3B S2 build
Another shot from the side
- IMG_0330.JPG (281.69 KiB) Viewed 37648 times
Last edited by araipilot on Thu Mar 14, 2013 1:42 am, edited 1 time in total.
Re: My audi CQ 3B S2 build
I don't have any pics from the back unfortunately but I can get some, you can see in some of the earlier pics while the vents were being primed. They are about 11 3/4' long and about 3 1/2' wide. You have to be very sure of the placement of vents because you have limited space under the hood but It turned out very nice and like I said it is very functional and it looks aggressivePRY4SNO wrote:
Spec is phenomenal, build is well executed.
Curious for some more pics and info on the hood vents (back side view, dimensions)...
Re: My audi CQ 3B S2 build
Head reinstalled and torqued down, checked 6 times to make absolutley sure all bolts torqued in proper sequence
- IMG_0332.JPG (249.34 KiB) Viewed 37637 times
Last edited by araipilot on Thu Mar 14, 2013 1:41 am, edited 1 time in total.
Re: My audi CQ 3B S2 build
Oil pan cleaned and inspected ready for install
- IMG_0334.JPG (286.4 KiB) Viewed 37637 times
Last edited by araipilot on Thu Mar 14, 2013 2:06 am, edited 1 time in total.
Re: My audi CQ 3B S2 build
Oil pan installed and coolant and oil lines being installed Intake and valve cover installed
- IMG_0369.JPG (240.09 KiB) Viewed 37637 times
Last edited by araipilot on Thu Mar 14, 2013 1:41 am, edited 1 time in total.
Re: My audi CQ 3B S2 build
Almost ready to go in
- coil on plugs installed for the AAN ECU swap
- IMG_0374.JPG (308.52 KiB) Viewed 37637 times
- IMG_0373.JPG (285.11 KiB) Viewed 37637 times
Last edited by araipilot on Thu Mar 14, 2013 1:41 am, edited 1 time in total.
Re: My audi CQ 3B S2 build
Yes back in
- S2 Intercooler back in as well
- IMG_0387.JPG (278.89 KiB) Viewed 37637 times
- S2 air box installed
- IMG_0389.JPG (284.98 KiB) Viewed 37637 times
- Finally in
- IMG_0384.JPG (265.98 KiB) Viewed 37637 times
Last edited by araipilot on Thu Mar 14, 2013 1:40 am, edited 1 time in total.
Re: My audi CQ 3B S2 build
Now that the engine is back in we need to make ready for the AAN Ecu and start to depin the harness. I made sure I labeled evey wire I removed with its original pinout location in case I had a memory laps, very easy to put the wrong wire in the wrong location. Worse than that is depining the harness. It took me almost 6 hours to change the 22 wires due to having inadequet tools but we made it work. Pin #55 is the VSS or vehicle speed sensor that the 3B ecu did not have so we tapped into the Blue and white wire from the diff lock as this signal has to be a "processed signal" if someone choses to go down this road just keep that in mind when tapping the bl/w wire.
- IMG_0280.JPG (206.29 KiB) Viewed 37637 times
Last edited by araipilot on Thu Mar 14, 2013 1:39 am, edited 1 time in total.
Re: My audi CQ 3B S2 build
More indepth wiring going on in these photos, you can see how easy it is to get lost even when your paying close attention and be very careful where you source your information there can be alot of miss information that can leave you scratching your head. It pays to take your time when going down these roads but the payoff will be worth the effort in the end.
- IMG_0033.JPG (308.98 KiB) Viewed 37637 times
- IMG_0012.JPG (177.84 KiB) Viewed 37637 times
- IMG_0011.JPG (210.24 KiB) Viewed 37637 times
- IMG_0010.JPG (191.4 KiB) Viewed 37637 times
- IMG_0034.JPG (257.86 KiB) Viewed 37637 times
Last edited by araipilot on Thu Mar 14, 2013 1:38 am, edited 1 time in total.
Re: My audi CQ 3B S2 build
These are a few pics of the wiring for the coil on plug set up. I just covered the Dissy and still using the Hall signal. I covered the entire harness with heat shrink tubing, this can be very time consuming but it turned out rather well.
- End product
- IMG_0008.JPG (303.7 KiB) Viewed 37636 times
- End product
- IMG_0008.JPG (303.7 KiB) Viewed 37636 times
- Started like this
- IMG_0007.JPG (281.03 KiB) Viewed 37636 times
- End product
- IMG_0008.JPG (303.7 KiB) Viewed 37636 times
Last edited by araipilot on Wed Jul 31, 2013 11:09 pm, edited 1 time in total.
Re: My audi CQ 3B S2 build
Now that the Ecu wiring is sorted time to start on the fan and the relay that I bought from well they shall remain unamed but did some research and this is what I came up with hope the pic will show the detail
- IMG_0040.JPG (198.19 KiB) Viewed 37648 times
Re: My audi CQ 3B S2 build
Latest update on the fan wiring. Even though I have the S2 engine harness there are still some bits of the stock wiring that remain in the car. The fan wiring has to be rewired becaue I have the RS2 fan so the stock wiring can not handle the watts from the 500 watt fan so you have to wire in a resistor. E1 shows no connection but later I found out that the R/W wire needs to be connected to the E1 slot for your L-speed afterrun fan.
Re: My audi CQ 3B S2 build
Ok it has been a while since my last posting. I finally got the motivation to address some issues I have been having with the car. I got to putting a new hall sender unit in my dissy. That was a major chore and took me almost 7 hours most of which was spent trying to get the pin out of the shaft, after that was complete it was fairly simple.
Below, I fabricated the exhaust manifold for the GTX3076R turbo but still have yet to fit inconnel exhaust valves along with the 1000cc high impedance injectors. This is my first attempt at fabricating equal length mandrel bent exhaust headers. Alot of work but the reward was well worth it. I am in the process of talking with Marc at EFI getting the AAN ECU sorted. My HP target requires me to wire in a RS4 MAF and with Marc's help it should be a steady process.
The O1A transmission was replaced using an URs4 01E with a stage 5 south bend clutch and transmission mounts I bought from Hank. As I'm sure you know that the output flanges need to be shorted by about 5mm for axle clearance issues and an Audi 4000 prop shaft was in stalled after a full rebuild of the center carrier bearing and U joints and repacked CV joints with new dust boots. New front Axles were installed. I am currently in the process of fabricating an intercooler and stainless steel cross member. When I am finished with the cross member I will take some pics and post them.
Cheers All
- IMG_0129.JPG (203.16 KiB) Viewed 37558 times
- IMG_0131.JPG (224.43 KiB) Viewed 37558 times
- IMG_0131.JPG (224.43 KiB) Viewed 37558 times
- IMG_0135.JPG (262.61 KiB) Viewed 37505 times
Last edited by araipilot on Thu Aug 08, 2013 10:47 pm, edited 3 times in total.

Re: My audi CQ 3B S2 build
Super job on that header..
Sent from my HTC One using Tapatalk 2
Sent from my HTC One using Tapatalk 2
UglyUr 2.5L 95.5mm Stroker
Rubi PTE6062 Gen 2 Screamer
Rubi PTE6062 Gen 2 Screamer

Re: My audi CQ 3B S2 build
Wow - awesome build, nice documentation too… looking forward to updates!